通过websphere部署以及打包成war的web项目。
(1)安装配置war包,部署项目
登录websphere,进入websphere主页(依次选中)
Applications --> Application Types --> websphere Enterprise Application --> install
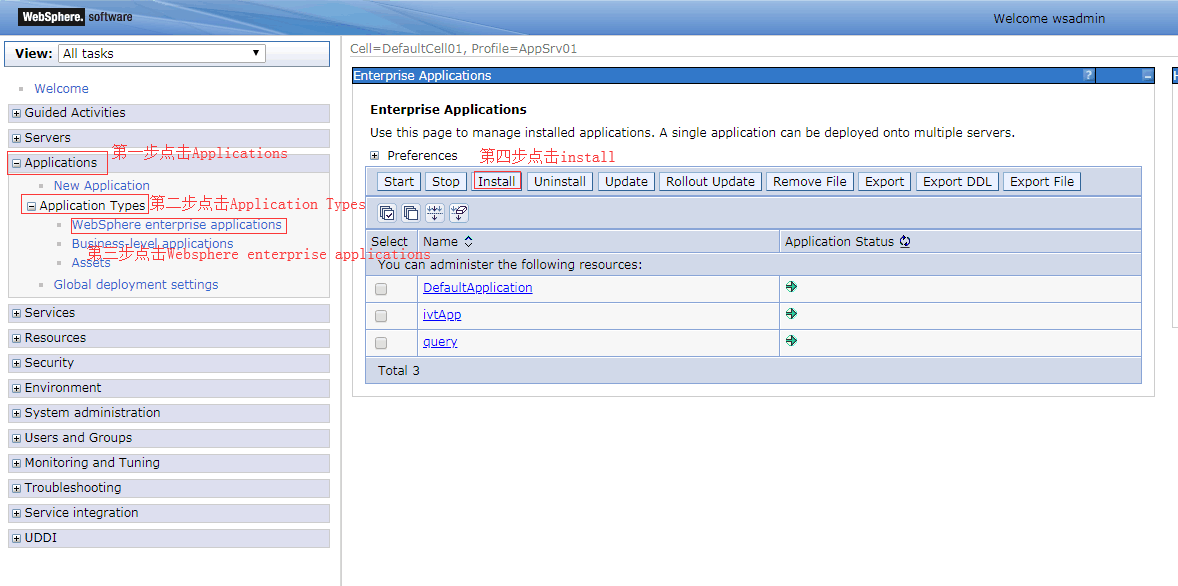
打开选择文件,选择需要上传的war包,然后点击next 。(这里需要一点点时间,因为需要将war包上传到websphere)

上传完后,选中如图示,点击next

开始进入step步骤。
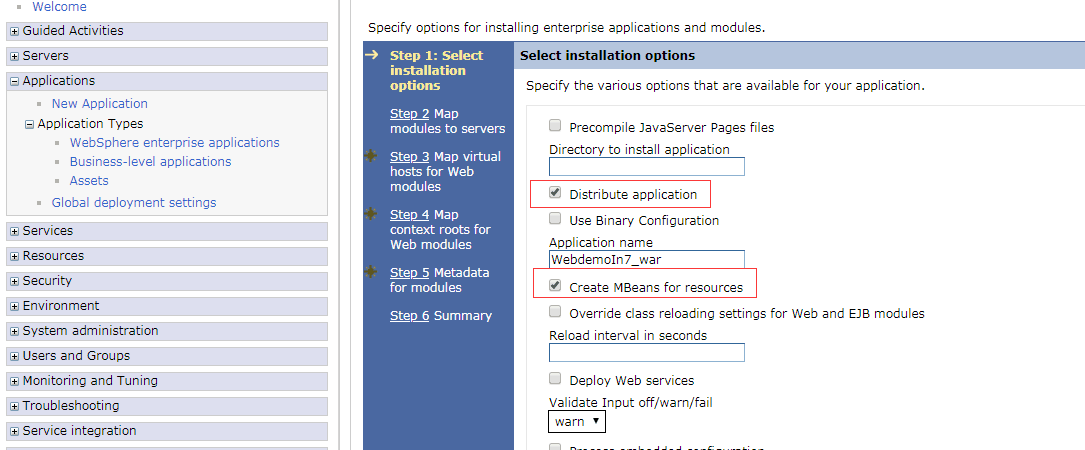
step1:选中Distribute Application ,选中 Create MBeans for resources,点击next
step2:选中 select ,点击next.
step3:选中select ,并右侧的虚拟主机使用 default_host(默认的就是default_host),点击next
step4:在Context Root那一栏下面写上项目名,就是war包的前缀部分,用来访问这个项目(这里一定要写,不然就无法正常启动),点击next
示例: 比如上传的是 Webdemo.war,Context Root目录下就写 /Webdemo
step5:直接点击next.
step6:点击finish.(等待项目安装)
安装完之后,点击save(页面的下方位置,蓝色字体)
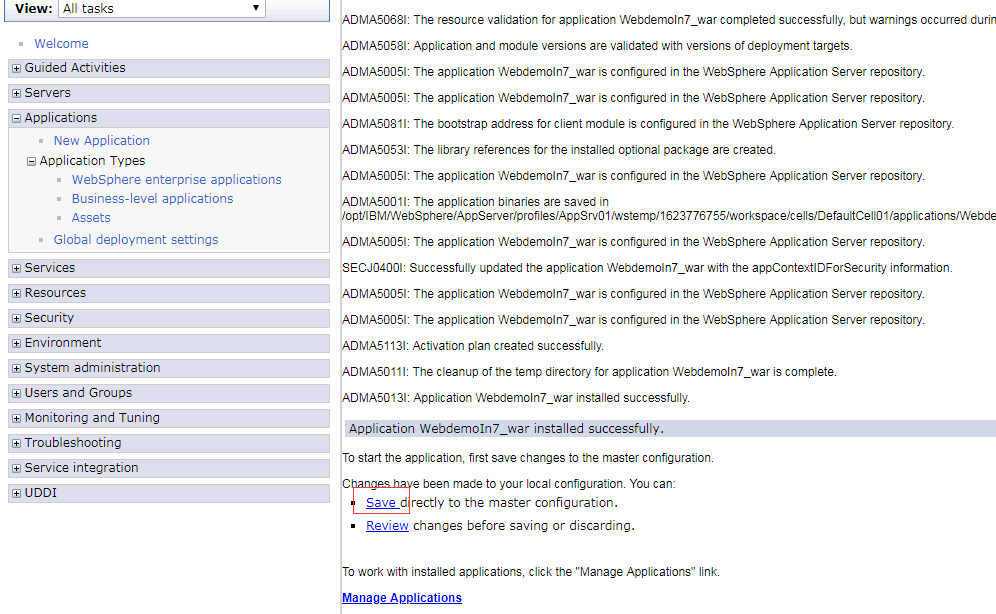
此时,war包已经上传安装成功了。系统自动跳转到启动页面。
选中刚刚上传的war包(WebdemoIn7.war),然后点击start。(启动成功时,右侧的红色叉叉会变成绿色箭头)
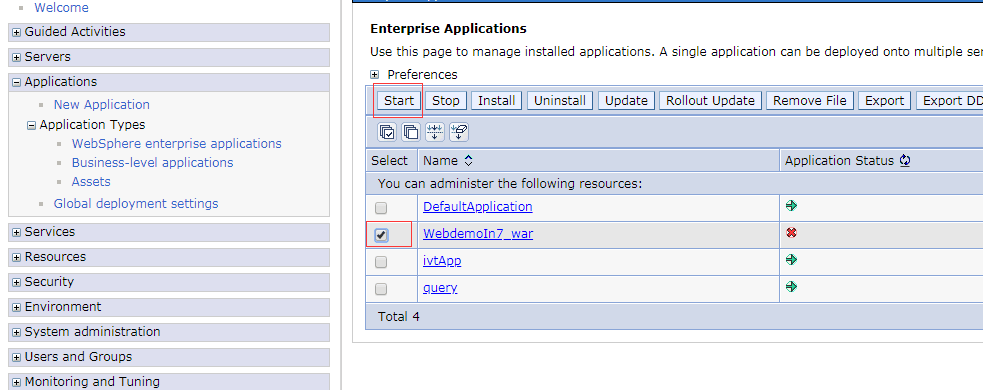
可以开始尝试访问,在地址栏输入访问地址: https://安装websphere的主机IP:port/${Context Root栏填写的地址}
例如: https://172.150.12.43:9043/WebdemoIn7
(2)如果访问出错, 错误内容类似:SRVE0255E: A WebGroup/Virtual Host to handle /p2pd/servlet/dispatch has not been defined.
可通过以下步骤解决:
检查项目配置
1. 点击Applications --> Application Types --> Websphere enterprise ,点击部署出错的那个项目,例如 WebdemoIn7.war

2.查看 Web Module properties 模块下面的 Virtual hosts
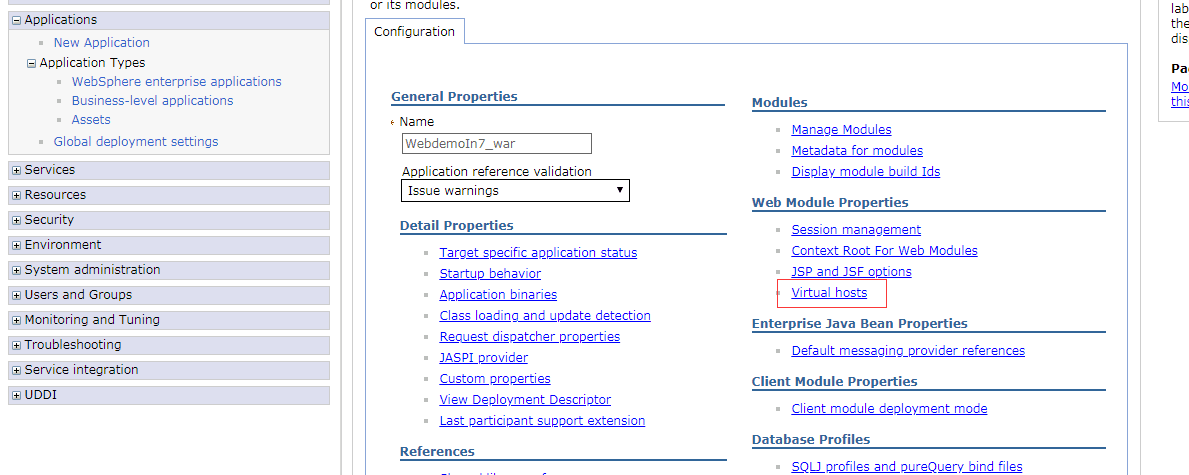
3.选中 select,并且将virtual hosts选中为 default_host,然后点击 ok .
之后会回到 configuration页面,点击上方的 save .
检查环境配置
第一步,点击 Environment --> Virtual Hosts ,然后选中 default_host
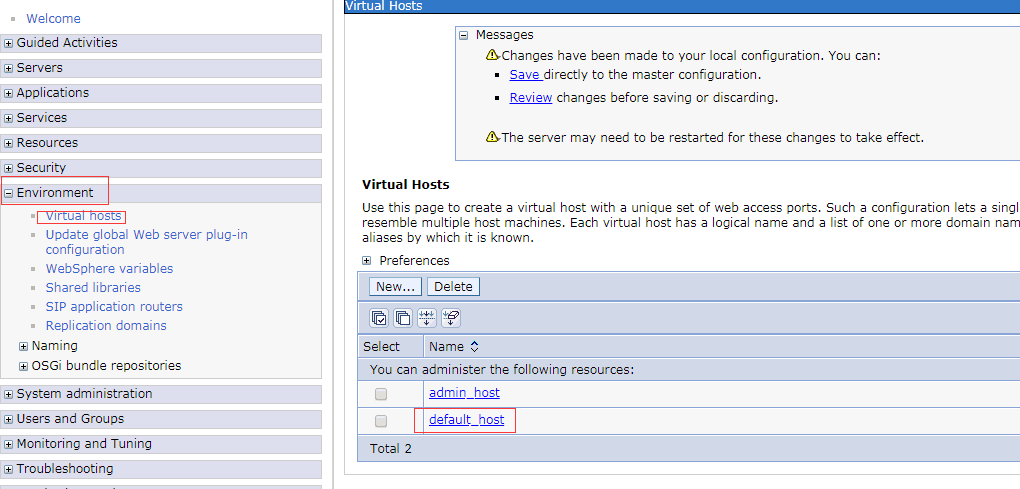
第二步,点击 Host Aliases,检查有没有自己安装时配置访问websphere的端口
如果没有就new一个,并且设置host name为 * 。(这里主要配置host name 为 *,port为你安装websphere时的端口),点击 ok,然后 save .
检测服务配置
1). 依次选中 Servers --> Server Types --> Websphere Application Servers ,然后选择右侧出现的那个服务,例如我的是 server1
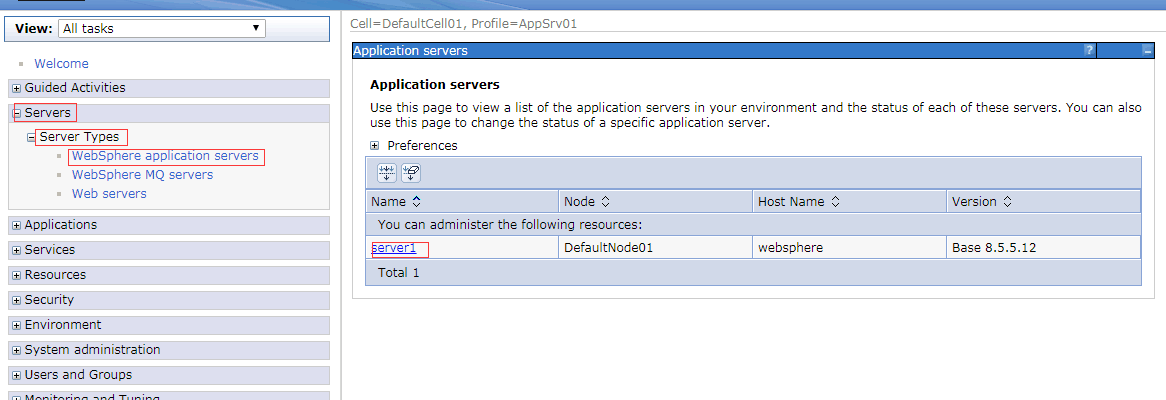
2).选择 Container Settings --> Web Container Settings --> Web Container
确定 Default_virtual_host指定的默认虚拟主机为 default_host ,然后点击 ok . 点击 save 。
最后重新启动 websphere,再次访问项目,在地址栏中输入访问链接。 https://172.150.12.43:9043/WebdemoIn7 便能访问成功。
错误解决方法参考链接:http://blog.csdn.net/jason_wang1989/article/details/47128603
转载于:https://www.cnblogs.com/DFX339/p/8572445.html
最后
以上就是耍酷眼神最近收集整理的关于websphere部署war包的全部内容,更多相关websphere部署war包内容请搜索靠谱客的其他文章。


![[07-9-1 10:03:06:707 CST] 3509c249 ServletInstan E SRVE0100E: 未识别出由 servlet webpublish 抛出的 init() 异常...](https://www.shuijiaxian.com/files_image/reation/bcimg8.png)


发表评论 取消回复