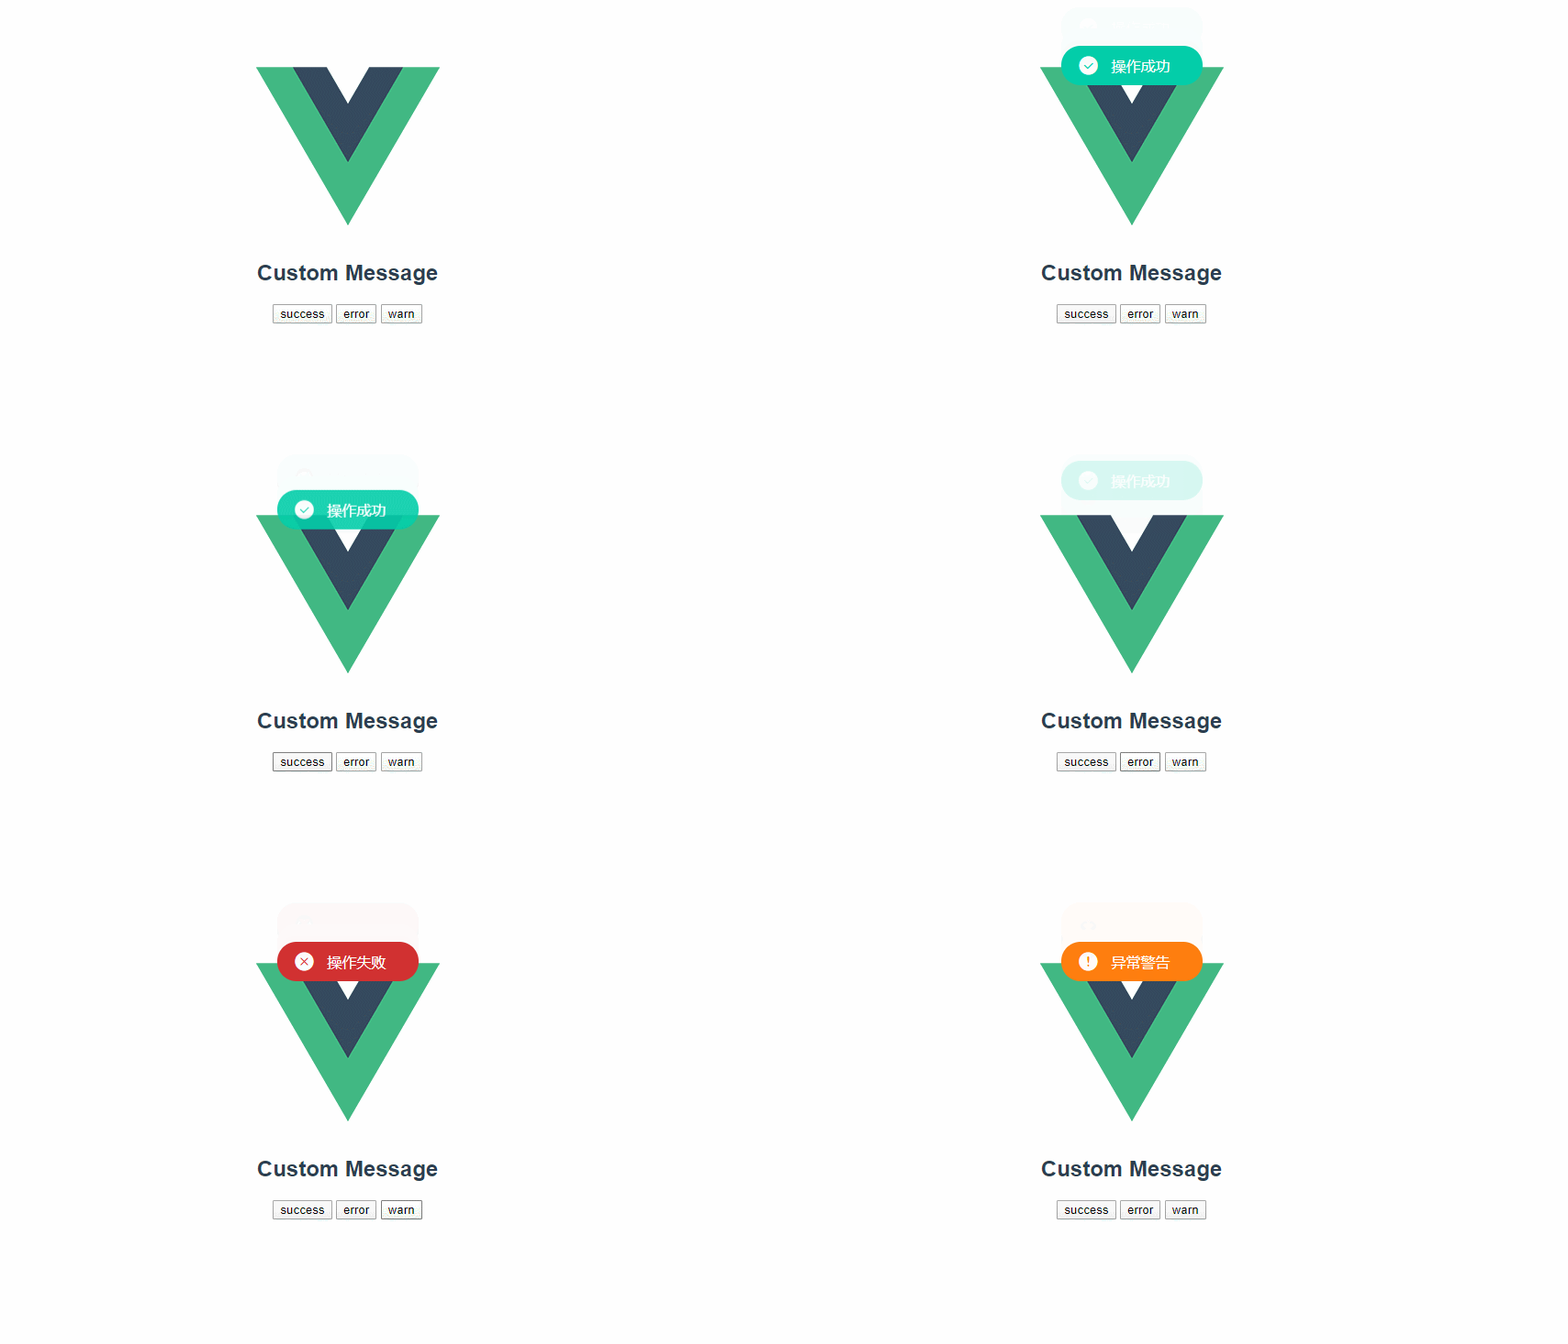
Vue实现custom-message

前言
之前在项目中使用vue框架中的element-UI时,使用element-UI的弹窗非常的nice,但在最近的项目中,要求项目体积小,且高度自定义,所以不能把element-UI的message的组件引进来再改样式,于是决定自己封装一个,来满足需求。
基本原理
使用Vue.extend(options)创建一个Vue构造器,再将构造器实例化,挂载到body中
...
const MessageBox = Vue.extend(MessageMain);
...
const Message = function (options = {}) {
...
	let instance = new MessageBox({
        data: options
    });
    //在文档之外渲染并且随后挂载
    instance.vm = instance.$mount();
    document.body.appendChild(instance.vm.$el);
...
}
通过构造器,将组件挂载到body上
实现步骤
- 创建messageMain.vue组件
<template>
  <transition name="taataa">
    <div :class="['plugins-message-box',type]" v-if="visible">
      <div :class="['message-icon','iconfont',iconClass]"></div>
      <div class="message-container">{{message}}</div>
    </div>
  </transition>
</template>

<script>
const typeClass = {
  success: "icon-success",
  error: "icon-error",
  warn: "icon-warn",
};
export default {
  name: "messageMain",
  data() {
    return {
      visible: false, // 控制DOM显示隐藏
      type: "success", // 默认type值为default
      icon: "", // 默认使用icon为空,则使用type值对应的icon
      message: "", // 默认的message为空,由外部传入
      duration: 2000, // 默认显示时间为2000ms
    };
  },
  computed: {
    // 如果外部传入icon则使用外部的icon,如果没有。则使用type值对应的icon
    iconClass() {
      if (this.icon) {
        return this.icon;
      } else {
        return typeClass[this.type];
      }
    },
  },
};
</script>
- 创建构造器
import Vue from 'vue'; // 引入Vue
import MessageMain from './messageMain'; // 引入上边定义好的message模板

const MessageBox = Vue.extend(MessageMain); // 使用Vue.extend来创建一个构造器
let instance; // instance 变量用来保存实例
let timer = null; // timer 变量用来保存定时器


// 定义一个function,参数为options,默认为一个对象
const Message = function (options = {}) {
    // 如果当前处在服务器端,则直接返回
    if (Vue.prototype.$isServer) return;
    // 如果当前定时器已开启,说明页面上已经有一个message-box了,则不能再继续创建新的message-box
    if (timer) return;
    // 对options做处理,如果直接传入string,则使其保存在options的message属性上
    if (typeof options === 'string') {
        options = {
            message: options
        }
    }
    // 初始化实例,并将options作为新的data传入,Vue会将options合并到原有的data上,覆盖原有的默认值,但是,在options中没有设置的是不会被改变的
    instance = new MessageBox({
        data: options
    });
    // 调用$mount方法,将当前实例渲染为真实DOM,生成$el,如果不执行这一步,将拿不到 $el 的值,但是不指定DOM节点接管当前实例
    instance.vm = instance.$mount();
    // 使用原生js的API将当前实例的真实DOM追加到body中
    document.body.appendChild(instance.vm.$el);
    // 实例上的vm就是我们的Vue组件,所以我们可以通过vm访问到当前实例中的所有属性
    // 将visible设置为true,即显示当前message-box
    instance.vm.visible = true;
    // 开启定时器
    timer = setTimeout(() => {
        instance.vm.visible = false;

        // setTimeout(() => {      //延迟卸载和删除,使得结束动画能够实现      这块地方有bug,待完善。。。
        //     instance.vm.$destroy();      // 在时间结束后将当前实例手动卸载
        //     instance.vm.$el.parentNode.removeChild(instance.vm.$el);     // 使用原生API将当前实例生成的DOM节点在真实的DOM树中删除
        // }, 1000)


        // 清除定时器
        timer = null;
    }, instance.vm.duration);
    // 定时器的时间使用vm中定义的时间
    return instance.vm;
};
// 最终抛出一个对象,对象上我们可以使用 install 来扩展Vue的插件
// 当我们的对象上有install方法的时候,它接收第一个参数为Vue,
// 我这里为了方便使用,还在当前抛出的对象上定义了一个message方法,为了方便在axios的拦截器中使用;
export default {
    message: Message,
    install(Vue) {
        Vue.prototype.$message = Message;
        Vue.message = Message;
    }
};
- 在main.js上将插件安装到Vue实例中
import Message from '.component/messageMain';
Vue.use(Message);
- 使用
<template>
  <div class="hello">
    <h2>Custom Message</h2>
    <div>
      <button @click="successMessage">success</button>
      <button @click="errorMessage">error</button>
      <button @click="warnMessage">warn</button>
    </div>
  </div>
</template>

<script>
export default {
  name: 'HelloWorld',
  data () {
    return {
      msg: 'Welcome to Your Vue.js App'
    }
  },
  methods: {
    successMessage() {
      this.$message({
        type: 'success',
        message: '操作成功',
        duration: '2000',
      })
    },
    errorMessage() {
      this.$message({
        type: 'error',
        message: '操作失败',
        duration: '2000',
      })
    },
    warnMessage() {
      this.$message({
        type: 'warn',
        message: '异常警告',
        duration: '2000',
      })
    },

  },
}
</script>

<!-- Add "scoped" attribute to limit CSS to this component only -->
<style scoped>
</style>
注:这了的icon是使用iconfont-阿里巴巴中Font class,
总结
完整的demo可以到我的GitHub上clone,欢迎star
完整代码链接:
GitHub链接
码云链接
参考链接
最后
以上就是清新电话最近收集整理的关于Vue实现自定义Message的全部内容,更多相关Vue实现自定义Message内容请搜索靠谱客的其他文章。
本图文内容来源于网友提供,作为学习参考使用,或来自网络收集整理,版权属于原作者所有。


发表评论 取消回复