在前面学习了树莓派字符设备驱动代码编写和编译,但一直不是特别明白,现在学习100ask_imx6ull_mini的驱动框架时更加清楚了一些,所以重新记录下来。整个编写和编译流程与树莓派区别不大,思路相同。
内核模块的编译(树莓派内核模块编译)都需要提前对LINUX源码进行配置编译(树莓派linux源码配置编译)
一、编写驱动程序
编写驱动程序步骤:
- 确定主设备号
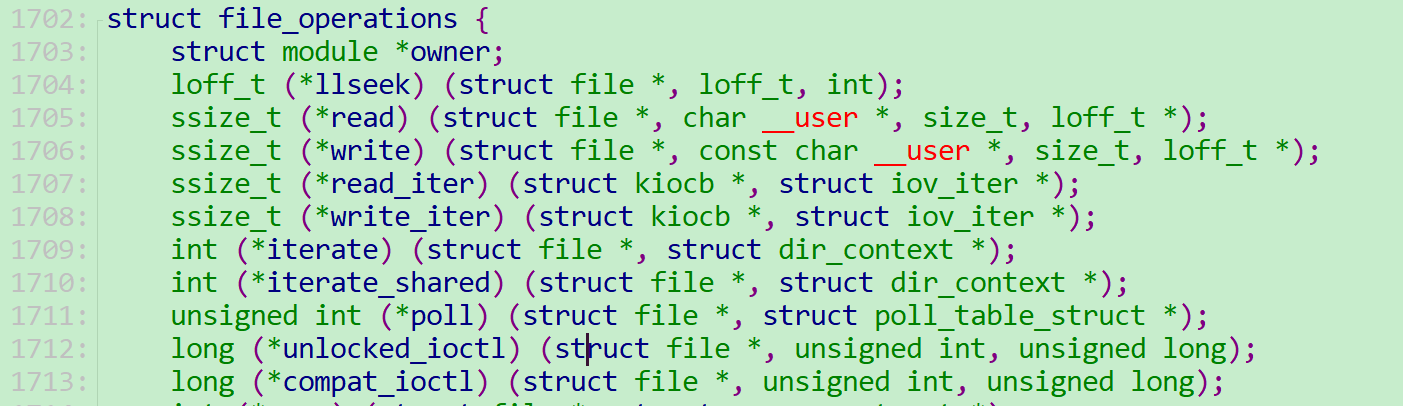
- 定义自己的 file_operations 结构体
- 实现对应的 open/read/write函数,填写入结构体
- 把file_operations 结构体告诉内核,注册驱动程序
- 谁来注册驱动程序?需要一个入口函数;安装驱动程序时,就会调用这个入口函数
- 卸载驱动程序,调用出口函数
- 其他,提供设备信息,创建设备节点
imx-linux4.9.88includelinux目录下fs.h中的file_operations 结构体:
可以参考imx-linux4.9.88driverschar目录下的misc.c文件编写驱动程序
hello_drv.c
#include <linux/module.h>
#include <linux/fs.h>
#include <linux/errno.h>
#include <linux/miscdevice.h>
#include <linux/kernel.h>
#include <linux/major.h>
#include <linux/mutex.h>
#include <linux/proc_fs.h>
#include <linux/seq_file.h>
#include <linux/stat.h>
#include <linux/init.h>
#include <linux/device.h>
#include <linux/tty.h>
#include <linux/kmod.h>
#include <linux/gfp.h>

#define MIN(a,b) (a<b ? a:b)

//1.确定主设备号
static int major = 0;
static char kernelBuf[1024];
static struct class *hello_class;

//3.实现对应的 open/read/write函数,填写入结构体
ssize_t hello_drv_read (struct file *file, char __user *buf, size_t size, loff_t *pops)
{
    int err;
    printk("%s %s line %d",__FILE__,__FUNCTION__,__LINE__);
    err = copy_to_user(buf, kernelBuf, MIN(size,1024));

    return MIN(size,1024);
}

ssize_t hello_drv_write (struct file *file,const char __user *buf, size_t size, loff_t *pops)
{
    int err;
    printk("%s %s line %d",__FILE__,__FUNCTION__,__LINE__);
    err = copy_from_user(kernelBuf, buf, MIN(size,1024));

    return MIN(size,1024);
}

int hello_drv_open (struct inode *inode, struct file *file)
{
    printk("%s %s line %d",__FILE__,__FUNCTION__,__LINE__);

    return 0;
}

int hello_drv_close (struct inode *inode, struct file *file)
{
    printk("%s %s line %d",__FILE__,__FUNCTION__,__LINE__);

    return 0;
}

//2.定义自己的 file_operations 结构体
static struct file_operations hello_drv = {
    .owner	 = THIS_MODULE,
    .read    = hello_drv_read,
    .write   = hello_drv_write,
    .open    = hello_drv_open,
    .release = hello_drv_close
};
//4.把file_operations 结构体告诉内核,注册驱动程序
//5.谁来注册驱动程序?需要一个入口函数;安装驱动程序时,就会调用这个入口函数
static int __init hello_drv_init(void)
{
    int err;

    printk("%s %s line %d",__FILE__,__FUNCTION__,__LINE__);
    major = register_chrdev(0,"hello",&hello_drv);
    hello_class = class_create(THIS_MODULE, "hello");
	err = PTR_ERR(hello_class);
	if (IS_ERR(hello_class))
	{
        printk("%s %s line %d",__FILE__,__FUNCTION__,__LINE__);
        unregister_chrdev(major,"hello");
        return -1;
    }

    device_create(hello_class, NULL, MKDEV(major, 0),NULL, "hello");

    return 0;
}


//6.卸载驱动程序,调用出口函数
static void __exit hello_drv_exit(void)
{
    printk("%s %s line %d",__FILE__,__FUNCTION__,__LINE__);
    device_destroy(hello_class, MKDEV(major, 0));
    class_destroy(hello_class);
    unregister_chrdev(major,"hello");
    return 0;
}


//7.其他,提供设备信息,创建设备节点

module_init(hello_drv_init);
module_exit(hello_drv_exit);
MODULE_LICENSE("GPL");
二、编写测试程序
hello_drv_test.c
#include <stdio.h>
#include <sys/types.h>
#include <sys/stat.h>
#include <fcntl.h>
#include <string.h>
#include <unistd.h>

/*
*./hello_drv_test -w abc
*./hello_drv_test -r
*/

int main(int argc,char **argv)
{
    if(argc <2)
    {
        printf("Usage:%s -w <string>n",argv[0]);
        printf("Usage:%s -r n",argv[0]);

        return -1;
    }

    int fd;
    char buf[1024];
    fd = open("/dev/hello",O_RDWR);
    if(-1==fd)
    {
        printf("can not open /dev/hellon");
        return -1;
    }

    if(strcmp(argv[1],"-w")==0 && argc==3)
    {
        write(fd, argv[2], strlen(argv[2]));
    }else
    {
        read(fd,buf,1024);
        buf[1023] = 'n';

        printf("APP get data %s",buf);
    }

    close(fd);

    return  0;
}
三、编译测试
以100ask_imx6ull MINI开发板为例(可以参考前面有关的博文):
编译驱动代码需要一个提前编译好的内核
1.编译内核镜像
make mrproper
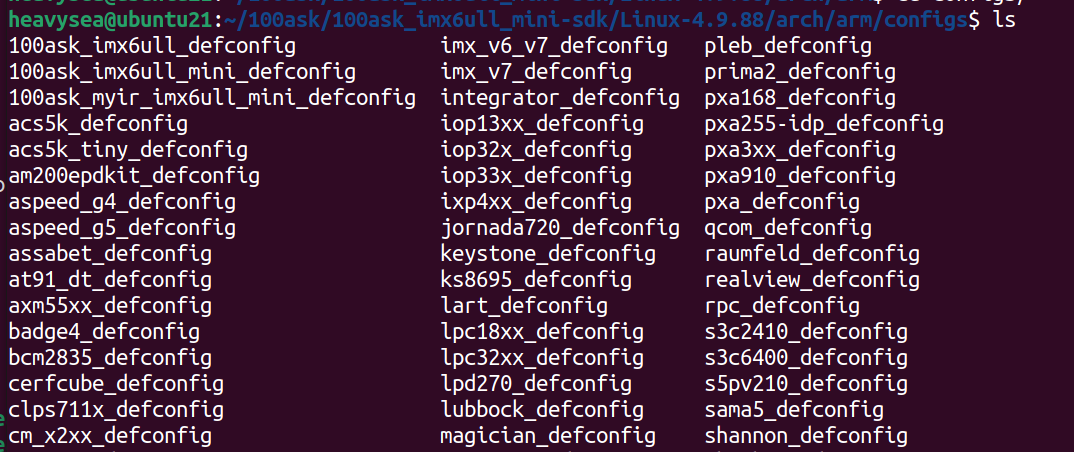
make 100ask_imx6ull_mini_defconfig
make zImage -jN //N表示根据CPU个数,来加速编译系统
make dtbs
// 复制到网络文件系统目录备用
cp arch/arm/boot/zImage ~/nfs_rootfs
cp arch/arm/boot/dts/100ask_myir_imx6ull_mini.dtb ~/nfs_rootfs
如果执行make 100ask_imx6ull_mini_defconfig报错显示找不到路径,需要去相应目录下查看是否有该目录,这里是将厂家提供的_defconfig配置到 .config里。
2.编译内核模块及测试程序
1.将驱动代码hello_drv.c 放到字符设备目录下
2.进入Makefile 文件,需要把驱动按模块编译进内核,需要添加下面一行
obj-m += hello_drv.o
3.编译内核模块(最终会生成.ko文件)
注意一定要回到内核目录下(…linux-4.4/)进行编译
make ARCH=arm CROSS_COMPILE=arm-buildroot-linux-gnueabihf- modules
4.编译测试程序
arm-buildroot-linux-gnueabihf-gcc hello_drv_test.c -o Test
拷贝到nfs目录下
也可以借助Makefile文件直接执行make命令完成编译:
Makefile
# 1. 使用不同的开发板内核时, 一定要修改KERN_DIR
# 2. KERN_DIR中的内核要事先配置、编译, 为了能编译内核, 要先设置下列环境变量:
# 2.1 ARCH,          比如: export ARCH=arm64
# 2.2 CROSS_COMPILE, 比如: export CROSS_COMPILE=aarch64-linux-gnu-
# 2.3 PATH,          比如: export PATH=$PATH:/home/book/100ask_roc-rk3399-pc/ToolChain-6.3.1/gcc-linaro-6.3.1-2017.05-x86_64_aarch64-linux-gnu/bin
# 注意: 不同的开发板不同的编译器上述3个环境变量不一定相同,
#       请参考各开发板的高级用户使用手册

KERN_DIR = /home/book/100ask/linux-4.4

all:
	make -C $(KERN_DIR) M=`pwd` modules
	$(CROSS_COMPILE)gcc -o hello_drv_test hello_drv_test.c

clean:
	make -C $(KERN_DIR) M=`pwd` modules clean
	rm -rf modules.order
	rm -f hello_drv_test

obj-m	+= hello_drv.o
3.运行测试
需要把程序放到ARM板子上运行,这里使用NFS挂载Ubuntu的某个目录,访问该目录中的程序。这也是前面拷贝程序到NFS目录的原因。
将编译内核模块生成的.ko拷贝到NFS目录
cp *.ko ~/nfs_rootfs/
insmod hello_drv.ko    // 安装驱动程序
ls /dev/hello -l        // 驱动程序会生成设备节点
运行测试程序
./hello_drv_test -w heavysea
./hello_drv_test -r

dmesg |grep hello    // 查看内核态打印的有关驱动的信息
rmmod   hello_drv.ko // 卸载驱动模块
最后
以上就是机灵红牛最近收集整理的关于hello 驱动编写-最简单的驱动程序一、编写驱动程序二、编写测试程序三、编译测试的全部内容,更多相关hello内容请搜索靠谱客的其他文章。


发表评论 取消回复