一个linux驱动编程模板,用于以后编程需要,模板由三部分组成,一是驱动模板程序,二是Makefile文件,三是驱动模板测试程序。
1、linux驱动编程模板
#include <linux/errno.h>
#include <linux/kernel.h>
#include <linux/module.h>
#include <linux/slab.h>
#include <linux/input.h>
#include <linux/init.h>
#include <linux/serio.h>
#include <linux/delay.h>
#include <linux/clk.h>
#include <linux/miscdevice.h>
#include <linux/gpio.h>
#include <asm/io.h>
#include <asm/irq.h>
#include <asm/uaccess.h>
#include <linux/kallsyms.h>
#include <linux/cdev.h>
#include <linux/device.h>
#include <linux/jiffies.h>

extern void A_print_jiffies(void);
extern void B_print_jiffies(void);

/* 用udev机制自动添加设备节点 */
struct class *driving_template_class;

/* 主设备号 */
static int driving_template_major = 0;
static struct cdev driving_templateDevs;


static int driving_template_open(struct inode *inode, struct file *file)
{
    return 0;
}


static long driving_template_ioctl(struct file *file, unsigned int cmd, unsigned long arg)
{
    printk("this is the driving template !n");
    printk("arg is %ld!n",arg);
    return 0;
}

/* 这个结构是字符设备驱动程序的核心
 * 当应用程序操作设备文件时所调用的open、read、write等函数,
 * 最终会调用这个结构中指定的对应函数
 */
static struct file_operations func_fops = {
    /* 一个宏,推向编译模块时自动创建的__this_module变量 */
    .owner  =   THIS_MODULE,
    .open   =   driving_template_open,
    .unlocked_ioctl  =   driving_template_ioctl,
};


/*
 * Set up the cdev structure for a device.
 */
static void driving_template_setup_cdev(struct cdev *dev, int minor,struct file_operations *fops)
{
    int err, devno = MKDEV(driving_template_major, minor);
    cdev_init(dev, fops);
    dev->owner = THIS_MODULE;
    dev->ops = fops;
    err = cdev_add (dev, devno, 1);
    if (err)
        printk (KERN_NOTICE "Error %d adding Led%d", err, minor);
}

/*
 * 执行“insmod leds.ko”命令时就会调用这个函数
 */

static int __init driving_template_init(void)
{
    int result;
    dev_t dev = MKDEV(driving_template_major, 0);
    /* 加载模式后,执行”cat /proc/devices”命令看到的设备名称 */
    char dev_name[]="func";
    /* Figure out our device number. */
    if (driving_template_major)
        result = register_chrdev_region(dev, 1, dev_name);
    else {
        result = alloc_chrdev_region(&dev, 0, 1, dev_name);
        driving_template_major = MAJOR(dev);
    }
    if (result < 0) {
        printk(KERN_WARNING "leds: unable to get major %dn", driving_template_major);
        return result;
    }
    if (driving_template_major == 0)
        driving_template_major = result;
    /* Now set up cdev. */
    driving_template_setup_cdev(&driving_templateDevs, 0, &func_fops);

    /*udev机制可以自动添加设备节点,只需要添加xxx_class这个类,以及device_create()*/
    /*在sys目录下创建xx_class这个类,/sys/class/~*/
    driving_template_class = class_create(THIS_MODULE, "driving_template_class");
    /*自动创建设备/dev/$DEVICE_NAME*/
    device_create(driving_template_class, NULL, driving_templateDevs.dev,  dev_name,  dev_name);

    printk("driving template installed, with major %dn", driving_template_major);
    printk("The device name is: %sn", dev_name);
    return 0;

}

/*
 * 执行”rmmod leds”命令时就会调用这个函数
 */
static void __exit driving_template_exit(void)
{
    /* 卸载驱动程序 */
    cdev_del(&driving_templateDevs);
    unregister_chrdev_region(MKDEV(driving_template_major, 0), 1);
    printk("driving template device uninstalledn");
}

/* 这两行指定驱动程序的初始化函数和卸载函数 */
module_init(driving_template_init);
module_exit(driving_template_exit);

/* 描述驱动程序的一些信息,不是必须的 */
MODULE_AUTHOR("SweeNeil");
MODULE_DESCRIPTION("driving template Driver 2018-07-19");
MODULE_LICENSE("Dual BSD/GPL");
2、Makefile文件编写
ifneq ($(KERNELRELEASE),)
obj-m:=func.o
else

#generate the path
CURRENT_PATH:=$(shell pwd)

#the absolute path
LINUX_KERNEL_PATH:=/lib/modules/$(shell uname -r)/build


#complie object
.PHONY:default
default:
	make -C $(LINUX_KERNEL_PATH) M=$(CURRENT_PATH) modules

.PHONY:clean
clean:
	make -C $(LINUX_KERNEL_PATH) M=$(CURRENT_PATH) clean
endif
使用Make命令进行编译,编译过程如下:
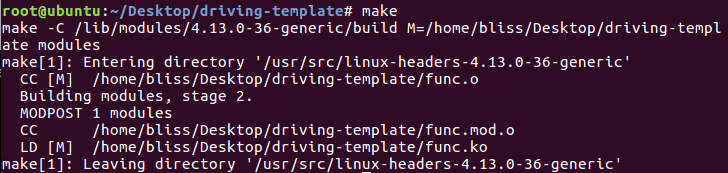
编译成功后使用:
insmod func.ko插入驱动程序。
3、测试编写的驱动
#include <stdio.h>
#include <stdlib.h>
#include <unistd.h>
#include <sys/ioctl.h>
#include <time.h>


int main(int argc, char **argv)
{
    int fd = open("/dev/func", 0);
    if (fd < 0) {
        printf("Can't open /dev/funcn");
        return -1;
    }
    ioctl(fd, 1, 10);


    close(fd);
    return 0;
}
编写完成之后,使用gcc编译测试程序,然后运行编译好的测试程序,使用dmesg查看运行结果如下:

最后
以上就是老实悟空最近收集整理的关于Linux驱动编程模板的全部内容,更多相关Linux驱动编程模板内容请搜索靠谱客的其他文章。
本图文内容来源于网友提供,作为学习参考使用,或来自网络收集整理,版权属于原作者所有。


发表评论 取消回复