全局封装
1.在components中创建Title.vue组件
<template>T
  <header>
    <i class="iconfont icon-back"></i>
    <span>111111111</span>
  </header>
</template>
<style lang="scss" scoped>
header {
  z-index: 1;
  position: fixed;
  top: 0;
  left: 0;
  width: 100%;
  height: 40px;
  text-align: center;
  line-height: 40px;
  background-color: #fff;
  i {
    position: absolute;
    left: 0;
  }
}
</style>
2.在until中创建title.js定义全局组件,引入Title.vue
import Vue from "vue";
import Title from '@/components/Title'
Vue.component('m-title',Title)   //注册全局的组件
3.在 mina.js中引入title.js(只看最后一个引入)
import '@/until/filter'    //引入全局过滤器
import '@/until/scrollTop'  //引入全局指令
import '@/until/title'  //引入全局组件
4.再要引入的界面调用即可
<m-title></m-title>
扩展
给i标签加一个点击事件,不同的地方对i的使用不同,比如的是返回上一页,有的跳转到指定页面,下面讲一下
1.在component中的Title.vue中给i增加点击事件,用$emit触发并传出一个back用于外部的点击触发
<template>
  <header>
    <i class="iconfont icon-back" @click="fun()"></i>
    <span>1111111</span>
  </header>
</template>
<script>
export default {
    methods: {
        fun(){
            this.$emit("back")
        }
    },
};
</script>
<style lang="scss" scoped>
header {
  z-index: 1;
  position: fixed;
  top: 0;
  left: 0;
  width: 100%;
  height: 40px;
  text-align: center;
  line-height: 40px;
  background-color: #fff;
  i {
    position: absolute;
    left: 0;
  }
}
</style>
2.在组件所在地触发
<m-title @back="fun()"></m-title>
3.传入你自己的方法,我的是返回上一页
methods: {
    fun(){
      this.$router.back()
    }
  }
给第一步的span插入你想要的值,可以用插槽,当然也可以用传属性的方法 插槽示例
1.{{detilinfo.name}}为我要插入的值
<m-title @back="fun()">
      {{detilinfo.name}}
    </m-title>
2.在component中的Title.vue的span中放入插槽即可
<template>
  <header>
    <i class="iconfont icon-back" @click="fun()"></i>
    <span>
        <slot></slot>
    </span>
  </header>
</template>
48-18m
局部封装
1.在components中创建Search.vue组件
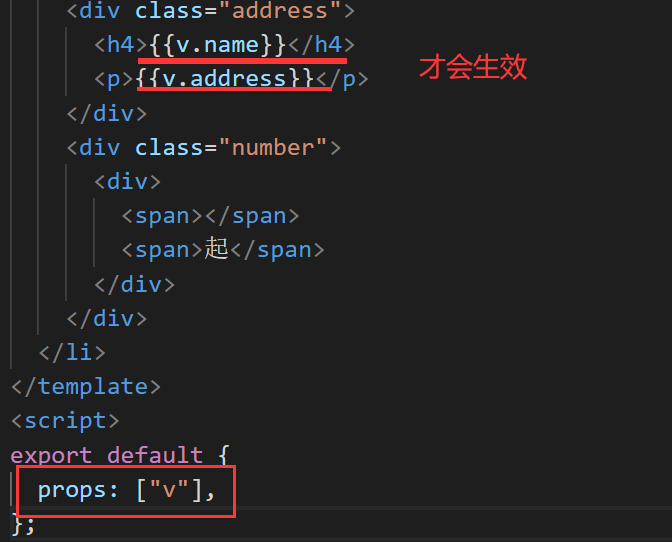
<template>
  <li>
    <div class="address">
      <h4>{{v.name}}</h4>
      <p>{{v.address}}</p>
    </div>
    <div class="number">
      <div>
        <span></span>
        <span>起</span>
      </div>
    </div>
  </li>
</template>
<script>
export default {
  props: ["v"],
};
</script>
<style lang="scss" scoped>
li {
  padding: 10px;
  display: flex;
  .address {
    width: calc(100% - 65px);
    text-align: left;
    padding-right: 15px;
    float: left;
    h4 {
      color: #191a1b;
      font-size: 15px;
      max-width: 80%;
      overflow: hidden;
      text-overflow: ellipsis;
      white-space: nowrap;
    }
    p {
      color: #797d82;
      font-size: 12px;
      margin-top: 5px;
      max-width: 80%;
      overflow: hidden;
      text-overflow: ellipsis;
      white-space: nowrap;
    }
  }
  .number {
    width: 70px;
    text-align: center;
    float: right;
    margin-right: -5px;
  }
}
</style>
2.在使用界面引用
import search from '@/components/Search'
3.注册
 components:{
    search
  },
4.使用
<search></search>
注意
需要给组件传值的话需要传值,然后组件中用props接收
53-08m
最后
以上就是无语蜜蜂最近收集整理的关于自定义封装组件全局封装局部封装的全部内容,更多相关自定义封装组件全局封装局部封装内容请搜索靠谱客的其他文章。
本图文内容来源于网友提供,作为学习参考使用,或来自网络收集整理,版权属于原作者所有。


发表评论 取消回复