一、目标任务概述
这里记录了一下一个多线程定时作业的实现流程,任务目标是每天半夜1点执行定时作业,把当天产生的记录,进行批量计算处理,之后在更新回数据库。所以从代码里面抽出来从项目创建开始写了个小demo,进行了一下整理和记录以备忘。
这里的主要环境和工具如下:
IntelliJ IDEA 2021.2.3
JDK8
Mysql5.7
Postman
Navicat Premium
spring-boot 2.6.7
mybatis 2.2.2
二、项目创建
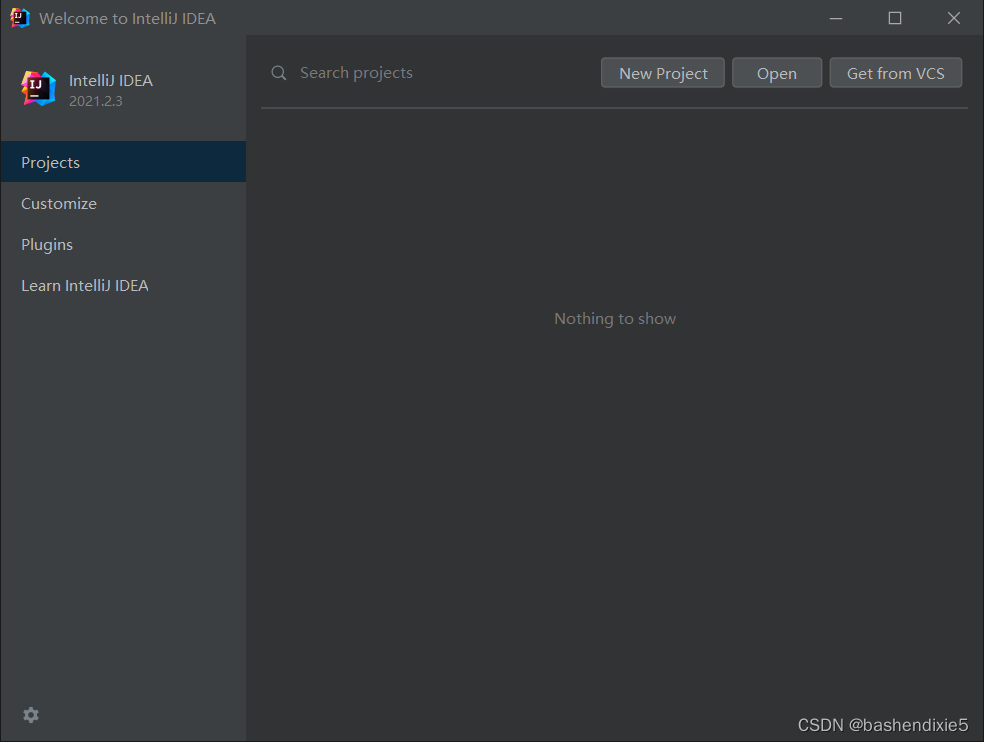
打开idea,创建一个新项目,截图如下
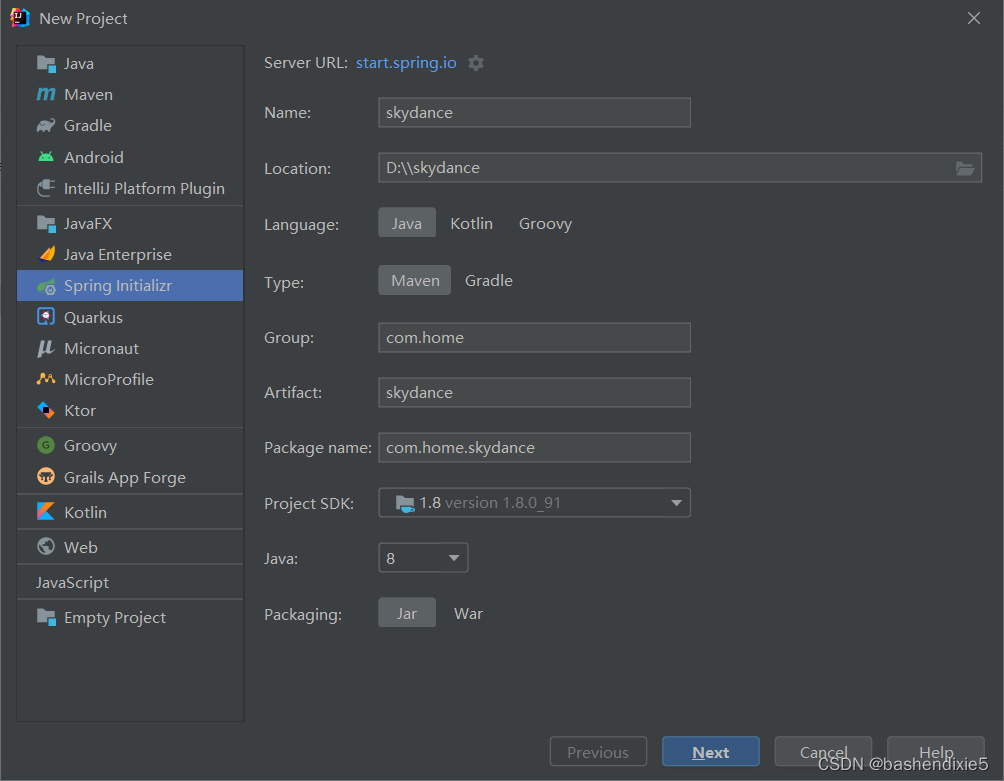
左侧选择Spring Initializr,填写右侧的相关信息。
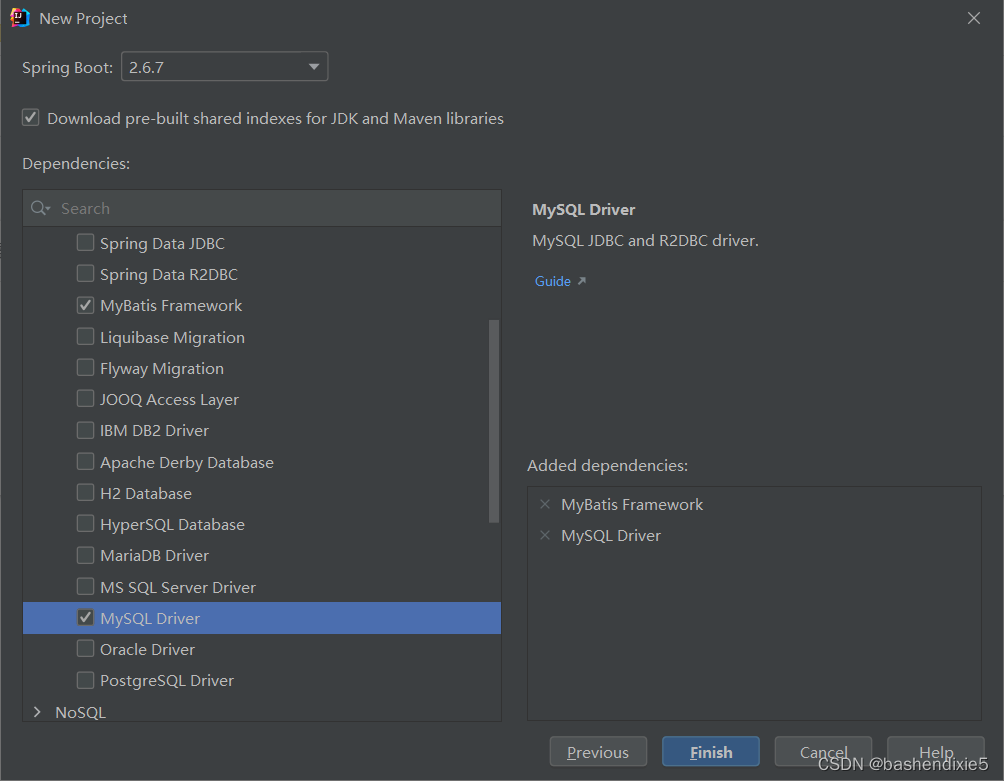
选择需要的包,主要是mybatis和mysql driver,spring-boot-starter-web等等,缺了也没关系,可以在项目内再添加。
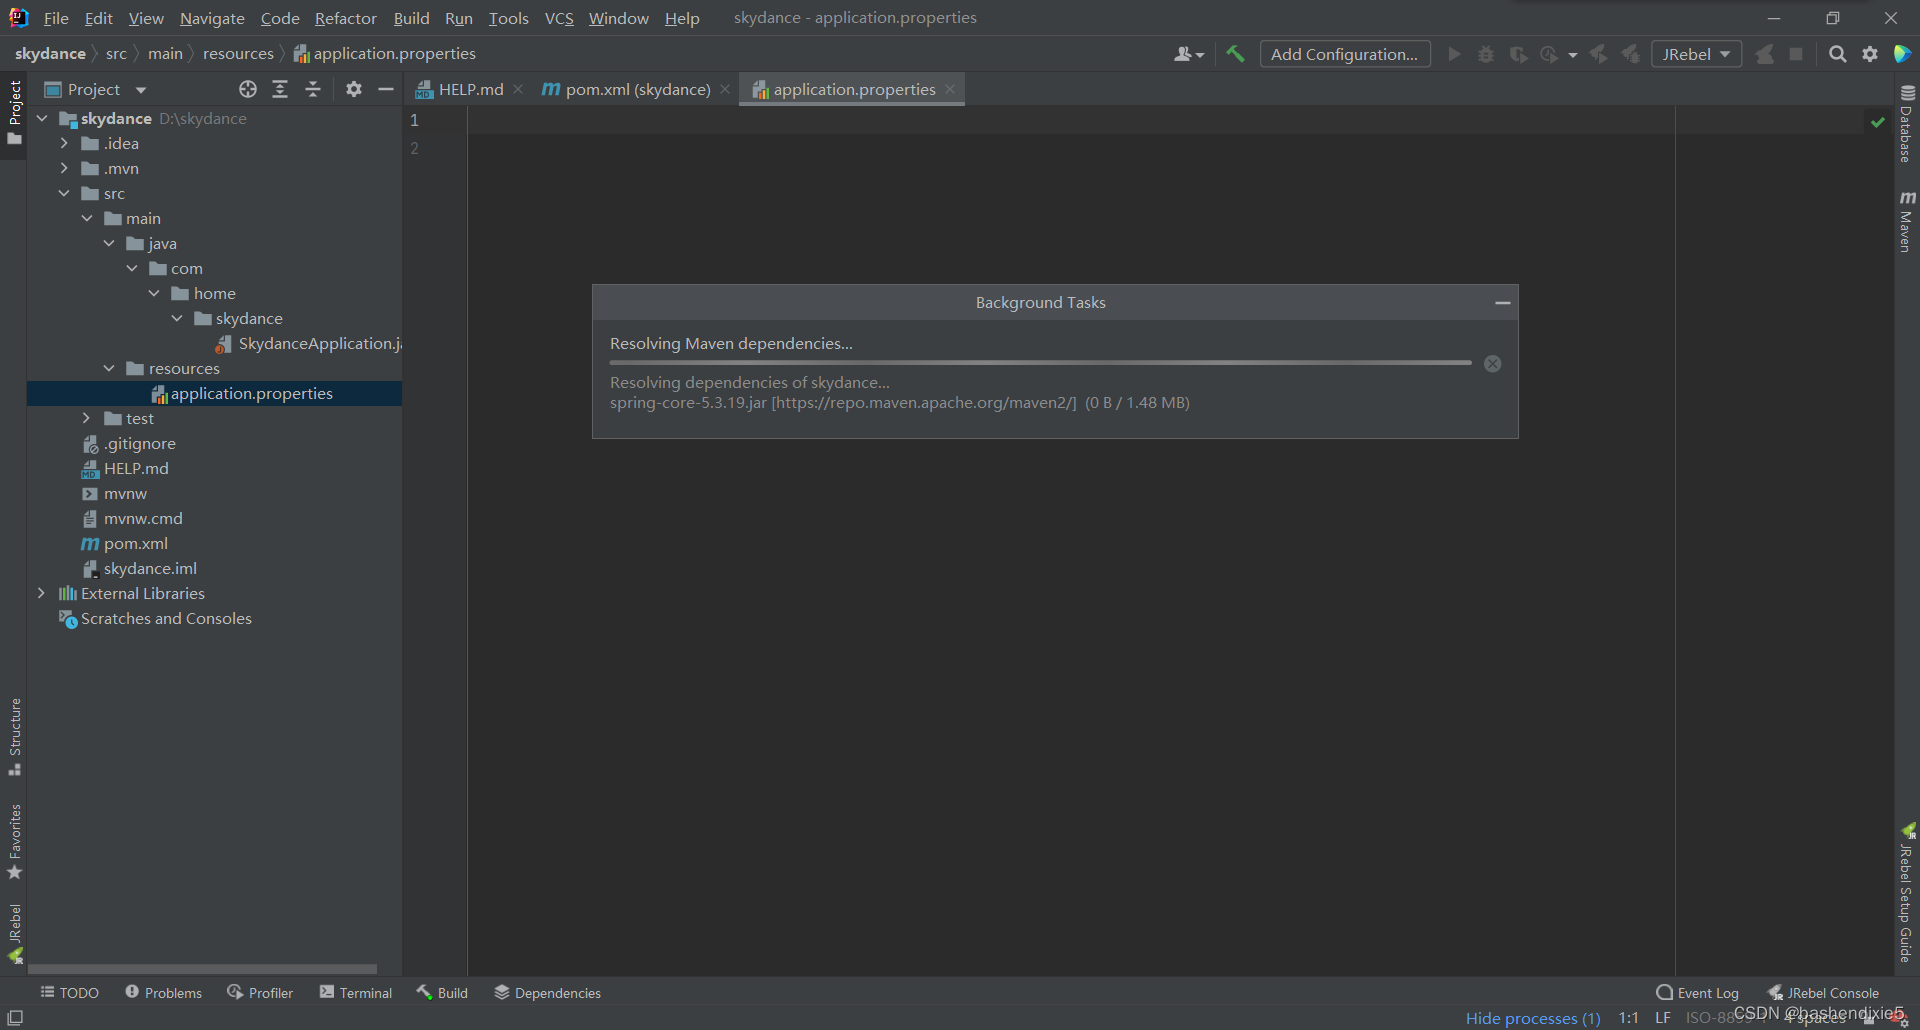
上面信息填完后,点finish,然后项目结构如下图左侧,并且maven开始添加需要的包,耐心等待。
三、添加相应代码
1、pom.xml完整内容
<?xml version="1.0" encoding="UTF-8"?>
<project xmlns="http://maven.apache.org/POM/4.0.0" xmlns:xsi="http://www.w3.org/2001/XMLSchema-instance"
         xsi:schemaLocation="http://maven.apache.org/POM/4.0.0 https://maven.apache.org/xsd/maven-4.0.0.xsd">
    <modelVersion>4.0.0</modelVersion>
    <parent>
        <groupId>org.springframework.boot</groupId>
        <artifactId>spring-boot-starter-parent</artifactId>
        <version>2.6.7</version>
        <relativePath/> <!-- lookup parent from repository -->
    </parent>
    <groupId>com.home</groupId>
    <artifactId>skydance</artifactId>
    <version>0.0.1-SNAPSHOT</version>
    <name>skydance</name>
    <description>skydance</description>
    <properties>
        <java.version>1.8</java.version>
    </properties>
    <dependencies>
        <dependency>
            <groupId>org.mybatis.spring.boot</groupId>
            <artifactId>mybatis-spring-boot-starter</artifactId>
            <version>2.2.2</version>
        </dependency>

        <dependency>
            <groupId>org.springframework.boot</groupId>
            <artifactId>spring-boot-starter-web</artifactId>
        </dependency>
        <dependency>
            <groupId>mysql</groupId>
            <artifactId>mysql-connector-java</artifactId>
            <scope>runtime</scope>
        </dependency>
        <dependency>
            <groupId>org.springframework.boot</groupId>
            <artifactId>spring-boot-starter-test</artifactId>
            <scope>test</scope>
        </dependency>
        <dependency>
            <groupId>org.junit.platform</groupId>
            <artifactId>junit-platform-commons</artifactId>
        </dependency>
    </dependencies>

    <build>
        <plugins>
            <plugin>
                <groupId>org.springframework.boot</groupId>
                <artifactId>spring-boot-maven-plugin</artifactId>
            </plugin>
        </plugins>
        <resources>
            <resource>
                <directory>src/main/resources</directory>
                <includes>
                    <include>**/*.properties</include>
                    <include>**/*.xml</include>
                </includes>
                <filtering>true</filtering>
            </resource>
            <resource>
                <directory>src/main/java</directory>
                <includes>
                    <include>**/*.properties</include>
                    <include>**/*.xml</include>
                </includes>
                <filtering>true</filtering>
            </resource>
        </resources>
    </build>

</project>
2、配置文件properties
这里使用application.properties,而没使用yml。主要配置内容如下
server.port=9001
spring.datasource.url=jdbc:mysql://127.0.0.1:3306/world?&serverTimezone=Asia/Shanghai&useUnicode=true&characterEncoding=utf8&useSSL=false&allowMultiQueries=true
spring.datasource.username=root
spring.datasource.password=123456
spring.datasource.driver-class-name=com.mysql.cj.jdbc.Driver
mybatis.mapper-locations=classpath:com/home/skydance/dao/*.xml
第1行指定了运行的端口。
第2行指定了数据库的连接url。
地址/端口/数据库名称:jdbc:mysql://127.0.0.1:3306/world
指定时区:serverTimezone=Asia/Shanghai
指定编码:useUnicode=true
指定字符集:characterEncoding=utf8
禁用SSLuseSSL=false
开启批量执行sql:allowMultiQueries=true
第3、4行指定了数据库的账号密码,这里没有进行加密,也没有创建新用户,不是一个好习惯。
第5行指定了驱动包。
第6行指定了mybatis,mapper的包路径。
3、项目结构
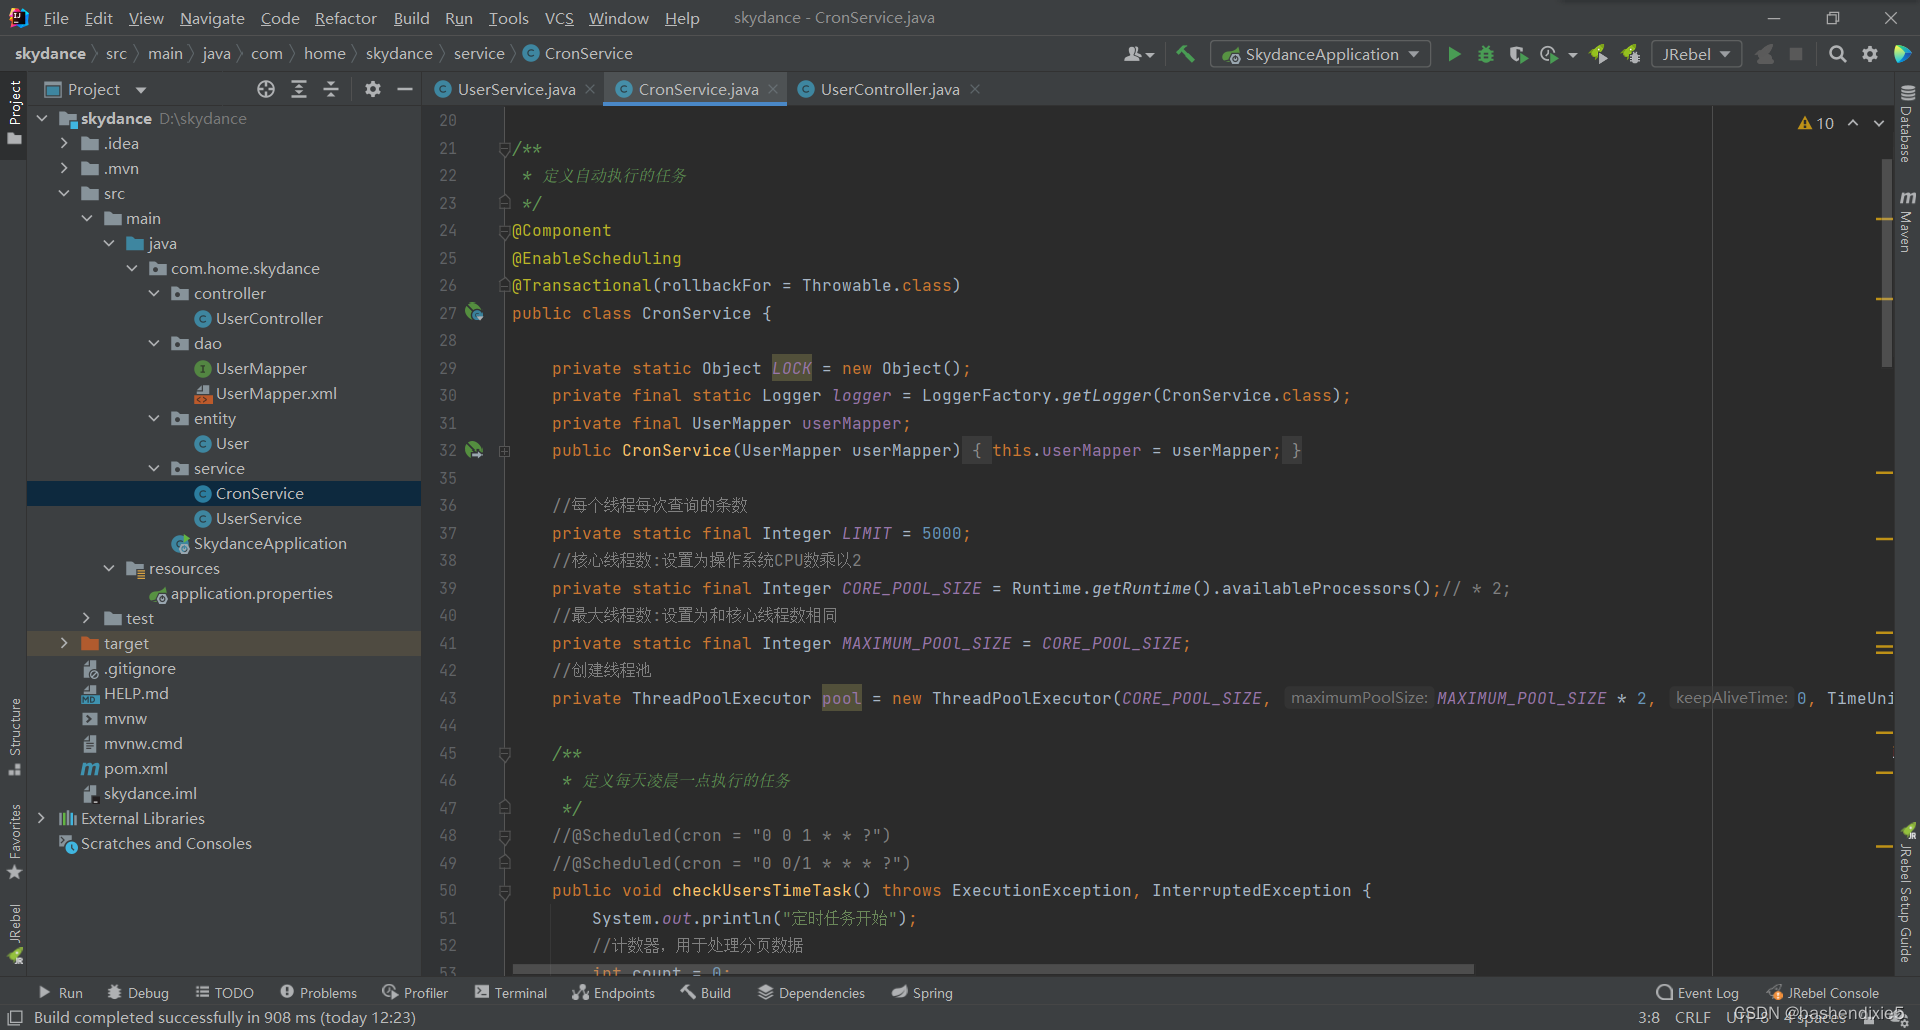
4、数据表结构
一张模拟任务的简单的表,定时任务主要是要读取当天的数据计算svd_value,然后更新回数据库。

5、定时任务参考代码
我们创建一个名称为CronService的文件。使用Scheduled开启定时任务。
package com.home.skydance.service;

import com.home.skydance.dao.UserMapper;
import com.home.skydance.entity.User;
import org.slf4j.Logger;
import org.slf4j.LoggerFactory;
import org.springframework.scheduling.annotation.EnableScheduling;
import org.springframework.stereotype.Component;
import org.springframework.transaction.annotation.Transactional;
import org.springframework.util.CollectionUtils;

import java.time.LocalDate;
import java.time.LocalDateTime;
import java.time.LocalTime;
import java.time.ZoneId;
import java.util.ArrayList;
import java.util.Date;
import java.util.List;
import java.util.concurrent.*;

/**
 * 定义自动执行的任务
 */
@Component
@EnableScheduling
@Transactional(rollbackFor = Throwable.class)
public class CronService {

    private static Object LOCK = new Object();
    private final static Logger logger = LoggerFactory.getLogger(CronService.class);
    private final UserMapper userMapper;
    public CronService(UserMapper userMapper) {
        this.userMapper = userMapper;
    }

    //每个线程每次查询的条数
    private static final Integer LIMIT = 5000;
    //核心线程数
    private static final Integer CORE_POOL_SIZE = Runtime.getRuntime().availableProcessors();// * 2;
    //最大线程数
    private static final Integer MAXIMUM_POOl_SIZE = CORE_POOL_SIZE;
    //创建线程池
    private ThreadPoolExecutor pool = new ThreadPoolExecutor(CORE_POOL_SIZE, MAXIMUM_POOl_SIZE * 2, 0, TimeUnit.SECONDS, new LinkedBlockingQueue<>(100));

    /**
     * 定义每天凌晨一点执行的任务
     */
    @Scheduled(cron = "0 0 1 * * ?")
    //@Scheduled(cron = "0 0/1 * * * ?")
    public void checkUsersTimeTask() throws ExecutionException, InterruptedException {
        System.out.println("定时任务开始");
        //计数器,用于处理分页数据
        int count = 0;
        //获取所有待处理数据总数
        Integer total = userMapper.countPreRecordsByDate(getMaxCurrentDate());
        logger.info("待处理数据条数:{}", total);
        //计算需要多少轮才能处理完
        int num = total / (LIMIT * CORE_POOL_SIZE) + 1;
        logger.info("要经过的轮数:{}", num);
        //统计处理成功的数据条数
        int finishCount = 0;
        for (int i = 0; i < num; i++)
        {
            logger.info("第" + (i+1) + "轮开始");
            //接收线程返回结果
            List<Future<Integer>> futureList = new ArrayList<>(32);
            //起CORE_POOL_SIZE个线程并行查询更新库,加锁
            for (int j = 0; j < CORE_POOL_SIZE; j++) {
                synchronized (LOCK) {
                    int start = count * LIMIT;
                    count++;
                    //提交线程,用数据起始位置标识线程
                    Future<Integer> future = pool.submit(new MarkDataTask(start, LIMIT));
                    //先不取值,防止阻塞,放进集合
                    futureList.add(future);
                }
            }
            //统计处理成功的数据
            for (Future f : futureList) {
                finishCount = finishCount + (int)f.get();
            }
            logger.info("第" + (i+1) + "轮结束");
        }
        logger.info("当天定时任务完成,预处理数据:{},处理成功:{}", total, finishCount);
        System.out.println("定时任务结束");
    }

    public static Date getMaxCurrentDate() {
        LocalDate localDate = LocalDate.now(); //获取今天的日期
        //LocalDate yesterday = localDate.plusDays(-1); //前一天日期是今天减1
        LocalDate yesterday = localDate;
        LocalDateTime startTime = LocalDateTime.of(yesterday, LocalTime.MIN);
        LocalDateTime endTime = LocalDateTime.of(yesterday, LocalTime.MAX);
        return Date.from(endTime.atZone(ZoneId.systemDefault()).toInstant());
    }

    /**
     * 批量处理数据线程类
     */
    class MarkDataTask implements Callable<Integer> {
        int start;
        int limit;

        MarkDataTask(int start, int limit) {
            this.start = start;
            this.limit = limit;
        }

        @Override
        public Integer call() {
            //设置线程名字
            Thread.currentThread().setName("Thread" + start);
            int count = 0;
            //获取当前线程需要处理的数据
            List<User> usersList = userMapper.selectByDateTime(getMaxCurrentDate(), start, limit);
            if (CollectionUtils.isEmpty(usersList)) {
                return count;
            }
            logger.info("操作第:[{},{}]数据", start, ""+(start + limit));
            // 这里进行处理数据并更新数据库开始
            for(int i=0; i<usersList.size(); i++)
            {
                usersList.get(i).setSvdValue(usersList.get(i).getId() * 3 - 3);
                usersList.get(i).setThreadNo(Thread.currentThread().getName());
                usersList.get(i).setUpdateTime(new Date());
            }
            // 这里进行处理数据并更新数据库结束
            userMapper.updateForeach(usersList);
            logger.info("操作第:[{},{}]数据完成!", start, start + limit);
            return usersList.size();
        }
    }
}
四、完整代码
java_example/skydance at main · bashendixie/java_example · GitHubContribute to bashendixie/java_example development by creating an account on GitHub. https://github.com/bashendixie/java_example/tree/main/skydance
最后
以上就是欢呼宝马最近收集整理的关于Java Demo示例:多线程定时执行批量任务一、目标任务概述二、项目创建三、添加相应代码四、完整代码的全部内容,更多相关Java内容请搜索靠谱客的其他文章。


发表评论 取消回复