1.处理延迟队列
2.处理发布确认
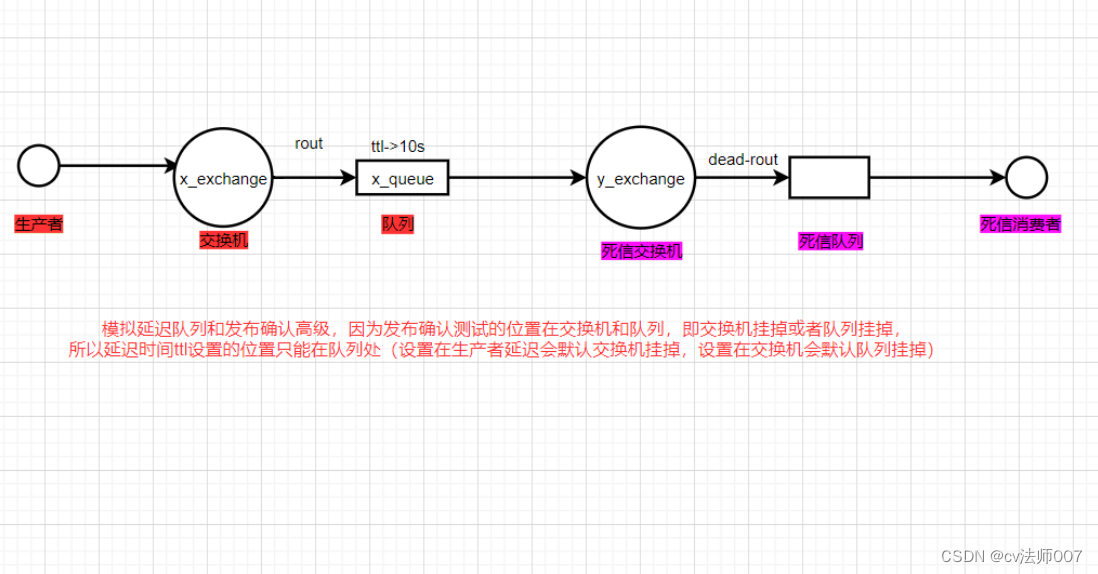
首先流程图以及各名称设置如下,争对ttl过期时间设置位置的解释
创建springboot工程,导入以下依赖
 <dependencies>
        <dependency>
            <groupId>org.springframework.boot</groupId>
            <artifactId>spring-boot-starter</artifactId>
        </dependency>

        <dependency>
            <groupId>org.springframework.boot</groupId>
            <artifactId>spring-boot-starter-test</artifactId>
            <scope>test</scope>
        </dependency>

        <!--        Rabbi tMQ 依赖-->
        <dependency>
            <groupId>org.springframework.boot</groupId>
            <artifactId>spring-boot-starter-amqp</artifactId>
        </dependency>

        <!--        阿里巴巴类型转换-->
        <dependency>
            <groupId>com.alibaba</groupId>
            <artifactId>fastjson</artifactId>
            <version>1.2.47</version>
        </dependency>
        <dependency>
            <groupId>org.projectlombok</groupId>
            <artifactId>lombok</artifactId>
        </dependency>
        <!--        swagger-->
        <dependency>
            <groupId>io.springfox</groupId>
            <artifactId>springfox-swagger2</artifactId>
            <version>2.9.2</version>
        </dependency>
        <dependency>
            <groupId>io.springfox</groupId>
            <artifactId>springfox-swagger-ui</artifactId>
            <version>2.9.2</version>
        </dependency>
        <!--        Rabbi tMQ 测试依赖-->
        <dependency>
            <groupId>org.springframework.amqp</groupId>
            <artifactId>spring-rabbit-test</artifactId>
            <scope>test</scope>
        </dependency>
        <dependency>
            <groupId>org.springframework.boot</groupId>
            <artifactId>spring-boot-starter-web</artifactId>
        </dependency>
    </dependencies>

    <build>
        <plugins>
            <plugin>
                <groupId>org.springframework.boot</groupId>
                <artifactId>spring-boot-maven-plugin</artifactId>
            </plugin>
        </plugins>
    </build>
开启rabbitMQ客户端
yml配置文件配置如下(连接rabbitmq密码用户名这些都是你的)
server:
  port: 8084
spring:
  rabbitmq:
    password: 123456
    username: admin
    host: 192.168.17.141
    port: 5672
    #发布消息到交换器后会触发回调方法  (成功失败都会)
    publisher-confirm-type: correlated
    #回退消息配置  、消息退回生产者 (失败才会)
    publisher-returns: true
编写代码,首先需要有swagger配置类
package com.delayandadvanced.config;


import org.springframework.context.annotation.Bean;
import org.springframework.context.annotation.Configuration;
import springfox.documentation.builders.ApiInfoBuilder;
import springfox.documentation.service.ApiInfo;
import springfox.documentation.service.Contact;
import springfox.documentation.spi.DocumentationType;
import springfox.documentation.spring.web.plugins.Docket;
import springfox.documentation.swagger2.annotations.EnableSwagger2;

@Configuration
@EnableSwagger2

public class SwaggerConfig {
    @Bean
    public Docket webApiConfig ( ) {

        return new Docket( DocumentationType. SWAGGER_2)
                . groupName ( "webApi" )
                . apiInfo (webApiInfo ( ) )
                . select ( )
                . build ( );
    }
    private ApiInfo webApiInfo ( ) {

        return new ApiInfoBuilder( )
                . title ( "rabbitmq 接口文档 " )
                . description ( "本文档描述了 rabbitmq 微服务接口定义" )
                . version ( " 1 . 0 " )
                . contact (new Contact( "enjoy6288 " , "http : //baidu. com" ,

                        " 1900168534@qq . com" ) )
                . build ( ) ;
    }
}
重要的一步,编写rabbitMQ配置类
package com.delayandadvanced.config;

import org.springframework.amqp.core.*;
import org.springframework.beans.factory.annotation.Qualifier;
import org.springframework.context.annotation.Bean;
import org.springframework.context.annotation.Configuration;

import java.util.HashMap;
import java.util.Map;

/**
 * 编写配置  声明队列 交换机   绑定关系
 */
@Configuration
public class RabbitmqConfig {
    //交换机名称
    public static final String X_EXCHANGE="x_exchange";
    //死信交换机名称
    public static final String Y_EXCHANGE="y_exchange";
    //队列
    public static final String X_QUEUE="x_queue";
    //死信队列
    public static final String Y_QUEUE="y_queue";

    //声明队列
    @Bean
    public Queue xQueue(){
        Map<String,Object> arguments=new HashMap<>(3);
        /*设置队列中的消息过期后到指定的死信交换机,通过路由到死信队列*/
        arguments.put("x-dead-letter-exchange",Y_EXCHANGE);
        arguments.put("x-dead-letter-routing-key","dead-rout");
        /*设置ttl过期时间 单位为ms*/
        arguments.put("x-message-ttl",10000);
        return QueueBuilder.durable(X_QUEUE).withArguments(arguments).build();
    }
    //声明死信队列
    @Bean
    public Queue yQueue(){
        return QueueBuilder.durable(Y_QUEUE).build();
    }

    //声明交换机 类型为direct
    @Bean
    public DirectExchange xExchange(){
        return new DirectExchange(X_EXCHANGE);
    }
    //声明死信交换机
    @Bean
    public DirectExchange yExchange(){
        return new DirectExchange(Y_EXCHANGE);
    }

    //队列与交换机进行绑定
    @Bean
    public Binding xQueueAndXexchange(
            @Qualifier("xQueue")Queue queue,
            @Qualifier("xExchange")DirectExchange exchange){
        return BindingBuilder.bind(queue).to(exchange).with("rout");
    }
    //死信队列与死信交换机进行绑定
    @Bean
    public Binding yQueueAndYexchange(
            @Qualifier("yQueue")Queue queue,
            @Qualifier("yExchange")DirectExchange exchange
    ){
        return BindingBuilder.bind(queue).to(exchange).with("dead-rout");
    }
}
配置发布确认,注意一定要把当前类注入到内部接口中
package com.delayandadvanced.config;

import lombok.extern.slf4j.Slf4j;
import org.springframework.amqp.core.Message;
import org.springframework.amqp.core.ReturnedMessage;
import org.springframework.amqp.rabbit.connection.CorrelationData;
import org.springframework.amqp.rabbit.core.RabbitTemplate;
import org.springframework.beans.factory.annotation.Autowired;
import org.springframework.stereotype.Component;

import javax.annotation.PostConstruct;

/**
 * 配置发布确认
 *
 * 交换机消息回调
 * 队列退回处理
 *
 */
@Slf4j
@Component
public class MyCallBack implements RabbitTemplate.ConfirmCallback,RabbitTemplate.ReturnsCallback {
  @Autowired
  private RabbitTemplate rabbitTemplate;

//因为ConfirmCallback和ReturnsCallback是内部接口,
// MyCallBack实现RabbitTemplate并没有注入到ConfirmCallback和ReturnsCallback中
  @PostConstruct
  public void init(){ //this指的就是MyCallBack
      rabbitTemplate.setReturnsCallback(this);
      rabbitTemplate.setConfirmCallback(this);
  }

/** 交换机回调成功或者失败*/
    @Override
    public void confirm(CorrelationData correlationData, boolean ack, String cause) {
        //三元运算符  id为生产者发送消息是设置的
        String id=correlationData==null?"":correlationData.getId();
        if (ack){
           log.info("交换机接收到的id为:{}",id);
        }else {
            log.info("交换机没有收到id为:{},原因是:{}",id,cause);
        }
    }
/**队列只回调失败*/
    @Override
    public void returnedMessage(ReturnedMessage returned) {//这里把参数进行了分装,如果你的版本高则跟我一样
  /*public ReturnedMessage(Message message, int replyCode, String replyText, String exchange, String routingKey) {*/

        Message message = returned.getMessage();
        String exchange = returned.getExchange();
        String routingKey = returned.getRoutingKey();
        String replyText = returned.getReplyText();
        log.error("消息:{},被交换机:{}退回,退回原因是:{},路由routingKey是;{}",
                new String(message.getBody()),exchange,replyText,routingKey);

    }

}
编写生产者
package com.delayandadvanced.controller;

import com.delayandadvanced.config.RabbitmqConfig;
import lombok.extern.slf4j.Slf4j;
import org.springframework.amqp.core.DirectExchange;
import org.springframework.amqp.core.MessagePostProcessor;
import org.springframework.amqp.rabbit.connection.CorrelationData;
import org.springframework.amqp.rabbit.core.RabbitTemplate;
import org.springframework.beans.factory.annotation.Autowired;
import org.springframework.beans.factory.annotation.Qualifier;
import org.springframework.web.bind.annotation.GetMapping;
import org.springframework.web.bind.annotation.PathVariable;
import org.springframework.web.bind.annotation.RestController;

import java.util.Date;

/**
 * 生产者 发布消息
 */
@Slf4j
@RestController
public class ProducerController {
    @Autowired
    private RabbitTemplate rabbitTemplate;
    @Autowired
    @Qualifier("xExchange")
    private DirectExchange xExchange; //交换机名我采用从容器中获取的方式

    @GetMapping("/hello/{message}")
    public void message(@PathVariable("message")String message){
        log.info("当前时间:{},发送一条:{}消息给队列",new Date().toString(),message);
        //设置id
        CorrelationData correlationData=new CorrelationData();
        correlationData.setId("111");
        //进行发布
        rabbitTemplate.convertAndSend(xExchange.getName(), "rout","消息来自ttl为10秒的队列,消息是:"+message,correlationData);


    }

}
编写消费者,通过监听指定队列进行消费
package com.delayandadvanced.consumer;

import com.delayandadvanced.config.RabbitmqConfig;
import lombok.extern.slf4j.Slf4j;
import org.springframework.amqp.core.Message;
import org.springframework.amqp.rabbit.annotation.RabbitListener;
import org.springframework.stereotype.Component;

import java.util.Date;

@Slf4j
@Component
public class TestConsumer {

    /* 监听死信队列*/
    @RabbitListener(queues = RabbitmqConfig.Y_QUEUE)
    public void message(Message message){
        log.info("当前时间:{},死信队列接收到的消息为:{}",new Date(),new String(message.getBody()));
    }
}
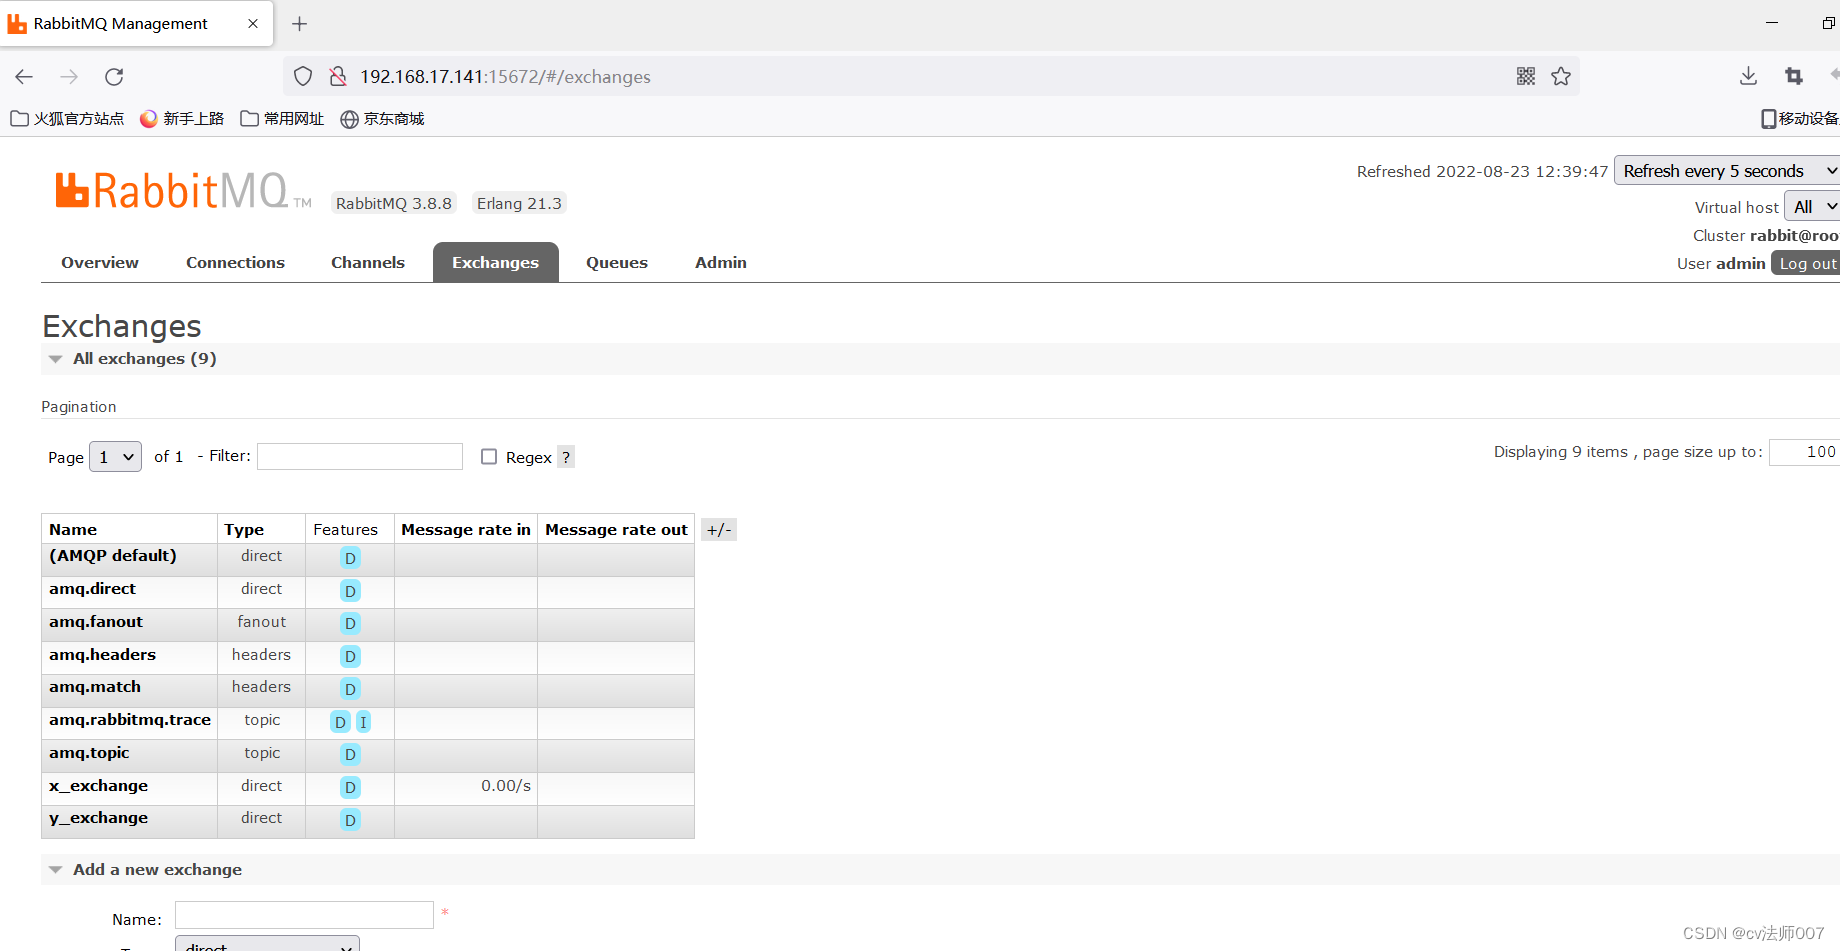
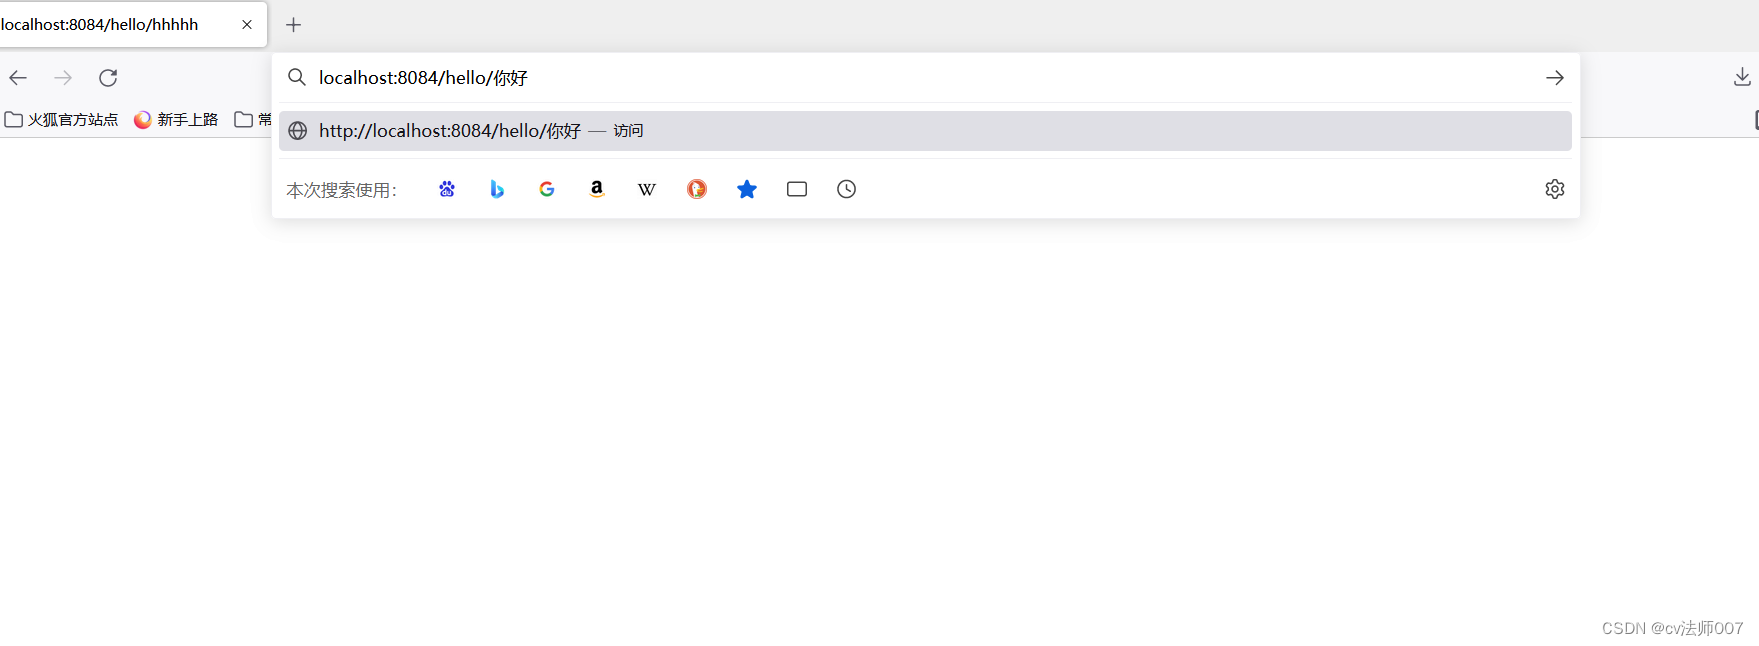
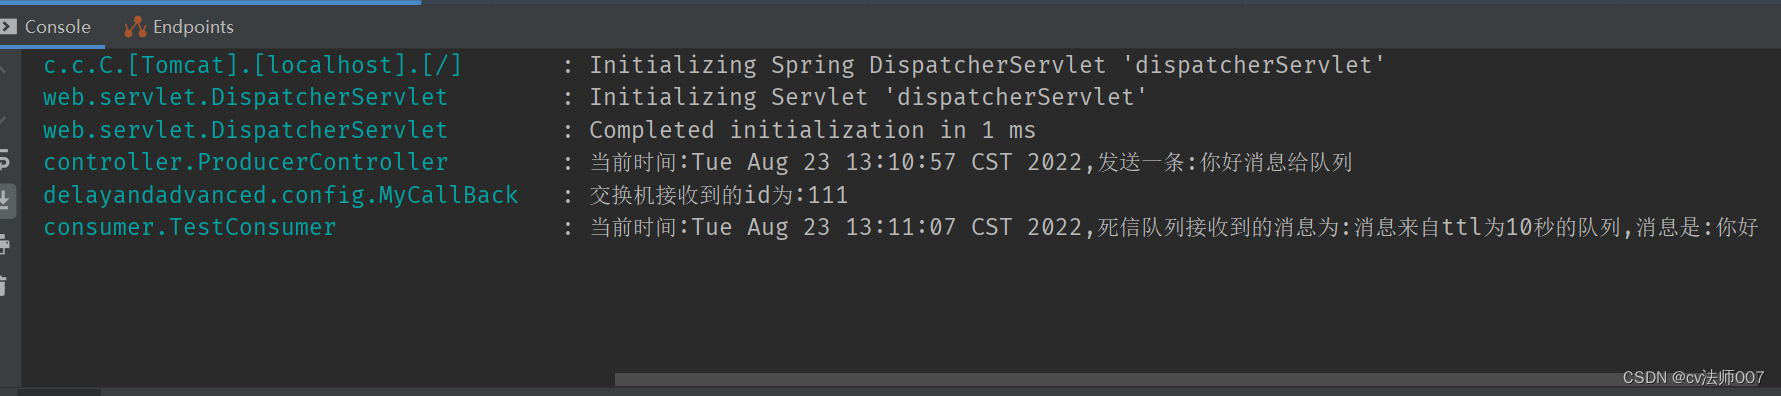
现在启动工程,一切配置都正常时,在浏览器发送消息
可以看到控制台输出,队列和交换机没有任何问题,10秒过后消息被消费
现在改变交换机名称,模拟生产者发消息时,没有交换机(等同于交换机挂掉)
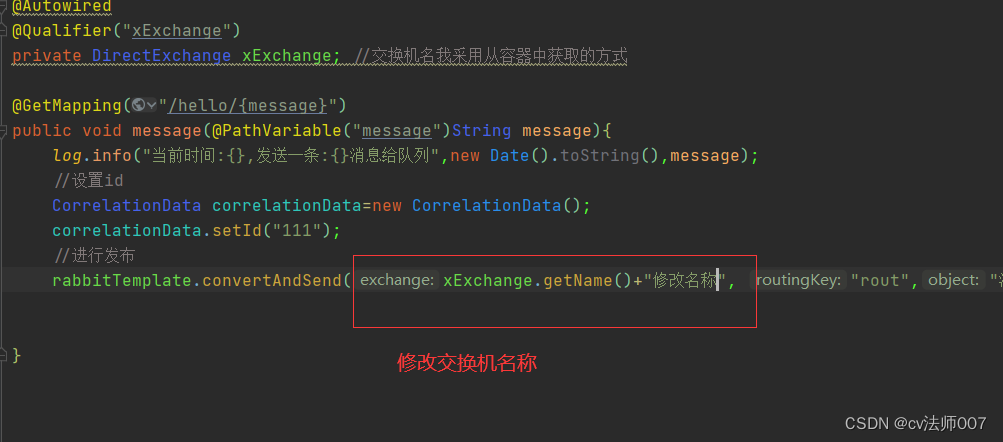
现在重启工程,进行重新发送消息 ,可以看到消息被退回

现在把交换机设置为正常,把交换机与队列之间的路由routingKey进行修改,模拟队列挂掉
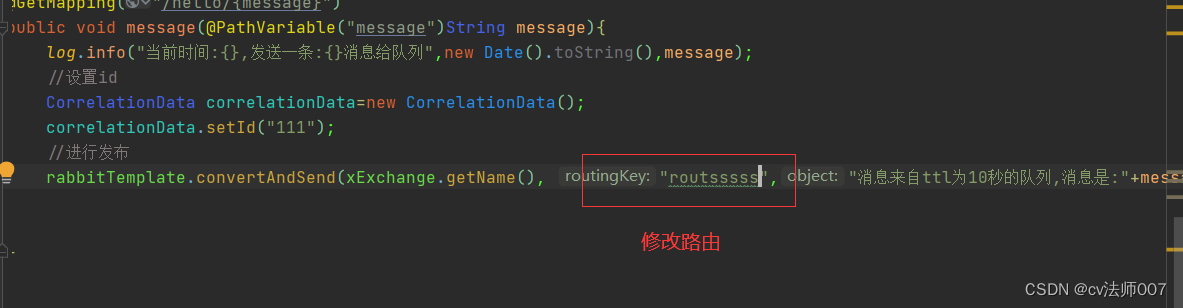
现在重启工程,进行重新发送消息 ,可以看到消息被回退到生产者

到此,关于延迟队列ttl设置在队列处和确认发布演示完毕,如有错误还请指出,大家一起学习
最后
以上就是标致苗条最近收集整理的关于rabbitMQ延迟队列和发布确认(springboot版)的全部内容,更多相关rabbitMQ延迟队列和发布确认(springboot版)内容请搜索靠谱客的其他文章。
本图文内容来源于网友提供,作为学习参考使用,或来自网络收集整理,版权属于原作者所有。


发表评论 取消回复