基于tensorflow的目标检测 迁移学习
- 前言
- 安装TF Object Detection API
- 下载tensorflowmodels
- COCO API安装
- 安装protobuf
- 编译proto文件,产生py文件
- 制作自己的数据集
- 从百度获取需要的图片
- 使用labelImg工具进行标注图片
- 将xml文件转换为csv文件
- 生成TFrecord格式文件
- 训练
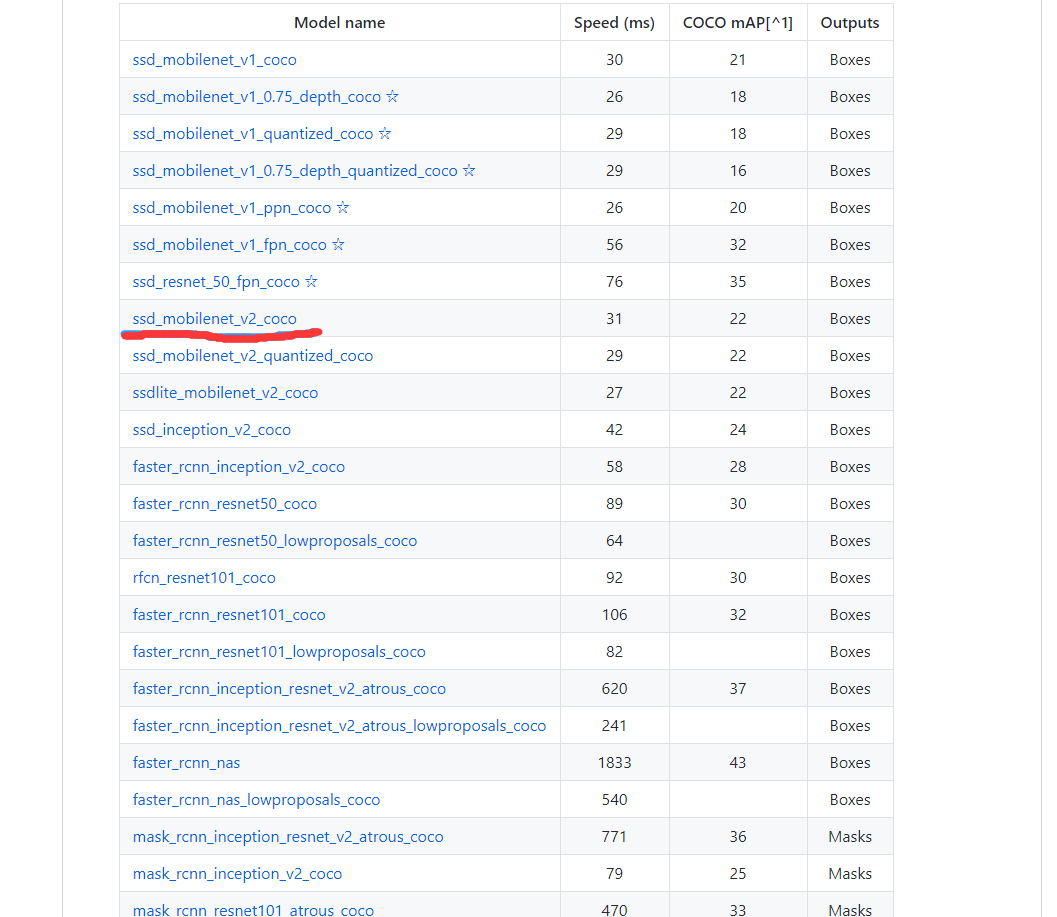
- 下载ssd_mobilenet_v2_coco模型
- 编写标签文件*.pbtxt
- 配置ssd_mobilenet_v2_coco.config
- 训练
- 导出训练好的模型进行推理
- 测试检测效果
前言
我写作本篇博文的目的是整理近期的工作,并保存下来以供后续查看。
系统环境:win10 64位 1909版,python 3.6.7,tensorflow 1.15.0,处理器:core i7 6700HQ,显卡:NVIDIA GTX965M。
想实现使用ssd_mobilenet_v2_coco 模型进行训练以识别路边的垃圾桶。
安装TF Object Detection API
Tensorflow Object Detection API 依赖以下库:
- Protobuf 3.0.0
- Python-tk
- Pillow 1.0
- lxml
- tf Slim (which is included in the “tensorflow/models/research/” checkout)
- Jupyter notebook
- Matplotlib
- Tensorflow (>=1.12.0)
- Cython
- contextlib2
- cocoapi
安装Tensorflow的详细步骤,可以参考Tensorflow安装说明。典型的用户可以使用以下命令之一安装Tensorflow:
# For CPU
pip install tensorflow
# For GPU
pip install tensorflow-gpu
使用pip安装依赖项:
pip install --user Cython
pip install --user contextlib2
pip install --user pillow
pip install --user lxml
pip install --user jupyter
pip install --user matplotlib
下载tensorflowmodels
下载tensorflowmodels,可以导航到models/research/文件夹下,使用python setup.py install`进行安装。不过在安装之前需要先配置安装COCO API,Protobuf和slim模块。
COCO API安装
如果使用COCO评估指标,下载 cocoapi并导航到PythonAPI文件夹下,使用python setup.py install进行安装,或者将pycocotools子文件夹复制到tensorflow / models / research目录,
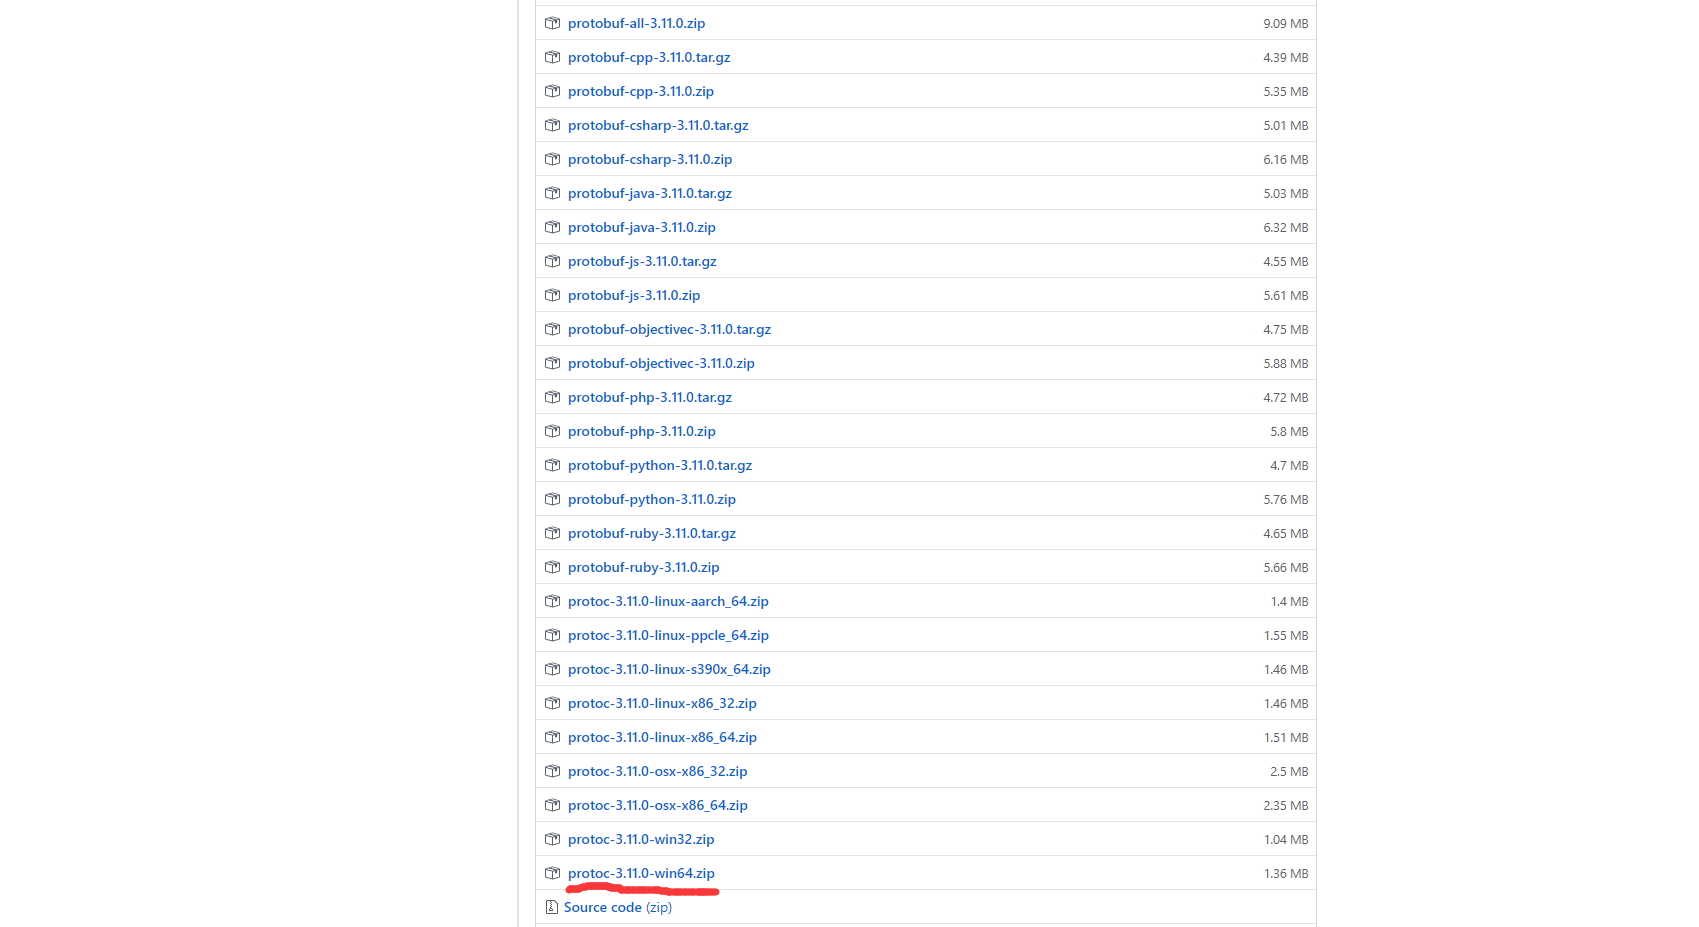
安装protobuf
再GitHub上下载protobuf的相应版本的文档。
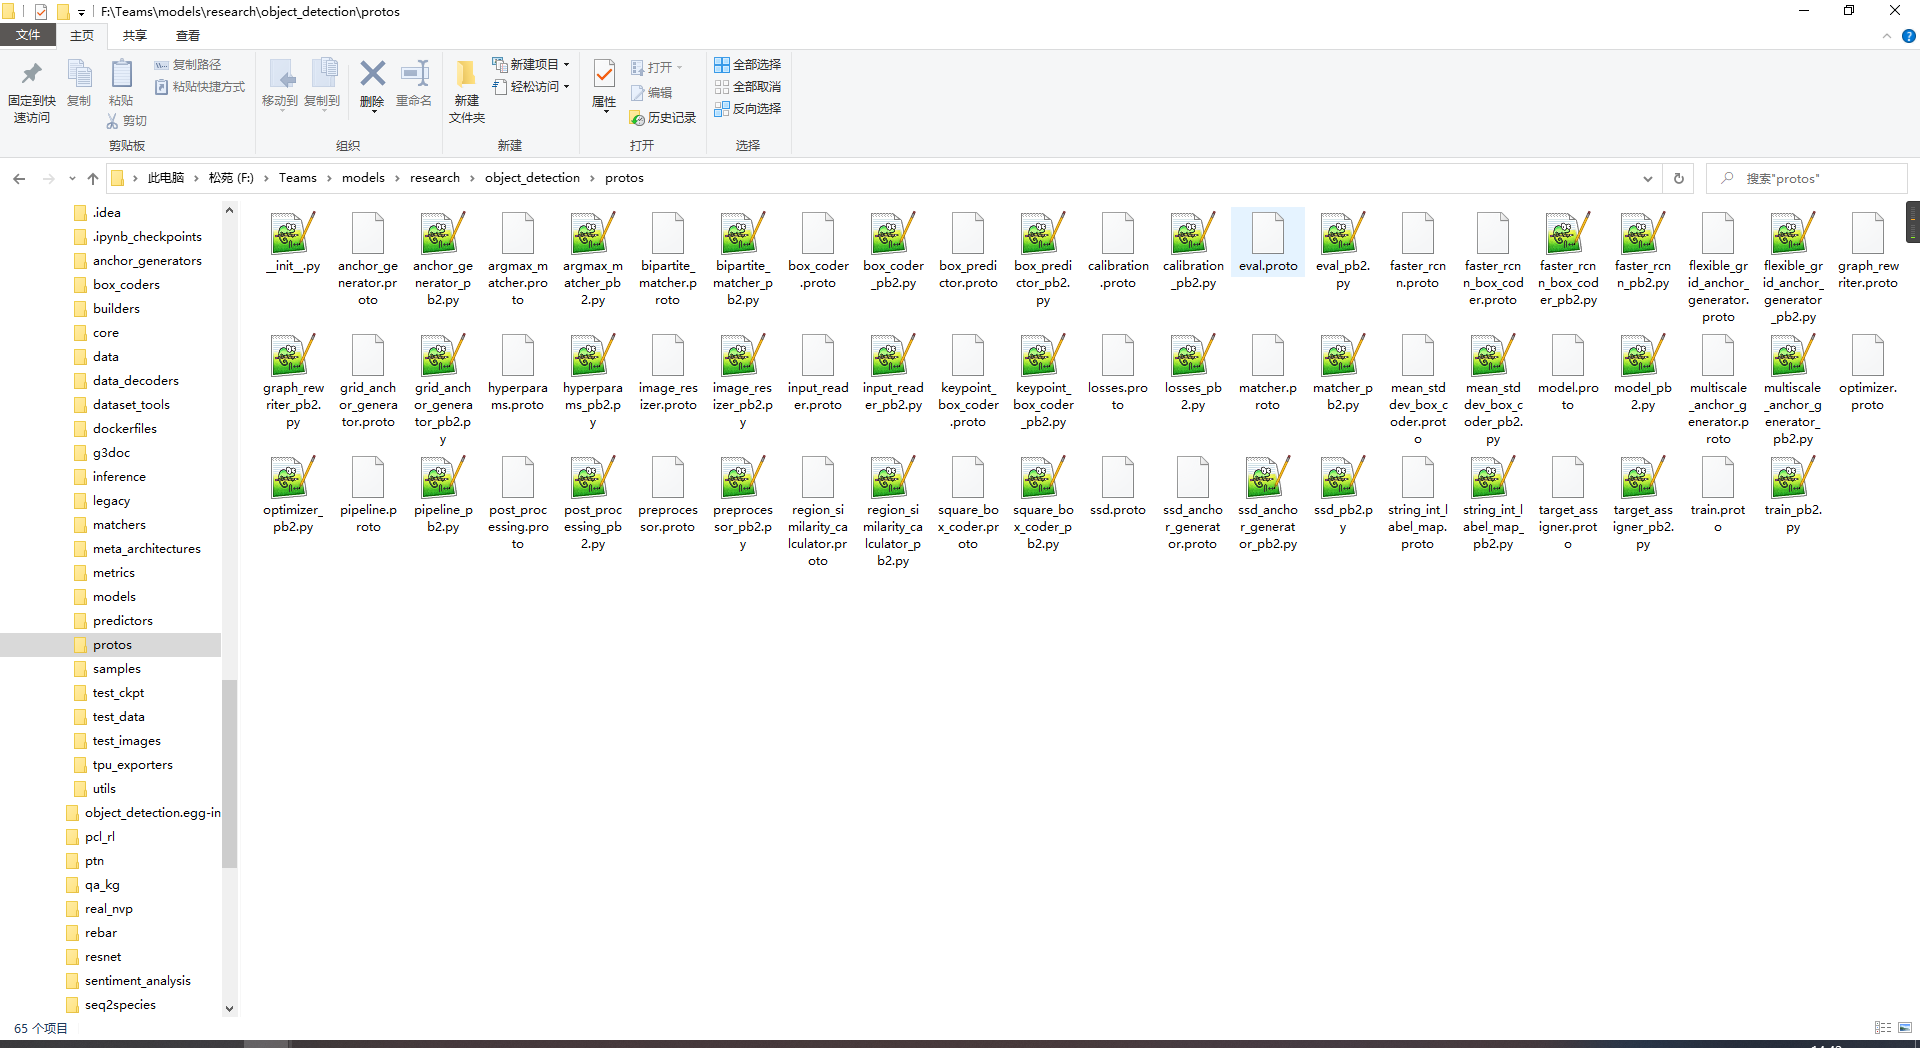
编译proto文件,产生py文件
# From tensorflow/models/research/
protoc object_detection/protos/*.proto --python_out=.
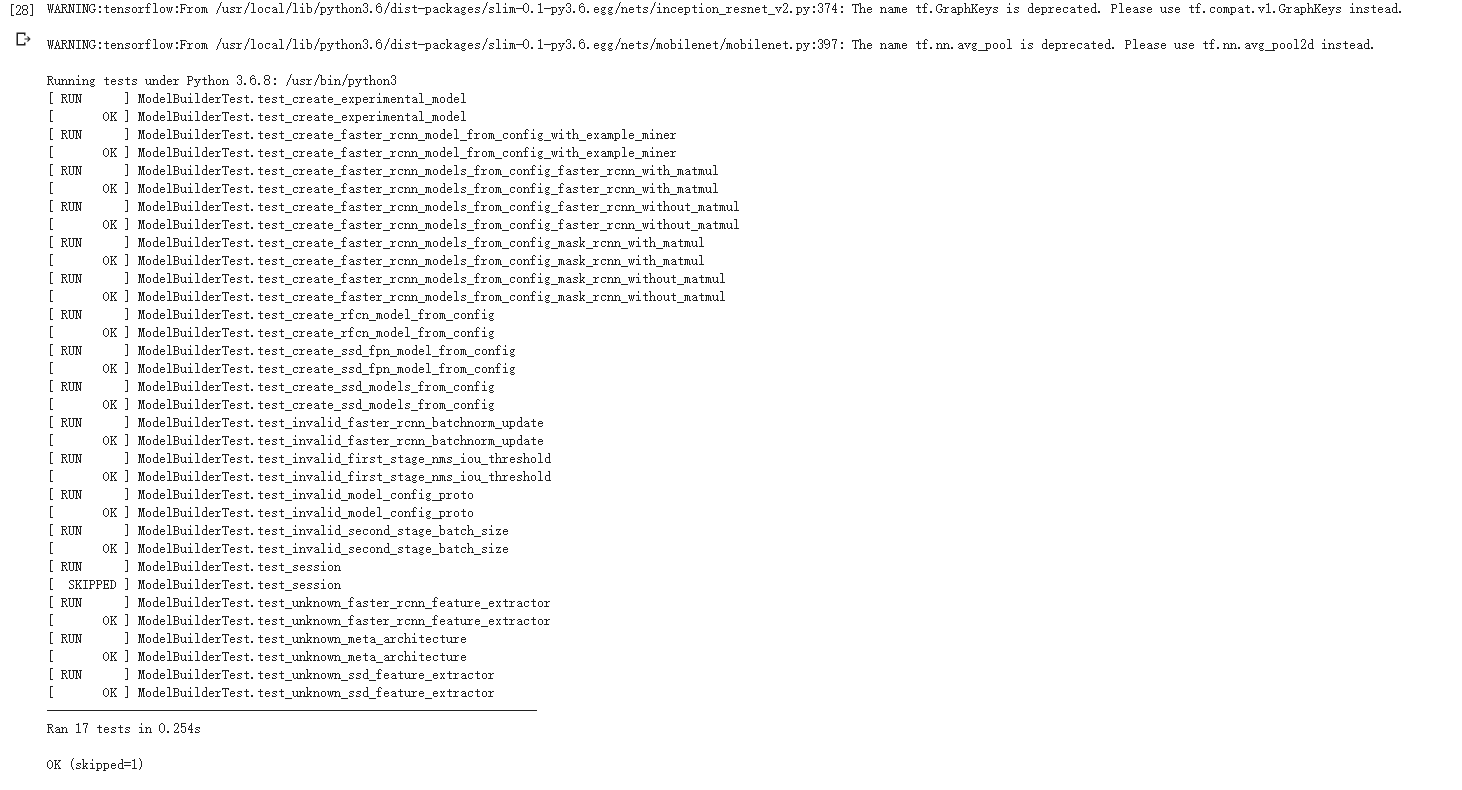
您可以
通过运行以下命令来测试是否已正确安装Tensorflow对象检测API:
python object_detection / builders / model_builder_test.py
得到如下结果说明安装成功了。
制作自己的数据集
从百度获取需要的图片
# -*- coding: utf-8 -*-

import json
import itertools
import urllib
import requests
import os
import re
import sys
print("hah")
#############################################################
word="垃圾桶"               #图片搜索的关键字,目前仅支持单个关键词
imageNum =1000;             #下载图片的数目
saveImagePath="trashcan"    #保存图片的途径  trashcan
indexOffset=0               #图像命名起始点
#############################################################

str_table = {
    '_z2C$q': ':',
    '_z&e3B': '.',
    'AzdH3F': '/'
}

char_table = {
    'w': 'a',
    'k': 'b',
    'v': 'c',
    '1': 'd',
    'j': 'e',
    'u': 'f',
    '2': 'g',
    'i': 'h',
    't': 'i',
    '3': 'j',
    'h': 'k',
    's': 'l',
    '4': 'm',
    'g': 'n',
    '5': 'o',
    'r': 'p',
    'q': 'q',
    '6': 'r',
    'f': 's',
    'p': 't',
    '7': 'u',
    'e': 'v',
    'o': 'w',
    '8': '1',
    'd': '2',
    'n': '3',
    '9': '4',
    'c': '5',
    'm': '6',
    '0': '7',
    'b': '8',
    'l': '9',
    'a': '0'
}

# str 的translate方法需要用单个字符的十进制unicode编码作为key
# value 中的数字会被当成十进制unicode编码转换成字符
# 也可以直接用字符串作为value
char_table = {ord(key): ord(value) for key, value in char_table.items()}

# 解码图片URL
def decode(url):
    # 先替换字符串
    for key, value in str_table.items():
        url = url.replace(key, value)
    # 再替换剩下的字符
    return url.translate(char_table)

# 生成网址列表
def buildUrls(word):
    word = urllib.parse.quote(word)
    url = r"http://image.baidu.com/search/acjson?tn=resultjson_com&ipn=rj&ct=201326592&fp=result&queryWord={word}&cl=2&lm=-1&ie=utf-8&oe=utf-8&st=-1&ic=0&word={word}&face=0&istype=2nc=1&pn={pn}&rn=60"
    urls = (url.format(word=word, pn=x) for x in itertools.count(start=0, step=60))
    return urls

# 解析JSON获取图片URL
re_url = re.compile(r'"objURL":"(.*?)"')
def resolveImgUrl(html):
    imgUrls = [decode(x) for x in re_url.findall(html)]
    return imgUrls

def downImg(imgUrl, dirpath, imgName):
    filename = os.path.join(dirpath, imgName)
    try:
        res = requests.get(imgUrl, timeout=15)
        if str(res.status_code)[0] == "4":
            print(str(res.status_code), ":" , imgUrl)
            return False
    except Exception as e:
        print("抛出异常:", imgUrl)
        print(e)
        return False
    with open(filename, "wb") as f:
        f.write(res.content)
    return True


def mkDir(dirName):
    dirpath = os.path.join(sys.path[0], dirName)
    if not os.path.exists(dirpath):
        os.mkdir(dirpath)
    return dirpath

if __name__ == '__main__':
    print("=" * 50)
   # word = input("请输入你要下载的图片关键词:n")

    dirpath = mkDir(saveImagePath)

    urls = buildUrls(word)
    index = 0
    for url in urls:
        print("正在请求:", url)
        html = requests.get(url, timeout=10).content.decode('utf-8')
        imgUrls = resolveImgUrl(html)
        if len(imgUrls) == 0:  # 没有图片则结束
            break
        for url in imgUrls:
            if downImg(url, dirpath, str(index+indexOffset) + ".jpg"):
                index += 1
                print("正在下载第 %s 张" % (index+indexOffset))
                if index==imageNum:
                    break
        if index==imageNum:
            print("---------------------下载完成----------------------")
            print("下载结果保存在脚本目录下的文件夹中,文件名字:" + saveImagePath)
            break
运行该脚本,下载了1000张垃圾桶的图片,然后进行筛选,删除掉无效的图片。
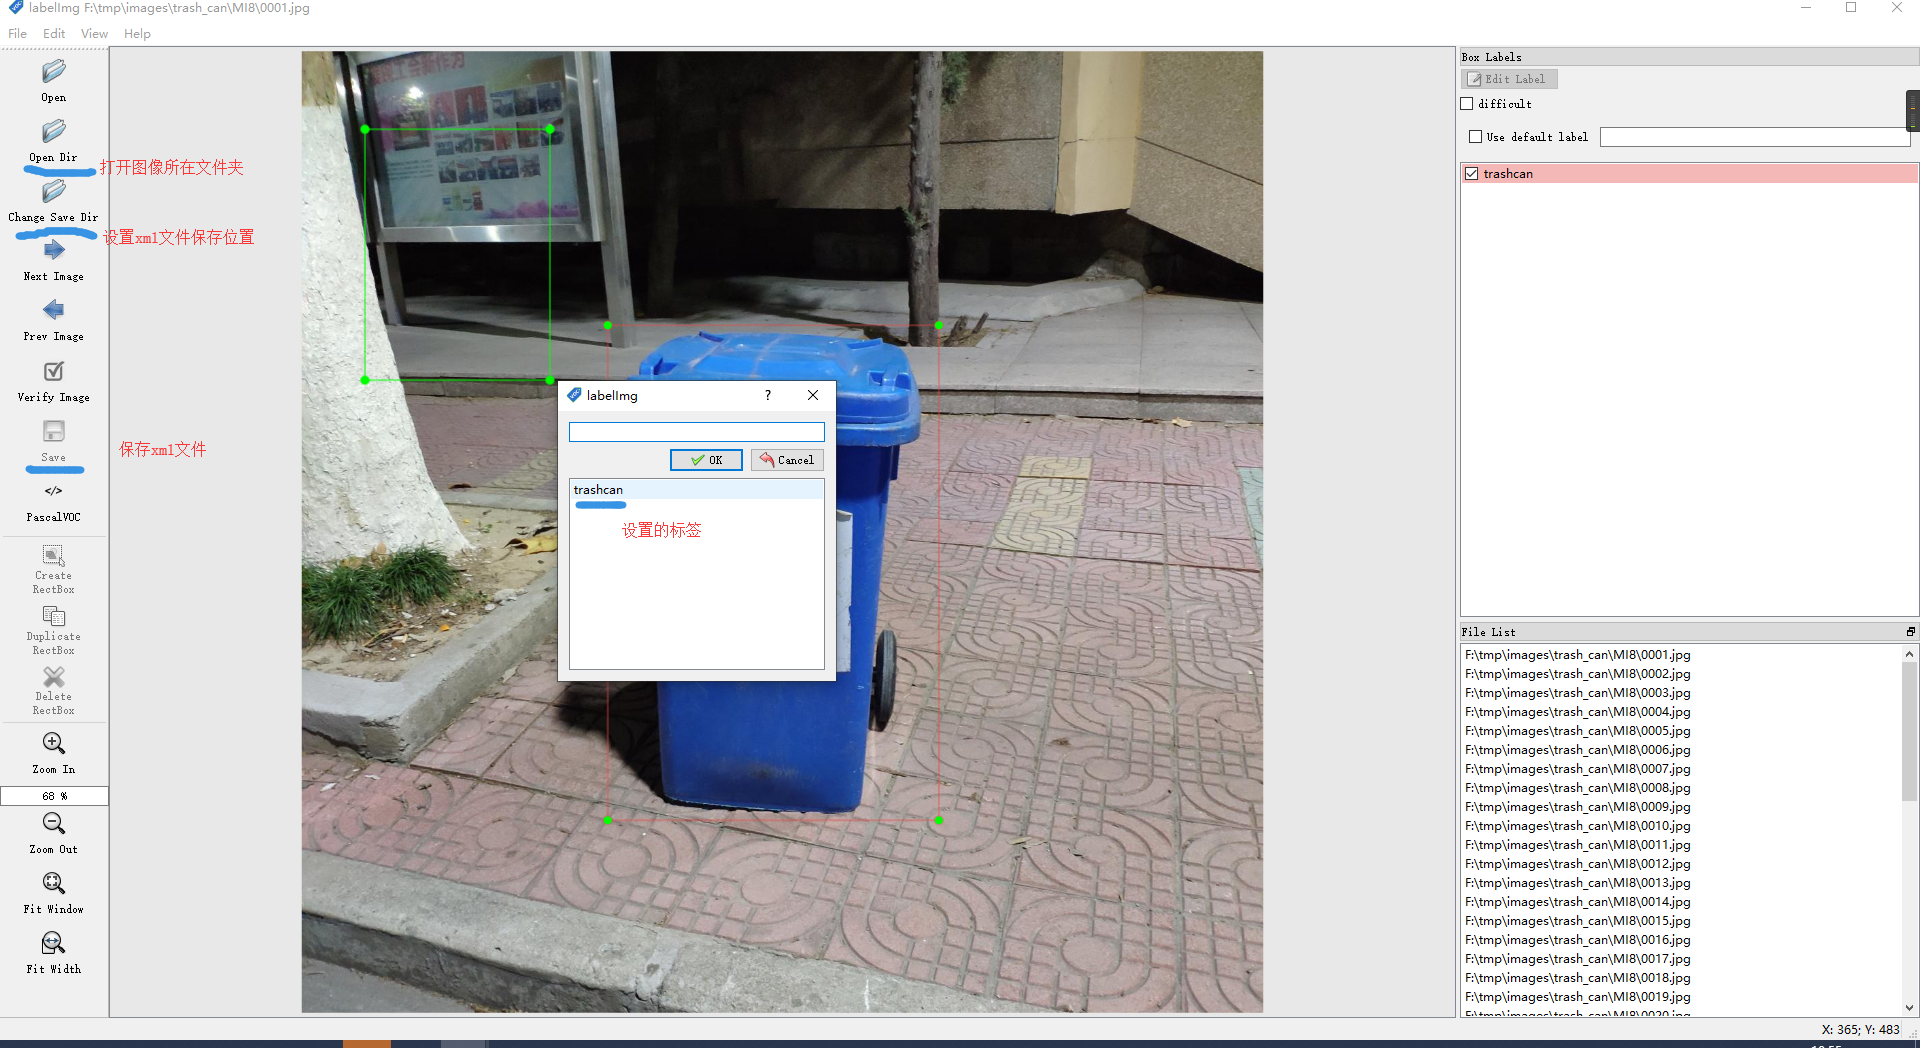
使用labelImg工具进行标注图片
下载labelImg,LabelImg是图形图像注释工具,用Python编写的,Qt做的图形界面。批注以PASCAL VOC格式(ImageNet使用的格式)另存为XML文件。此外,它还支持YOLO格式。
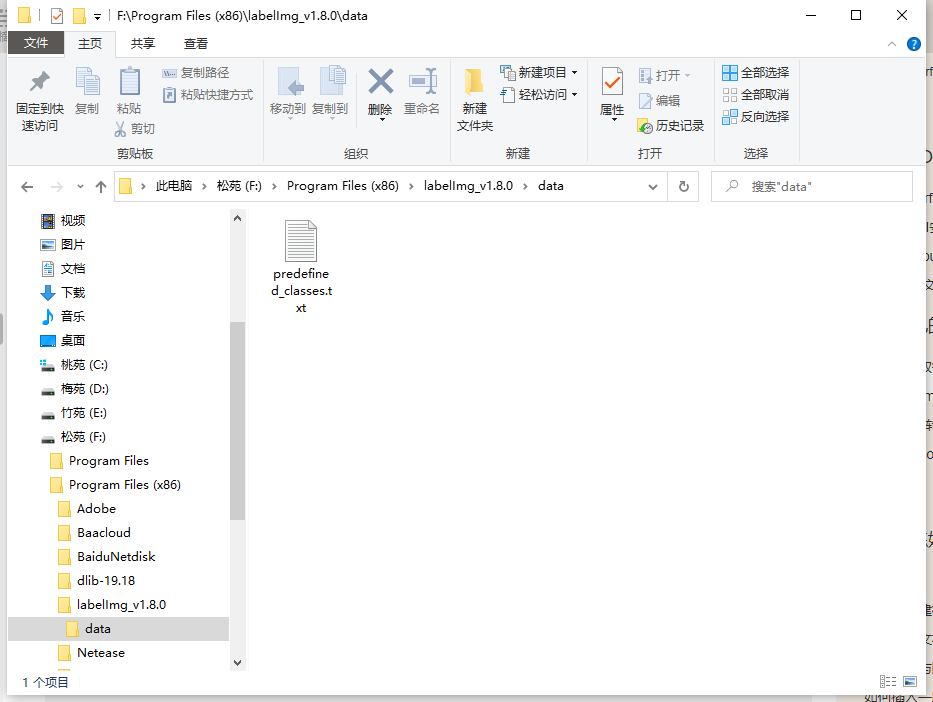
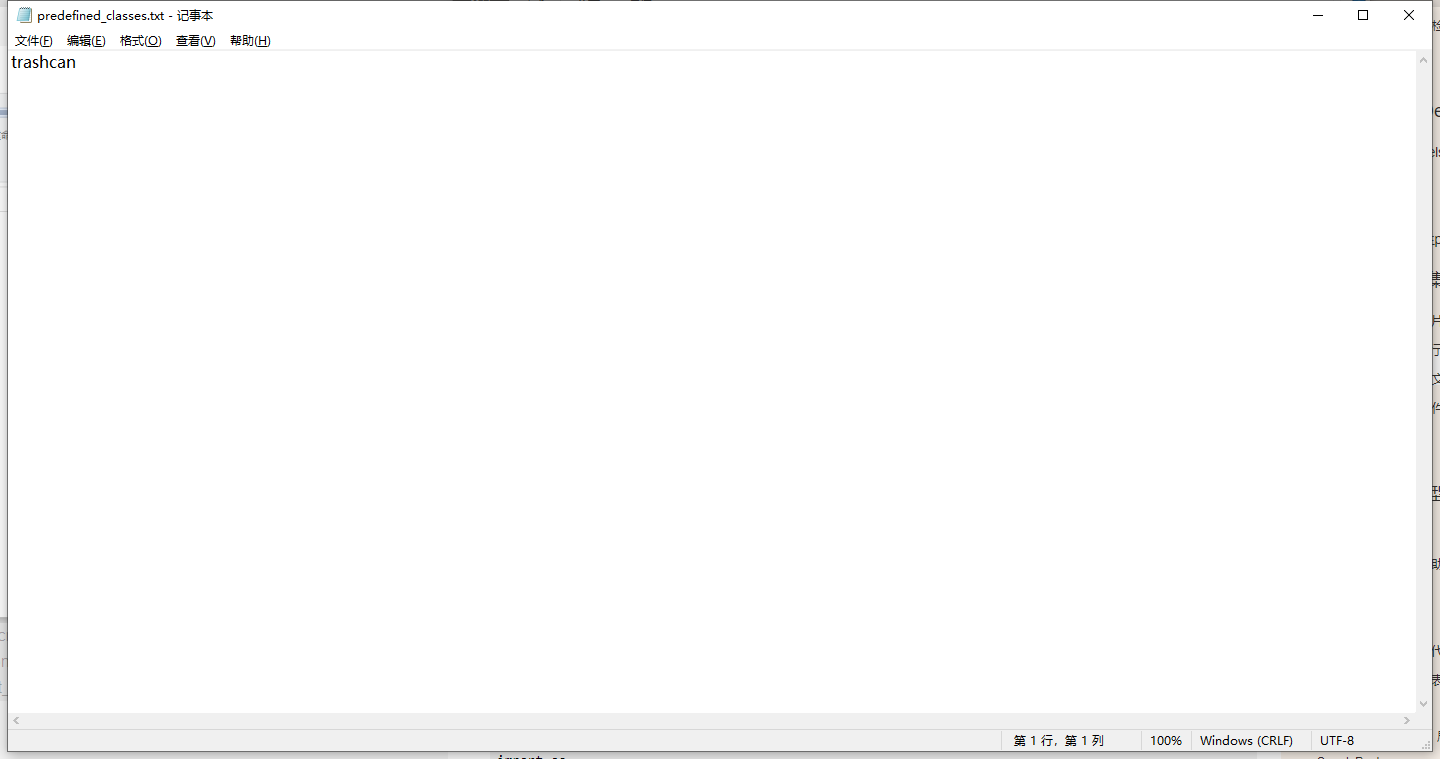
data目录下有predefined_classes.txt的文件里面存放标签的名称,根据自己的需要进行更改。
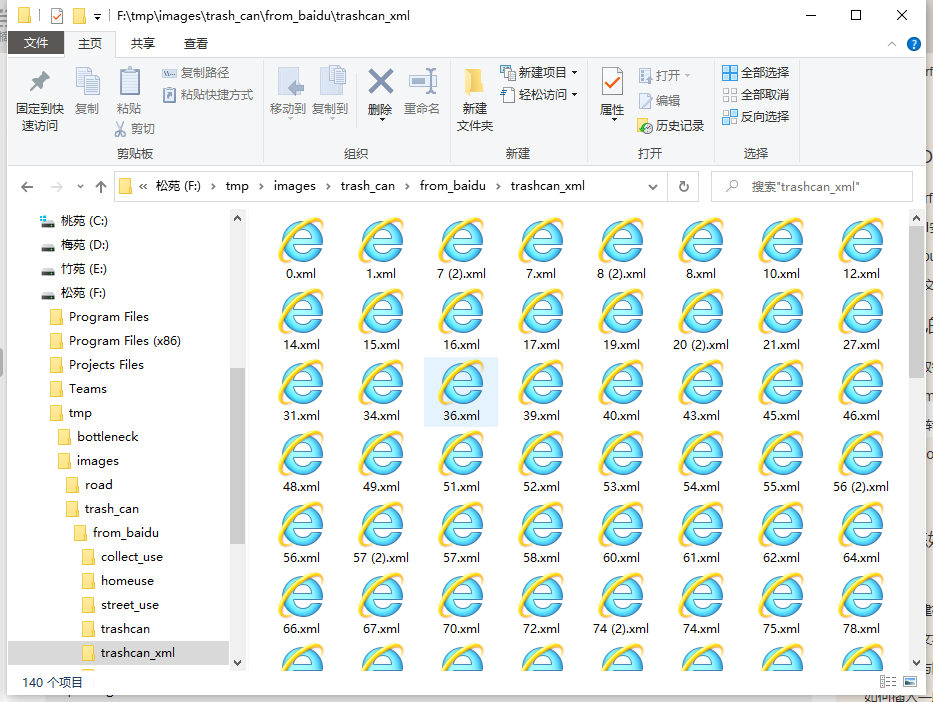
将xml文件转换为csv文件
找到标注好的xml文件的保存位置,如下:
使用如下脚本将xml文件转换为csv文件:
import os
import glob
import pandas as pd
import xml.etree.ElementTree as ET
import random


def xml_to_csv(path):
    xml_list = []
    xml_list_test = []
    # 设置训练集所占比例
    rate = 0.8
    i = 0
    img_file = glob.glob(path + '/*.xml')
    random.shuffle(img_file)
    for xml_file in img_file:
        i = i + 1
        num_of_train= int(len(glob.glob(path + '/*.xml'))*rate)
        tree = ET.parse(xml_file)
        root = tree.getroot()
        if i <= num_of_train:
            for member in root.findall('object'):
                value = (root.find('filename').text,
                         int(root.find('size')[0].text),
                         int(root.find('size')[1].text),
                         member[0].text,
                         int(member[4][0].text),
                         int(member[4][1].text),
                         int(member[4][2].text),
                         int(member[4][3].text)
                         )
                xml_list.append(value)
        else:
            for member in root.findall('object'):
                value = (root.find('filename').text,
                         int(root.find('size')[0].text),
                         int(root.find('size')[1].text),
                         member[0].text,
                         int(member[4][0].text),
                         int(member[4][1].text),
                         int(member[4][2].text),
                         int(member[4][3].text)
                         )
                xml_list_test.append(value)
    column_name = ['filename', 'width', 'height', 'class', 'xmin', 'ymin', 'xmax', 'ymax']
    xml_df = pd.DataFrame(xml_list, columns=column_name)
    xml_df_test = pd.DataFrame(xml_list_test, columns=column_name)
    return xml_df, xml_df_test


def main():
    # xml文件的存储地址,根据自己xml存储路径进行调整
    image_path = os.path.join('../../images/trash can/from_baidu/trashcan_xml', 'xml')
    # csv文件保存位置,自行调整
    # 训练集
    csv_save_path = 'data/train_labels.csv'
    # 测试集
    csv_save_path_test = 'data/test_labels.csv'

    xml_df, xml_df_test = xml_to_csv(image_path)
    xml_df.to_csv(csv_save_path, index=None)
    xml_df_test.to_csv(csv_save_path_test, index=None)
    print('Successfully converted xml to csv.')


main()
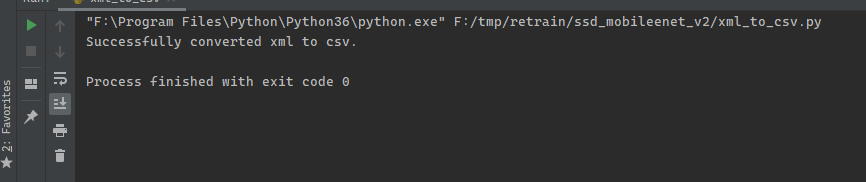
生成的csv格式的train_labels.csv文件:

生成TFrecord格式文件
编写脚本generate_tfrecord.py,用于生成TFrecord格式文件,内容如下:
"""
Usage:
  # From tensorflow/models/
  # Create train data:
  python generate_tfrecord.py --csv_input=data/train_labels.csv  --output_path=data/train.record --image_dir=images

  # Create test data:
  python generate_tfrecord.py --csv_input=data/test_labels.csv  --output_path=data/test.record --image_dir=images
"""
from __future__ import division
from __future__ import print_function
from __future__ import absolute_import

import os
import io
import pandas as pd
import tensorflow as tf

from PIL import Image
from object_detection.utils import dataset_util
from collections import namedtuple, OrderedDict

flags = tf.app.flags
flags.DEFINE_string('csv_input', '', 'Path to the CSV input')
flags.DEFINE_string('output_path', '', 'Path to output TFRecord')
flags.DEFINE_string('image_dir', '', 'Path to images')
FLAGS = flags.FLAGS


# 确保更换为自己的定义的标签
def class_text_to_int(row_label):
    if row_label == 'trashcan':
        return 1
    else:
        None


def split(df, group):
    data = namedtuple('data', ['filename', 'object'])
    gb = df.groupby(group)
    return [data(filename, gb.get_group(x)) for filename, x in zip(gb.groups.keys(), gb.groups)]


def create_tf_example(group, path):
    with tf.gfile.GFile(os.path.join(path, '{}'.format(group.filename)), 'rb') as fid:
        encoded_jpg = fid.read()
    encoded_jpg_io = io.BytesIO(encoded_jpg)
    image = Image.open(encoded_jpg_io)
    width, height = image.size

    filename = group.filename.encode('utf8')
    image_format = b'jpg'
    xmins = []
    xmaxs = []
    ymins = []
    ymaxs = []
    classes_text = []
    classes = []

    for index, row in group.object.iterrows():
        xmins.append(row['xmin'] / width)
        xmaxs.append(row['xmax'] / width)
        ymins.append(row['ymin'] / height)
        ymaxs.append(row['ymax'] / height)
        classes_text.append(row['class'].encode('utf8'))
        classes.append(class_text_to_int(row['class']))

    tf_example = tf.train.Example(features=tf.train.Features(feature={
        'image/height': dataset_util.int64_feature(height),
        'image/width': dataset_util.int64_feature(width),
        'image/filename': dataset_util.bytes_feature(filename),
        'image/source_id': dataset_util.bytes_feature(filename),
        'image/encoded': dataset_util.bytes_feature(encoded_jpg),
        'image/format': dataset_util.bytes_feature(image_format),
        'image/object/bbox/xmin': dataset_util.float_list_feature(xmins),
        'image/object/bbox/xmax': dataset_util.float_list_feature(xmaxs),
        'image/object/bbox/ymin': dataset_util.float_list_feature(ymins),
        'image/object/bbox/ymax': dataset_util.float_list_feature(ymaxs),
        'image/object/class/text': dataset_util.bytes_list_feature(classes_text),
        'image/object/class/label': dataset_util.int64_list_feature(classes),
    }))
    return tf_example


def main(_):
    writer = tf.python_io.TFRecordWriter(FLAGS.output_path)
    path = os.path.join(FLAGS.image_dir)
    examples = pd.read_csv(FLAGS.csv_input)
    grouped = split(examples, 'filename')
    for group in grouped:
        tf_example = create_tf_example(group, path)
        writer.write(tf_example.SerializeToString())

    writer.close()
    output_path = os.path.join(os.getcwd(), FLAGS.output_path)
    print('Successfully created the TFRecords: {}'.format(output_path))


if __name__ == '__main__':
    tf.app.run()
使用命令,运行程序:
# 生成训练data:
python generate_tfrecord.py --csv_input=data/train_labels.csv  --output_path=data/train.record --image_dir=images
# 生成测试data:
python generate_tfrecord.py --csv_input=data/test_labels.csv  --output_path=data/test.record --image_dir=images
其中
--csv_input 为csv文件地址
--output_path 为输出*.record文件保存地址
--image_dir 为图片保存地址
训练
下载ssd_mobilenet_v2_coco模型
模型可以在detection_model_zoo中找到。
编写标签文件*.pbtxt
格式如下
item {
  id: 1
  name: 'trashcan'
}
配置ssd_mobilenet_v2_coco.config
在modelsresearchobject_detectionsamplesconfigs路径下找到ssd_mobilenet_v2_coco.config文件,打开内容如下:
# SSD with Mobilenet v2 configuration for MSCOCO Dataset.
# Users should configure the fine_tune_checkpoint field in the train config as
# well as the label_map_path and input_path fields in the train_input_reader and
# eval_input_reader. Search for "PATH_TO_BE_CONFIGURED" to find the fields that
# should be configured.

model {
  ssd {
    num_classes: 90
    box_coder {
      faster_rcnn_box_coder {
        y_scale: 10.0
        x_scale: 10.0
        height_scale: 5.0
        width_scale: 5.0
      }
    }
    matcher {
      argmax_matcher {
        matched_threshold: 0.5
        unmatched_threshold: 0.5
        ignore_thresholds: false
        negatives_lower_than_unmatched: true
        force_match_for_each_row: true
      }
    }
    similarity_calculator {
      iou_similarity {
      }
    }
    anchor_generator {
      ssd_anchor_generator {
        num_layers: 6
        min_scale: 0.2
        max_scale: 0.95
        aspect_ratios: 1.0
        aspect_ratios: 2.0
        aspect_ratios: 0.5
        aspect_ratios: 3.0
        aspect_ratios: 0.3333
      }
    }
    image_resizer {
      fixed_shape_resizer {
        height: 300
        width: 300
      }
    }
    box_predictor {
      convolutional_box_predictor {
        min_depth: 0
        max_depth: 0
        num_layers_before_predictor: 0
        use_dropout: false
        dropout_keep_probability: 0.8
        kernel_size: 1
        box_code_size: 4
        apply_sigmoid_to_scores: false
        conv_hyperparams {
          activation: RELU_6,
          regularizer {
            l2_regularizer {
              weight: 0.00004
            }
          }
          initializer {
            truncated_normal_initializer {
              stddev: 0.03
              mean: 0.0
            }
          }
          batch_norm {
            train: true,
            scale: true,
            center: true,
            decay: 0.9997,
            epsilon: 0.001,
          }
        }
      }
    }
    feature_extractor {
      type: 'ssd_mobilenet_v2'
      min_depth: 16
      depth_multiplier: 1.0
      conv_hyperparams {
        activation: RELU_6,
        regularizer {
          l2_regularizer {
            weight: 0.00004
          }
        }
        initializer {
          truncated_normal_initializer {
            stddev: 0.03
            mean: 0.0
          }
        }
        batch_norm {
          train: true,
          scale: true,
          center: true,
          decay: 0.9997,
          epsilon: 0.001,
        }
      }
    }
    loss {
      classification_loss {
        weighted_sigmoid {
        }
      }
      localization_loss {
        weighted_smooth_l1 {
        }
      }
      hard_example_miner {
        num_hard_examples: 3000
        iou_threshold: 0.99
        loss_type: CLASSIFICATION
        max_negatives_per_positive: 3
        min_negatives_per_image: 3
      }
      classification_weight: 1.0
      localization_weight: 1.0
    }
    normalize_loss_by_num_matches: true
    post_processing {
      batch_non_max_suppression {
        score_threshold: 1e-8
        iou_threshold: 0.6
        max_detections_per_class: 100
        max_total_detections: 100
      }
      score_converter: SIGMOID
    }
  }
}

train_config: {
  batch_size: 24
  optimizer {
    rms_prop_optimizer: {
      learning_rate: {
        exponential_decay_learning_rate {
          initial_learning_rate: 0.004
          decay_steps: 800720
          decay_factor: 0.95
        }
      }
      momentum_optimizer_value: 0.9
      decay: 0.9
      epsilon: 1.0
    }
  }
  fine_tune_checkpoint: "PATH_TO_BE_CONFIGURED/model.ckpt"
  fine_tune_checkpoint_type:  "detection"
  # Note: The below line limits the training process to 200K steps, which we
  # empirically found to be sufficient enough to train the pets dataset. This
  # effectively bypasses the learning rate schedule (the learning rate will
  # never decay). Remove the below line to train indefinitely.
  num_steps: 200000
  data_augmentation_options {
    random_horizontal_flip {
    }
  }
  data_augmentation_options {
    ssd_random_crop {
    }
  }
}

train_input_reader: {
  tf_record_input_reader {
    input_path: "PATH_TO_BE_CONFIGURED/mscoco_train.record-?????-of-00100"
  }
  label_map_path: "PATH_TO_BE_CONFIGURED/mscoco_label_map.pbtxt"
}

eval_config: {
  num_examples: 8000
  # Note: The below line limits the evaluation process to 10 evaluations.
  # Remove the below line to evaluate indefinitely.
  max_evals: 10
}

eval_input_reader: {
  tf_record_input_reader {
    input_path: "PATH_TO_BE_CONFIGURED/mscoco_val.record-?????-of-00010"
  }
  label_map_path: "PATH_TO_BE_CONFIGURED/mscoco_label_map.pbtxt"
  shuffle: false
  num_readers: 1
}
需要更改的条目如下
# 分类的数目
num_classes: 90
# 根据电脑硬件配置做适当更改,显存较小可以适当减小该值
batch_size: 24
# 预训练模型ckpt文件的位置
fine_tune_checkpoint: "PATH_TO_BE_CONFIGURED/model.ckpt"
# 训练数据保存位置,以及标签文件位置
train_input_reader: {
  tf_record_input_reader {
    input_path: "PATH_TO_BE_CONFIGURED/mscoco_train.record-?????-of-00100"
  }
  label_map_path: "PATH_TO_BE_CONFIGURED/mscoco_label_map.pbtxt"
}
# 测试数据保存位置和相应标签文件位置
# shuffle表示是否随机选取测试图片
eval_input_reader: {
  tf_record_input_reader {
    input_path: "PATH_TO_BE_CONFIGURED/mscoco_val.record-?????-of-00010"
  }
  label_map_path: "PATH_TO_BE_CONFIGURED/mscoco_label_map.pbtxt"
  shuffle: false
  num_readers: 1
}

# 训练的步数
num_steps: 200000
训练
Google 提供的Google Colaboratory 进行训练,需要自备梯子。
使用如下命令进行训练
python train.py --pipeline_config_path=pretrained_model/ssd_mobilenet_v2_coco.config --train_dir=train --logtostderr
--pipeline_config_path 为修改后的config文件的位置
--train_dir=train 训练产生数据的保存位置
--logtostderr log文件保存位置
训练中截图:

训练结束后产生如下所示文件
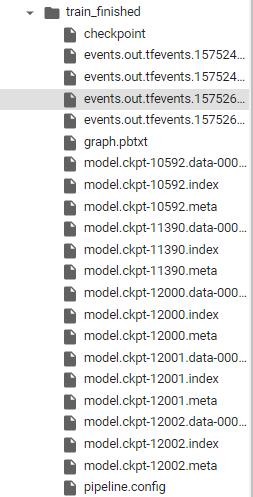
可以用于推理
导出训练好的模型进行推理
训练完模型后,应将其导出到Tensorflow图原型。检查点通常由三个文件组成:
model.ckpt-$ {CHECKPOINT_NUMBER} .data-00000-of-00001
model.ckpt-$ {CHECKPOINT_NUMBER} .index
model.ckpt-$ {CHECKPOINT_NUMBER} .meta
在确定要导出的候选检查点之后,从tensorflow / models / research运行以下命令:
# From tensorflow/models/research/
INPUT_TYPE=image_tensor
PIPELINE_CONFIG_PATH={path to pipeline config file}
TRAINED_CKPT_PREFIX={path to model.ckpt}
EXPORT_DIR={path to folder that will be used for export}
python object_detection/export_inference_graph.py
    --input_type=${INPUT_TYPE}
    --pipeline_config_path=${PIPELINE_CONFIG_PATH}
    --trained_checkpoint_prefix=${TRAINED_CKPT_PREFIX}
    --output_directory=${EXPORT_DIR}
注意:我们正在配置导出的模型以摄取4-D图像张量。我们还可以配置导出的模型以获取编码图像或序列化 tf.Examples。
导出后,您应该看到目录$ {EXPORT_DIR}包含以下内容:
 - saved_model /,包含导出模型的已保存模型格式的目录
 -  Frozen_inference_graph.pb,导出模型的冻结图格式
 - model.ckpt*,用于导出的模型检查点
 -  checkpoint,一个指定恢复包含的检查点文件的文件
 -  pipeline.config,导出模型的管道配置文件
测试检测效果
使用如下脚本进行测试
import numpy as np
import os
import cv2
import six.moves.urllib as urllib
import sys
import time
import tarfile
import tensorflow as tf
import zipfile
from object_detection.utils import label_map_util
from object_detection.utils import visualization_utils as vis_util
from distutils.version import StrictVersion


# This is needed since the notebook is stored in the object_detection folder.
sys.path.append("..")

if StrictVersion(tf.__version__) < StrictVersion('1.9.0'):
    raise ImportError('Please upgrade your TensorFlow installation to v1.9.* or later!')

cap = cv2.VideoCapture(0)

CWD_PATH = os.getcwd()
PATH_TO_CKPT = os.path.join(CWD_PATH, 'ssd_mobilenet_v2_coco', 'frozen_inference_graph.pb')
# List of the strings that is used to add correct label for each box.
PATH_TO_LABELS = os.path.join(CWD_PATH, 'ssd_mobilenet_v2_coco', 'graph.pbtxt')

NUM_CLASSES = 100
start = time.time()

detection_graph = tf.Graph()
with detection_graph.as_default():
    od_graph_def = tf.compat.v1.GraphDef()
    with tf.io.gfile.GFile(PATH_TO_CKPT, 'rb') as fid:
        serialized_graph = fid.read()
        od_graph_def.ParseFromString(serialized_graph)
        tf.import_graph_def(od_graph_def, name='')
label_map = label_map_util.load_labelmap(PATH_TO_LABELS)
categories = label_map_util.convert_label_map_to_categories(label_map, max_num_classes=NUM_CLASSES, use_display_name=True)
category_index = label_map_util.create_category_index(categories)
with detection_graph.as_default():
    with tf.compat.v1.Session(graph=detection_graph) as sess:
        while True:
            ret, image_np = cap.read()
            # Expand dimensions since the model expects images to have shape: [1, None, None, 3]
            image_np_expanded = np.expand_dims(image_np, axis=0)
            image_tensor = detection_graph.get_tensor_by_name('image_tensor:0')
            # Each box represents a part of the image where a particular object was detected.
            boxes = detection_graph.get_tensor_by_name('detection_boxes:0')
            # Each score represent how level of confidence for each of the objects.
            # Score is shown on the result image, together with the class label.
            scores = detection_graph.get_tensor_by_name('detection_scores:0')
            classes = detection_graph.get_tensor_by_name('detection_classes:0')
            num_detections = detection_graph.get_tensor_by_name('num_detections:0')
            # Actual detection.
            (boxes, scores, classes, num_detections) = sess.run(
                [boxes, scores, classes, num_detections],
                feed_dict={image_tensor: image_np_expanded})
            # Visualization of the results of a detection.
            image = image_np
            vis_util.visualize_boxes_and_labels_on_image_array(
                image_np, np.squeeze(boxes),
                np.squeeze(classes).astype(np.int32),
                np.squeeze(scores), category_index,
                use_normalized_coordinates=True,
                line_thickness=2)
            final_score = np.squeeze(scores)
            count = 0
            for i in range(100):

                if scores is None or final_score[i] > 0.5:
                    count = count + 1

            print("the count of objects is: ", count)
            im_shape = image.shape
            im_width = im_shape[1]
            im_height = im_shape[0]

            if count != 0:
                for i in range(count):
                    # print(boxes[0][i])
                    y_min = boxes[0][i][0] * im_height
                    x_min = boxes[0][i][1] * im_width
                    y_max = boxes[0][i][2] * im_height
                    x_max = boxes[0][i][3] * im_width
                    cv2.rectangle(image, (int(x_min), int(y_min)), (int(x_max), int(y_max)), (0, 255, 255), 2)
                print("object{0}: {1}".format(i, category_index[classes[0][i]]['name']), ',Center_X:', int((x_min + x_max) / 2), ',Center_Y:', int((y_min + y_max) / 2))
            # print(x_min,y_min,x_max,y_max)

            seconds = time.time() - start
            start = time.time()
            print("Time taken : {0} seconds".format(seconds))
            cv2.imshow('object detection', cv2.resize(image, (800, 600))) # cv2.resize(image_np, (800,600))
            if cv2.waitKey(25) & 0xFF == ord('q'):
                cv2.destroyAllWindows()
                break
cap.release()
cv2.destroyAllWindows()
最后
以上就是彩色砖头最近收集整理的关于基于tensorflow的目标检测 迁移学习 ssd_mobilenet_v2_coco前言安装TF Object Detection API制作自己的数据集训练导出训练好的模型进行推理的全部内容,更多相关基于tensorflow的目标检测内容请搜索靠谱客的其他文章。


发表评论 取消回复