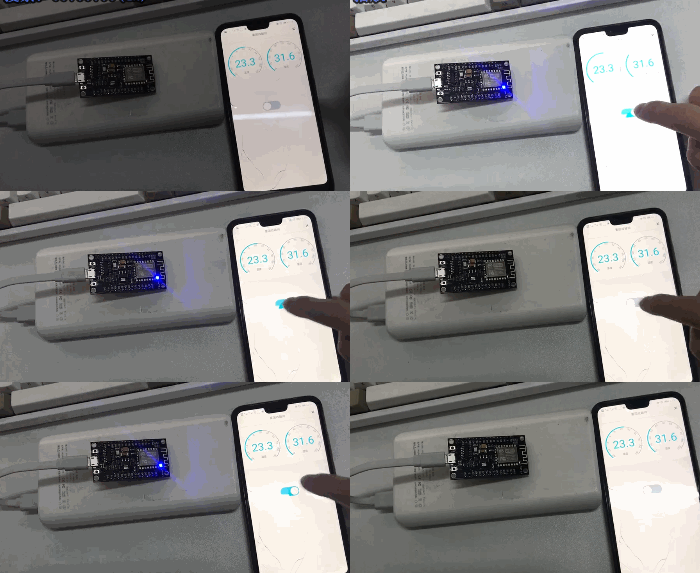
成果展示图:

登陆https://nodemcu-build.com/index.php
选择以下19个模块生成bin文件
adc crypto dht encoder file gpio i2c mqtt net node pwm sjson sntp spi tmr u8g2 uart websocket wifi
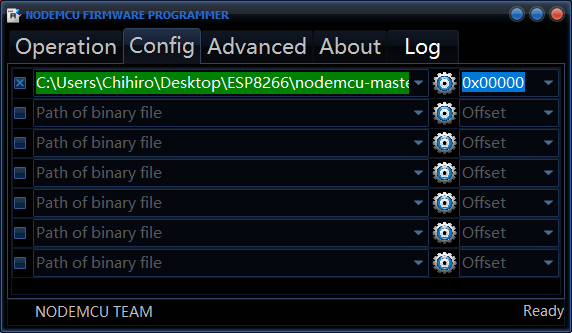
使用工具刷入ESP8266

使用ESPlorer编写程序
-----[定义引脚,]-------------
pin=4
gpio.mode(pin,gpio.OUTPUT)
gpio.write(pin,gpio.HIGH)


-----[wifi config]-------------
---------------------------
cfg={}
cfg.ssid="Chihiro"
cfg.pwd="88888888"

-----[阿里三元组]-------------
----------------------------
ProductKey ="aaaaaaaaa"
ClientId =wifi.sta.getmac()
DeviceName ="sp01"
DeviceSecret="bbbbbbbbbbbbbbbbb"
RegionId="cn-shanghai"

myMQTTport=1883    --port
myMQTT=nil        --client


myMQTThost=ProductKey..".iot-as-mqtt."..RegionId..".aliyuncs.com"   --host
myMQTTusername=DeviceName.."&"..ProductKey          --username

topic0="/a1REbk4YN1c/${deviceName}/user/get"
topic1="/a1REbk4YN1c/${deviceName}/user/my"
topic2="/sys/a1REbk4YN1c/sp01/thing/event/property/post"

----[wifi connect]---------------
wifi.setmode(wifi.STATION)
wifi.sta.config(cfg)
wifi.sta.connect()


wifi.eventmon.register(wifi.eventmon.STA_GOT_IP, function(T)
     print("Connected, IP is "..wifi.sta.getip())
end)

wifi.eventmon.register(wifi.eventmon.STA_DISCONNECTED, function(T)
     print("wifi disconnect")
end)


function GetNetTime()
    sntp.sync({"0.nodemcu.pool.ntp.org","1.nodemcu.pool.ntp.org","2.nodemcu.pool.ntp.org","3.nodemcu.pool.ntp.org","www.beijing-time.org"},
         function(sec, usec, server, info)
                 print('sync', sec, usec, server)
         end,
         function()
            print("get time error")
         end)
    return 0
end

--------MQTT------------------
myMQTTtimes='6666'
hmacdata="clientId"..ClientId.."deviceName"..DeviceName.."productKey"..ProductKey.."timestamp"..myMQTTtimes
myMQTTpassword=crypto.toHex(crypto.hmac("sha1",hmacdata,DeviceSecret))
myMQTTClientId=ClientId.."|securemode=3,signmethod=hmacsha1,timestamp="..myMQTTtimes.."|"


-----[创建MQTT客户端]-------------
myMQTT=mqtt.Client(myMQTTClientId, 120,myMQTTusername,myMQTTpassword)


-----[客户端发起请求连接]-------------
MQTTconnectFlag=0
tmr.alarm(0,1000,1,function()
    if myMQTT~=nil then
        print("Attempting client connect...")
        myMQTT:connect(myMQTThost, myMQTTport,0,MQTTSuccess,MQTTFailed)
    end
end)

-----[MQTT连接成功]-------------
function MQTTSuccess(client)
    print("MQTT connected")
    client:subscribe(topic0,0, function(conn)
        print("subscribe success")
    end)
    myMQTT=client
    MQTTconnectFlag=1
    tmr.stop(0)
end

-----[MQTT连接失败]-------------
function MQTTFailed(client,reson)
    print("Fail reson:"..reson)
    MQTTconnectFlag=0
    tmr.start(0)
end

------[设备offline 事件]-----
myMQTT:on("offline", function(client)
    print ("offline")
    tmr.start(0)
end)

-----[开灯]-------------
function OpenLed()
    gpio.write(pin,0)
end

-----[关灯]-------------
function CloseLed()
    gpio.write(pin,1)
end


myMQTT:on("message", function(client, topic, data)
    print(topic ..":")
   if data ~= nil then
        print(data)
        if string.find(data, [["LightSwitch":0]])~=nil then
            print("CloseLED")
            CloseLed()
        elseif string.find(data, [["LightSwitch":1]])~=nil then
            print("OpenLed")
            OpenLed()
        elseif data=="fs"  then
            myMQTT:publish(topic2,"{"id": "123","version": "1.0","params": { "CurrentTemperature": {"value": 23.3},"CurrentHumidity": { "value": 31.6, }},"method": "thing.event.property.post"}",0,0,function(client) print("send ok" ) end )
        else
            gpio.write(pin,1)
        end
    end
end)

--------[定时上传]------------
--tmr.alarm(1, 5000, 1, function()
   -- if MQTTconnectFlag==1 and myMQTT~=nil then
       -- myMQTT:publish(topic0,"this is data upload",0,0,function(client)
                       -- print("send ok" )
        --end)
   --end
--end)
最后
以上就是会撒娇板栗最近收集整理的关于ESP8266使用MQTT接入阿里IoT的全部内容,更多相关ESP8266使用MQTT接入阿里IoT内容请搜索靠谱客的其他文章。
本图文内容来源于网友提供,作为学习参考使用,或来自网络收集整理,版权属于原作者所有。


发表评论 取消回复