前言
本篇继续购物清单应用的完善,解决完离线存储后,目前的购物清单存在两个问题:一是没法删除(女朋友的购物车除外,见下图);二是我们的中间件的写法的 if...else 嵌套会随着 Action 的增加而增加,可以进一步改进。

本篇来解决这两个问题,话不多说,开干!
购物车数量加减组件
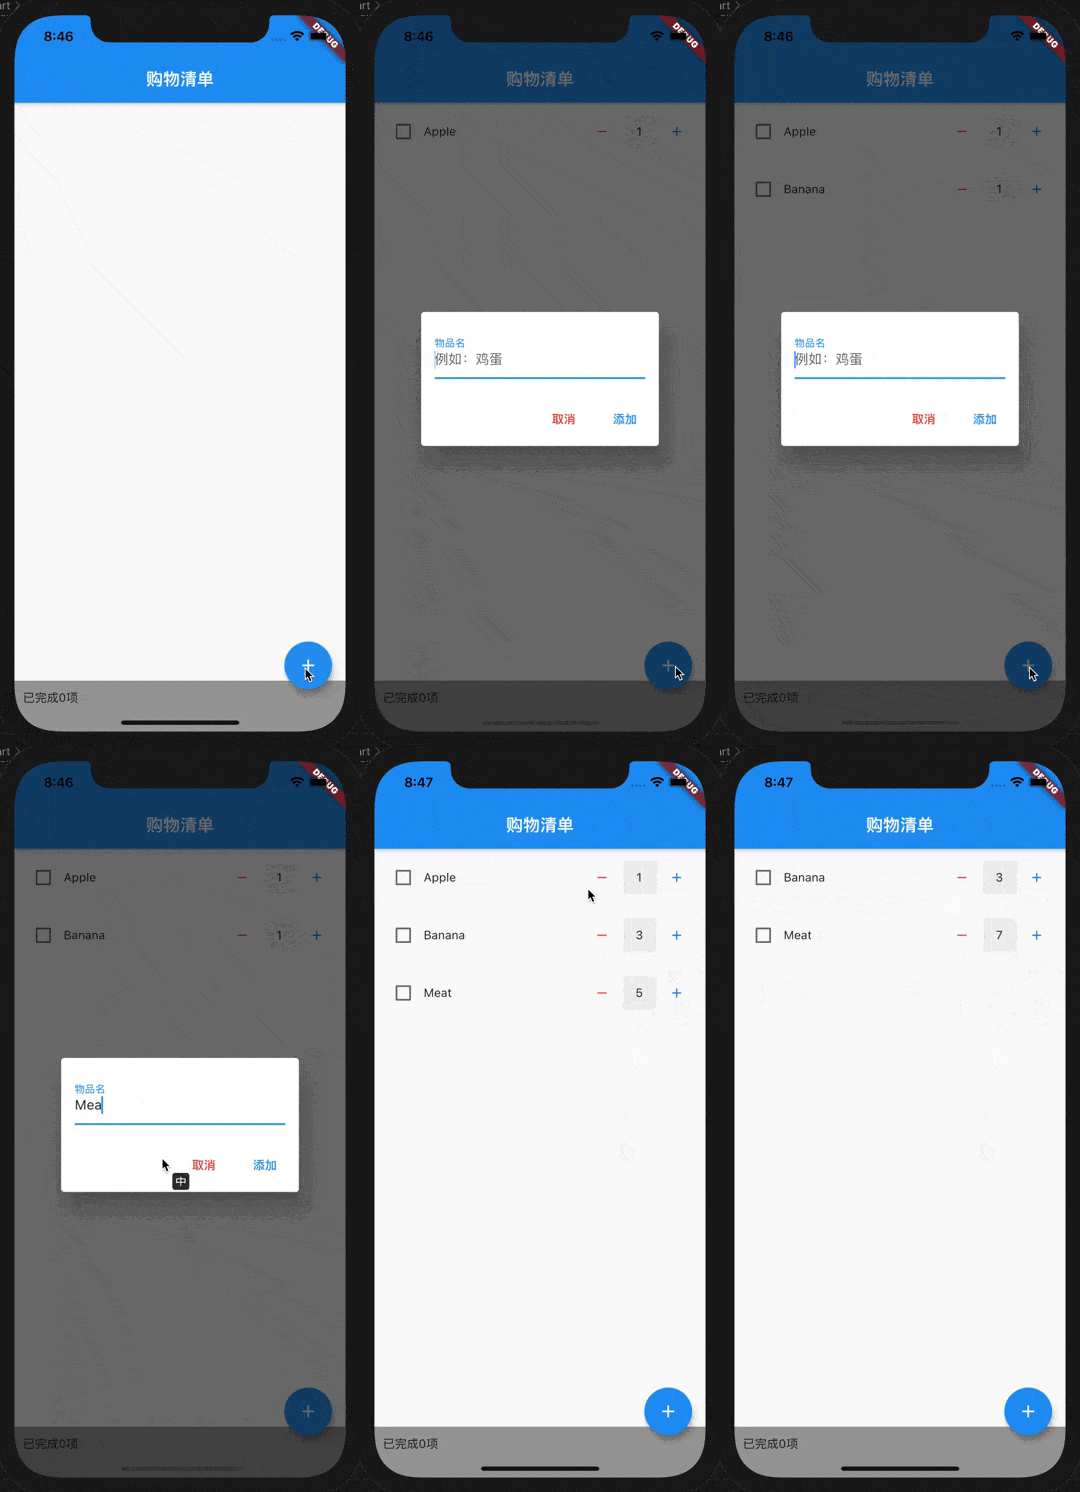
在商城应用中,我们在购物车经常会用到数量控制的加减组件,如下图所示。点击加号数量加 1,点击减号数量减 1。

我们也来实现一个这样的通用组件:
-
数量显示购物清单当前物品的数量;
-
点击加号数量加 1;
-
点击减号数量减 1,如果减到 0 就把该项删除。
在开发组件前,我们应该先定义好组件的对外接口(包括属性和交互方法),在购物车数量加减组件中,有如下接口需要与使用它的组件进行交互:
-
数量属性:组件本身不承载业务,因此这个数量是由上层组件来控制的;我们定义为
count。 -
点击加号的响应方法,我们定义为
onAdd,该方法携带加 1 后的数量参数。 -
点击减号的响应方法,我们定义为
onSub,该方法携带减 1 后的数量参数。 -
中间文本的宽
width和height,非必传,由组件自身设定默认参数。
由于组件本身没有自身的状态,因此定义为 StatelessWidget,如下所示:
class CartNumber extends StatelessWidget {final ValueChanged<int> onSub;final ValueChanged<int> onAdd;final int count;final double width;final double height;const CartNumber({Key? key,required this.count,required this.onAdd,required this.onSub,this.width = 40,this.height = 40,}) : super(key: key);
这里顺带讲一下,对于 Flutter 中的通用组件,尽可能地将构造方法定义为 const,表示该对象是不可变的,这样在渲染过程中效率会更高。我们以后单独针对这个来一篇介绍。加减组件本身的实现比较简单,这里不贴代码了,需要代码的请看这里:Redux状态管理相关代码。
数量增减业务实现
数量增减照样我们需要使用 Redux 的状态管理实现,这里新增两个 Action:
-
AddItemCountAction:数量加 1,携带当前的购物项ShoppingItem。 -
SubItemCountAction:数量减 1,携带当前的购物项ShoppingItem。
然后在 Reducer 中处理增减数量逻辑:
ShoppingListState shoppingListReducer(ShoppingListState state, action) {// ...if (action is AddItemCountAction) {var newItems = addItemCountActionHandler(state.shoppingItems, action.item);return ShoppingListState(shoppingItems: newItems);}if (action is SubItemCountAction) {var newItems = subItemCountActionHandler(state.shoppingItems, action.item);return ShoppingListState(shoppingItems: newItems);}return state;}List<ShoppingItem> addItemCountActionHandler(List<ShoppingItem> oldItems, ShoppingItem itemToHandle) {List<ShoppingItem> newItems = oldItems.map((item) {if (item == itemToHandle) {return ShoppingItem(name: item.name, selected: item.selected, count: item.count + 1);} else {return item;}}).toList();return newItems;}List<ShoppingItem> subItemCountActionHandler(List<ShoppingItem> oldItems, ShoppingItem itemToHandle) {List<ShoppingItem> newItems = oldItems.map((item) {if (item == itemToHandle) {return ShoppingItem(name: item.name, selected: item.selected, count: item.count - 1);} else {return item;}}).toList();// 删除数量等于0的元素newItems = newItems.where((item) => item.count > 0).toList();return newItems;}
在中间件中同样需要在加减数量时进行离线存储处理。
void shoppingListMiddleware(Store<ShoppingListState> store, dynamic action, NextDispatcher next) async {if (action is ReadOfflineAction) {// 从离线存储中读取清单} else if (action is AddItemAction ||action is ToggleItemStateAction ||action is AddItemCountAction ||action is SubItemCountAction) {List<Map<String, String>> listToSave =_prepareForSave(store.state.shoppingItems, action);SharedPreferences.getInstance().then((prefs) =>prefs.setString(SHOPPLINT_LIST_KEY, json.encode(listToSave)));} else if (action is AddItemCountAction) {} else {// ReadOfflineSuccessAction:无操作}next(action);}List<Map<String, String>> _prepareForSave(List<ShoppingItem> oldItems, dynamic action) {List<ShoppingItem> newItems = [];// ...if (action is AddItemCountAction) {newItems = addItemCountActionHandler(oldItems, action.item);}if (action is SubItemCountAction) {newItems = subItemCountActionHandler(oldItems, action.item);}return newItems.map((item) => item.toJson()).toList();}
就这样,我们的加减数量的逻辑就完成了,来看看效果吧。

中间件代码优化
效果是达到预期了,但是中间件的代码有点 Low,if 里面套了 4 个 Action,而且如果 Action 一多,那 if...else 简直没法看。对于这种情况,Redux 中提供了一种指定 Action 的响应方式,那就是:
TypedMiddleware<T, Action>(middlewareFunction)
其中 T 是对应的状态类,Action 是对应的 Action 类,而 middlewareFunction 就是对应 Action 的处理方法。通过这种方式可以将 Action 和对应的处理中间件绑定起来,然后在执行中间件的时候会找到对绑定的 Action 对应的中间件执行,从而避免了if...else 的情况。然后组成一个中间件数组,这样就不需要写那么多 if...else 了。改造完的中间件代码如下:
List<Middleware<ShoppingListState>> shopplingListMiddleware() => [TypedMiddleware<ShoppingListState, ReadOfflineAction>(_readOfflineActionMiddleware),TypedMiddleware<ShoppingListState, AddItemAction>(_addItemActionMiddleware),TypedMiddleware<ShoppingListState, ToggleItemStateAction>(_toggleItemActionMiddleware),TypedMiddleware<ShoppingListState, AddItemCountAction>(_addItemCountActionMiddleware),TypedMiddleware<ShoppingListState, SubItemCountAction>(_subItemCountActionMiddleware),];void _readOfflineActionMiddleware(Store<ShoppingListState> store,ReadOfflineAction action, NextDispatcher next) {SharedPreferences.getInstance().then((prefs) {dynamic offlineList = prefs.get(SHOPPLINT_LIST_KEY);if (offlineList != null && offlineList is String) {store.dispatch(ReadOfflineSuccessAction(offlineList: json.decode(offlineList)));}});next(action);}void _addItemActionMiddleware(Store<ShoppingListState> store, AddItemAction action, NextDispatcher next) {List<Map<String, String>> listToSave =_prepareForSave(store.state.shoppingItems, action);SharedPreferences.getInstance().then((prefs) => prefs.setString(SHOPPLINT_LIST_KEY, json.encode(listToSave)));next(action);}void _toggleItemActionMiddleware(Store<ShoppingListState> store,ToggleItemStateAction action, NextDispatcher next) {List<Map<String, String>> listToSave =_prepareForSave(store.state.shoppingItems, action);SharedPreferences.getInstance().then((prefs) => prefs.setString(SHOPPLINT_LIST_KEY, json.encode(listToSave)));next(action);}void _addItemCountActionMiddleware(Store<ShoppingListState> store,AddItemCountAction action, NextDispatcher next) {List<Map<String, String>> listToSave =_prepareForSave(store.state.shoppingItems, action);SharedPreferences.getInstance().then((prefs) => prefs.setString(SHOPPLINT_LIST_KEY, json.encode(listToSave)));next(action);}void _subItemCountActionMiddleware(Store<ShoppingListState> store,SubItemCountAction action, NextDispatcher next) {List<Map<String, String>> listToSave =_prepareForSave(store.state.shoppingItems, action);SharedPreferences.getInstance().then((prefs) => prefs.setString(SHOPPLINT_LIST_KEY, json.encode(listToSave)));next(action);}
改造完的中间件代码看似变多了,其实是因为我们的几个 Action的操作类似导致的,如果 Action 的业务差别比较大,代码量不会增加多少,但是整个代码的维护性增强了很多。当然,创建 Store 的 代码的中间件参数也需要改一下:
final store = Store<ShoppingListState>(shoppingListReducer,initialState: ShoppingListState.initial(),middleware: shopplingListMiddleware(),);
总结
本篇完成了购物数量加减组件的开发,以及使用了TypedMiddleware将中间件处理方法与对应的 Action 进行绑定避免过多的 if...else 判断,增强了中间件的可维护性。使用了几次 Redux 后,我们也会发现 Redux 的架构、业务逻辑和 UI 界面的职责、界限更为清晰。对于大中型项目来说,在可维护性上可能会比 Provider更胜一筹。
最后
以上就是落寞金鱼最近收集整理的关于Flutter 开发一个通用的购物车数量编辑组件的全部内容,更多相关Flutter内容请搜索靠谱客的其他文章。


发表评论 取消回复