uart4.h
#ifndef __UART4_H__
#define __UART4_H__
#include "stm32mp1xx_uart.h"
#include "stm32mp1xx_gpio.h"
#include "stm32mp1xx_rcc.h"

//uart初始化
void hal_uart4_init();

//发送一个字符
void put_char(const char str);

//发送一个字符串
void put_string(const char* string);

//接收一个字符
char get_char();

//接收一个字符串
char* get_string();


#endif
uart4.c
#include "uart4.h"
//extern void delay_ms(int ms);
//uart初始化
void hal_uart4_init()
{
//使GPIOG与GPIOB时钟使能
RCC->MP_AHB4ENSETR |= (0x1 << 1);
RCC->MP_AHB4ENSETR |= (0x1 << 6);
//使UART4时钟使能
RCC->MP_APB1ENSETR |= (0x1 << 16);
//GPIOx_MODER寄存器功能:设置PB2和PG11引脚为复用功能
GPIOB->MODER &= ~(0x3 << 4);
GPIOB->MODER |= (0x1 << 5);
GPIOG->MODER &= ~(0x3 << 22);
GPIOG->MODER |= (0x1 << 23);
//GPIOx_AFRL寄存器功能:设置PB2引脚的复用功能为UART4_RX
GPIOB->AFRL &= ~(0xf << 8);
GPIOB->AFRL |= (0x1 << 11);
//GPIOx_AFRH寄存器功能:设置PG11引脚的复用功能为UART4_TX
GPIOG->AFRH &= ~(0xf << 12);
GPIOG->AFRH |= (0x6 << 12);
/*******UART章节初始化******/
if(USART4->CR1 & (0x1 <<0))
{
//delay_ms(500);
//将UE设为禁止
USART4->CR1 &= ~(0x1 << 0);
}
//USART_CR1[28][12]:设置8位数据位宽度
USART4->CR1 &= ~(0x1 << 12);
USART4->CR1 &= ~(0x3 << 28);
//USART_CR1[15]:设置串口16倍采样率
USART4->CR1 &= ~(0x1 << 15);
//USART_CR1[10]:设置串口无奇偶校验位
USART4->CR1 &= ~(0x1 << 10);
//USART_CR1[3]:设置串口发送寄存器使能
USART4->CR1 |= (0x1 << 3);
//USART_CR1[2]:设置串口接收寄存器使能
USART4->CR1 |= (0x1 << 2);
//USART_CR1[0]:设置串口使能
USART4->CR1 |= (0x1 << 0);
//USART__CR2寄存器地址
USART4->CR2 &= ~(0x3 << 12);
//USART_BRR寄存器地址
USART4->BRR = 0x22b;
//USART_PRESC寄存器地址
USART4->PRESC &= ~(0xf << 0);
}
//发送一个字符
void put_char(const char str)
{
//判断发送数据寄存器是否有数据
//读0:寄存器满,需要等待
//读1:寄存器为空,发送下一字节数据
while(!(USART4->ISR & (0x1 << 7)));
//将要发送的字符存入发送数据寄存器中
USART4->TDR = str;
//判断数据是否发送完成
while(!(USART4->ISR & (0x1 << 6)));
}
//发送一个字符串
void put_string(const char* string)
{
while(*string)
{
put_char(*string++);
}
put_char('n');
put_char('r');
}
//接收一个字符
char get_char()
{
char str;
//判断接受寄存器
while(!(USART4->ISR & (0x1 << 5)));
str = USART4->RDR;
return str;
}
char buf[50] = "";
//接收一个字符串
char* get_string()
{
unsigned int i;
for(i=0;i<49;i++)
{
buf[i] = get_char();
put_char(buf[i]);
if(buf[i] == 'r')
{
break;
}
}
buf[i] = '�';
put_char('n');
return buf;
}
main.c
#include "uart4.h"
extern void printf(const char *fmt, ...);
void delay_ms(int ms)
{
	int i,j;
	for(i = 0; i < ms;i++)
		for (j = 0; j < 1800; j++);
}


int main()
{
 	hal_uart4_init();

	put_string("Hello Bill!");
	while(1)
	{
	put_char(get_char()+1);
 	//put_string(get_string());

	}
	return 0;
}
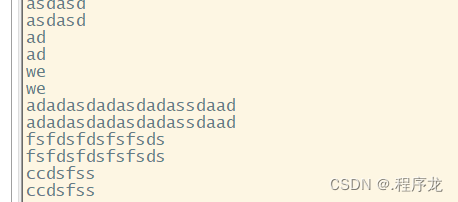
运行示例


最后
以上就是落寞汉堡最近收集整理的关于UART串口实验实现数据收发的全部内容,更多相关UART串口实验实现数据收发内容请搜索靠谱客的其他文章。
本图文内容来源于网友提供,作为学习参考使用,或来自网络收集整理,版权属于原作者所有。


发表评论 取消回复