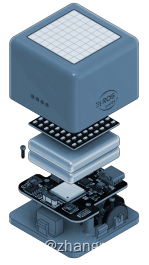
将C语言+嵌入式+单片机+ROS2等相关知识点,有机融合到一门课程之中。
突破windows或linux的限制,突破电脑或手机的限制,突破单片机原有的理论实践体系,全面提升到CoCube机器人平台。

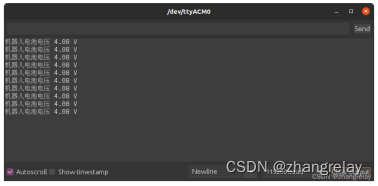
模拟量采集和转换:

#include "Arduino.h"
#include <ESP32AnalogRead.h>
ESP32AnalogRead adc;
void setup()
{
	adc.attach(34);
	Serial.begin(115200);
}

void loop()
{
	delay(50);
	Serial.println("Voltage = "+String(adc.readVoltage()));
}
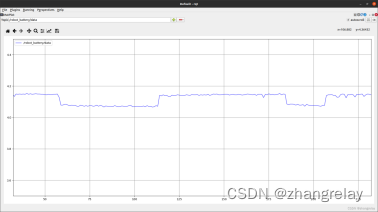
机器人电池电压的实时监控:

#include <micro_ros_arduino.h>

#include <stdio.h>
#include <rcl/rcl.h>
#include <rcl/error_handling.h>
#include <rclc/rclc.h>
#include <rclc/executor.h>

#include <std_msgs/msg/float32.h>

#if !defined(ESP32) && !defined(TARGET_PORTENTA_H7_M7) && !defined(ARDUINO_NANO_RP2040_CONNECT)
#error This example is only avaible for Arduino Portenta, Arduino Nano RP2040 Connect and ESP32 Dev module
#endif

#define BAT_DET 34

rcl_publisher_t publisher;
std_msgs__msg__Float32 msg;
rclc_support_t support;
rcl_allocator_t allocator;
rcl_node_t node;

#define LED_PIN 13

#define RCCHECK(fn) { rcl_ret_t temp_rc = fn; if((temp_rc != RCL_RET_OK)){error_loop();}}
#define RCSOFTCHECK(fn) { rcl_ret_t temp_rc = fn; if((temp_rc != RCL_RET_OK)){}}


void error_loop(){
  while(1){
    digitalWrite(LED_PIN, !digitalRead(LED_PIN));
    delay(100);
  }
}

void timer_callback(rcl_timer_t * timer, int64_t last_call_time)
{
  RCLC_UNUSED(last_call_time);
  if (timer != NULL) {
    RCSOFTCHECK(rcl_publish(&publisher, &msg, NULL));
    msg.data++;
  }
}

void setup() {
  set_microros_wifi_transports("***", "***", "***", 8888);

  pinMode(BAT_DET, INPUT);

  pinMode(LED_PIN, OUTPUT);
  digitalWrite(LED_PIN, HIGH);


  delay(2000);

  allocator = rcl_get_default_allocator();

  //create init_options
  RCCHECK(rclc_support_init(&support, 0, NULL, &allocator));

  // create node
  RCCHECK(rclc_node_init_default(&node, "robot_battery_wifi_node", "", &support));

  // create publisher
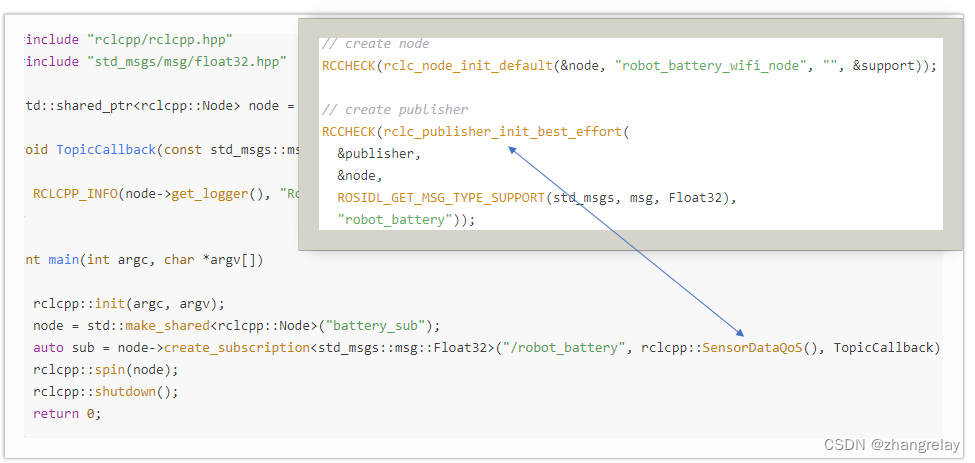
  RCCHECK(rclc_publisher_init_best_effort(
    &publisher,
    &node,
    ROSIDL_GET_MSG_TYPE_SUPPORT(std_msgs, msg, Float32),
    "robot_battery"));

  msg.data = 0.66;
}

void loop() {
    float battery = 4.21 * analogRead(BAT_DET) / 2435;
    RCSOFTCHECK(rcl_publish(&publisher, &msg, NULL));
    msg.data=battery;
    delay(1000);
}
不仅掌握的模拟量基本读取,也能知道其应用,例如电池电量测量,环境亮度监测等一系列涉及到具体机器人各环节的基础知识点。
从原有枯燥的单片机知识点融合到机器人细节设计的实际调试。
C和C++的区别,电脑C++编程和嵌入式C编程,代码如何保持相似的风格。

ESP32:
RCCHECK(rclc_publisher_init_best_effort(
&publisher,
&node,
ROSIDL_GET_MSG_TYPE_SUPPORT(std_msgs, msg, Int32),
"topic_name"));
RCCHECK(rclc_publisher_init_default(
&publisher,
&node,
ROSIDL_GET_MSG_TYPE_SUPPORT(std_msgs, msg, Int32),
"topic_name"));
PC:
rclcpp::QoS qos(rclcpp::KeepLast(7));
pub_ = this->create_publisher<std_msgs::msg::String>("chatter", qos);
sub_ = create_subscription<std_msgs::msg::String>("chatter", rclcpp::SensorDataQoS(), callback);
sub_ = create_subscription<std_msgs::msg::String>("chatter", 10, callback);
最后
以上就是呆萌滑板最近收集整理的关于机器人微控制器编程(CoCube)-突破边界的全部内容,更多相关机器人微控制器编程(CoCube)-突破边界内容请搜索靠谱客的其他文章。


发表评论 取消回复