我是靠谱客的博主 坚强画笔,这篇文章主要介绍【Python】skimage电脑视觉与图片影像处理(2)Computer Vision & Image Processing设置像素化、填充原图题目1结果题目2结果(两张图参数设置不同),现在分享给大家,希望可以做个参考。
Computer Vision & Image Processing
设置像素化、填充
题目1
Practice 1: RGB & Gray Images
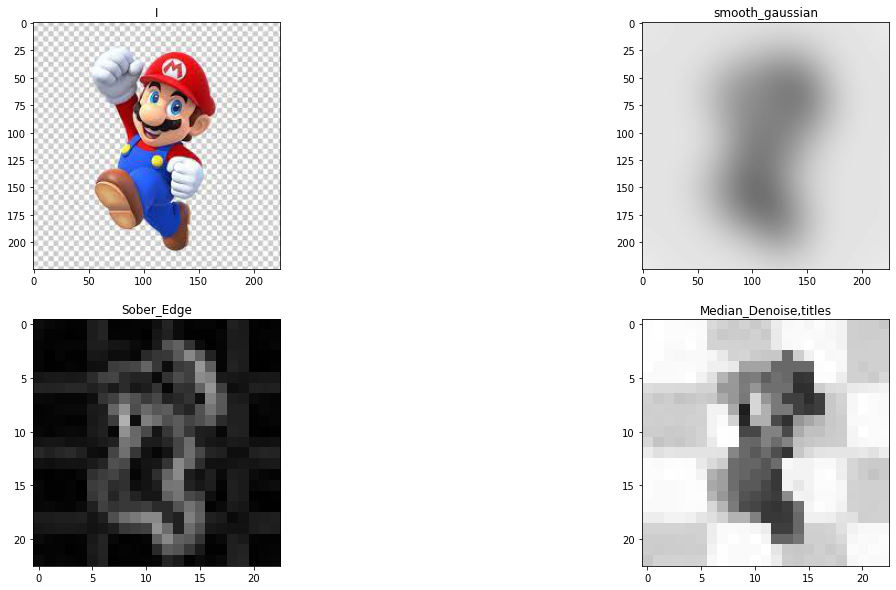
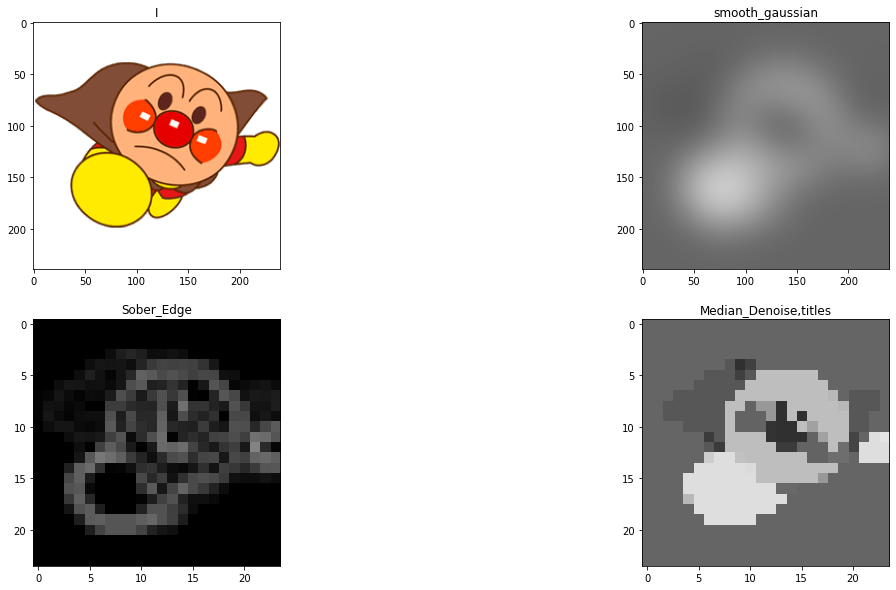
◎ 請選擇一張圖片使用skimage讀取進來
◎ 使用rgb2gray將圖片轉成灰階
◎ 使用imshow_all把原圖、Gaussian Blur、Sobel Edge、
Median Denoise一起show出來
题目2
Practice 2: Resize & Rotate
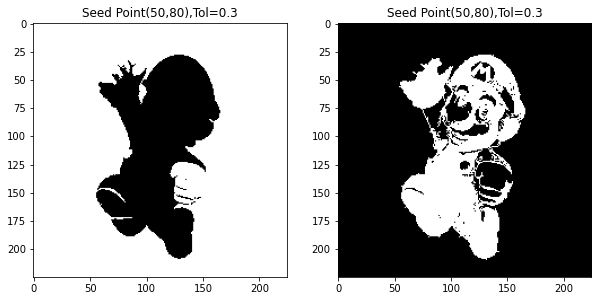
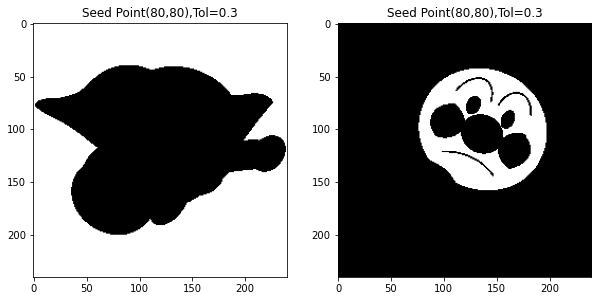
◎ 用前面同一張圖使用Floodfill的方式找出兩種不同的
遮罩結果
○ 挑選兩個不同的seed_point
○ 根據不同點去調整tolerance參數大小得到較好的結果
代码实现
from skimage.io import imread, imshow
from skimage import data

import matplotlib.pyplot as plt
imgpath = 'C:/Users/student/Downloads/main.png'
I = imread(imgpath)
imshow(I)
plt.show()

"测试skimage自带的图片"

#自带猫猫
I2 = data.chelsea()
imshow(I2)
plt.show()

#直接讀取灰階圖
I_gray = imread(imgpath, as_gray=True)
imshow(I_gray)


#彩色轉灰階
from skimage.color import rgb2gray
I_gray = rgb2gray(I)

#圖片顯示色彩預設為灰階
plt.rcParams['image.cmap'] = 'gray'

import sys
mypath = 'C:/Users/student/Downloads'
sys.path.append(mypath)
from IMA import imshow_all, image_show

#像素化
pixelated = I_gray[::10, ::10]
imshow(pixelated)
#平均化
import numpy as np
from scipy import ndimage as ndi
mean_kernel = np.full((3, 3), 1/9)
filtered = ndi.correlate(pixelated, mean_kernel)
imshow(filtered)


#高斯模糊
from skimage import filters
from skimage import img_as_float
pixelated_float = img_as_float(pixelated)
smooth = filters.gaussian(pixelated_float,sigma = 1)#sigma越大,模糊程度越大
size = 20
structuring_element = np.ones((3*size,3*size))
smooth_maen = filters.rank.mean(I_gray,structuring_element)
smooth_gaussian =filters.gaussian(I_gray,size)
imshow(smooth_gaussian)

vertical_kernel = np.array([
 [-1],
 [ 0],
 [ 1],
])
gradient_vertical = ndi.correlate(pixelated.astype(float),
 vertical_kernel)
fig, ax = plt.subplots()
ax.imshow(gradient_vertical)

#edge filtering:Sobel Edge Filter
from skimage import filters
Sober_Edge = filters.sobel(pixelated)
imshow(Sober_Edge)

#Denoising Filters
from skimage.morphology import disk
neighborhood =disk(radius = 1)
Median_Denoise = filters.rank.median(pixelated,neighborhood)
imshow(Median_Denoise)
#作业题1
imshow_all(I,smooth_gaussian,Sober_Edge,Median_Denoise,titles =["I","smooth_gaussian","Sober_Edge","Median_Denoise,titles"])

"语法为imshow_all(图片1,……,图片n,titles = ["标题1",……,"标题n"])"

#Supervised Segmentation:Flood fill
import skimage.segmentation as seg
seed_point = (50,50)
tol = 0.3
flood_mask = seg.flood(I_gray,seed_point,tolerance = tol)

plt.imshow(flood_mask)
plt.title("Seed Point("+str(seed_point[0])+','+str(seed_point[1])+"),Tol="+str(tol))
plt.plot(seed_point[0],seed_point[1],'rx')

seed_point = (80,80)
tol = 0.3
flood_mask1 = seg.flood(I_gray,seed_point,tolerance = tol)
plt.imshow(flood_mask)
plt.title("Seed Point("+str(seed_point[0])+','+str(seed_point[1])+"),Tol="+str(tol))
plt.plot(seed_point[0],seed_point[1],'rx')

imshow_all(flood_mask,flood_mask1,titles=["Seed Point("+str(seed_point[0])+','+str(seed_point[1])+"),Tol="+str(tol),"Seed Point("+str(seed_point[0])+','+str(seed_point[1])+"),Tol="+str(tol)])
原图


题目1结果


题目2结果(两张图参数设置不同)


最后
以上就是坚强画笔最近收集整理的关于【Python】skimage电脑视觉与图片影像处理(2)Computer Vision & Image Processing设置像素化、填充原图题目1结果题目2结果(两张图参数设置不同)的全部内容,更多相关【Python】skimage电脑视觉与图片影像处理(2)Computer内容请搜索靠谱客的其他文章。
本图文内容来源于网友提供,作为学习参考使用,或来自网络收集整理,版权属于原作者所有。


发表评论 取消回复