我是靠谱客的博主 沉默糖豆,这篇文章主要介绍【Spring Cloud、Sentinel】搭建Spirng Cloud项目(三):Spring Cloud服务整合Sentinel一、环境准备二、Spring Cloud服务整合Sentinel三、重启服务后,展示效果四、问题总结五、拓展,现在分享给大家,希望可以做个参考。
一、环境准备
1、Spring Cloud中单个服务并能正常使用。参考链接
2、Sentinel已经搭建。
二、Spring Cloud服务整合Sentinel
1、引入依赖
        <dependency>
            <groupId>com.alibaba.cloud</groupId>
            <artifactId>spring-cloud-starter-alibaba-sentinel</artifactId>
        </dependency>
2、application.yml配置
spring:
  application:
    name: a-server
  cloud:
    sentinel:
      transport:
        # sentinel地址
        dashboard: pfhe.com:7003
        # 此端口用于跟sentinel绑定,集群时能知道具体那台
        port: 7200
      # 程序启动就建立心跳
      eager: true
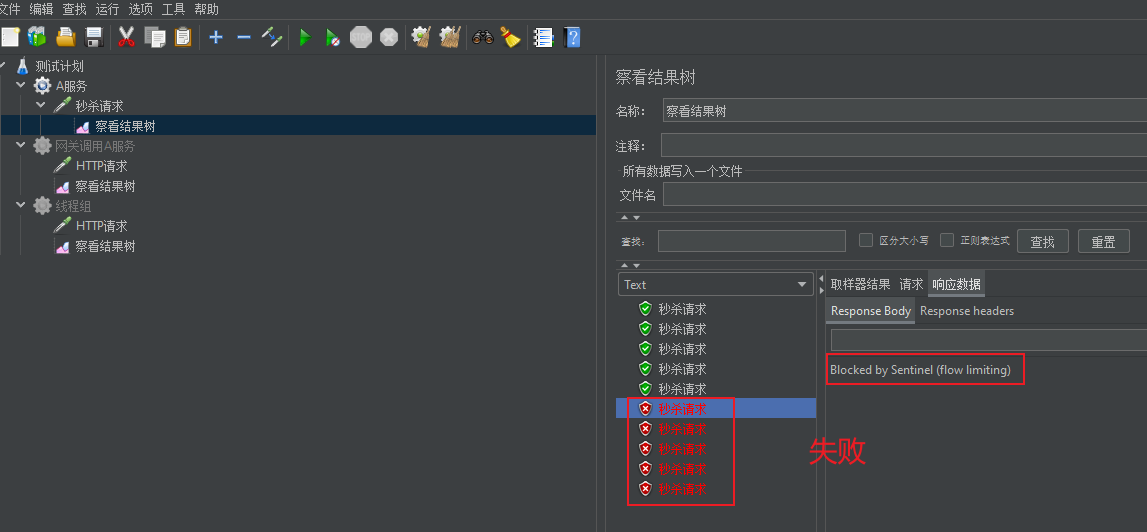
三、重启服务后,展示效果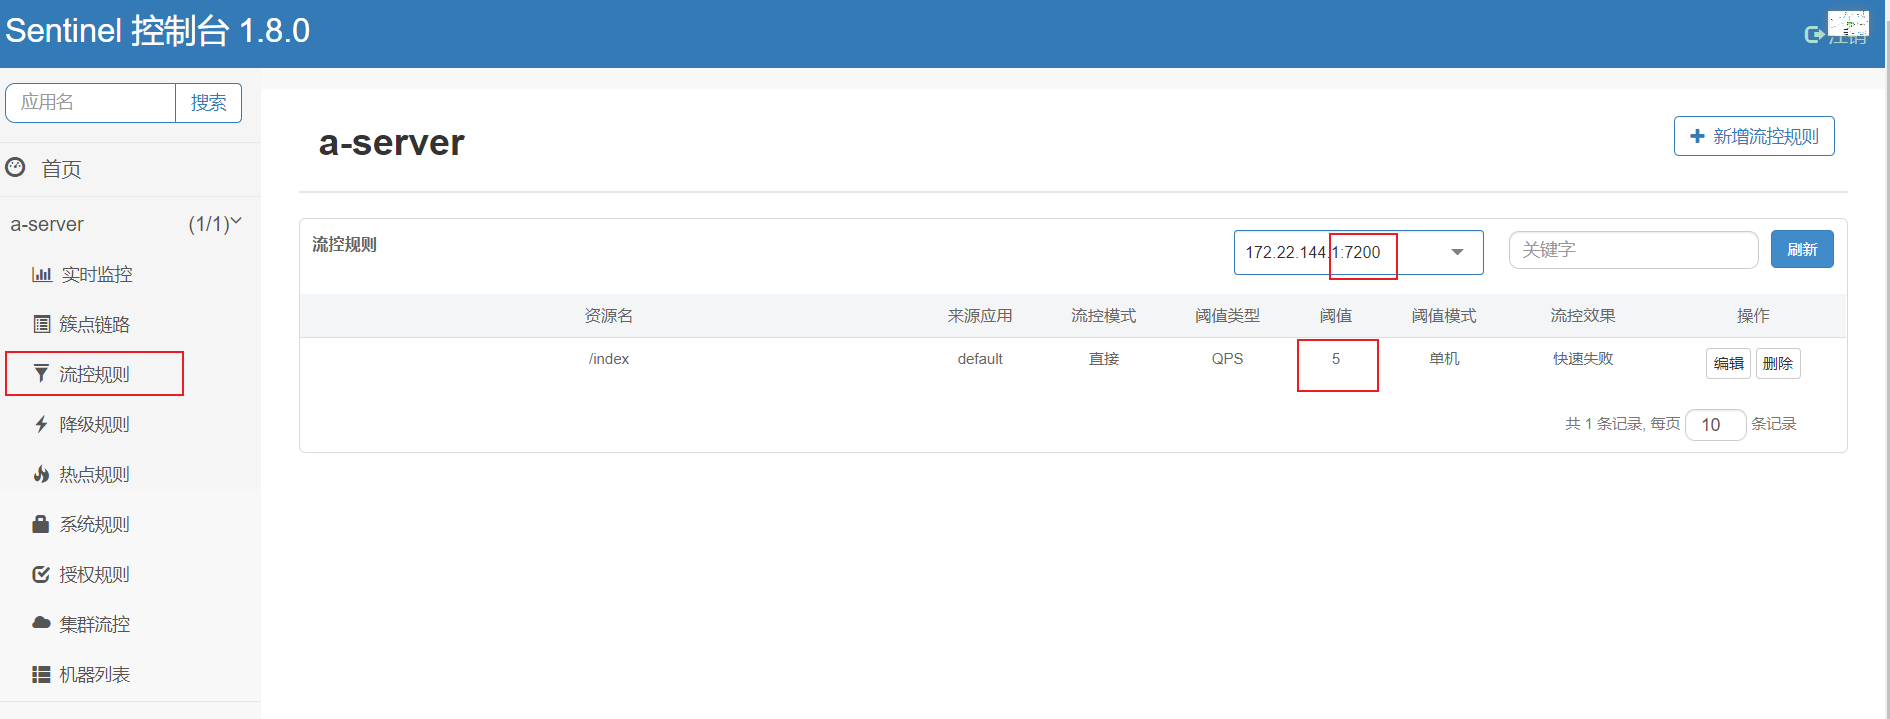
四、问题总结
五、拓展
【Sentinel、Nacos】Sentinel中读取Nacos中配置
【Sentinel】Sentinel同步修改到Nacos中
最后
以上就是沉默糖豆最近收集整理的关于【Spring Cloud、Sentinel】搭建Spirng Cloud项目(三):Spring Cloud服务整合Sentinel一、环境准备二、Spring Cloud服务整合Sentinel三、重启服务后,展示效果四、问题总结五、拓展的全部内容,更多相关【Spring内容请搜索靠谱客的其他文章。
本图文内容来源于网友提供,作为学习参考使用,或来自网络收集整理,版权属于原作者所有。


发表评论 取消回复