telnet服务器架设
(1)查看是否安装telnet服务器
[root@localhost ~]# rpm -qa|grep telnet-server
(2)安装telnet-server
[root@localhost ~]# yum install telnet-server
(3)再次查看是否安装telnet-server
[root@localhost ~]# rpm -qa |grep telnet-server
telnet-server-0.17-64.el7.x86_64//说明已经安装了
(4)查看是否安装xinetd服务
//原因:telnet服务不是独立的服务,在xinetd服务下,有xinetd服务管理。
[root@localhost xinetd.d]# rpm -qa xinetd
没反应就是成功了
(5)安装xinetd服务
[root@localhost xinetd.d]# yum install xinetd
(6)将xinetd服务和telnet服务设置为开机自启动
[root@localhost xinetd.d]# systemctl enable xinetd.service
[root@localhost xinetd.d]# systemctl enable telnet.socket
Created symlink from /etc/systemd/system/sockets.target.wants/telnet.socket to /usr/lib/systemd/system/telnet.socket.
(7)启动xinetd服务和telnet服务
[root@localhost xinetd.d]# systemctl start xinetd.service
[root@localhost xinetd.d]# systemctl start telnet.socket
(8)查看xinetd服务和telnet服务的状态(非必须步骤)
[root@localhost xinetd.d]# systemctl status xinetd.service
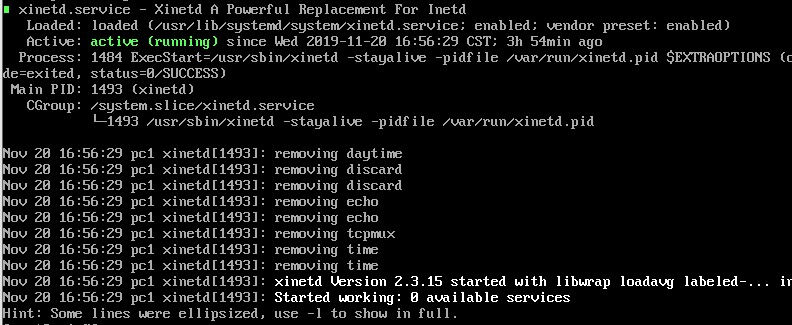
[root@localhost xinetd.d]# systemctl status telnet.socket

(9)开启root登录,通过关闭安全的方法实现
[root@localhost xinetd.d]# cd /etc/
[root@localhost etc]# ls secure*
securetty
[root@localhost etc]# mv securetty securetty.bak
注:也可以securetty的末尾加上pts/0 pts/1的方法开启root登录,这样就不用关闭安全了。
(10)配置防火墙规则
[root@localhost etc]# firewall-cmd --permanent --add-port=23/tcp//开放23端口
success
[root@localhost etc]# firewall-cmd –reload//重新加载防火墙,使改动生效
success
(11)测试物理机和虚拟机的互通性
[root@localhost etc]# ping 192.168.68.239(物理机IP)
PING 192.168.68.239 (192.168.68.239) 56(84) bytes of data.
64 bytes from 192.168.68.239: icmp_seq=1 ttl=128 time=2.66 ms
64 bytes from 192.168.68.239: icmp_seq=2 ttl=128 time=3.05 ms
64 bytes from 192.168.68.239: icmp_seq=3 ttl=128 time=1.82 ms
64 bytes from 192.168.68.239: icmp_seq=4 ttl=128 time=0.645 ms
64 bytes from 192.168.68.239: icmp_seq=5 ttl=128 time=0.550 ms
64 bytes from 192.168.68.239: icmp_seq=6 ttl=128 time=1.98 ms
^C
--- 192.168.68.239 ping statistics ---
6 packets transmitted, 6 received, 0% packet loss, time 5007ms
rtt min/avg/max/mdev = 0.550/1.787/3.055/0.937 ms
(12)查看虚拟机Linux 机器的IP地址
[root@localhost etc]# ip a
192.168.190.10
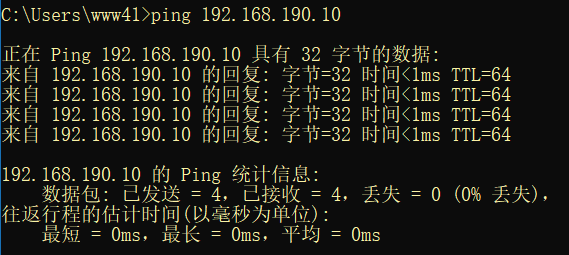
(13)在物理机windows系统中测试与Linux机器的连通性。
(14)在物理机windows中安装telnet客户端
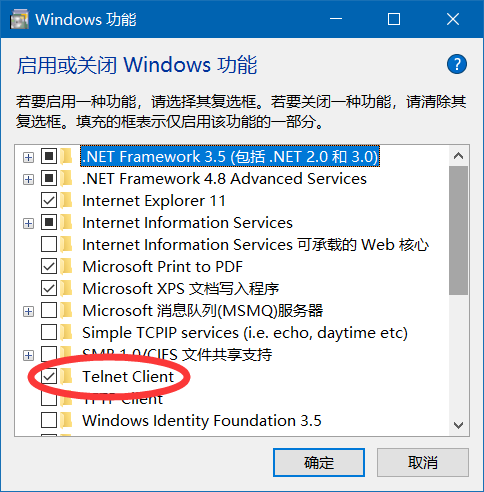
在window7以上的版本,默认没有安装telnet客户端,需要安装。安装方法如下:
a.打开控制面板
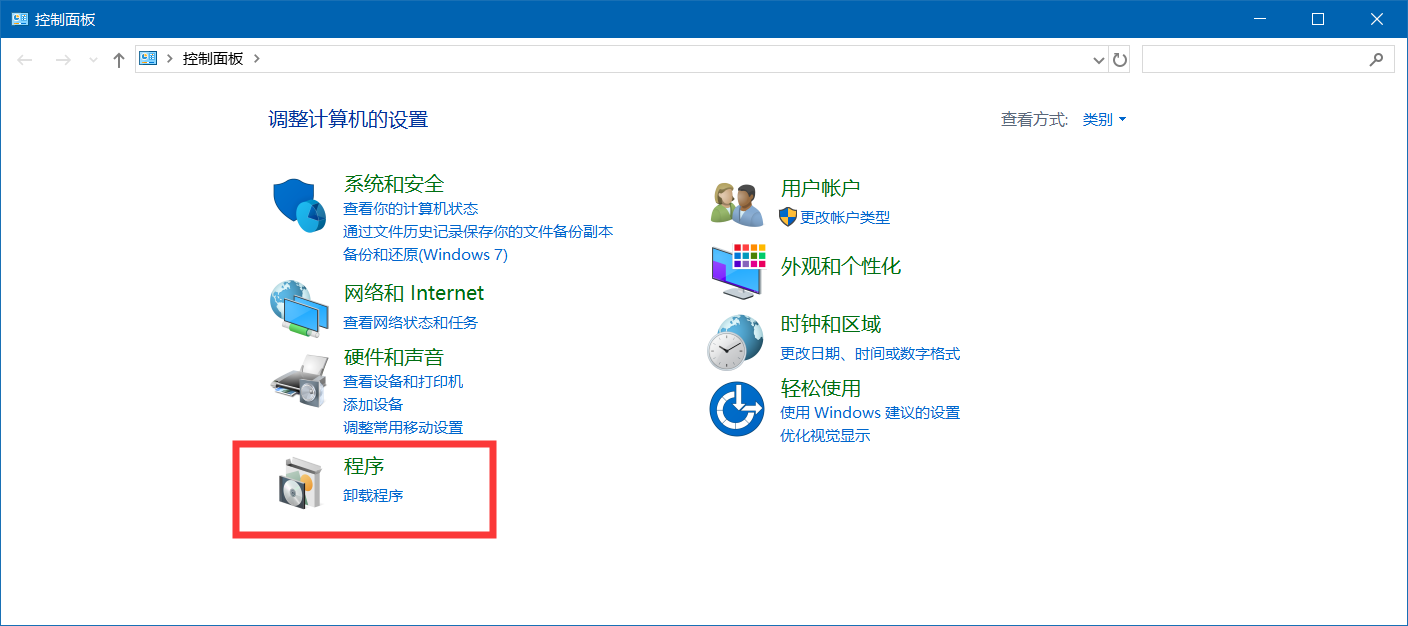
b.点击程序
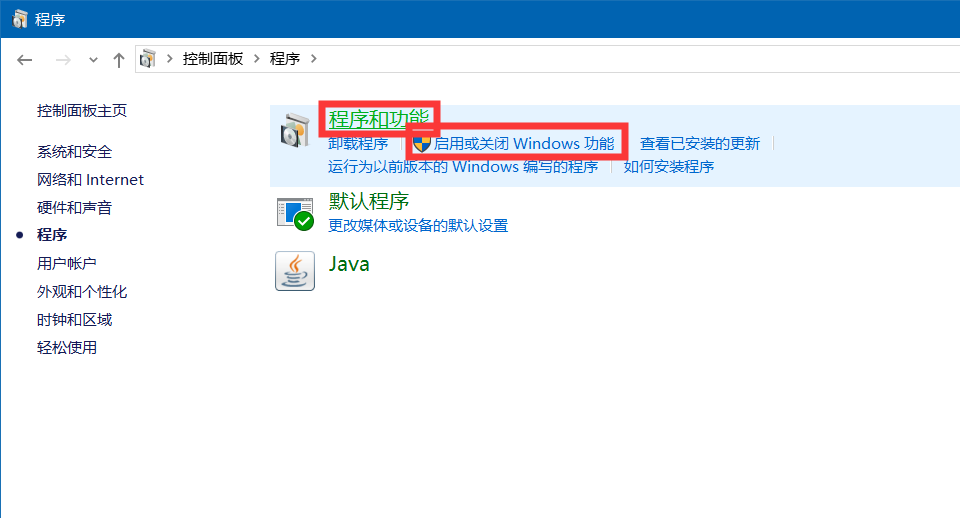
c.启用或关闭Windwos功能,勾选上Telnet客户端点确定进行安装。
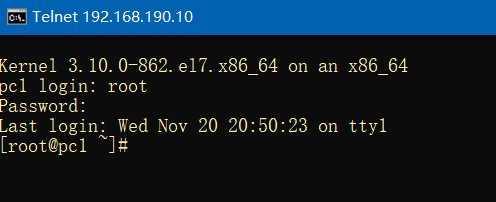
(15)安装完成后打开CMD,输入Telnet IP地址。
![]()
出现以下界面表示配置Telnet成功了。
最后
以上就是专一学姐最近收集整理的关于CentOS7搭建telnet服务器实现远程登陆管理的全部内容,更多相关CentOS7搭建telnet服务器实现远程登陆管理内容请搜索靠谱客的其他文章。


发表评论 取消回复