目录
Mac/Linux连Linux
Mac/Linux连Windows
Windows连Linux
前言
一般买来的服务器都是给你root用户,但实际上安全隐患太大。比如我自己的服务器给实验室搭个跳板机内网穿透实验室的GPU服务器完成远程开发。但实现其需要秘钥免密登陆,如果新来的能直接免密登陆我服务器,手皮了一下把我服务器整崩了咋办,所以还是等开个非root普通用户给大家作跳板。
不同操作系统间免密访问原理都是一样的,A主机免密访问B主机,需要A主机生成的公钥添加到B主机的~/.ssh/authorized_keys文件中,这样A访问B,B拿到A的用户连接信息,然后去自己的authorized_keys文件中查询看看有没有对应的信息,有就用A的公钥加密一段生成的信息,发给A后用A的私钥解开,之后A将解开后的明文信息发送给B进行对比,开始否正确,若正确则表明了A的公钥是由A本人的私钥解开的,即验证了身份的正确性,所以这也是为什么你要免密访问对方主机就要把自己的公钥丢过去的原因。当然这只是个很笼统的说法,只是为了帮助大家快速感性的有个大概认识。
但由于操作系统间各种配置不同,尤其是windows别具一格,总有些奇奇怪怪的地方让秘钥免密连接失败,下面大致介绍下不同操作系统间的秘钥免密连接。
Mac/Linux连Linux
首先进入~/.ssh目录,没有则新建目录。ls看看有无公钥和私钥文件,没有则输入ssh-keygen,一路回车后就可以看到公钥和私钥两个文件

然后输入下面命令把私钥文件加入到mac的ssh列表中(mac这步不能省)
ssh-add -K id_rsa
添加后登陆Linux,创建新用户,输入useradd创建,passwd设置密码,这里新建的用户叫guest
[root@izwz99t7wh8lhysugop73tt ~]# useradd guest
[root@izwz99t7wh8lhysugop73tt ~]# passwd guest
更改用户 guest 的密码 。
新的 密码:
无效的密码: 密码少于 8 个字符
重新输入新的 密码:
passwd:所有的身份验证令牌已经成功更新。
[root@izwz99t7wh8lhysugop73tt ~]#
密码随便设,说是无效密码其实不要紧。
再修改sshd的配置文件,看看相关项是否打开,下面是我服务器上/etc/ssh/sshd_config文件打开的配置(---- 关键 ----注释部分 没有则新建,no则改成yes)
...

# HostKey for protocol version 1
#HostKey /etc/ssh/ssh_host_key
# HostKeys for protocol version 2
HostKey /etc/ssh/ssh_host_rsa_key
#HostKey /etc/ssh/ssh_host_dsa_key
HostKey /etc/ssh/ssh_host_ecdsa_key
HostKey /etc/ssh/ssh_host_ed25519_key

...

# ----- 关键 -----
RSAAuthentication yes
PubkeyAuthentication yes

...

# The default is to check both .ssh/authorized_keys and .ssh/authorized_keys2
# but this is overridden so installations will only check .ssh/authorized_keys
# ----- 关键 -----
AuthorizedKeysFile	.ssh/authorized_keys

...

# Change to no to disable s/key passwords
#ChallengeResponseAuthentication yes
ChallengeResponseAuthentication no

...

# GSSAPI options
GSSAPIAuthentication yes
GSSAPICleanupCredentials no

...

# WARNING: 'UsePAM no' is not supported in Red Hat Enterprise Linux and may cause several
# problems.
UsePAM yes

...

X11Forwarding yes

...

UsePrivilegeSeparation sandbox		# Default for new installations.

...


# Accept locale-related environment variables
AcceptEnv LANG LC_CTYPE LC_NUMERIC LC_TIME LC_COLLATE LC_MONETARY LC_MESSAGES
AcceptEnv LC_PAPER LC_NAME LC_ADDRESS LC_TELEPHONE LC_MEASUREMENT
AcceptEnv LC_IDENTIFICATION LC_ALL LANGUAGE
AcceptEnv XMODIFIERS

...

# override default of no subsystems
Subsystem	sftp	/usr/libexec/openssh/sftp-server

...

UseDNS no
AddressFamily inet
# ----- 关键 -----
PermitRootLogin yes
SyslogFacility AUTHPRIV
PasswordAuthentication yes
vim /etc/ssh/sshd_config 修改保存后输入下面命令重启ssh服务
/bin/systemctl restart sshd.service
然后退出后使用guest用户再登陆
[root@izwz99t7wh8lhysugop73tt ~]# exit
登出
Connection to xnwder.top closed.
jackzhang@jackdeMacBook-Pro .ssh %
jackzhang@jackdeMacBook-Pro .ssh % ssh guest@47.107.xx.xx
guest@47.107.xx.xx's password:

Welcome to Alibaba Cloud Elastic Compute Service !

[guest@izwz99t7wh8lhysugop73tt ~]$
注意这里为保证安全,linux有个很坑的规定,服务端的linux下必须保证:
1、~/.ssh目录权限必须是700
2、非root用户的home目录权限必须是700,即这里/home/guest目录必须是700
3、~/.ssh/authorized_keys文件的权限必须是600
否则即使把其他都配置好了还是需要密码登陆
所以登陆guest用户后第一步先改权限:
[guest@izwz99t7wh8lhysugop73tt ~]$ pwd
/home/guest
[guest@izwz99t7wh8lhysugop73tt ~]$ chmod 700 .
[guest@izwz99t7wh8lhysugop73tt ~]$
然后切换回mac/linux,使用ssh-copy-id命令将本地的公钥同步到服务器guest用户的~/.ssh/authorized_keys文件中,执行完后会在guest用户下生成~/.ssh文件夹和~/.ssh/authorized_keys文件
jackzhang@jackdeMacBook-Pro ~ % ssh-copy-id -i ~/.ssh/id_rsa.pub guest@47.107.xx.xx
/usr/bin/ssh-copy-id: INFO: Source of key(s) to be installed: "/Users/jackzhang/.ssh/id_rsa.pub"
/usr/bin/ssh-copy-id: INFO: attempting to log in with the new key(s), to filter out any that are already installed
/usr/bin/ssh-copy-id: INFO: 1 key(s) remain to be installed -- if you are prompted now it is to install the new keys
guest@47.107.xx.xx's password:

Number of key(s) added:        1

Now try logging into the machine, with:   "ssh 'guest@47.107.xx.xx'"
and check to make sure that only the key(s) you wanted were added.

jackzhang@jackdeMacBook-Pro ~ %
与此同时,切换至guest用户,将权限改对,同时保证/home/guest目录下所有文件夹和文件的持有者是guest本人,而不是root,使用ls -all查看。
[guest@izwz99t7wh8lhysugop73tt ~]$ ls .ssh/ -all
总用量 12
drwx------ 2 guest guest 4096 7月  26 11:05 .
drwx------ 3 guest guest 4096 7月  26 11:05 ..
-rw------- 1 guest guest  587 7月  26 11:05 authorized_keys
[guest@izwz99t7wh8lhysugop73tt ~]$ chmod 700 .ssh/
[guest@izwz99t7wh8lhysugop73tt ~]$ chmod 600 .ssh/authorized_keys
[guest@izwz99t7wh8lhysugop73tt ~]$
然后切换回mac登陆远程guest用户,发现免密登陆成功
jackzhang@jackdeMacBook-Pro ~ % ssh guest@47.107.xx.xx
Last login: Mon Jul 26 10:59:33 2021 from 49.52.xx.xx

Welcome to Alibaba Cloud Elastic Compute Service !

[guest@izwz99t7wh8lhysugop73tt ~]$
如果因为防火墙一直拒绝连接,而你又使用的阿里云,装了宝塔面板,记得在阿里云控制台和宝塔面板两个地方把ssh端口放行,不然安全策略仍会阻止建立连接。
Mac/Linux连Windows
windows以win10为例,首先保证win10用户有密码,不要使用空密码(不然后面连接各种问题,已经帮你试过了),没有的话去win10设置-->账户-->登陆选项里设置。设置密码后安装的SSH服务连接密码就是账户密码。
安装过程参考这篇:傻瓜式操作,100%成功:Win10安装SSH服务
安装完毕后就可以开始配置免密登陆了,win10这里有个很坑的地方,它把信任的keys,也就是authorized_keys文件默认位置放到了其他地方,所以有时候即使你在win下用户目录下新建了.ssh文件夹,并且创建了authorized_keys文件,也将访客公钥加进去后,仍然无法免密登陆windows。
这时候去修改C:/ProgramData/ssh/sshd_config文件,把其中的
Match Group administrators
       AuthorizedKeysFile __PROGRAMDATA__/ssh/administrators_authorized_keys
注释掉即可。如果你后面要搭建内网穿透和ssh转发之类的,建议将C:WindowsSystem32OpenSSHsshd_config_default文件中的
Match Group administrators
       AuthorizedKeysFile __PROGRAMDATA__/ssh/administrators_authorized_keys
也注释掉,然后把PermitRootLogin、PubkeyAuthentication、PasswordAuthentication、AllowTcpForwarding、GatewayPorts等配置打开
下面是我win下sshd_config_default文件的配置
# This is the sshd server system-wide configuration file.  See
# sshd_config(5) for more information.

# The strategy used for options in the default sshd_config shipped with
# OpenSSH is to specify options with their default value where
# possible, but leave them commented.  Uncommented options override the
# default value.

Port 22
#AddressFamily any
#ListenAddress 0.0.0.0
#ListenAddress ::

#HostKey __PROGRAMDATA__/ssh/ssh_host_rsa_key
#HostKey __PROGRAMDATA__/ssh/ssh_host_dsa_key
#HostKey __PROGRAMDATA__/ssh/ssh_host_ecdsa_key
#HostKey __PROGRAMDATA__/ssh/ssh_host_ed25519_key

# Ciphers and keying
#RekeyLimit default none

# Logging
#SyslogFacility AUTH
#LogLevel INFO

# Authentication:

#LoginGraceTime 2m
PermitRootLogin yes
#StrictModes yes
#MaxAuthTries 6
#MaxSessions 10

PubkeyAuthentication yes

# The default is to check both .ssh/authorized_keys and .ssh/authorized_keys2
# but this is overridden so installations will only check .ssh/authorized_keys
AuthorizedKeysFile	.ssh/authorized_keys

#AuthorizedPrincipalsFile none

# For this to work you will also need host keys in %programData%/ssh/ssh_known_hosts
#HostbasedAuthentication no
# Change to yes if you don't trust ~/.ssh/known_hosts for
# HostbasedAuthentication
#IgnoreUserKnownHosts no
# Don't read the user's ~/.rhosts and ~/.shosts files
#IgnoreRhosts yes

# To disable tunneled clear text passwords, change to no here!
PasswordAuthentication yes
PermitEmptyPasswords yes

# GSSAPI options
#GSSAPIAuthentication no

#AllowAgentForwarding yes
AllowTcpForwarding yes
GatewayPorts yes
#PermitTTY yes
#PrintMotd yes
#PrintLastLog yes
#TCPKeepAlive yes
#UseLogin no
#PermitUserEnvironment no
#ClientAliveInterval 0
#ClientAliveCountMax 3
#UseDNS no
#PidFile /var/run/sshd.pid
#MaxStartups 10:30:100
#PermitTunnel no
#ChrootDirectory none
#VersionAddendum none

# no default banner path
#Banner none

# override default of no subsystems
Subsystem	sftp	sftp-server.exe

# Example of overriding settings on a per-user basis
#Match User anoncvs
#	AllowTcpForwarding no
#	PermitTTY no
#	ForceCommand cvs server

#Match Group administrators
#       AuthorizedKeysFile __PROGRAMDATA__/ssh/administrators_authorized_keys
配置没问题后就将访客主机生成的公钥添加到win10主机下的authorized_keys文件中,如果已存在authorized_keys文件则打开该文件(比如用sublime),另起一行,添加进去保存即可。如果遇到写权限不足情况,可将其拷贝到桌面,修改后再覆盖回来(我就是这么干的)。
至于mac/linux公钥的生成方式可见上一小节:Mac/Linux连Linux
这里举个例子,比如我Mac用户是jackzhang,目标主机win10用户是DELL,那么就将 jackzhang用户下的~/.ssh/id_rsa.pub里的公钥内容添加到C:UsersDELL.sshauthorized_keys文件中
公钥传递方法可以使用scp协议,比如
scp id_ras.pub DELL@xx.xx.xx.xx:C:/Users/DELL/.ssh/id_rsa.pub
表示将mac/linux下的公钥文件拷贝到ip为xx.xx.xx.xx的win10主机下的DELL用户的.ssh目录中
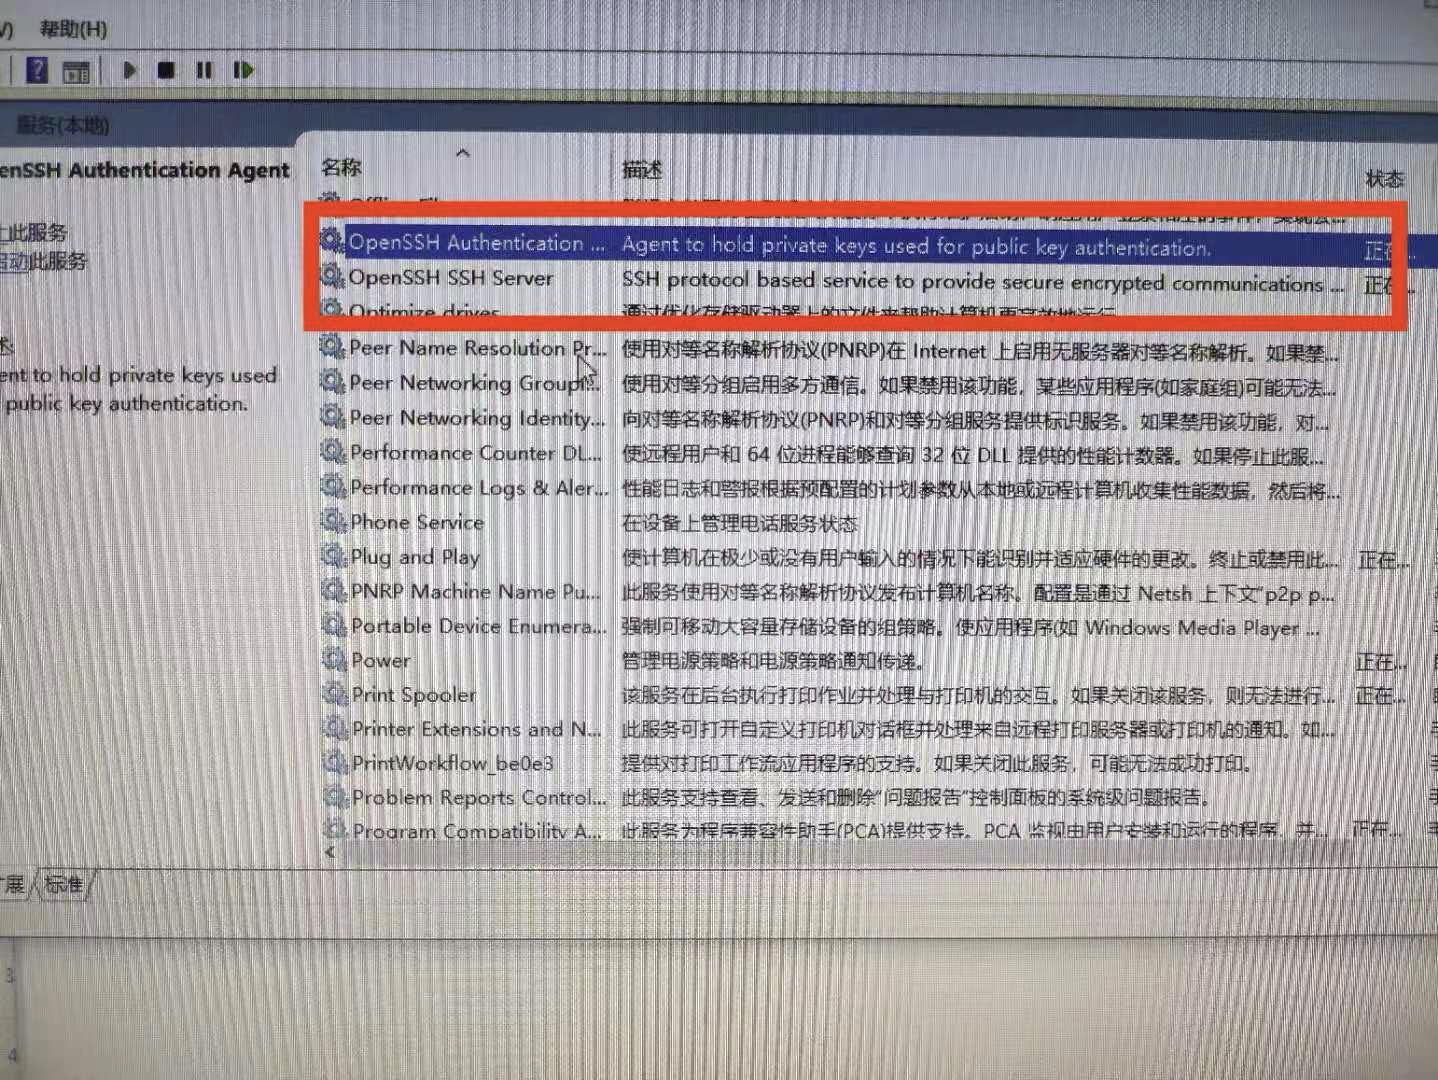
然后win10左下角搜索 “服务” ,打开服务后找到两个OpenSSH选项,全部重启即可

然后在mac/linux上就可以通过
ssh DELL@xx.xx.xx.xx
的方式直接秘钥免密登陆了。
Windows连Linux
同样先保证linux端口放行,ubuntu可以使用
sudo ufw status
查看端口放行状态。使用
sudo ufw allow 22
开放22端口。使用
sudo ufw reload
使防火墙重新载入。如果是centos7,端口开放可见该篇第三部分。开放后还要确保你云服务器控制台安全策略是否放行,如果装了宝塔面板是否在面板上放行。
其余步骤和 Mac/Linux连Linux 小节一样,windows也是通过在cmd中输入ssh-keygen命令,一路回车后就可以看到公钥和私钥两个文件,按步骤来就行。
秘钥传递可通过scp协议进行
scp C:UsersXXX.sshid_ras.pub 用户名@xx.xx.xx.xx:~/.ssh/id_rsa.pub
将公钥添加过去后,直接 ssh 用户名@xx.xx.xx.xx 就可实现秘钥免密登陆了。
补充:
想顺便在家里访问搭建内网穿透访问实验室内网GPU服务器?看这篇:【在家也能连组内GPU】Vscode等各类客户端使用公网云跳板Linux内网穿透实验室Win10主机实现SSH远程开发
适用于linux穿透linux和linux穿透win10
最后
以上就是端庄小懒猪最近收集整理的关于Linux、Windows、Mac非root普通用户使用秘钥免密SSH登录的全部内容,更多相关Linux、Windows、Mac非root普通用户使用秘钥免密SSH登录内容请搜索靠谱客的其他文章。


发表评论 取消回复