什么是Ribbon?
Ribbon是一个负载均衡客户端,可以很好的控制htt和tcp的一些行为。Feign默认集成了ribbon。在微服务架构中,业务都会被拆分成一个独立的服务,服务与服务的通讯是基于http restful的。Spring Cloud有两种服务调用方式,一种是Ribbon+restTemplate,另一种是Feign。
推荐博客:
Ribbon实现服务器端的负载均衡 参考博客:https://blog.csdn.net/Jeson0725/article/details/70058910
常见错误:
1、Spring Boot扫描不到controller解决方案加注解指定包路径,多个用逗号隔开
Spring Boot无法自动注入bean问题解决方案:https://blog.csdn.net/zjh_746140129/article/details/80156223
2、Ribbon使用@LoadBalanced报错,由于LoadBalanced是负载均衡,所以使用时不需要指定ip,直接指定服务名
参考博客:https://blog.csdn.net/awhip9/article/details/70599014
一、建立服务消费者
1、项目建立可参考上一篇博客:https://blog.csdn.net/zjh_746140129/article/details/80557302
2、项目pom.xml 新增
 <dependency>
			<groupId>org.springframework.cloud</groupId>
			<artifactId>spring-cloud-starter-ribbon</artifactId>
		</dependency>
完整pom.xml
<?xml version="1.0" encoding="UTF-8"?>
<project xmlns="http://maven.apache.org/POM/4.0.0" xmlns:xsi="http://www.w3.org/2001/XMLSchema-instance"
xsi:schemaLocation="http://maven.apache.org/POM/4.0.0 http://maven.apache.org/xsd/maven-4.0.0.xsd">
<modelVersion>4.0.0</modelVersion>
<groupId>com.serverribbon</groupId>
<artifactId>serverribbon</artifactId>
<version>0.0.1-SNAPSHOT</version>
<packaging>jar</packaging>
<name>serverribbon</name>
<description>Demo project for Spring Boot</description>
<parent>
<groupId>org.springframework.boot</groupId>
<artifactId>spring-boot-starter-parent</artifactId>
<version>2.0.2.RELEASE</version>
<relativePath/> <!-- lookup parent from repository -->
</parent>
<properties>
<project.build.sourceEncoding>UTF-8</project.build.sourceEncoding>
<project.reporting.outputEncoding>UTF-8</project.reporting.outputEncoding>
<java.version>1.8</java.version>
<spring-cloud.version>Finchley.RC2</spring-cloud.version>
</properties>
<dependencies>
<dependency>
<groupId>org.springframework.cloud</groupId>
<artifactId>spring-cloud-starter-netflix-eureka-server</artifactId>
</dependency>
<dependency>
<groupId>org.springframework.cloud</groupId>
<artifactId>spring-cloud-starter-ribbon</artifactId>
</dependency>
<dependency>
<groupId>org.springframework.boot</groupId>
<artifactId>spring-boot-starter-test</artifactId>
<scope>test</scope>
</dependency>
</dependencies>
<dependencyManagement>
<dependencies>
<dependency>
<groupId>org.springframework.cloud</groupId>
<artifactId>spring-cloud-dependencies</artifactId>
<version>${spring-cloud.version}</version>
<type>pom</type>
<scope>import</scope>
</dependency>
</dependencies>
</dependencyManagement>
<build>
<plugins>
<plugin>
<groupId>org.springframework.boot</groupId>
<artifactId>spring-boot-maven-plugin</artifactId>
</plugin>
</plugins>
</build>
<repositories>
<repository>
<id>spring-milestones</id>
<name>Spring Milestones</name>
<url>https://repo.spring.io/milestone</url>
<snapshots>
<enabled>false</enabled>
</snapshots>
</repository>
</repositories>
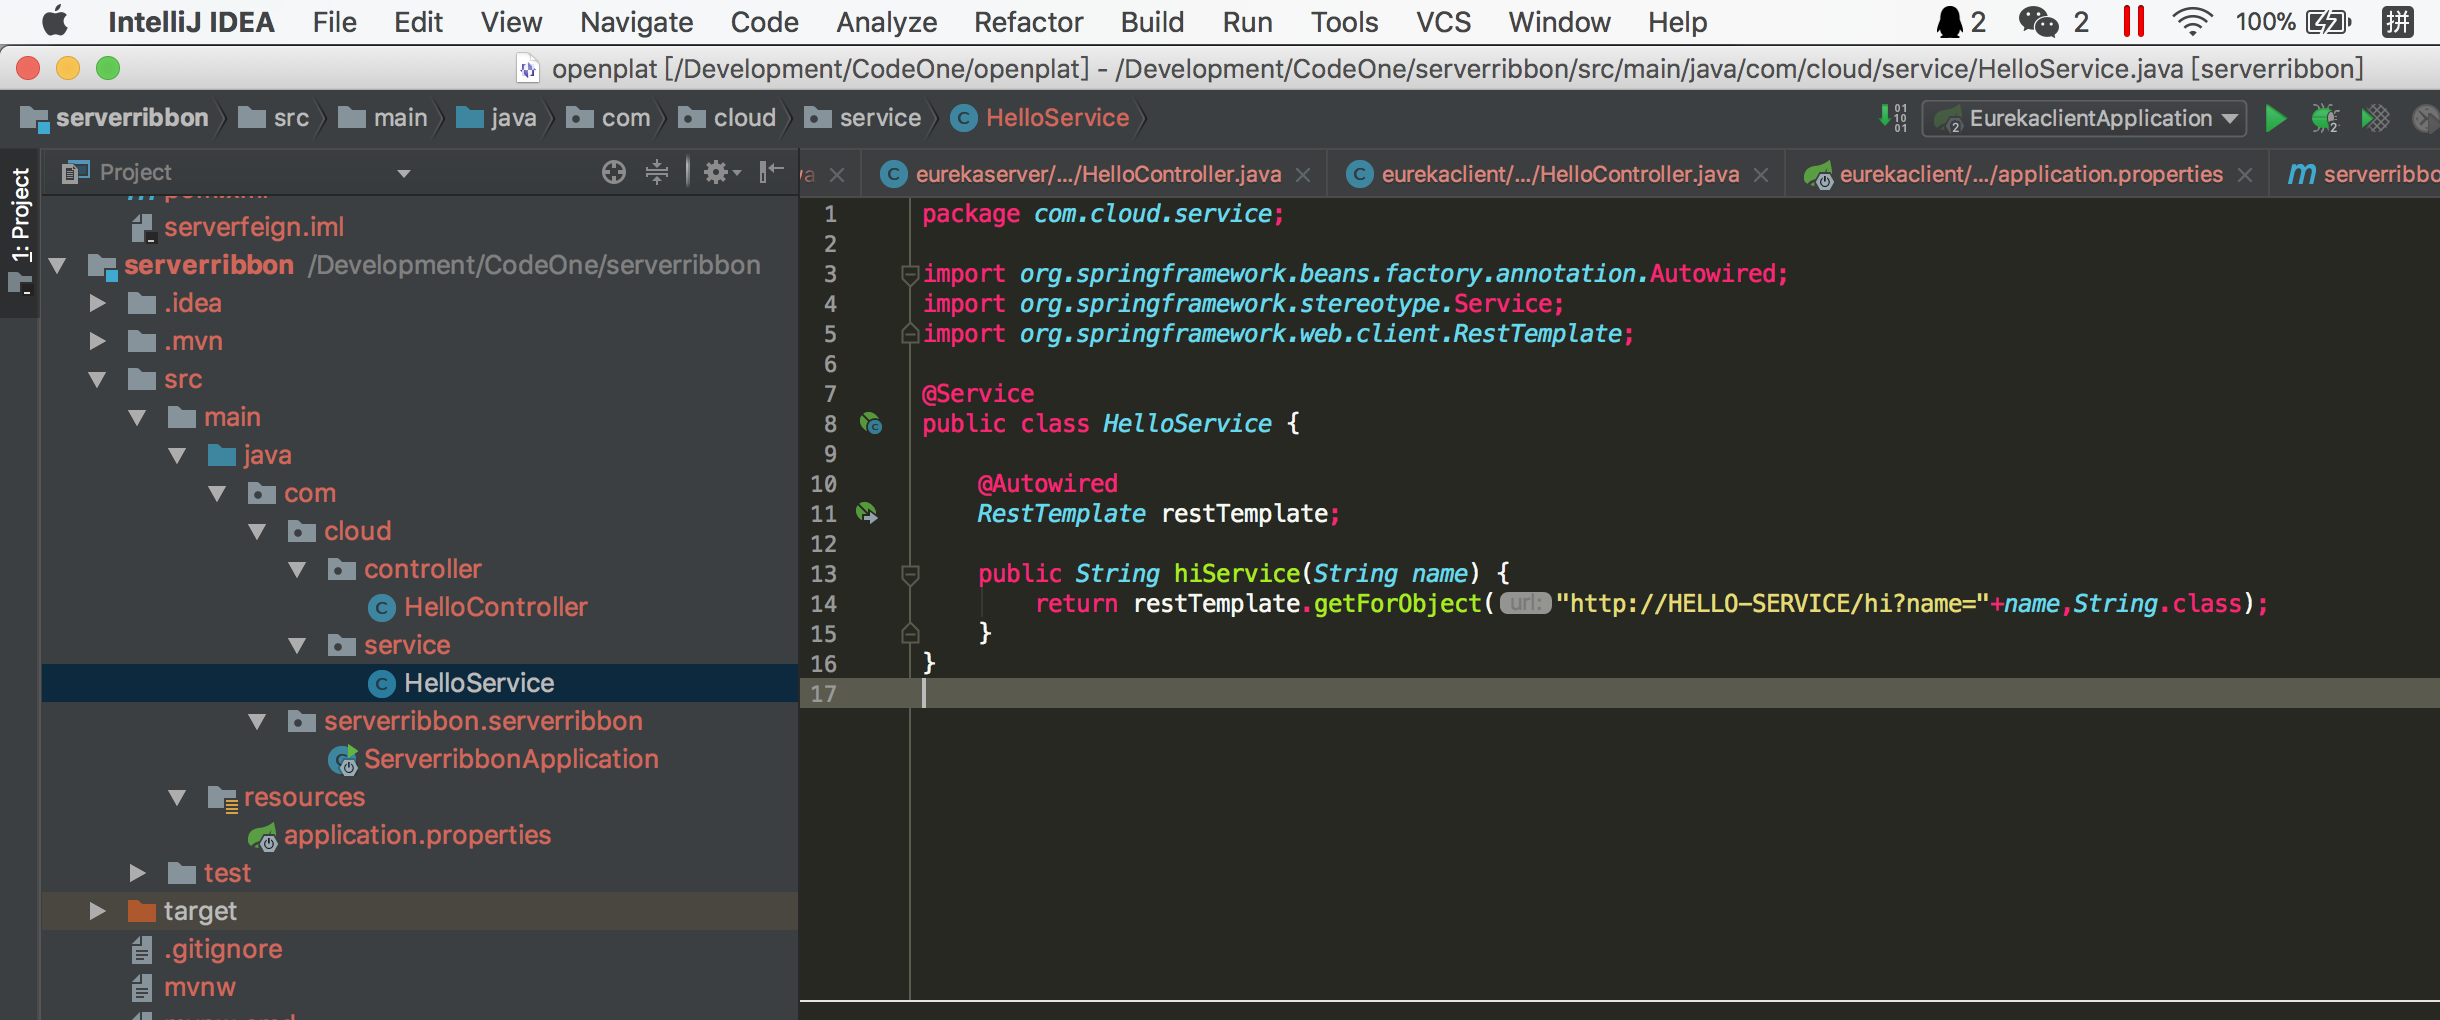
</project>3、编写服务消费Service和Controller
通过之前注入ioc容器的restTemplate来消费hello-service服务的“/hi”接口,在这里我们直接用的程序名替代了具体的url地址,在ribbon中它会根据服务名来选择具体的服务实例,根据服务实例在请求的时候会用具体的url替换掉服务名
package com.cloud.service;

import org.springframework.beans.factory.annotation.Autowired;
import org.springframework.stereotype.Service;
import org.springframework.web.client.RestTemplate;

@Service
public class HelloService {

    @Autowired
    RestTemplate restTemplate;

    public String hiService(String name) {
        return restTemplate.getForObject("http://HELLO-SERVICE/hi?name="+name,String.class);
    }
}
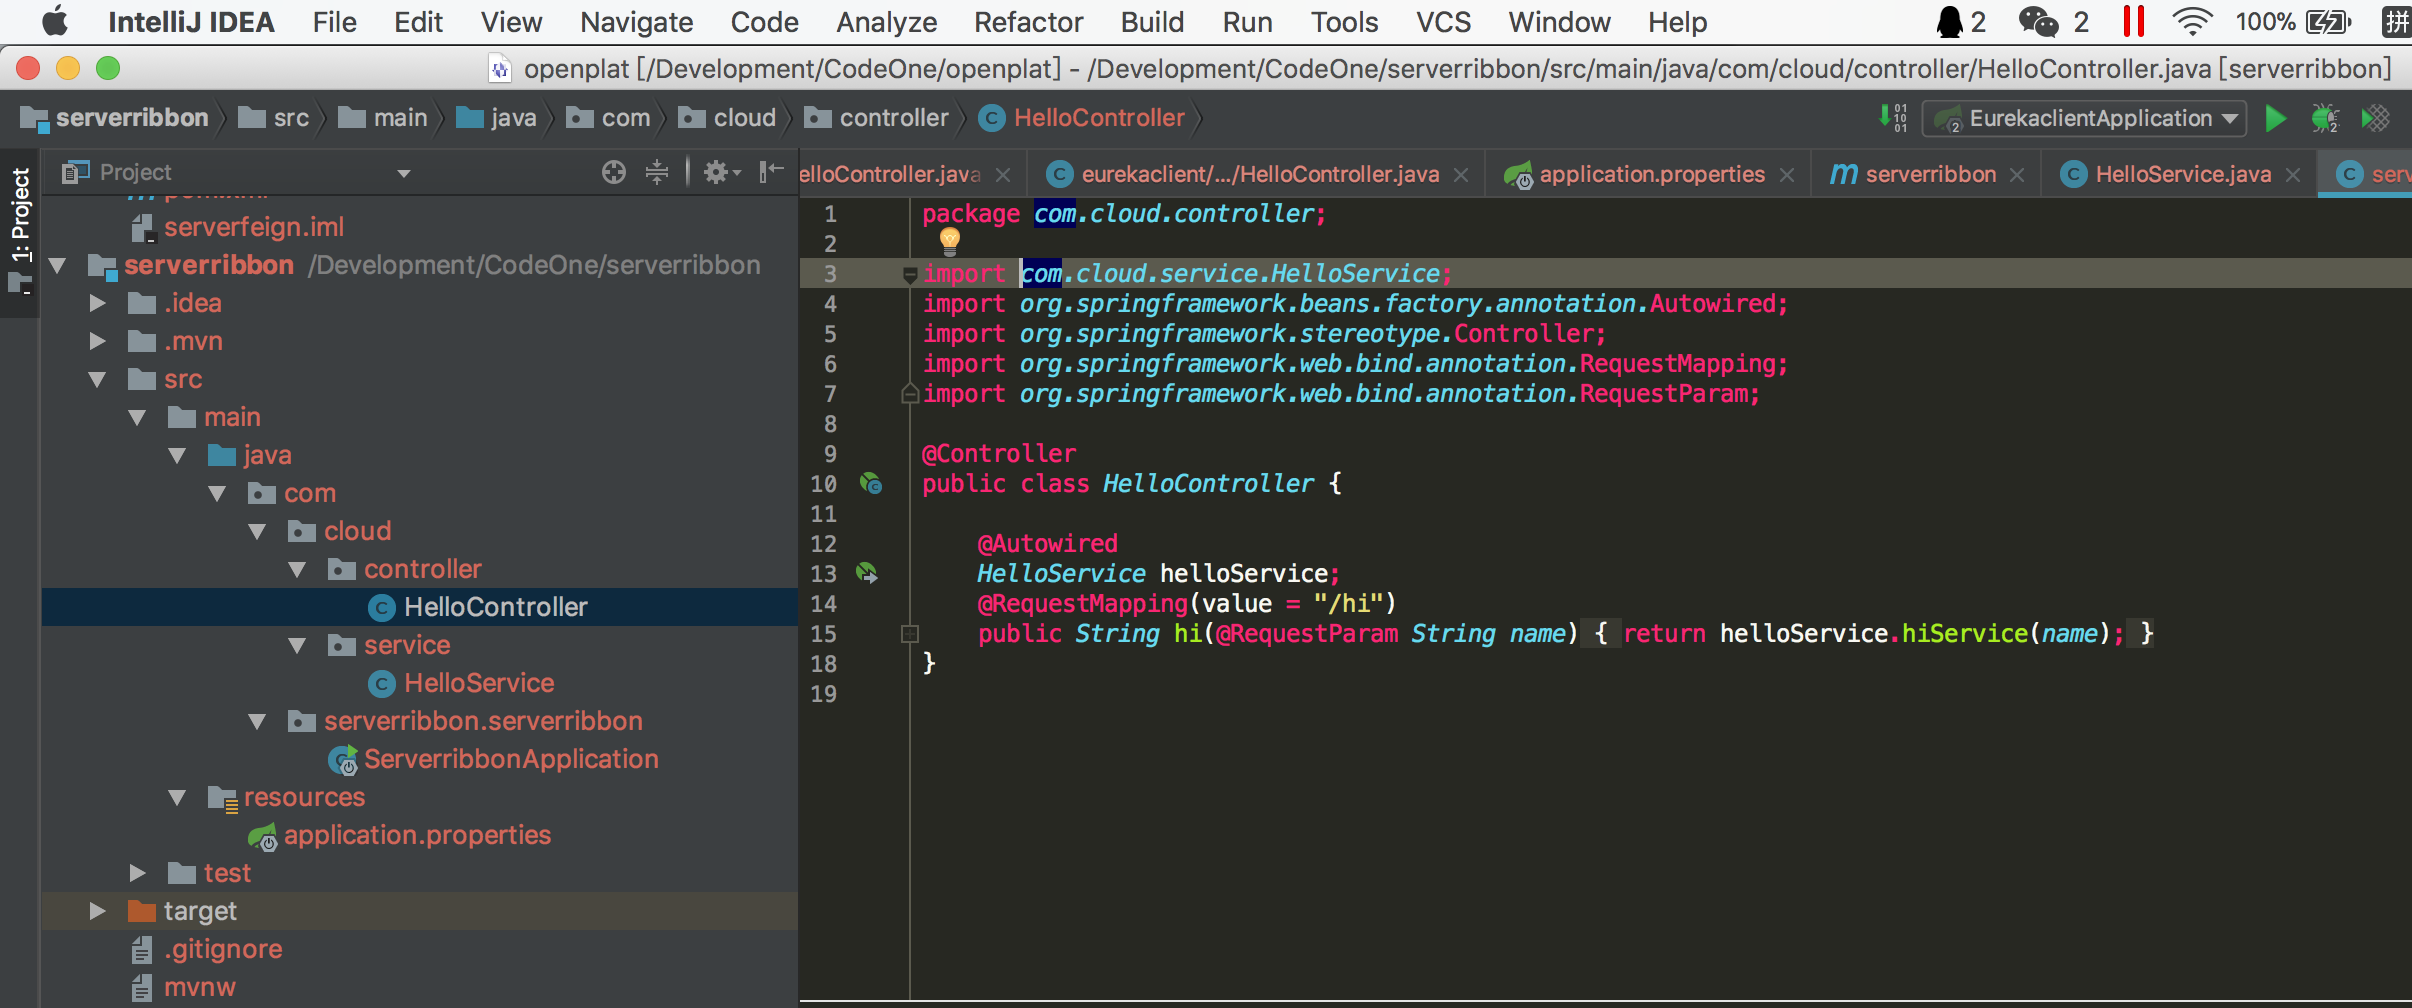
package com.cloud.controller;

import com.cloud.service.HelloService;
import org.springframework.beans.factory.annotation.Autowired;
import org.springframework.stereotype.Controller;
import org.springframework.web.bind.annotation.RequestMapping;
import org.springframework.web.bind.annotation.RequestParam;
import org.springframework.web.bind.annotation.ResponseBody;

@Controller
public class HelloController {

    @Autowired
    HelloService helloService;
    @RequestMapping(value = "/hi")
    @ResponseBody
    public String hi(@RequestParam String name){
        return helloService.hiService(name);
    }
}
4、修改配置文件
server.port=8763
spring.application.name=service-ribbon
#指定服务中心地址
eureka.client.service-url.defaultZone=http://localhost:8761/eureka/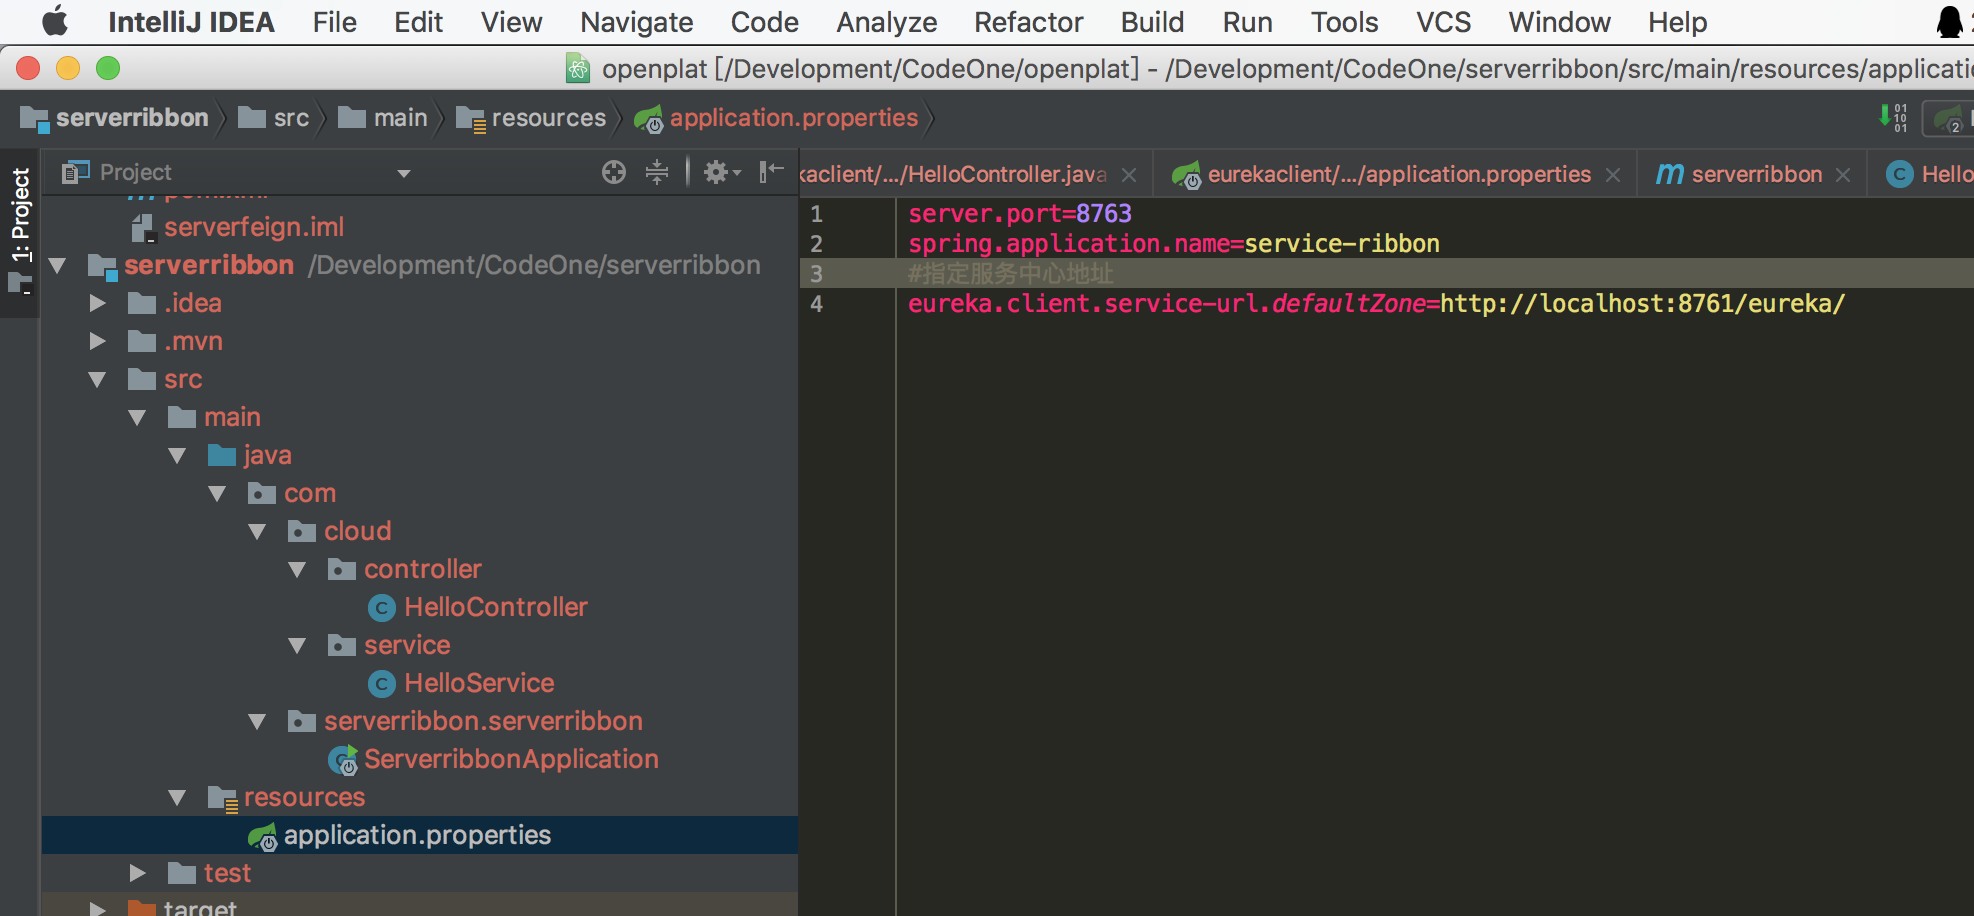
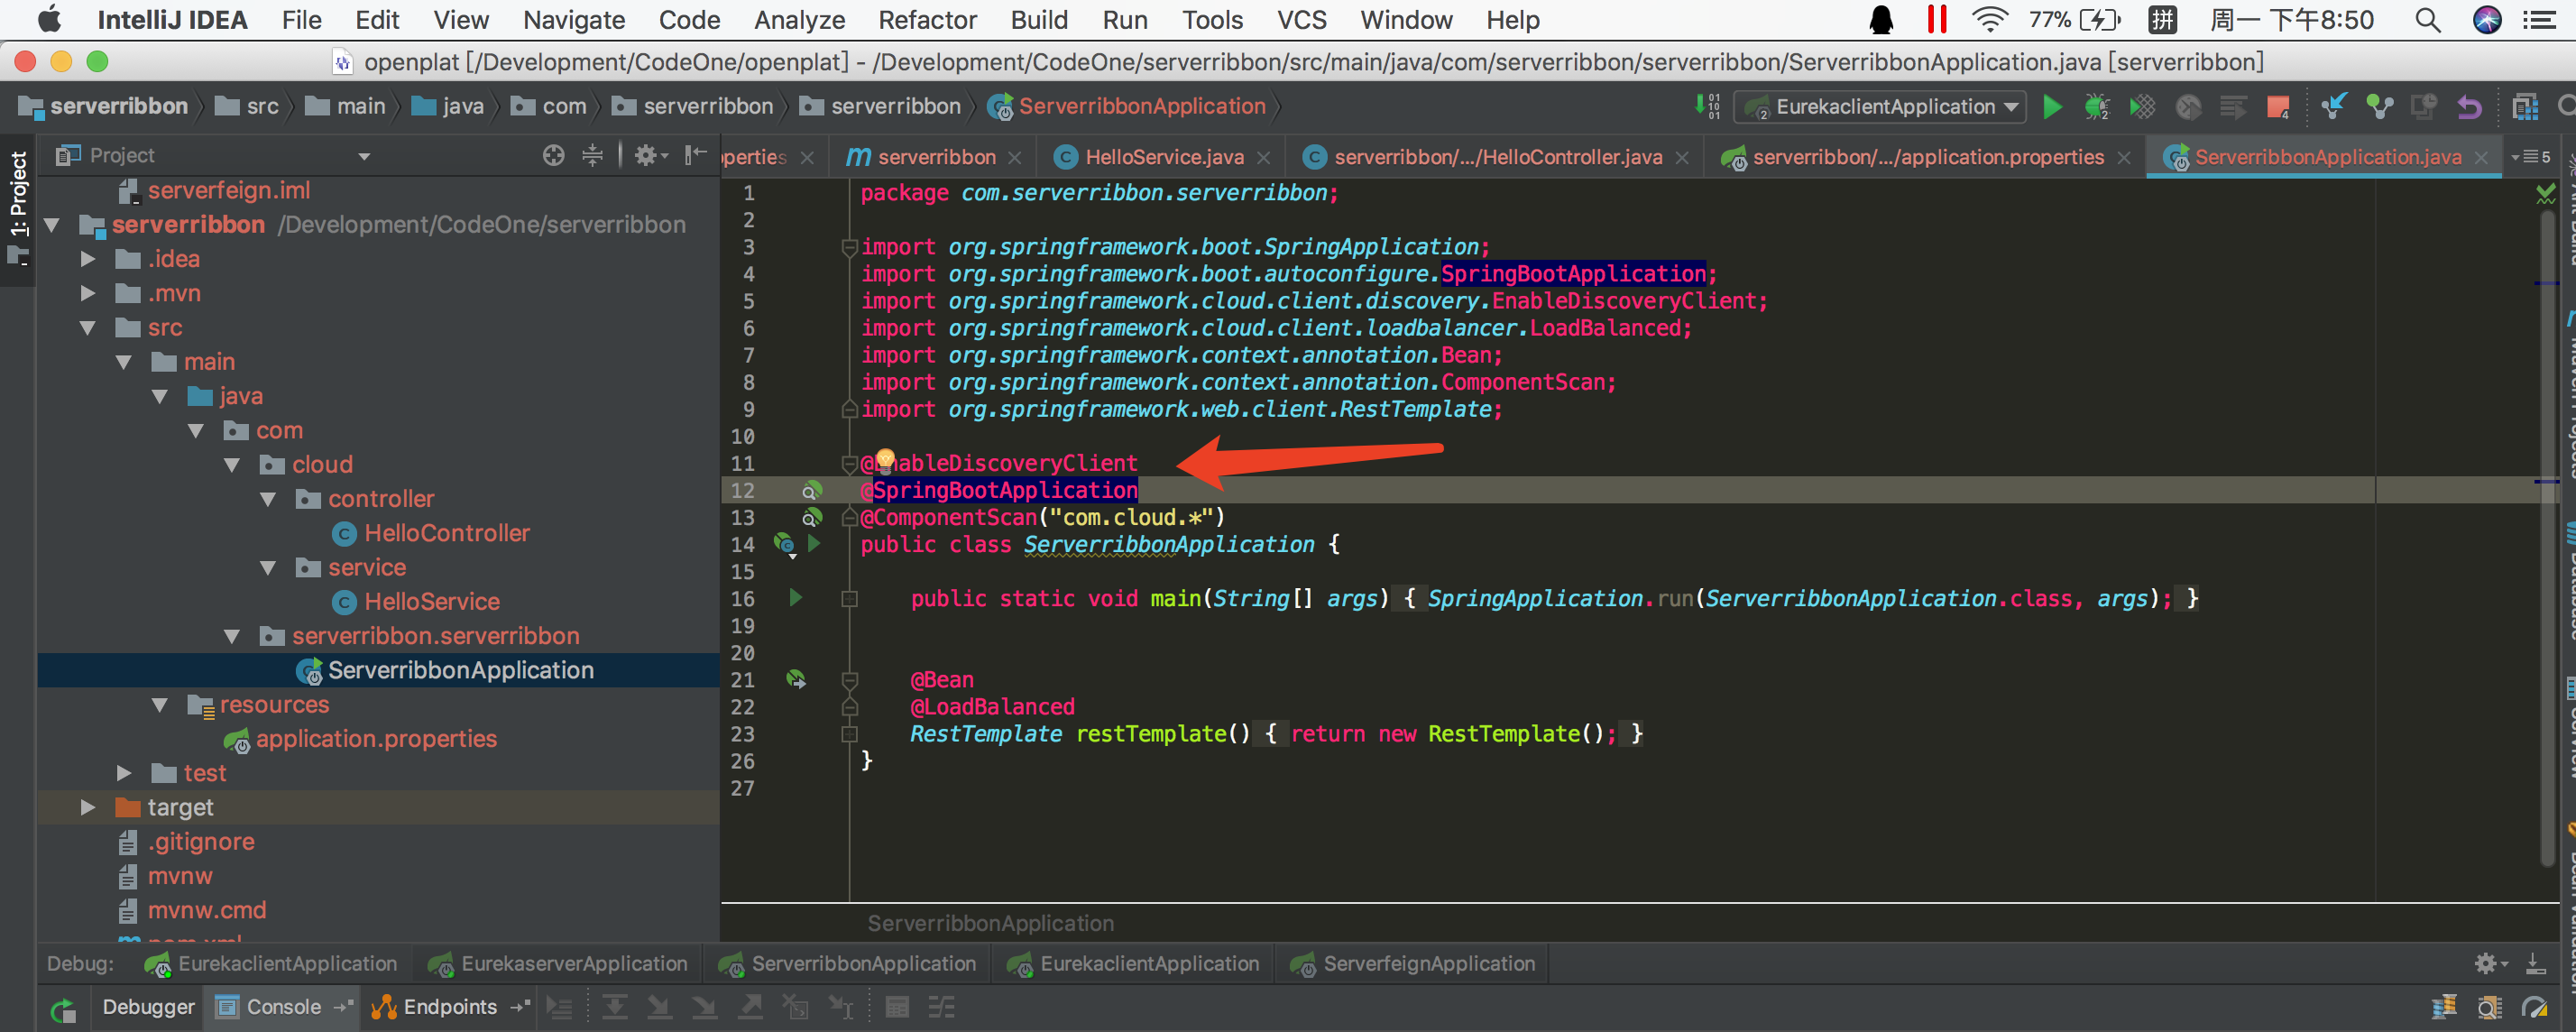
5、修改启动类
在工程的启动类中,通过@EnableDiscoveryClient向服务中心注册;并且向程序的ioc注入一个bean: restTemplate;并通过@LoadBalanced注解表明这个restRemplate开启负载均衡的功能。
package com.serverribbon.serverribbon;

import org.springframework.boot.SpringApplication;
import org.springframework.boot.autoconfigure.SpringBootApplication;
import org.springframework.cloud.client.discovery.EnableDiscoveryClient;
import org.springframework.cloud.client.loadbalancer.LoadBalanced;
import org.springframework.context.annotation.Bean;
import org.springframework.context.annotation.ComponentScan;
import org.springframework.web.client.RestTemplate;

@EnableDiscoveryClient
@SpringBootApplication
@ComponentScan("com.cloud.*")
public class ServerribbonApplication {

	public static void main(String[] args) {
		SpringApplication.run(ServerribbonApplication.class, args);
	}


	@Bean
	@LoadBalanced
	RestTemplate restTemplate() {
		return new RestTemplate();
	}
}
二、启动服务注册中心、服务提供者(2个)、服务消费者

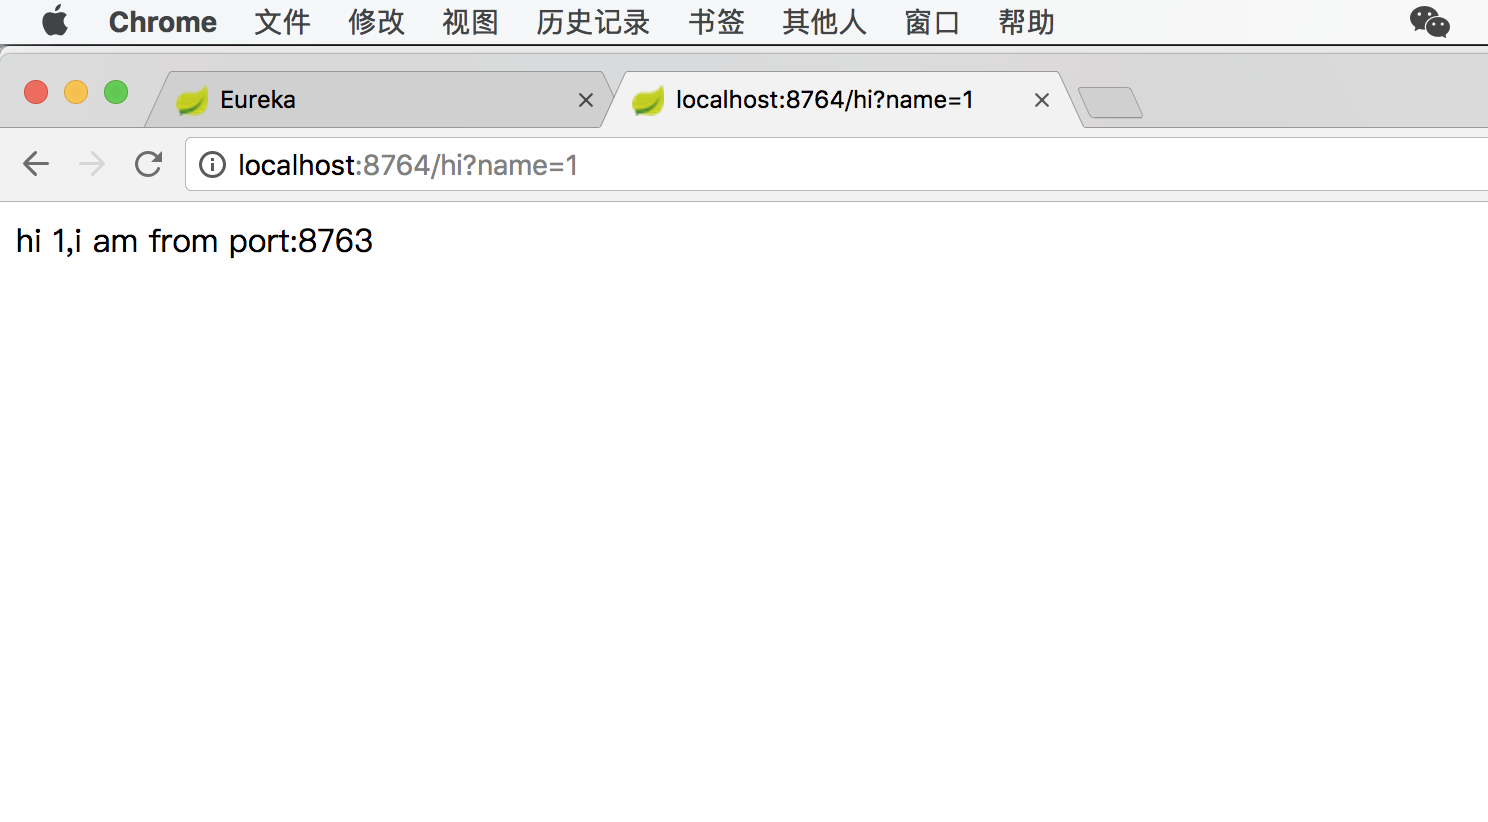
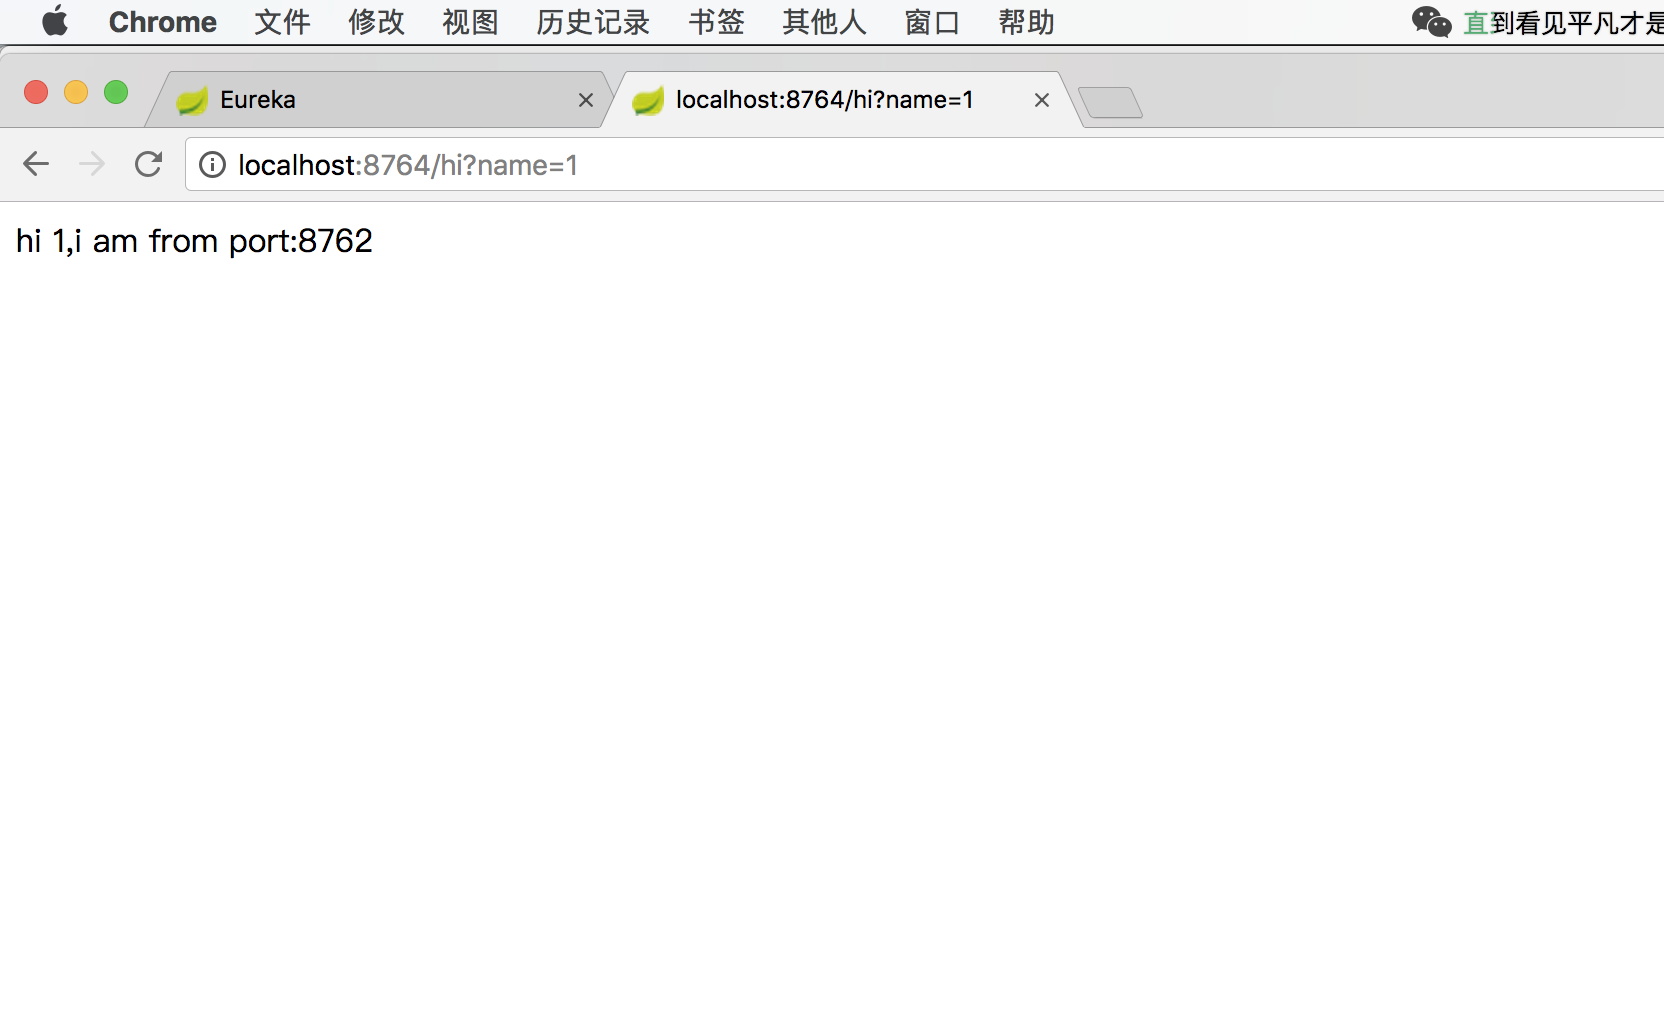
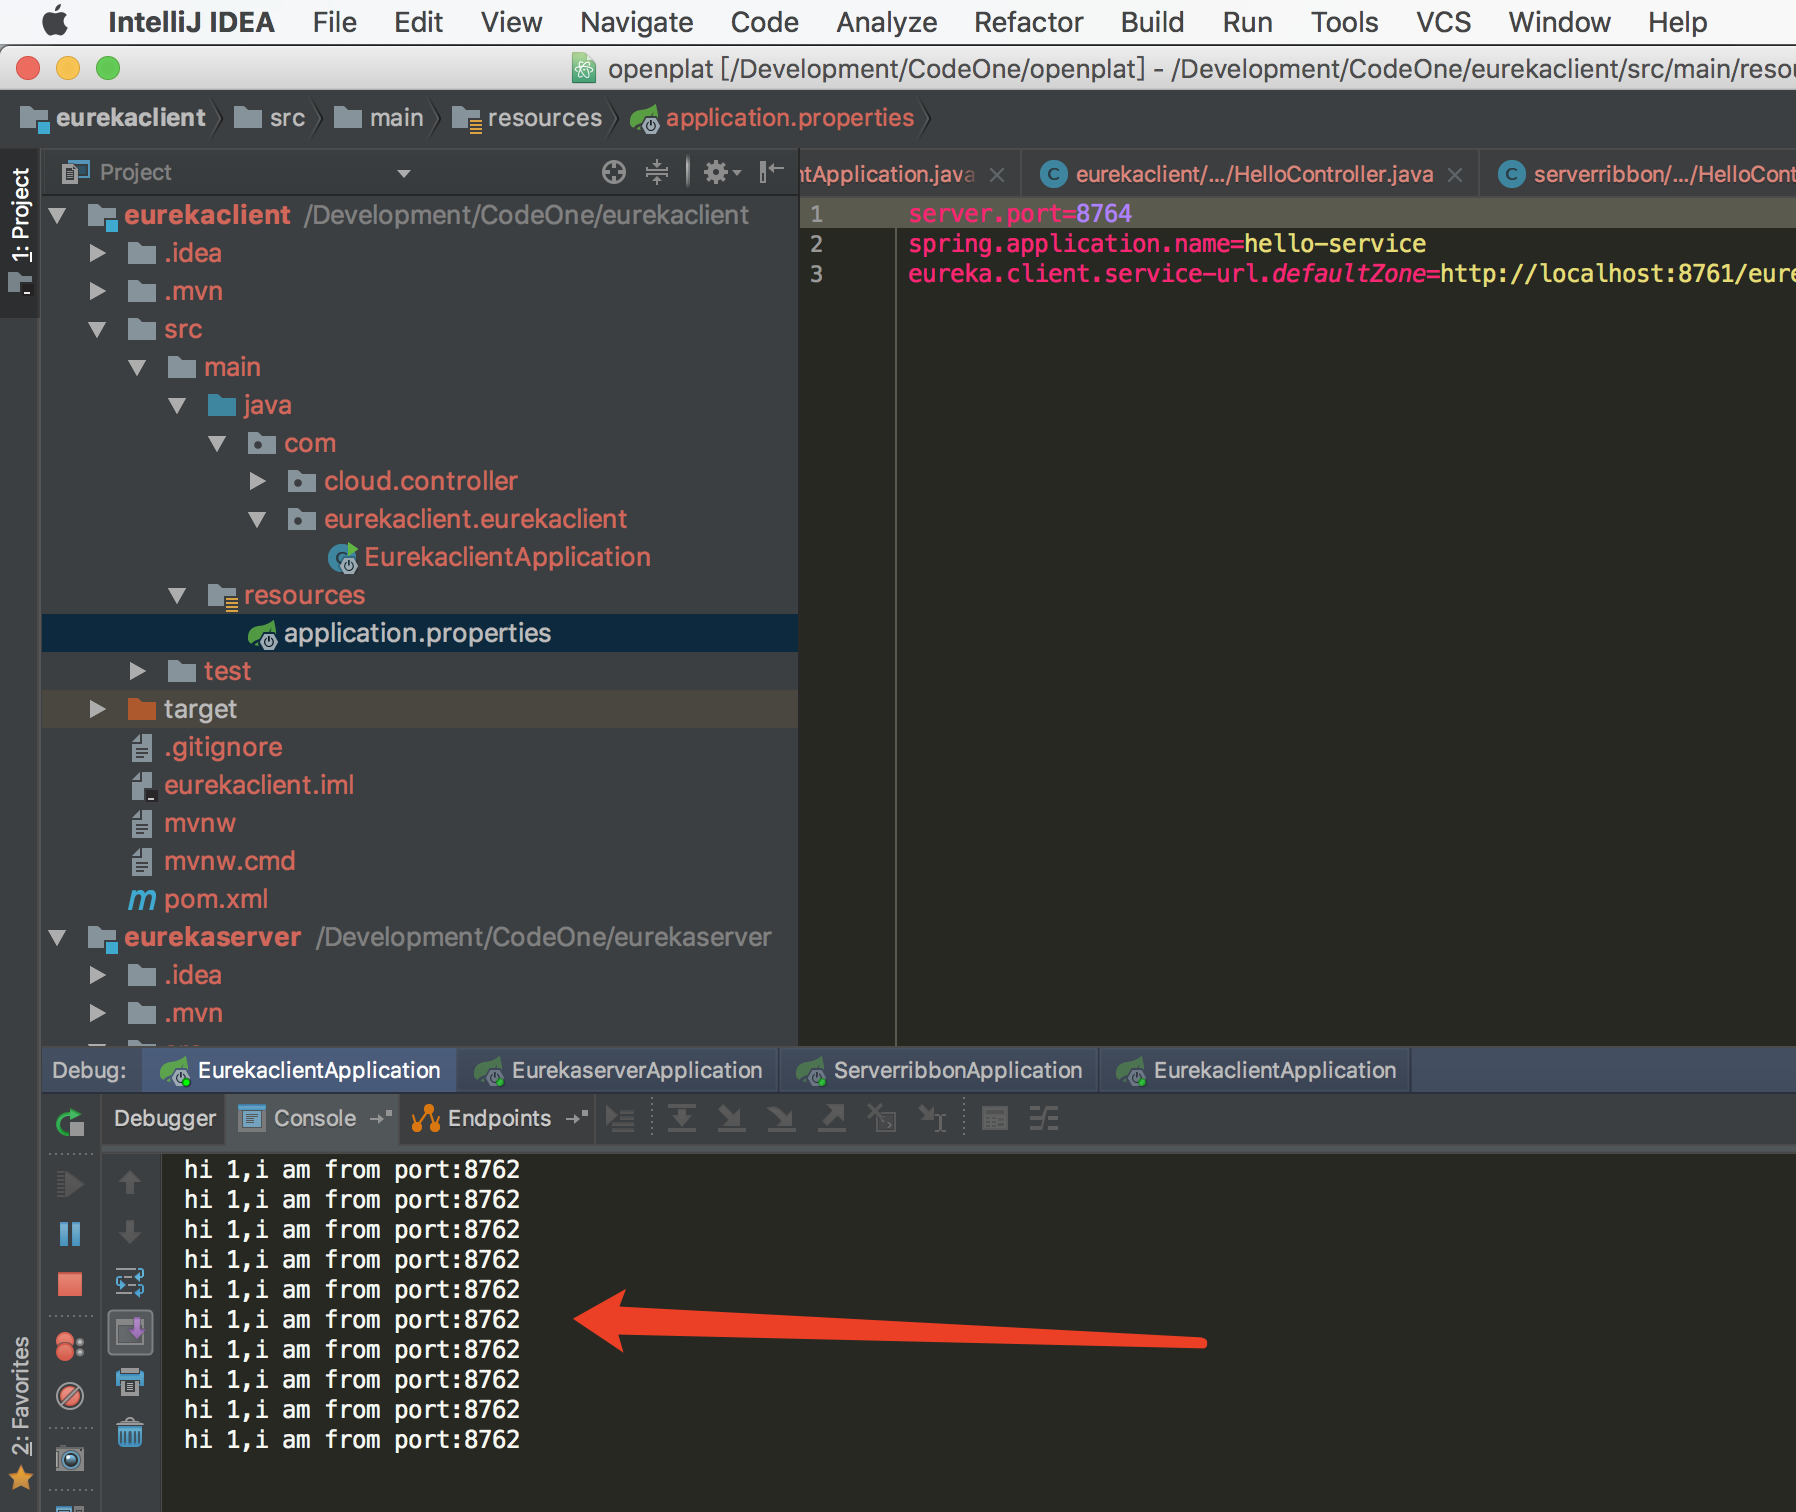
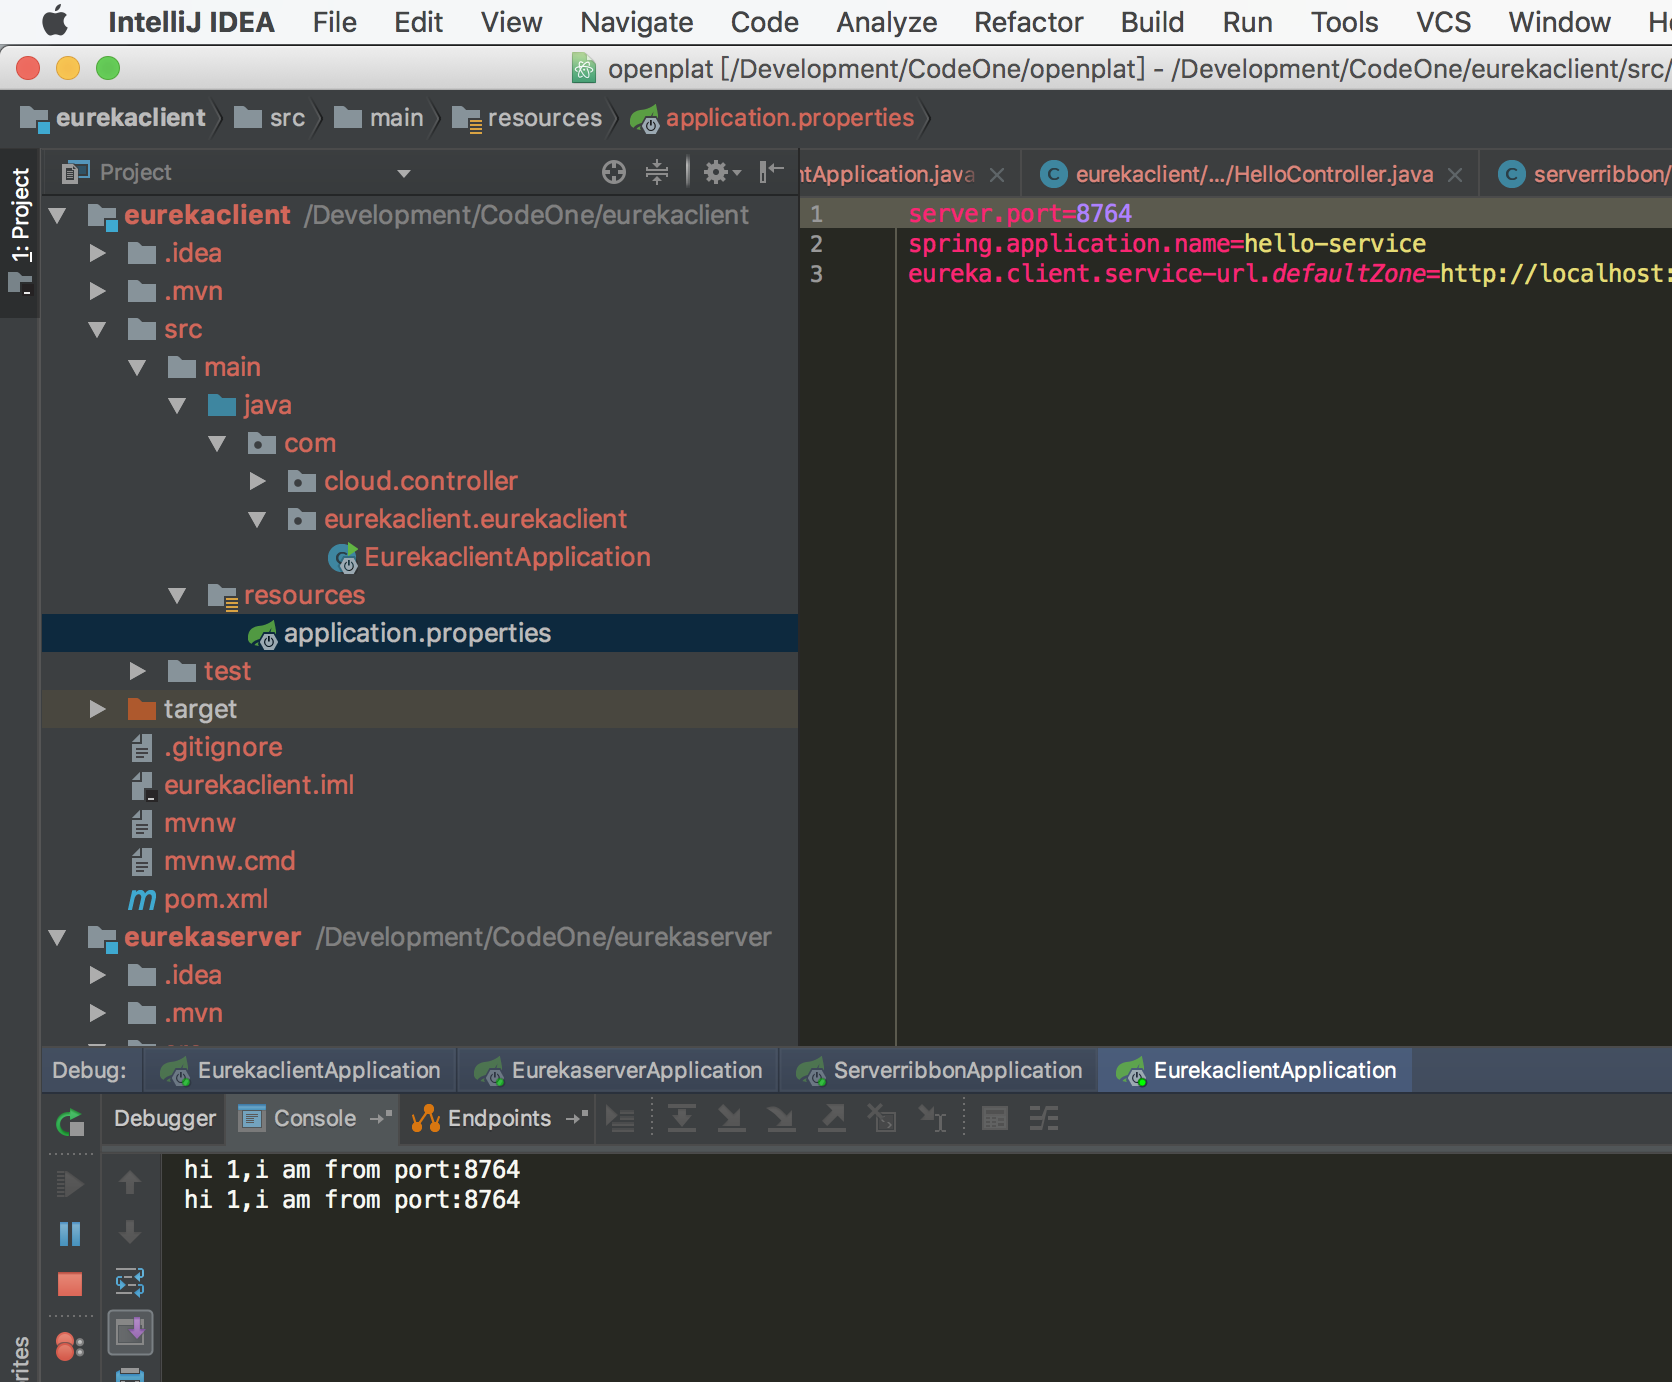
三、刷新消费者,查看服务提供者后台打印,此时已经完成了消费的负载均衡(这里采用了轮训)
Spring Boot与Spring Cloud学习使用可参看笔者博客
①Spring Cloud入门教程之服务注册与发现Eureka
②Spring Cloud入门教程之服务消费者 Ribbon
③Spring Cloud入门教程之服务消费者 Feign
④Spring Cloud入门教程之断路器 Hystrix
⑤Spring Cloud入门教程之断路由网关 Zuul
⑥Spring Cloud入门教程之分布式配置中心 Spring Cloud Config
⑦idea下新建Spring Boot项目并配置启动
⑧Spring Boot无法自动注入bean问题解决方案
⑨idea 设置Spring Boot热部署
最后
以上就是贪玩网络最近收集整理的关于Spring Cloud入门教程之服务消费者 Ribbon(二)(Finchley版本+Boot2.0)的全部内容,更多相关Spring内容请搜索靠谱客的其他文章。


发表评论 取消回复