一、配置地址重写
1、 创建访问目录和测试页
1)
创建目录和测试页
[root@centos01 ~]# mkdir /code
[root@centos01 ~]# mkdir /code/zh
[root@centos01 ~]# mkdir /code/en
[root@centos01 ~]# echo “zh” > /code/zh/index.html
[root@centos01 ~]# echo “en” > /code/en/index.html
[root@centos01 ~]# echo “wwwwww” > /code/index.html
2)
配置地址重写
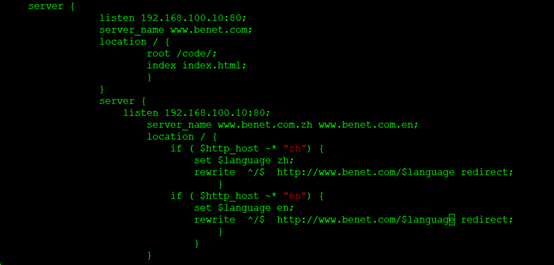
[root@centos01 ~]# vim /usr/local/nginx/conf/nginx.conf
server {
listen 192.168.100.10:80;
server_name www.benet.com;
location / {
root /code/;
index index.html;
}
}
server {
listen 192.168.100.10:80;
server_name www.benet.com.zh www.benet.com.en;
location / {
if ( $http_host ~* “zh”) {
set
l
a
n
g
u
a
g
e
z
h
;
r
e
w
r
i
t
e
/
language zh; rewrite ^/
languagezh;rewrite/ http://www.benet.com/$language redirect;
}
if ( $http_host ~* “en”) {
set
l
a
n
g
u
a
g
e
e
n
;
r
e
w
r
i
t
e
/
language en; rewrite ^/
languageen;rewrite/ http://www.benet.com/$language redirect;
}
}
}
3)
杀死nginx并查看和启动查看
[root@centos01 ~]# killall nginx
[root@centos01 ~]# nginx -t

[root@centos01 ~]# nginx
[root@centos01 ~]# netstat -anptu | grep 80

2、 配置DNS
1)
配置dns
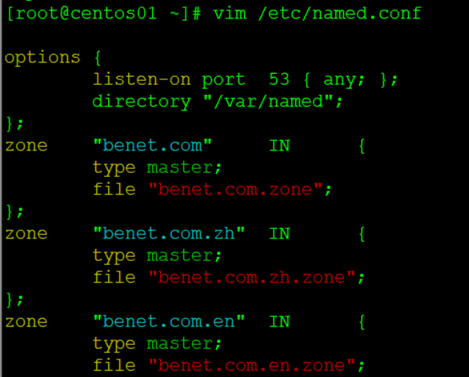
[root@centos01 ~]# vim /etc/named.conf
options {
listen-on port 53 { any; };
directory “/var/named”;
};
zone “benet.com” IN {
type master;
file “benet.com.zone”;
};
zone “benet.com.zh” IN {
type master;
file “benet.com.zh.zone”;
};
zone “benet.com.en” IN {
type master;
file “benet.com.en.zone”;
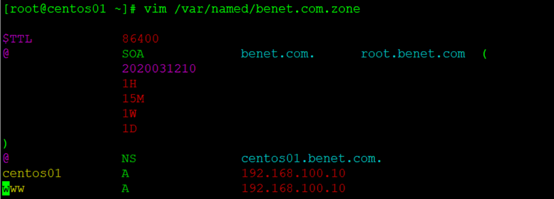
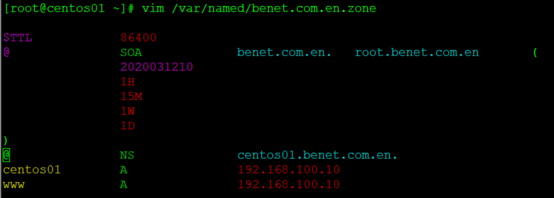
[root@centos01 ~]# vim /var/named/benet.com.zone
$TTL 86400
@ SOA benet.com. root.benet.com (
2020031210
1H
15M
1W
1D
)
@ NS centos01.benet.com.
centos01 A 192.168.100.10
www A 192.168.100.10
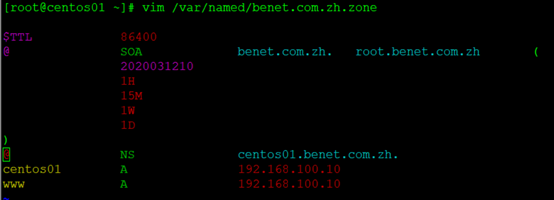
[root@centos01 ~]# vim /var/named/benet.com.zh.zone
$TTL 86400
@ SOA benet.com.zh. root.benet.com.zh (
2020031210
1H
15M
1W
1D
)
@ NS centos01.benet.com.zh.
centos01 A 192.168.100.10
www A 192.168.100.10
[root@centos01 ~]# vim /var/named/benet.com.en.zone
$TTL 86400
@ SOA benet.com.en. root.benet.com.en (
2020031210
1H
15M
1W
1D
)
@ NS centos01.benet.com.en.
centos01 A 192.168.100.10
www A 192.168.100.10
2)
重新启动
[root@centos01 ~]# systemctl restart named
3、 客户端访问
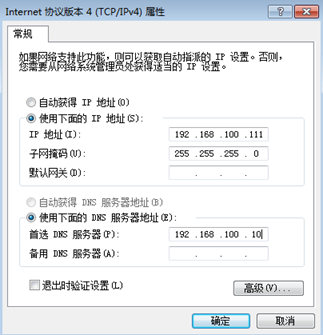
1)
客户端配置IP地址
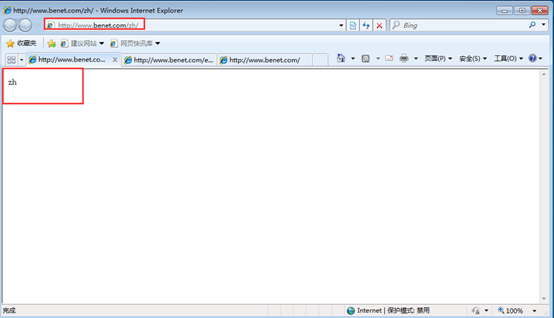
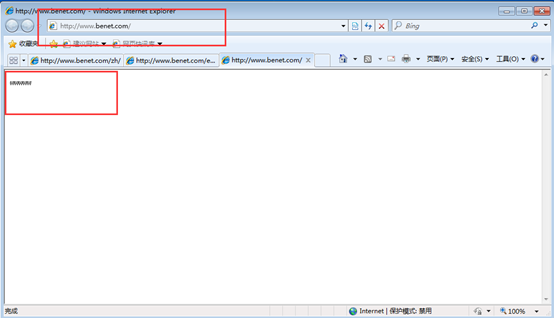
2)
客户端访问

*二、 配置基于域名地址跳转
1)
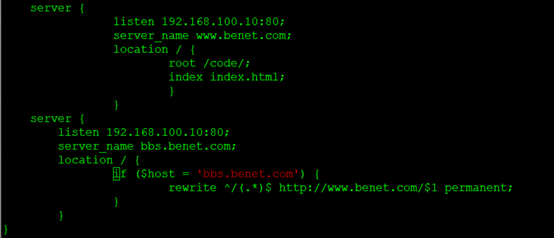
基于域名地址跳转**
[root@centos01 ~]# vim /usr/local/nginx/conf/nginx.conf
server {
listen 192.168.100.10:80;
server_name www.benet.com;
location / {
root /code/;
index index.html;
}
}
server {
listen 192.168.100.10:80;
server_name bbs.benet.com;
location / {
if (KaTeX parse error: Expected '}', got 'EOF' at end of input: … rewrite ^/(.*) http://www.benet.com/$1 permanent;
}
}
}
2)
查看是否错误,重新启动ngixn
[root@centos01 ~]# nginx -t

[root@centos01 ~]# killall nginx
[root@centos01 ~]# nginx
3)
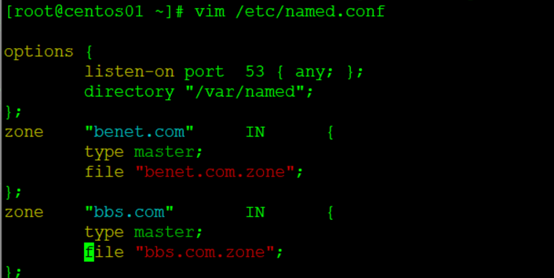
配置dns并重新启动
[root@centos01 ~]# vim /etc/named.conf
options {
listen-on port 53 { any; };
directory “/var/named”;
};
zone “benet.com” IN {
type master;
file “benet.com.zone”;
};
zone “bbs.com” IN {
type master;
file “bbs.com.zone”;
};
[root@centos01 ~]# cp /var/named/benet.com.zone /var/named/bbs.com.zone
[root@centos01 ~]# vim /var/named/bbs.com.zone
[root@centos01 ~]# vim /var/named/bbs.com.zone
$TTL 86400
@ SOA bbs.com. root.bbs.com (
2020031210
1H
15M
1W
1D
)
@ NS centos01.bbs.com.
centos01 A 192.168.100.10
www A 192.168.100.10
[root@centos01 ~]# systemctl restart named
4)
客户端访问
**三、 配置客户端带参数跳转
1)
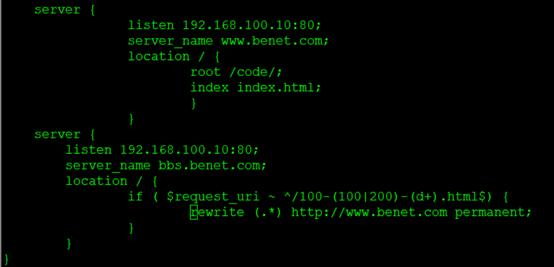
客户端带参数跳转**
[root@centos01 ~]# vim /usr/local/nginx/conf/nginx.conf
server {
listen 192.168.100.10:80;
server_name www.benet.com;
location / {
root /code/;
index index.html;
}
}
server {
listen 192.168.100.10:80;
server_name bbs.benet.com;
location / {
if (
r
e
q
u
e
s
t
u
r
i
/
100
−
(
100
∣
200
)
−
(
d
+
)
.
h
t
m
l
request_uri ~ ^/100-(100|200)-(d+).html
requesturi /100−(100∣200)−(d+).html) {
rewrite (.*) http://www.benet.com permanent;
}
}
}
2)
检查nginx是否配置错误并重启
[root@centos01 ~]# nginx -t

[root@centos01 ~]# killall nginx
[root@centos01 ~]# nginx
3)
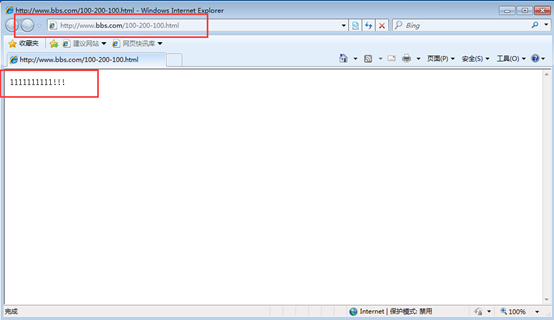
创建一个带符号的测试页
[root@centos01 ~]# vim /code/100-200-100.html
1111111111!!!

4)
客户端访问
最后
以上就是优秀飞机最近收集整理的关于Nginx配置地址重写、基于域名地址跳转、配置客户端带参数跳转(1)的全部内容,更多相关Nginx配置地址重写、基于域名地址跳转、配置客户端带参数跳转(1)内容请搜索靠谱客的其他文章。


发表评论 取消回复