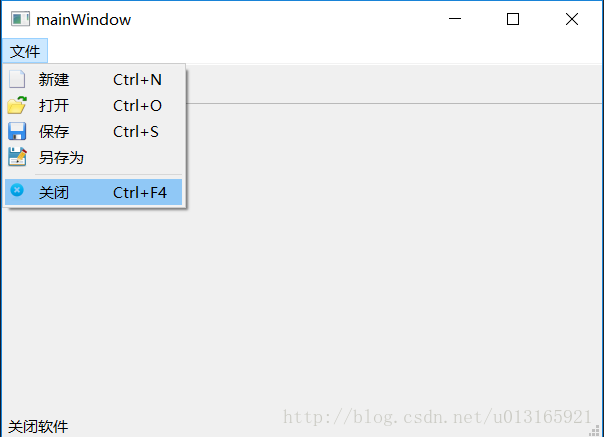
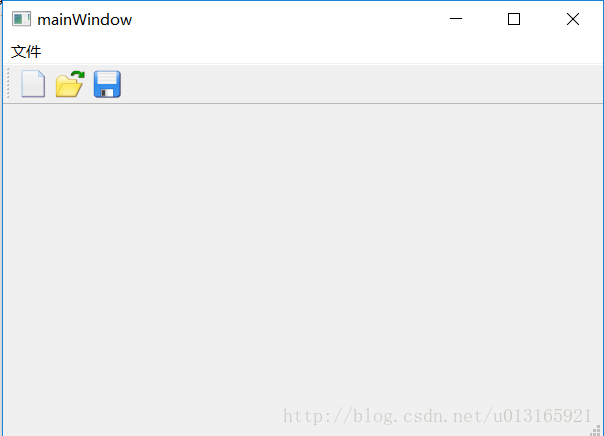
前文已经讲解了菜单栏、工具栏、任务栏的实现方法,下面我们对程序进行完善。实现功能为:为软件添加“文件”菜单,并在下拉列表上添加”新建”、 ”打开”、 ”保存”、 ”另存为”、 ”关闭”,并在工具栏加上“新建”、“打开”、“保存”图标。
代码
// 头文件
#pragma once
#include <QtWidgets/QMainWindow>
#include <QtGui>
#include <QtWidgets>
#include <QMainWindow>
#include "ui_mainWindow.h"

class mainWindow : public QMainWindow
{
    Q_OBJECT

public:
    mainWindow(QWidget *parent = Q_NULLPTR);
    ~mainWindow();

private:
    Ui::mainWindowClass ui;

    QDockWidget *dock_Image;                    // 图像窗口
    QString currentPath;                        // 当前图像的路径
    QLabel *imgLabel;                           // 图像显示框
    void InitImage();                           // 初始化图像
    void Menu_File();                           // 文件菜单

private slots :
    void File_new();        // 新建
    void File_open();       // 打开
    void File_save();       // 保存
    void File_saveas();     // 另存为
                            // 关闭不需要,直接使用close()
};
// CPP
#include "mainWindow.h"
#include <QtGui>
#include <QtWidgets>
#include <QMainWindow>
#pragma execution_character_set("utf-8")
mainWindow::mainWindow(QWidget *parent)
: QMainWindow(parent)
{
ui.setupUi(this);
Menu_File(); // 文件菜单
InitImage(); // 初始化图像QLabel
}
mainWindow::~mainWindow()
{
}
void mainWindow::Menu_File() // 文件菜单
{
// 菜单栏
QMenu *file = menuBar()->addMenu(tr("文件"));
// 菜单动作
QAction *Act_file_new = new QAction(QIcon("../Image/file/New.png"), tr("新建"), this);
Act_file_new->setShortcuts(QKeySequence::New); // 快捷键 Ctrl+N
connect(Act_file_new, SIGNAL(triggered()), this, SLOT(File_new()));
QAction *Act_file_open = new QAction(QIcon("../Image/file/Open.png"), tr("打开"), this);
Act_file_open->setShortcuts(QKeySequence::Open);// 快捷键 Ctrl+O
connect(Act_file_open, SIGNAL(triggered()), this, SLOT(File_open()));
QAction *Act_file_save = new QAction(QIcon("../Image/file/Save.png"), tr("保存"), this);
Act_file_save->setShortcuts(QKeySequence::Save);// 快捷键 Ctrl+S
connect(Act_file_save, SIGNAL(triggered()), this, SLOT(File_save()));
QAction *Act_file_saveas = new QAction(QIcon("../Image/file/SaveAs.png"), tr("另存为"), this);
Act_file_saveas->setShortcuts(QKeySequence::SaveAs);// 快捷键
connect(Act_file_saveas, SIGNAL(triggered()), this, SLOT(File_saveas()));
QAction *Act_file_close = new QAction(QIcon("../Image/file/Close.png"), tr("关闭"), this);
Act_file_close->setShortcuts(QKeySequence::Close);// 快捷键 Ctrl+F4
connect(Act_file_close, SIGNAL(triggered()), this, SLOT(close()));
// 将动作添加到菜单上
file->addAction(Act_file_new);
file->addAction(Act_file_open);
file->addAction(Act_file_save);
file->addAction(Act_file_saveas);
file->addSeparator(); //添加分割线
file->addAction(Act_file_close);
// 工具栏
ui.mainToolBar->addAction(Act_file_new);
ui.mainToolBar->addAction(Act_file_open);
ui.mainToolBar->addAction(Act_file_save);
// 任务栏
Act_file_new->setStatusTip(tr("新建图像"));
Act_file_open->setStatusTip(tr("打开图像"));
Act_file_save->setStatusTip(tr("保存图像"));
Act_file_saveas->setStatusTip(tr("图像另存为"));
Act_file_close->setStatusTip(tr("关闭软件"));
}
void mainWindow::InitImage() // 初始化图像Label
{
//……
}
void mainWindow::File_new() // 新建
{
//……
}
void mainWindow::File_open() // 打开
{
//……
}
void mainWindow::File_save() // 保存
{
//……
}
void mainWindow::File_saveas() // 另存为
{
//……
} 软件的运行结果如下:


运行无误,界面基本完成了。下面完善功能部分。
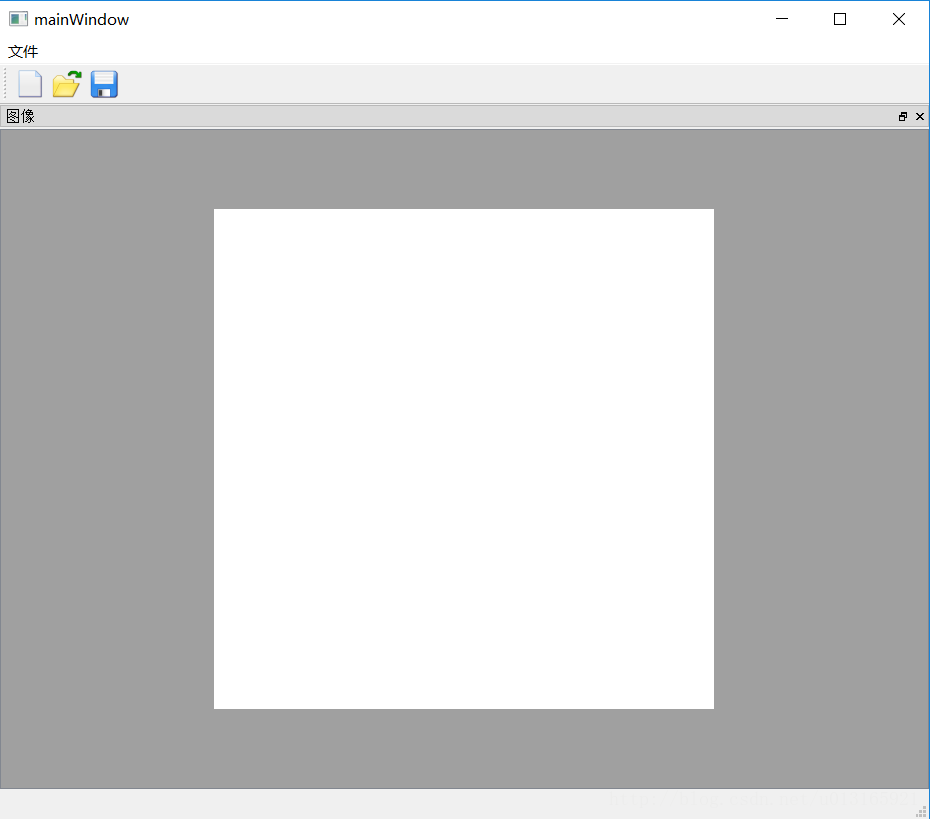
显示图像
这里运用QLabel来显示图像(头文件中定义了QLabel *imgLabel),另一个显示图像的方法是QPainter,在后面的博文中会接触到。
void mainWindow::InitImage()        // 初始化图像
{
    // 初始化QDockWidget.在以后会讲到,是可移动隐藏的小窗口,
    // 可以实现PS、VS停靠窗口的效果,目前只需了解
    dock_Image = new QDockWidget(tr("图像"), this);          //   图像
    setCentralWidget(dock_Image);

    // 初始化QLabel
    imgLabel = new QLabel(dock_Image);
    imgLabel->setScaledContents(true);  // 设置QLabel自动适应图像大小

    // 初始图像
    QImage image = QImage(500, 500, QImage::Format_RGB32);  // 新建图像
    image.fill(qRgb(255, 255, 255));                        // 全白
    imgLabel->setPixmap(QPixmap::fromImage(image));         // 显示图像
    imgLabel->resize(image.width(), image.height());        // 图像与imgLabel同大小

    // 增加滚动条,如果图像比imgLabel大,就会出现滚动条
    QScrollArea* scrollArea = new QScrollArea(this);
    scrollArea->setBackgroundRole(QPalette::Dark);
    scrollArea->setAlignment(Qt::AlignCenter);
    scrollArea->setWidget(imgLabel);
    dock_Image->setWidget(scrollArea);
}
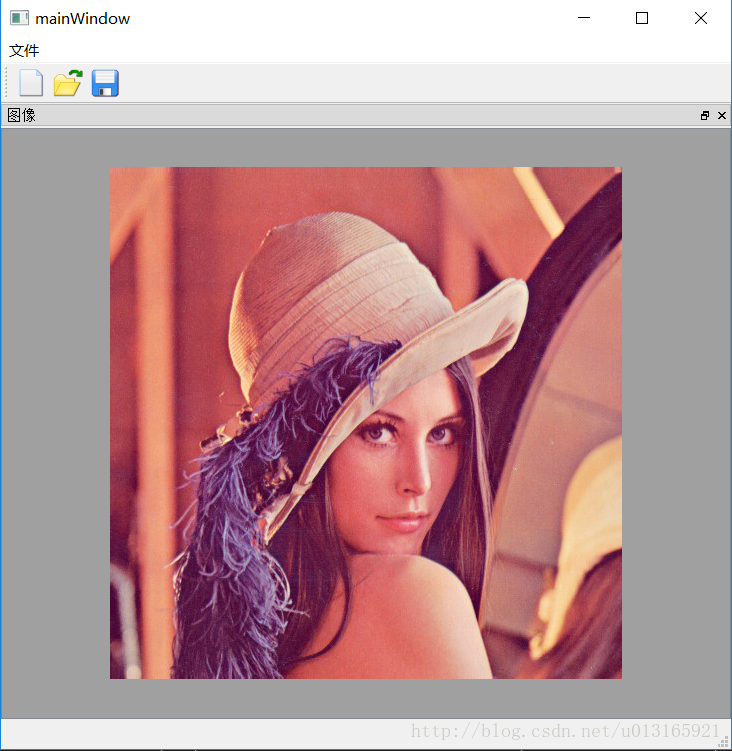
效果是这样的:

实现功能
void mainWindow::File_new()         // 新建
{
    QImage image = QImage(500, 500, QImage::Format_RGB32);  // 创建长宽各500的RGB图像
    image.fill(qRgb(255, 255, 255));                        // 白色图像
    imgLabel->setPixmap(QPixmap::fromImage(image));         // 转载图像
    imgLabel->resize(image.width(), image.height());        // imgLabel与图像同大小
    currentPath = "";                                       // 当前路径为空
}

void mainWindow::File_open()        // 打开
{   QString path = QFileDialog::getOpenFileName(this, tr("选择图像"), ".", tr("Images(*.jpg *.png *.bmp)"));                            // 文件选择框
    if (!path.isEmpty())                                    // 检测当前路径是否正确
    {
        QImage* img = new QImage();
        if (!(img->load(path)))
        {
            QMessageBox::information(this, tr("错误"), tr("打开图像失败!"));
            delete img;
            return;
        }
        imgLabel->setPixmap(QPixmap::fromImage(*img));
        imgLabel->resize(img->width(), img->height());
        currentPath = path;
    }
}

void mainWindow::File_save()        // 保存
{
    if (currentPath.isEmpty())      // 判断是新建的图像还是打开的图像
    {
        QString path = QFileDialog::getSaveFileName(this, tr("保存图像"), ".", tr("Images(*.jpg *.png *.bmp)"));
        {
            if (!path.isEmpty())
                currentPath = path;
        }
    }
    QImage img = imgLabel->pixmap()->toImage();     // 读取图像
    img.save(currentPath);                          // 保存图像
}

void mainWindow::File_saveas()      // 另存为
{
    QString path = QFileDialog::getSaveFileName(this, tr("图像另存为"), ".", tr("Images(*.jpg *.png *.bmp)"));
    if (!path.isEmpty())
    {
        QImage img = imgLabel->pixmap()->toImage();
        img.save(path);
currentPath = path;
    }
}
最后
以上就是怕孤单百褶裙最近收集整理的关于【QT】QT从零入门教程(五):图像文件操作 [新建打开保存]的全部内容,更多相关【QT】QT从零入门教程(五):图像文件操作内容请搜索靠谱客的其他文章。
本图文内容来源于网友提供,作为学习参考使用,或来自网络收集整理,版权属于原作者所有。


![【QT】QT从零入门教程(五):图像文件操作 [新建打开保存]](https://www.shuijiaxian.com/files_image/reation/bcimg6.png)


发表评论 取消回复