深度学习对计算要求太高了,没有高配的电脑,只好搭建GPU云主机。我用的是美团云,理由是穷,用不起阿里云和企鹅云。不过,美团云确实良心啊,配置和价格都让人感动。下面是笔记记录主要内容:
- 一、GPU主机的基本配置
- 二、anaconda的安装和依赖包的安装
- 三、jupyter_notebooks的使用
- 四、跑一个cnn结构的MNIST测试下速度
sorry,之前说美团云不能自定义镜像,实际上是在创建好云主机后可以导出镜像,在下次在创建主机时导入使用。我就觉得不可能这么不人性化滴,upupup。
首先基本配置主机
:
首先购买美团云产品,账户最低余额10快(建议少少的冲,因为云服务器计价是按照占用服务器时间来计算的,停机仍在计价)
购买步骤:美团云首页->产品服务->GPU云主机->购买->身份证认证->在GPU云服务器界面->新建选择配置 (完成后会在GPU主机处给你外网ip和密码)
我选的是单gpu、ubuntu16.04等配置,美团云不提供扩展镜像,服务器给的镜像只会装一些驱动和cuda8.0、cuDNN6.0。我电脑是deepin系统,若是windows系统还要下载putty或者xshell工具,美团云管理界面提供的终端不好用。尤其是服务器给的密码很复杂,网页终端不支持粘贴,linux系统密码不会显示,连星星都不显示,你会在输密码时候就有点想骂人。
打开终端、输入:
tream@DESKTOP-SVLVPIM:~$ sudo ssh 101.236.**.**按照提示输入密码:分别是sudo的本机密码和服务器密码。首次登录会生成系统秘钥:
The authenticity of host '101.236.**.** (101.236.**.**)' can't be established.ECDSA key fingerprint is SHA256:QImpuT3AaOrmn9GqFNBrUy9hBs5LKL+******.
Are you sure you want to continue connecting (yes/no)?
登录成功提示如下:
Welcome to Ubuntu 16.04 LTS (GNU/Linux 4.4.0-101-generic x86_64)

 * Documentation:  https://help.ubuntu.com/

170 packages can be updated.
0 updates are security updates.
创建用户:
root@Tream733:~# sudo adduser tream
Adding user `tream' ...
Adding new group `tream' (1000) ...
Adding new user `tream' (1000) with group `tream' ...
Creating home directory `/home/tream' ...
Copying files from `/etc/skel' ...
Enter new UNIX password:
Retype new UNIX password:
passwd: password updated successfully
Changing the user information for tream
Enter the new value, or press ENTER for the default
    Full Name []: tream
    Room Number []:
    Work Phone []:
    Home Phone []:
    Other []:
Is the information correct? [Y/n] y
在root账户下面将用户加入sudo用户组:
有两个方法:
法一:sudo usermod -aG sudo tream(后一个sudo为用户组名,tream为用户名)
法二:使用vim编辑器
root@Tream733:~$ sudo vim /etc/sudoers# User privilege specification
root ALL=(ALL:ALL) ALL
tream ALL=(ALL:ALL) ALL进入vim编辑器,单击o可以进行编辑,编辑完之后单击Esc,退出编辑模式,’:q’退出,如果没有写入权限,可以直接用’w!’写入,在输入’:q’退出vim编辑器。
从root账户进入user账户:
root@Tream733:~# su tream
To run a command as administrator (user "root"), use "sudo <command>".
See "man sudo_root" for details.
tream@Tream733:/root$
但是root显示为蓝色,在使用过程中可能会出现tream不在sudo分组中,需要激活用户环境变量:
tream@Tream733:/root$ source /etc/profile
To run a command as administrator (user "root"), use "sudo <command>".
See "man sudo_root" for details.
tream@Tream733:/root$
给home路径下tream用户文件777权限(任意用户可以读写操作):
tream@Tream733:~$ sudo chmod -R 777 /home/tream/若不给权限的话后面装软件会出现没有权限的问题
软件安装
首先安装anconda3,使用的是清华下载镜像,国外网速会超级慢,用wget下载安装文件,清华镜像上面最新linux版本是3-5.0.1,525M大小。
tream@Tream733:/root$ sudo wget https://mirrors.tuna.tsinghua.edu.cn/anaconda/archive/Anaconda3-5.0.1-Linux-x86_64.sh安装:
sudo bash Anaconda3-5.0.1-Linux-x86_64.sh然后就是enter、enter、enter直到出现是否接受协议:
Do you accept the license terms? [yes|no]
[no] >>>
Please answer 'yes' or 'no':'
软件安装位置,默认是/home/tream/anaconda3,不需要更改就直接enter
Anaconda3 will now be installed into this location:
/home/tream/anaconda3

  - Press ENTER to confirm the location
  - Press CTRL-C to abort the installation
  - Or specify a different location below

[/home/tream/anaconda3] >>>
到这一步软件装上了,但是还没有给环境变量。
一:给用户环境变量
tream@Tream733:/root$ sudo vim /etc/profileexport PATH=/home/tream/anaconda3/bin:$PATH激活环境变量配置:source /etc/profile
二:给系统环境变量
tream@Tream733:/root$ sudo vim /etc/environment:/home/tream/anaconda3/bin激活环境变量配置:source /etc/environment
二选一即可
安装成功
tream@Tream733:/root$ conda --version
conda 4.3.30
设置anaconda install源:
tream@Tream733:/root$ conda config --add channels 'https://mirrors.tuna.tsinghua.edu.cn/anaconda/pkgs/free/'
Warning: 'https://mirrors.tuna.tsinghua.edu.cn/anaconda/pkgs/free/' already in 'channels' list, moving to the top
tream@Tream733:/root$ conda config --set show_channel_urls yes
设置完成后就可以用
conda update conda在安装的过程中还是出现了无法写入anaconda3的情况,只好再次赋予777权限。
软件安装完成,现在可以用pip和conda来进行依赖包的安装。不过为了方便管理各种依赖库和用户,下面来介绍jupyter notebook工具
jupyter notebook的使用
创建jupyter notebook环境,附带的会安装一些依赖包。
tream@Tream733:/root$ conda create -n jupyter_notebook python=3激活环境
tream@Tream733:/root$ source activate jupyter_notebook
(jupyter_notebook) tream@Tream733:/root$
退出环境:
source deactivate#暂时不需要执行。就可以在jupyter notebook环境中安装依赖包了
coda install jupyter notebooktensorflow-gpu安装
(jupyter_notebook) tream@Tream733:/root$ conda install tensorflow-gpu
可以在gpu后面指定版本,如tensorflow-gpu=1.1
测试显卡:
In [1]: import tensorflow as tf
In [2]: print('tensorflow version:{}'.format(tf.__version__))
tensorflow version:1.3.0
In [3]: print('default gpu device {}'.format(tf.test.gpu_device_name()))
device: 0, name: Tesla M60, pci bus id: 0000:00:15.0
显卡信息
name: Tesla M60
major: 5 minor: 2 memoryClockRate (GHz) 1.1775
pciBusID 0000:00:15.0
Total memory: 7.93GiB
Free memory: 7.85GiB
jupyter notebook的配置:
需要生成jupyter notebook配置文件
(jupyter_notebook) tream@Tream733:/root$ jupyter notebook --generate-config
Writing default config to: /home/tream/.jupyter/jupyter_notebook_config.py
调用ipython设置jupyter notebook密码
(jupyter_notebook) tream@Tream733:/root$ ipython
Python 3.6.2 |Continuum Analytics, Inc.| (default, Jul 20 2017, 13:51:32)
Type 'copyright', 'credits' or 'license' for more information
IPython 6.1.0 -- An enhanced Interactive Python. Type '?' for help.
In [1]: from notebook.auth import passwd
In [2]: passwd()
Enter password:
Verify password:
Out[2]: 'sha1:b804cd47ff66:7c1d4a54809c54c356ae406b05c4c50767cc7958'
In [3]: exit
记录下’sha1:b804cd47ff66:7c1d4a54809c54c356ae406b05c4c50767cc7958’,在文件配置时候要用。
配置jupyter notebook的config文件
tream@Tream733:/root$ vi /home/tream/.jupyter/jupyter_notebook_config.pyc.NotebookApp.ip = '*'
c.NotebookApp.password = 'sha1:b804cd47ff66:7c1d4a54809c54c356ae406b05c4c50767cc7958'
c.NotebookApp.open_browser = False 直接找个空地输入进去就好了,不要在文件里面找了,眼睛会瞎的。。。。
运行jupyter notebook
我的报错了:PermissionError: [Errno 13] Permission denied: '/run/user/0/jupyter'
解决办法:进入0文件夹,给予权限:tream@Tream733:~$ sudo chmod 777 /run/user/0/>
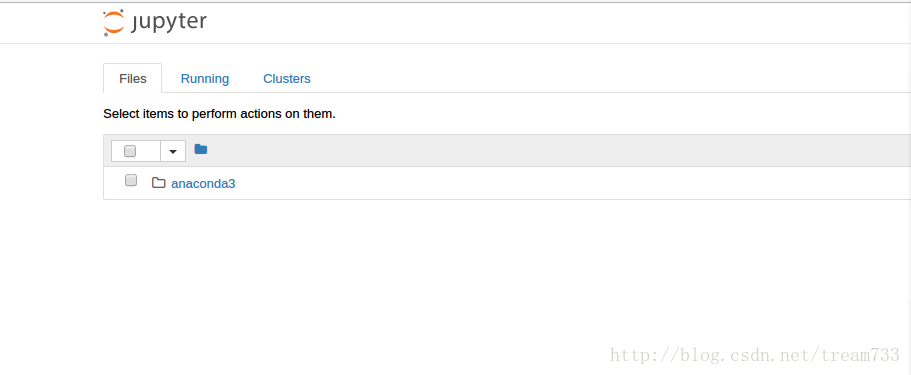
打开浏览器远程访问地址:http:(ip地址):8888(默认为8888,如果在其他端口,终端会有提示)
终端输出:

浏览器显示:

页面中可以上传文件。
终端中Ctrl+c停止jupyter notebook
运行一个程序测试运行速度
使用scp上传文件:
在本地计算机终端上运行:
tream@DESKTOP-SVLVPIM:~$ scp -r /home/tream/Desktop/T1 root@101.236.53.22:/home/tream
The authenticity of host '101.236.53.22 (101.236.53.22)' can't be established.
ECDSA key fingerprint is SHA256:QImpuT3AaOrmn9GqFNBrUy9hBs5LKL+7Lq522oMy70E.
Are you sure you want to continue connecting (yes/no)? yes
Warning: Permanently added '101.236.53.22' (ECDSA) to the list of known hosts.
root@101.236.53.22's password:
t10k-images-idx3-ubyte.gz                             100% 1610KB   1.6MB/s   00:01
train-images-idx3-ubyte.gz                            100% 9680KB   1.4MB/s   00:07
t10k-labels-idx1-ubyte.gz                             100% 4542    25.7KB/s   00:00
train-labels-idx1-ubyte.gz                            100%   28KB 281.4KB/s   00:00
mnist.py                                              100% 4228    15.8KB/s   00:00
tream@DESKTOP-SVLVPIM:~$
到服务器相应文件夹下:
tream@Tream733:/root$ cd /home/tream
tream@Tream733:~$ ls
anaconda3  T1
tream@Tream733:~$
运行程序:
“`
tream@Tream733:~
cdT1/tream@Tream733: /T1
ls
MNIST_data mnist.py
tream@Tream733:~/T1$ python mnist.py
2017-12-10 06:16:31.899810: I tensorflow/core/common_runtime/gpu/gpu_device.cc:976] DMA: 0
2017-12-10 06:16:31.899820: I tensorflow/core/common_runtime/gpu/gpu_device.cc:986] 0: Y
2017-12-10 06:16:31.899832: I tensorflow/core/common_runtime/gpu/gpu_device.cc:1045] Creating TensorFlow device (/gpu:0) -> (device: 0, name: Tesla M60, pci bus id: 0000:00:15.0)tep 0, training accuracy 0.1
step 100, training accuracy 0.9
step 200, training accuracy 0.8
step 300, training accuracy 0.8
step 400, training accuracy 0.9
step 500, training accuracy 0.9
step 600, training accuracy 0.8
step 700, training accuracy 0.8
step 800, training accuracy 0.9
step 900, training accuracy 1
step 1000, training accuracy 1
代码有10000步,速度算是非常快了,
2017-12-10 06:17:16.634586: W tensorflow/core/common_runtime/bfc_allocator.cc:217]
test accuracy 0.987
本程序不用保存模型,如要保存模型,可能还涉及到从服务器下载文件:
scp -r root@101.236.53.22:/home/tream/output/ /home/tream/
其他还有控制中心的一些操作,重装系统、设置防火墙、还有调整配置等等一系列功能。
没有linux经验,都是网络上整理还有咨询师兄,小白深度学习,后面可能会记录自己看的一些文章、还有记录跑过的对应文章的模型。
最后
以上就是孝顺盼望最近收集整理的关于深度学习笔记(一):GPU云主机配置的全部内容,更多相关深度学习笔记(一)内容请搜索靠谱客的其他文章。


发表评论 取消回复