前期准备:
怎么安装就不细说了网上很多
ActiveMQ下载(http://activemq.apache.org/components/classic/download/)
MQTT类官网提供了详细的解释:https://docs.spring.io/spring-integration/api/overview-summary.html

一、pom配置
<!--MQTT start-->
<dependency>
    <groupId>org.springframework.integration</groupId>
    <artifactId>spring-integration-stream</artifactId>
</dependency>
<dependency>
    <groupId>org.springframework.integration</groupId>
    <artifactId>spring-integration-mqtt</artifactId>
</dependency>
<!--MQTT end-->
二、spring boot的配置文件
#mqtt配置
mqtt:
  serverUrls: tcp://localhost:1883 #activemq 集群以逗号分隔
  clientId: clientId_ #客户端ID
  topics: topic-demo #主题 多个以逗号分隔
  username: admin #用户名
  password: admin #密码
  timeout: 10 #超时时间(秒)
  keepalive: 20 #心跳时间(秒)
  qos: 1 #默认数据质量(0:只发一次、1:至少一次、2:最多一次)
三、Java部分
MQTT连接配置:读取配置文件activemq地址及相关配置信息
import org.springframework.boot.context.properties.ConfigurationProperties;
import org.springframework.stereotype.Component;

import lombok.Data;

/**
 * 读取yml
 *
 * @date 2019/7/15 10:50
 */
@Data
@Component
@ConfigurationProperties(prefix = "mqtt")
public class IMqttProperties {
	// 集群地址
	private String serverUrls;
	// 客户端ID
	private String clientId;
	// 主题
	private String topics;
	// 用户名
	private String username;
	// 密码
	private String password;
	// 超时时间
	private Integer timeout;
	// 保持心跳时间
	private Integer keepalive;
	// 消息质量
	private Integer qos;

	public String[] getServerUrls() {
		return serverUrls.split(",");
	}

	public String[] getTopics() {
		return topics.split(",");
	}
}
MQTT连接配置
import javax.annotation.Resource;

import org.eclipse.paho.client.mqttv3.MqttConnectOptions;
import org.springframework.context.annotation.Bean;
import org.springframework.context.annotation.Configuration;
import org.springframework.integration.channel.DirectChannel;
import org.springframework.integration.mqtt.core.DefaultMqttPahoClientFactory;
import org.springframework.integration.mqtt.core.MqttPahoClientFactory;
import org.springframework.messaging.MessageChannel;

/**
 * MQTT连接配置
 *
 * @date 2019/7/15 10:50
 */
@Configuration
public class IMqttClient {

	@Resource
	private IMqttProperties properties;

	/**
	 * 连接activemq
	 */
	@Bean
	public MqttPahoClientFactory mqttClientFactory() {
		DefaultMqttPahoClientFactory factory = new DefaultMqttPahoClientFactory();

		// 连接activemq
		MqttConnectOptions options = new MqttConnectOptions();
		options.setServerURIs(properties.getServerUrls());
		options.setUserName(properties.getUsername());
		options.setPassword(properties.getPassword().toCharArray());
		options.setConnectionTimeout(properties.getTimeout());
		options.setKeepAliveInterval(properties.getKeepalive());
		options.setCleanSession(false);

		// 在客户端连接出现异常的情况下,由服务器主动发布此消息
		// options.setWill();

		factory.setConnectionOptions(options);
		return factory;
	}

	@Bean
	public MessageChannel mqttChannel() {
		return new DirectChannel();
	}
}
消费者
import java.util.HashMap;
import java.util.Map;

import javax.annotation.Resource;

import org.springframework.context.annotation.Bean;
import org.springframework.context.annotation.Configuration;
import org.springframework.integration.annotation.ServiceActivator;
import org.springframework.integration.endpoint.MessageProducerSupport;
import org.springframework.integration.mqtt.inbound.MqttPahoMessageDrivenChannelAdapter;
import org.springframework.integration.mqtt.support.DefaultPahoMessageConverter;
import org.springframework.messaging.MessageHandler;
import org.springframework.messaging.MessageHeaders;

/**
 * MQTT消费端
 *
 * @date 2019/7/15 10:50
 */
@Configuration
public class IMqttInbound {

	@Resource
	private IMqttProperties properties;
	@Resource
	private IMqttClient client;

	@Bean
	@ServiceActivator(inputChannel = "mqttChannel") // 绑定消费者
	public MessageHandler handler() {
		// 接收消息
		return message -> {
			Map<String, Object> msgMap = new HashMap<>();
			MessageHeaders headers = message.getHeaders();
			for (String key : headers.keySet()) {
				msgMap.put(key, headers.get(key));
			}
			msgMap.put("content", message.getPayload());
			System.out.println("接收到信息:" + msgMap.toString());
		};
	}

	@Bean
	public MessageProducerSupport mqttInbound() {
		// 如果同时启用消费者和生产者clientId不能重复
		String clientId = properties.getClientId();
		MqttPahoMessageDrivenChannelAdapter adapter = new MqttPahoMessageDrivenChannelAdapter(clientId, client.mqttClientFactory(), properties.getTopics());
		adapter.setQos(properties.getQos());
		adapter.setOutputChannel(client.mqttChannel());
		adapter.setConverter(new DefaultPahoMessageConverter());
		return adapter;
	}
}
生产者
import javax.annotation.Resource;

import org.springframework.context.annotation.Bean;
import org.springframework.context.annotation.Configuration;
import org.springframework.integration.annotation.ServiceActivator;
import org.springframework.integration.mqtt.core.MqttPahoClientFactory;
import org.springframework.integration.mqtt.outbound.MqttPahoMessageHandler;

/**
 * MQTT生产端
 *
 * @date 2019/7/15 10:50
 */
@Configuration
public class IMqttOutbound {

	@Resource
	private IMqttProperties properties;

	@Bean
	@ServiceActivator(inputChannel = "mqttChannel") // 绑定生产者
	public MqttPahoMessageHandler mqttOutbound(MqttPahoClientFactory clientFactory) {
		// 如果同时启用消费者和生产者clientId不能重复
		String clientId = properties.getClientId();
		MqttPahoMessageHandler messageHandler = new MqttPahoMessageHandler(clientId, clientFactory);
		messageHandler.setDefaultQos(properties.getQos());
		messageHandler.setAsync(true);
		messageHandler.setDefaultRetained(false);
		messageHandler.setAsyncEvents(false);
		return messageHandler;
	}
}
消息发送
import org.springframework.integration.annotation.MessagingGateway;
import org.springframework.integration.mqtt.support.MqttHeaders;
import org.springframework.messaging.handler.annotation.Header;

/**
 * 发送消息
 *
 * @date 2019/7/15 10:50
 */
@MessagingGateway(defaultRequestChannel = "mqttChannel")
public interface MqttMessageService {
	void sendToMessage(@Header(MqttHeaders.TOPIC) String topic, String payload);

	void sendToMessage(@Header(MqttHeaders.TOPIC) String topic, @Header(MqttHeaders.QOS) int qos, String payload);

	void sendToMessage(@Header(MqttHeaders.TOPIC) String topic, @Header(MqttHeaders.QOS) int qos, @Header(MqttHeaders.RETAINED) String retain, String payload);
}
四、实际操作
@Resource
private MqttMessageService messageService;
@RequestMapping("/send")
@ResponseBody
public String sendMsg(String topic, String payload) {
	if (StringUtils.isEmpty(topic) || StringUtils.isEmpty(payload)) {
		return "error";
	}
	messageService.sendToMessage(topic, payload);
	System.out.println("发送了一条主题为" + topic + "的信息:" + payload);
	return "ok";
}
五、前端实现消息推送和订阅
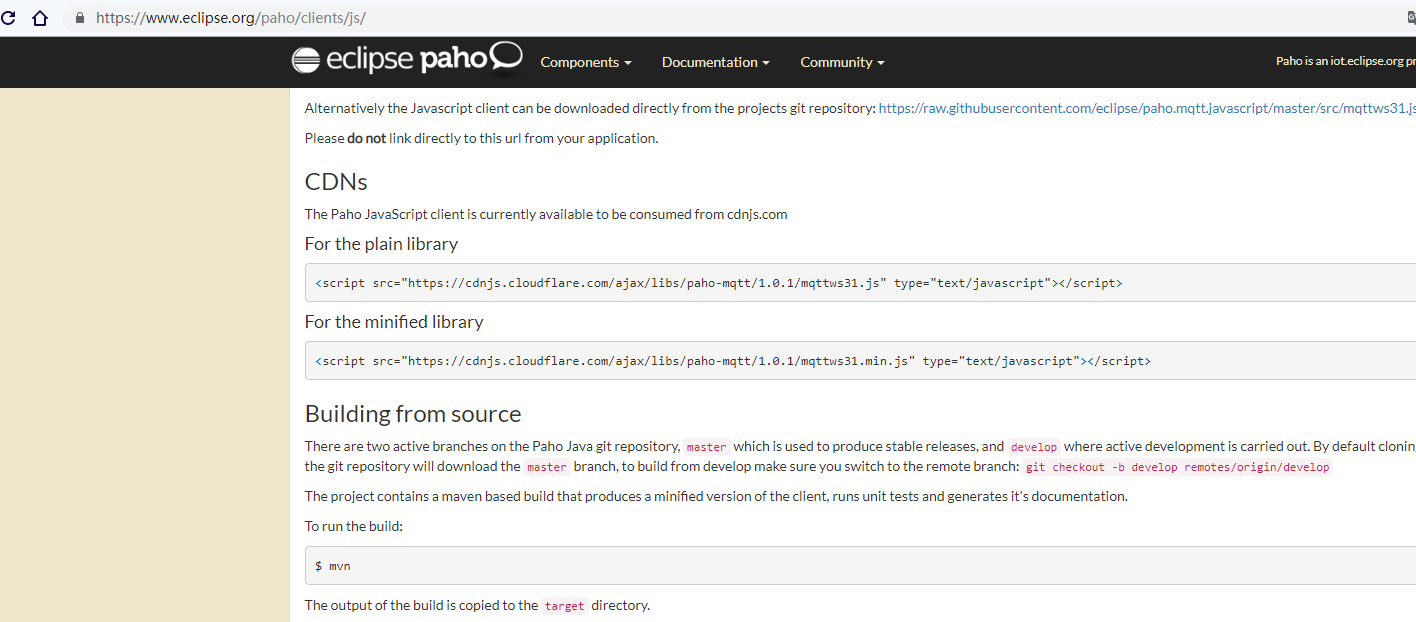
前端通过websocket方式实现消息的推送和订阅
官网:
https://www.eclipse.org/paho/clients/js/
js下载:
<script src="https://cdnjs.cloudflare.com/ajax/libs/paho-mqtt/1.0.1/mqttws31.js" type="text/javascript"></script>
<script src="https://cdnjs.cloudflare.com/ajax/libs/paho-mqtt/1.0.1/mqttws31.min.js" type="text/javascript"></script>

// called when the client connects
function onConnect() {
    // Once a connection has been made, make a subscription and send a message.
    $("#connect").text("ActiveMQ连接成功");
    // 订阅主题
    client.subscribe(topic);
}

// 连接失败
function onConnectFailure(failure) {
    console.log(failure)
}

// called when the client loses its connection
function onConnectionLost(responseObject) {
    if (responseObject.errorCode !== 0) {
        console.log(responseObject);
    }
}

// called when a message arrives
function onMessageArrived(message) {
    var data = {
        "topic": message.destinationName,
        "payloadString": message.payloadString,
        "qos": message.qos,
        "retained": message.retained,
    }
    console.log(data);
}

// Create a client instance
var clientId = "clientId_front_producder";
var topic = "topic-demo";
var client = new Paho.MQTT.Client("127.0.0.1", 61614, clientId);
var connectOption = {onSuccess: onConnect, onFailure: onConnectFailure};

$(function () {
    // set callback handlers
    client.onConnectionLost = onConnectionLost;
    client.onMessageArrived = onMessageArrived;
    // connect the client
    client.connect(connectOption);

    $('#topic').val(topic);
});

function send() {
    $.ajax({
        type: "POST",
        url: "./send",
        dataType: "json",
        data: $("#msg_form").serialize(),
        success: function (res) {
            if ("ok" == res) {
                alert("消息发送成功")
            } else if ("error" == res) {
                alert("参数错误")
            }
        }
    });
}
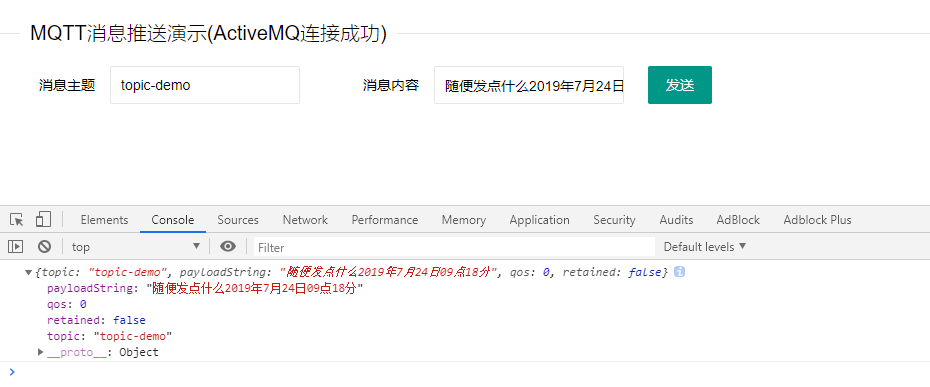
我这里实现的是通过ajax让后台去发送主题为"topic-demo"的消息,前端连接上ActiveMQ后当有消息推送时就自动拿到信息了

**
注:client它提供了跟后台相似的方法和参数,这样我们就可以实现在前端对MQTT消息的推送和订阅不需要再经过后台
**
最后
以上就是高高芹菜最近收集整理的关于springboot2.1.6整合activemq服务实现前后端mqtt消息订阅及推送的全部内容,更多相关springboot2内容请搜索靠谱客的其他文章。
本图文内容来源于网友提供,作为学习参考使用,或来自网络收集整理,版权属于原作者所有。


发表评论 取消回复