Esp8266【NodeMCU】使用MQTT连接巴法云服务器
- 注册巴法云账号
- Esp8266代码
- MQTT连接界面
- 测试
使用MQTT连接巴法云服务器 https://cloud.bemfa.com/,并且使用DS13B20温度传感器上传温度数据。需要下载安装MQTT.fx。MQTT下载地址 http://mqttfx.org/下载后直接安装。
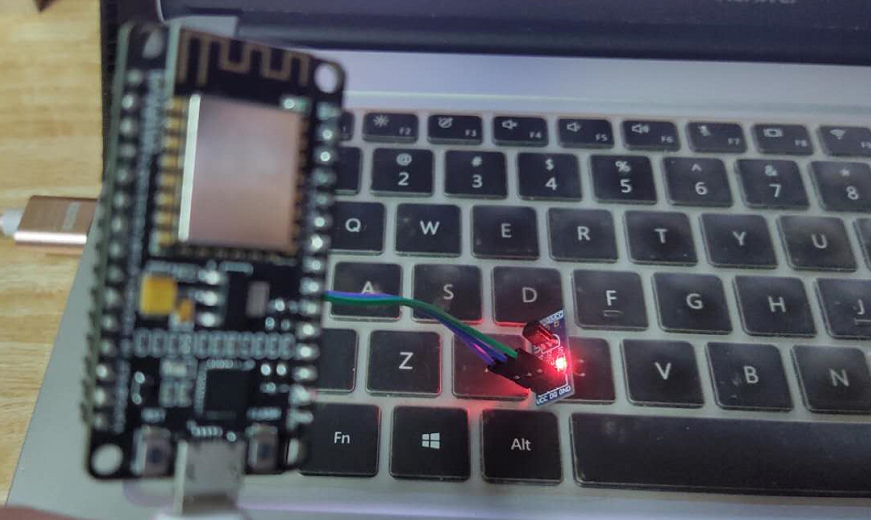
完整工程文件下载链接 https://download.csdn.net/download/weixin_45488643/12533250
注册巴法云账号
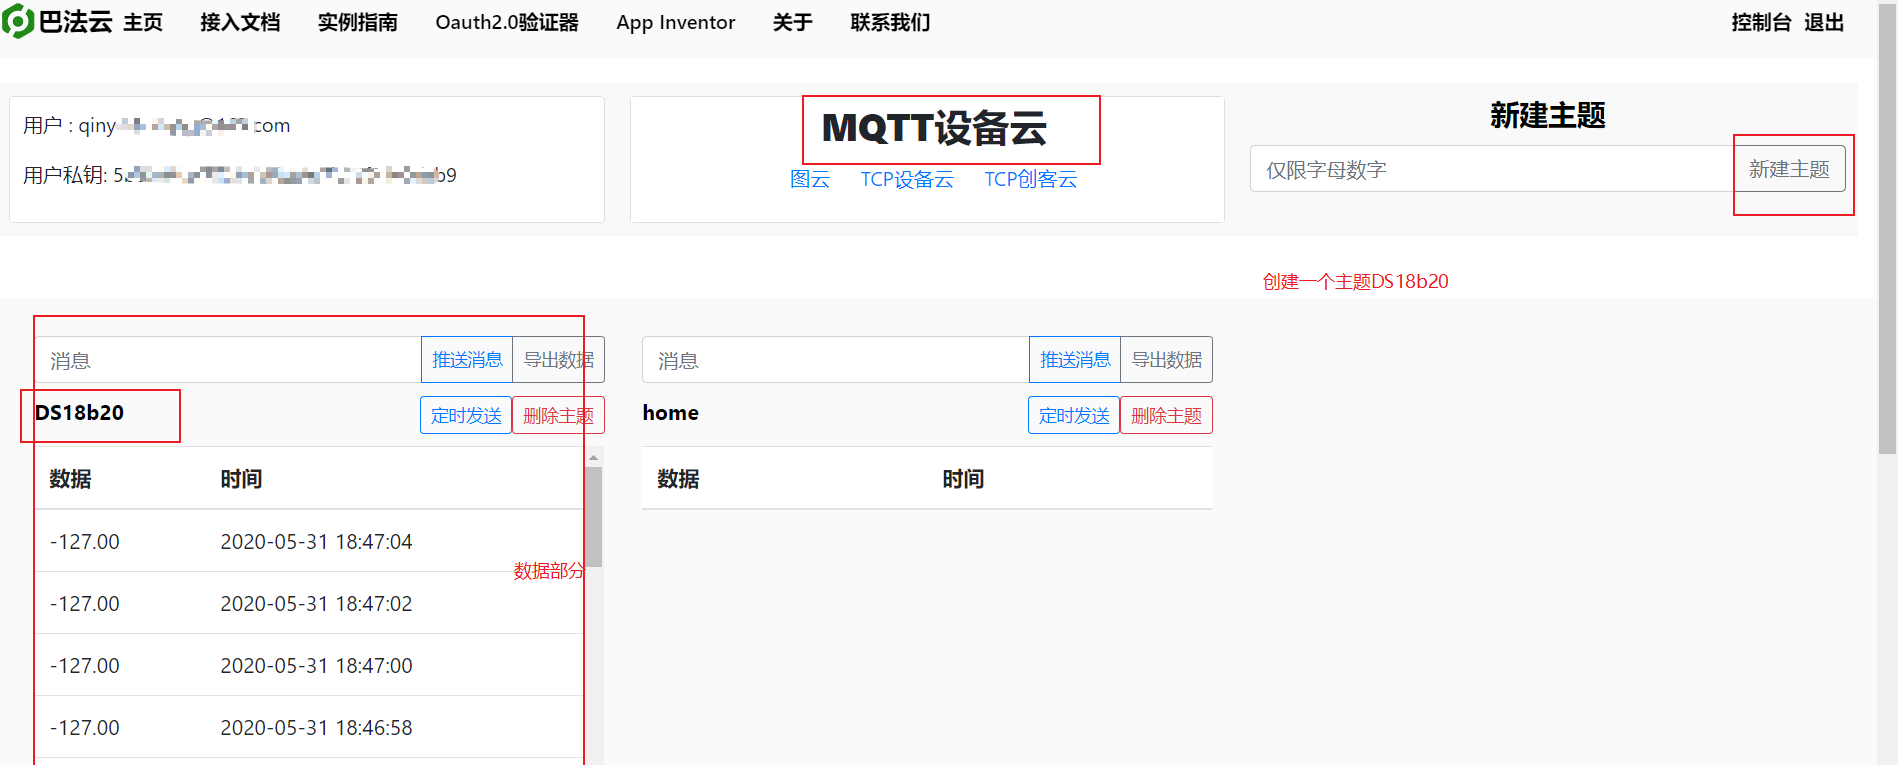
首先注册巴法云账号,在创建一个主题。巴法论坛http://bbs.bemfa.com/conversations/all注册账号登陆,在控制台,可以看到用户私钥,唯一识别码,创建一个主题。

控制台界面:
Esp8266代码
#include <ESP8266WiFi.h>//默认,加载WIFI头文件
#include "PubSubClient.h"//默认,加载MQTT库文件
#include <OneWire.h>
#include "DallasTemperature.h"

#define ONE_WIRE_BUS D2  //DS18B20接口,D3口

OneWire oneWire(ONE_WIRE_BUS);
DallasTemperature sensors(&oneWire);


const char* ssid = "tsy_B5AC58";//修改,你的路由去WIFI名字
const char* password = "19980208";//你的WIFI密码
const char* mqtt_server = "bemfa.com";//默认,MQTT服务器
const int mqtt_server_port = 9501;//默认,MQTT服务器
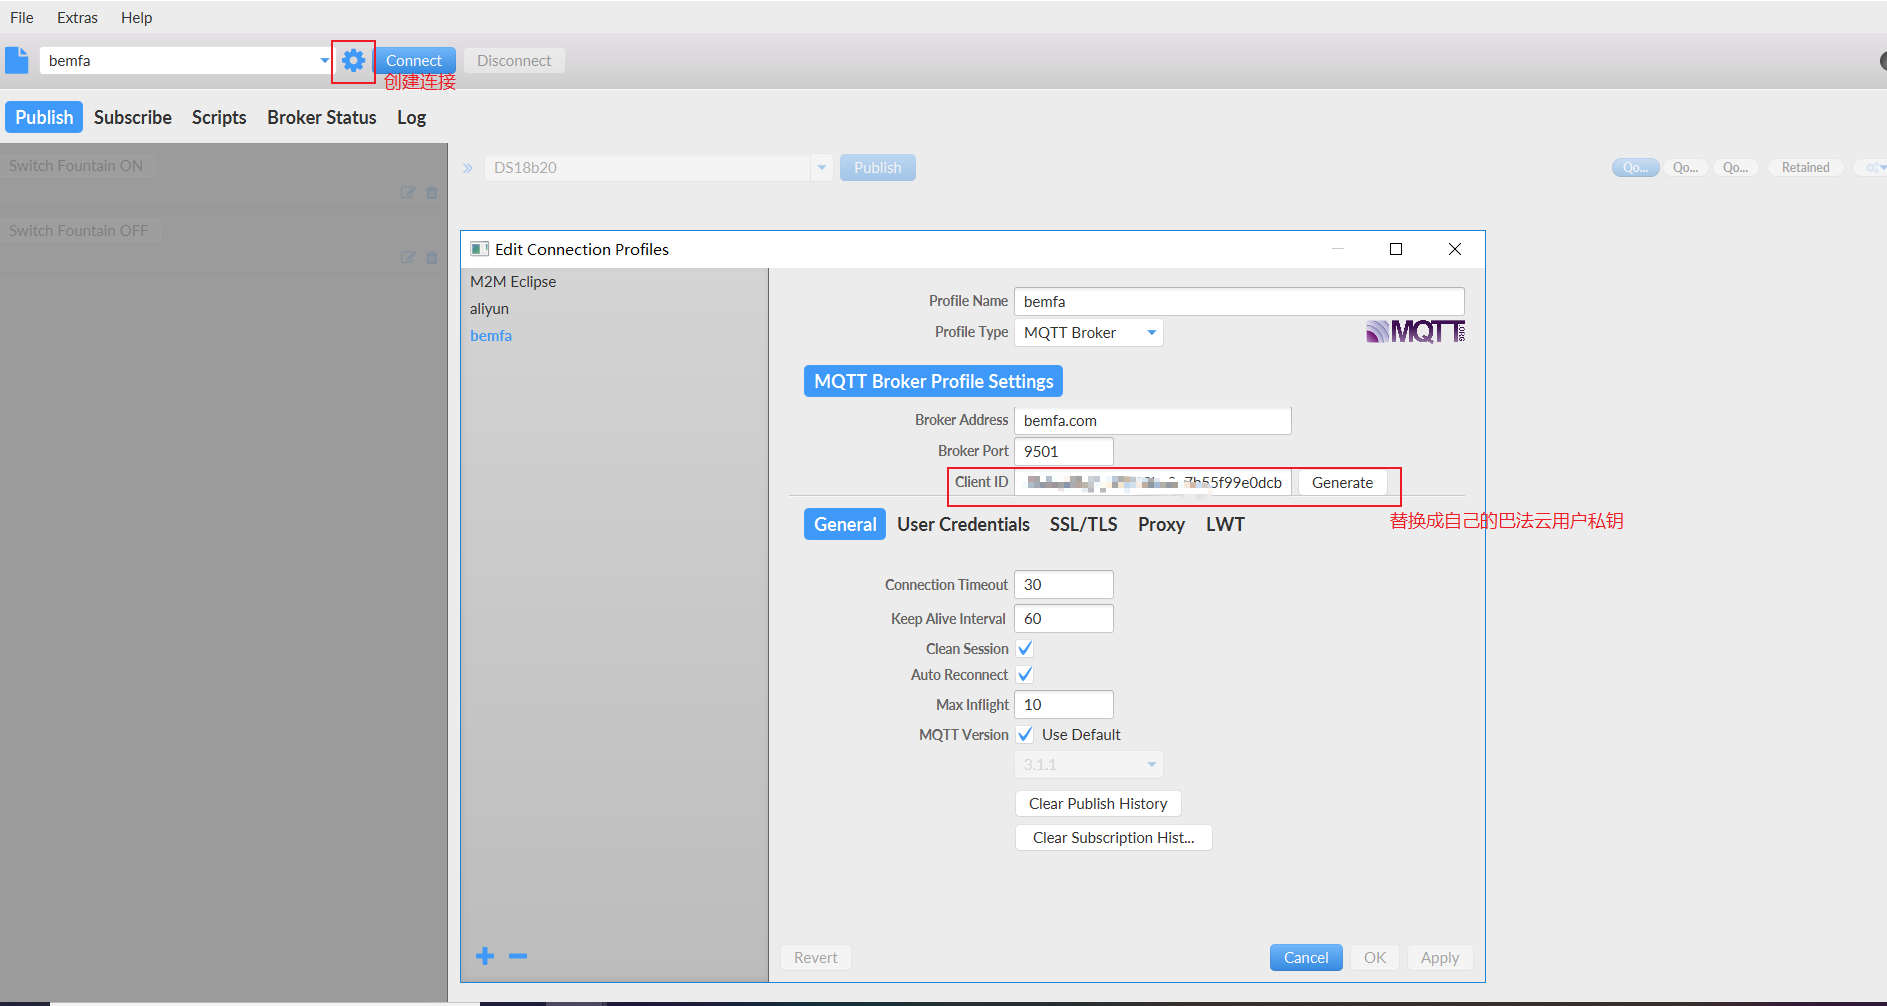
#define ID_MQTT  "5bXXXXXXXXXXXXXXXXXXXXXXXXXXXXXX"     //Client ID  修改成自己的,巴法云用户私钥


WiFiClient espClient;
PubSubClient client(espClient);
long lastMsg = 0;
char msg[50];


void setup_wifi() {
  delay(10);
  Serial.println();
  Serial.print("Connecting to ");
  Serial.println(ssid);

  WiFi.begin(ssid, password);

  while (WiFi.status() != WL_CONNECTED) {
    delay(500);
    Serial.print(".");
  }

  Serial.println("");
  Serial.println("WiFi connected");
  Serial.println("IP address: ");
  Serial.println(WiFi.localIP());
}

void callback(char* topic, byte* payload, unsigned int length) {
  Serial.print("Message arrived [");
  Serial.print(topic);
  Serial.print("] ");
  for (int i = 0; i < length; i++) {
    Serial.print((char)payload[i]);
  }
  Serial.println();
}

void reconnect() {
  // Loop until we're reconnected
  while (!client.connected()) {
    Serial.print("Attempting MQTT connection...");
    // Attempt to connect
    if (client.connect(ID_MQTT)) {
      Serial.println("connected");
    } else {
      Serial.print("failed, rc=");
      Serial.print(client.state());
      Serial.println(" try again in 5 seconds");
      // Wait 5 seconds before retrying
      delay(5000);
    }
  }
}


void setup() {

  sensors.begin();
  Serial.begin(115200);
  setup_wifi();
  client.setServer(mqtt_server,mqtt_server_port);
  client.setCallback(callback);
}
void loop() {
  if (!client.connected()) {
    reconnect();
  }
  client.loop();

  long now = millis();
  if (now - lastMsg > 2000) {
    lastMsg = now;

    sensors.requestTemperatures();
    float temp = sensors.getTempCByIndex(0);
    //snprintf(msg,6,"%.2f",temp); //读取字符并保存在msg
    dtostrf(temp,2,2,msg); // 要转换的float或者double值,转换后整数部分长度,转换后小数部分长度。保存到该char数组中。
    Serial.println(msg);
    client.publish("DS18b20",msg);//修改DS18b20为你的主题名
  }
}
MQTT连接界面
打开MQTT软件,创建连接
测试
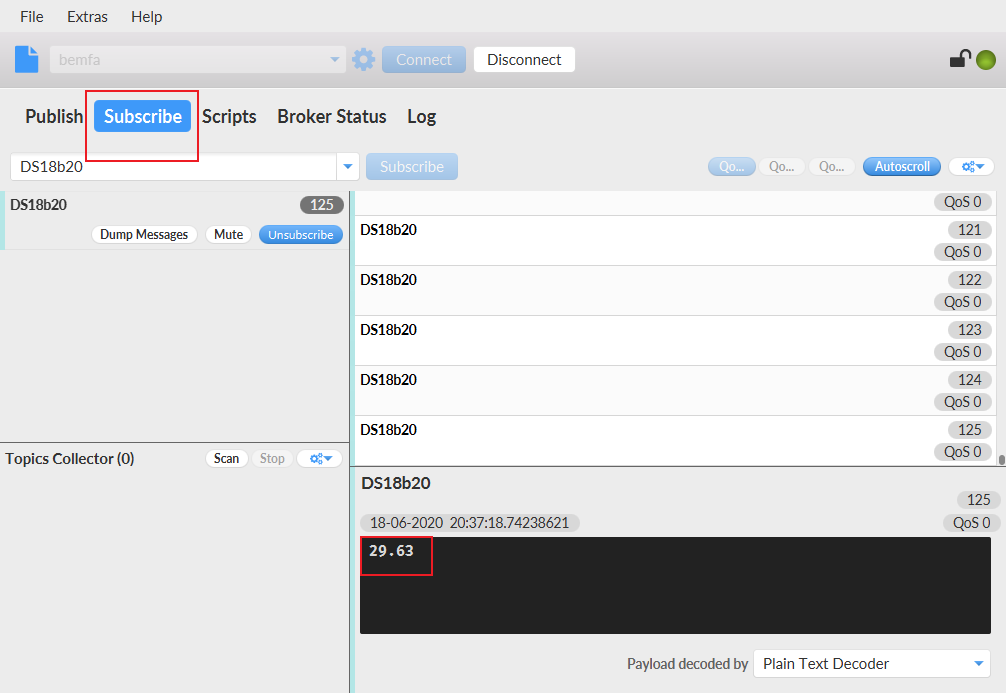
串口数据与巴法云服务器数对比: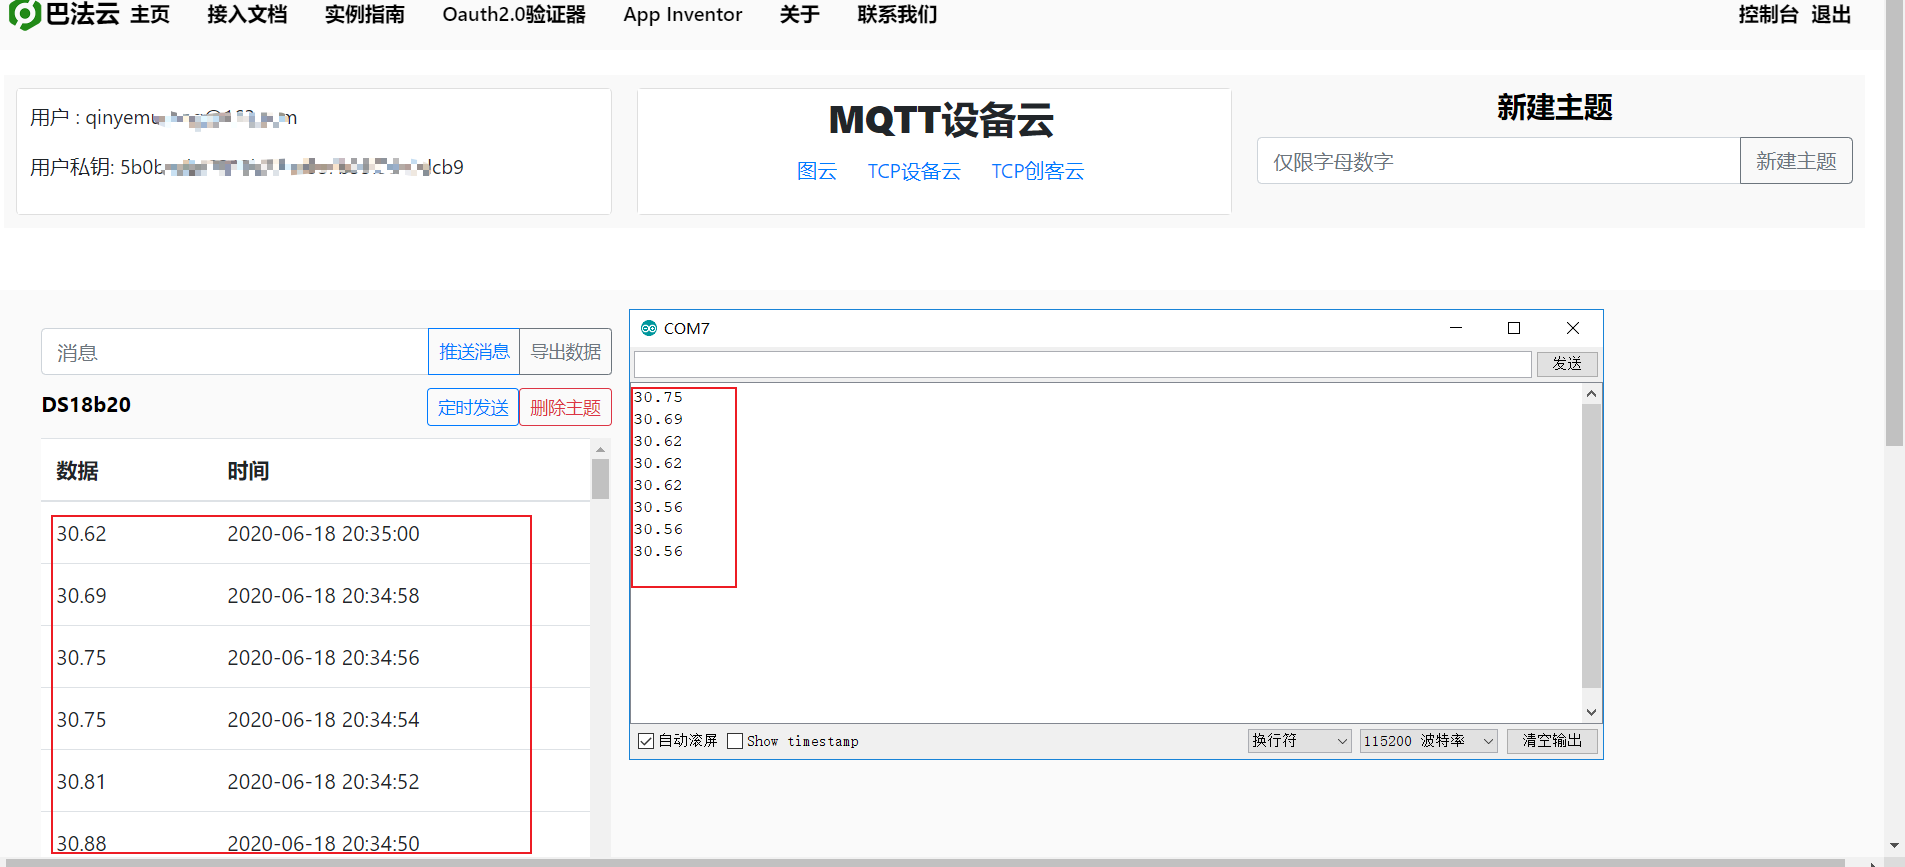
MQTT接收数据:
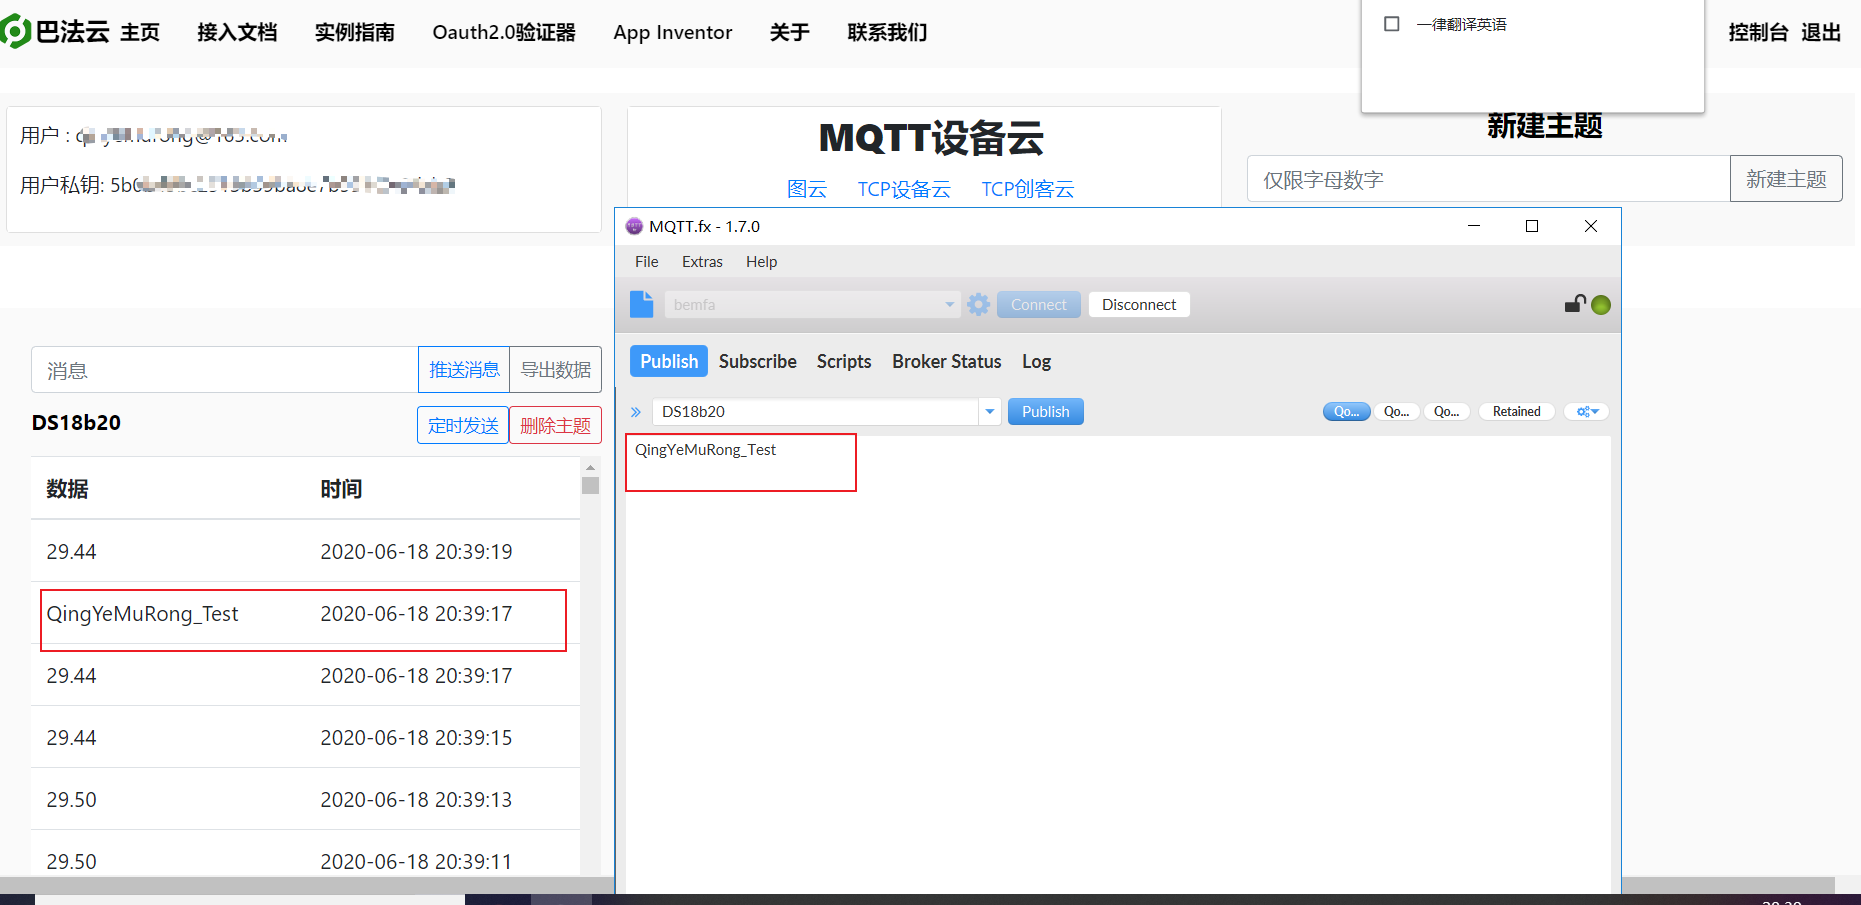
同过MQTT发送数据到巴法云服务器:
代码参考巴法云论坛。
最后
以上就是动听帆布鞋最近收集整理的关于Esp8266(NodeMCU)使用MQTT连接巴法云服务器注册巴法云账号Esp8266代码MQTT连接界面测试的全部内容,更多相关Esp8266(NodeMCU)使用MQTT连接巴法云服务器注册巴法云账号Esp8266代码MQTT连接界面测试内容请搜索靠谱客的其他文章。
本图文内容来源于网友提供,作为学习参考使用,或来自网络收集整理,版权属于原作者所有。


发表评论 取消回复