获取微信小程序授权信息并保存到数据库中(包含openId和session_key,java后台)
先来看效果图
微信小程序:
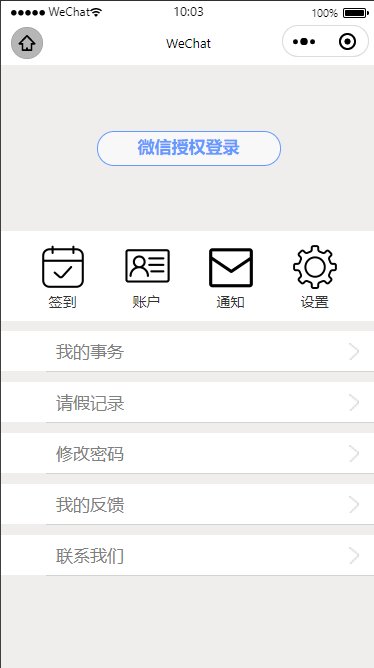
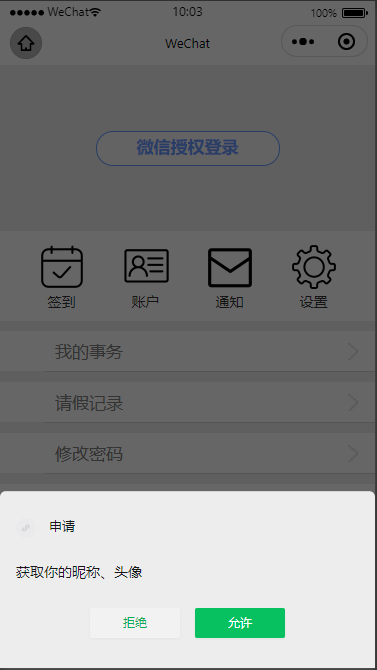
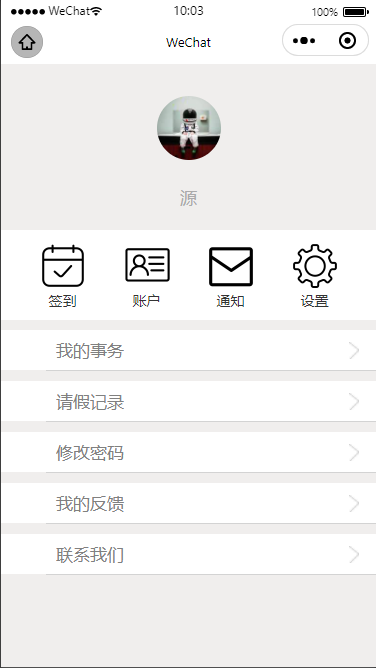
数据库,第一行数据是笔者写测试的时候随便加的。

这是java控制台显示信息,因为已经存在过了,所以不再存储

废话不多说,上代码:
wxml(真正有用的就是view_1):
<view class="view_contain">
    <!-- 第一部分 -->
    <view class="view_1">
        <view class="btn" hidden="{{hidden_actionSheet}}" bindchange="actionSheetChange">
            <button class="bt_login" open-type="getUserInfo" bindgetuserinfo="allowGetUserInfo"> 微信授权登录 </button>
        </view>
        <view class="title_name" hidden="{{!hidden_actionSheet}}">
            <image class="userinfo-avatar" src="{{userInfo.avatarUrl}}" mode="cover"></image>
        </view>
        <view class="text" hidden="{{!hidden_actionSheet}}">
            <text class="userinfo-nickname">{{userInfo.nickName}}</text>
        </view>
    </view>
    <!-- 第二部分 -->
    <view class="view_2">
        <view class="view_tupianwenzi">
            <image class="image_tupian" src="../../img/签到.png"></image>
            <text class="text_saoyisao ">签到</text>
        </view>
        <view class="view_tupianwenzi ">
            <image class="image_tupian " src="../../img/wxb账户.png"></image>
            <text class="text_saoyisao ">账户</text>
        </view>
        <view class="view_tupianwenzi ">
            <image class="image_tupian " src="../../img/消息通知.png"></image>
            <text class="text_saoyisao ">通知</text>
        </view>
        <view class="view_tupianwenzi ">
            <image class="image_tupian " src="../../img/设置.png"></image>
            <text class="text_saoyisao ">设置</text>
        </view>
</view>
<!-- 第三部分 -->
<view class="view_3 ">
    <view class="list-item ">
        <image class="item-image " src=""></image>
        <text class="item-text ">我的事务</text>
        <image class="image-jiantou " src="../../img/arrow.png"></image>
    </view>
    <view class="line "></view>
    <view class="list-item ">
        <image class="item-image " src=""></image>
        <text class="item-text ">请假记录</text>
        <image class="image-jiantou " src="../../img/arrow.png"></image>
    </view>
    <view class="line "></view>
    <view class="list-item ">
        <image class="item-image " src=""></image>
        <text class="item-text ">修改密码</text>
        <image class="image-jiantou " src="../../img/arrow.png"></image>
    </view>
    <view class="line "></view>
    <view class="list-item ">
        <image class="item-image " src=""></image>
        <text class="item-text ">我的反馈</text>
        <image class="image-jiantou " src="../../img/arrow.png"></image>
    </view>
    <view class="line "></view>
    <view class="list-item ">
        <image class="item-image " src=""></image>
        <text class="item-text ">联系我们</text>
        <image class="image-jiantou " src="../../img/arrow.png"></image>
    </view>
    <view class="line "></view>
</view>
</view>
wxss:
page {
 width: 100%;
 height: 100%;
}


.userinfo-avatar {
 width: 128rpx;
 height: 128rpx;
 margin: 20rpx;
 border-radius: 50%;
}

.bt_login {
 width: 200rpx;
 height: 70rpx;
 color: #6699FF;
 border: 3rpx solid #6699FF;
 border-radius: 80rpx;
 font-size: 35rpx;
 margin: 20rpx 0;
 display: flex;
 justify-content: center;
 align-items: center;
}
.title_name{
 width: 100%;
 height: 200rpx;
 font-size: 35rpx;
 text-align: center;
}
.text{
   font-size: larger;
}
.cancel {
 font-size: 35rpx;
}

.userinfo-nickname {
 color: #aaa;
}


.view_contain {
 width: 100%;
 height: 100%;
 background: #f0eeed;
}

/* 第一部分 */

.view_1 {
 display: flex;
 justify-content: center;
 flex-flow: column;
 width: 100%;
 height: 333rpx;
 background: #f0eeed;

}

.view_image_text {
 width: 100%;
 height: 300rpx;
 /* 水平垂直居中 */
 display: flex;
 justify-content: center;
 align-items: center;
}

.view_image_text>image {
 width: 200rpx;
 height: 200rpx;
 border-radius: 50%;
 border: 10rpx solid rgba(0, 0, 0, 0.1);
}

.text {
 display: flex;
 justify-content: center;
 align-items: center;
}

/* 第二部分 */

.view_2 {
 width: 100%;
 height: 15%;
 display: flex;
 flex-direction: row;
 align-items: center;
 justify-content: center;
 background: white;
}

.view_tupianwenzi {
 display: flex;
 flex-direction: column;
 width: 120rpx;
 align-items: center;
 margin-left: 25rpx;
 margin-right: 25rpx;
}

.image_tupian {
 display: flex;
 width: 100rpx;
 height: 100rpx;
}

/* 第三部分 */

.view_3 {
 width: 100%;
 height: 50%;
 /* background: #f0eeed; */
}

.list-item {
 display: flex;
 flex-direction: row;
 align-items: center;
 width: 100%;
 height: 80rpx;
 margin-top: 20rpx;
 position: relative;
 /*父元素位置要设置为相对*/
 background: white;
}

.item-image {
 width: 50rpx;
 height: 50rpx;
 margin: 20rpx;
}

.item-text {
 color: gray;
 font-size: 35rpx;
 margin-left: 20rpx;
}

.image-jiantou {
 width: 20rpx;
 height: 35rpx;
 position: absolute;
 /* 要约束所在位置的子元素的位置要设置成绝对 */
 right: 0;
 /* 靠右调节 */
 margin-right: 35rpx;
}

/* 黑线 使得产生阴影效果 */

.line {
 width: 100%;
 height: 3rpx;
 background: lightgray;
 margin-left: 90rpx;
}
核心js(注意看注释):
wx.login({
      success: function(res) {
        if (res.code) {  //wx.login获取code。
          console.log(res.code);
          //发起网络请求
          wx.getUserInfo({
            success:function(res_user){
              console.log(res_user.userInfo)
              wx.request({
                url: 'http://xxx.xxx.xxx.xxx:服务器端口/自定义名字',//填写自己的url
                method:'POST',
                //向后端发送的数据
                data: {
                  code: res.code ,   //将code发送到后台服务器。
                  imgurl: res_user.userInfo.avatarUrl,//获取头像url
                  nickname:res_user.userInfo.nickName,//获取昵称
                  sex:res_user.userInfo.gender,//获取性别
                },
                header: {
                       "Content-Type": "application/x-www-form-urlencoded" //POST方式是这个
              },
              })
            }
          })

        } else {
          console.log('获取用户登录态失败!' + res.errMsg)
        }
      }
    });
数据库设计(这个是我自己随便设计的,根据需求自己设计):

java,这里我使用的是springboot+mybatisplus:
entity层:
package com.hkd.entity;

import com.baomidou.mybatisplus.annotation.TableId;
import com.baomidou.mybatisplus.annotation.TableName;
import lombok.Data;

/**
 * @author xzbz
 * @create 2022-01-07 16:51
 */
@Data
@TableName("user")
public class user {

    @TableId
    private long id;
    private String nickname;
    private String password;
    private String sex;
    private String openid;
    private String session_key;
    private String imgurl;
}
mapper层:
package com.hkd.mapper;

import com.baomidou.mybatisplus.core.mapper.BaseMapper;
import com.hkd.entity.user;
import org.apache.ibatis.annotations.Mapper;

/**
 * @author xzbz
 * @create 2022-01-07 16:56
 */
@Mapper
public interface UserMapper extends BaseMapper<user> {
    public user selectUserByOpenId(String Openid);
}
service层:
package com.hkd.service;

import com.hkd.entity.user;
import com.hkd.mapper.UserMapper;
import org.springframework.beans.factory.annotation.Autowired;
import org.springframework.stereotype.Service;

/**
 * @author xzbz
 * @create 2022-01-07 16:58
 */
@Service
public class UserService {
    @Autowired
    private UserMapper userMapper;

    public boolean save(user user){
        return userMapper.insert(user)>0;
    }

    public int update(user user){
        return userMapper.updateById(user);
    }

    public user selectUserByOpenId(String openId){
        return userMapper.selectUserByOpenId(openId);
    }
}
Controller层(里面的appid和appsecret填写自己的):
package com.hkd.controller;

import com.hkd.entity.user;
import com.hkd.service.UserService;
import org.springframework.beans.factory.annotation.Autowired;
import org.springframework.web.bind.annotation.RequestMapping;
import org.springframework.web.bind.annotation.RequestParam;
import org.springframework.web.bind.annotation.ResponseBody;
import org.springframework.web.bind.annotation.RestController;

import java.io.BufferedReader;
import java.io.InputStreamReader;
import com.alibaba.fastjson.JSON;
import com.alibaba.fastjson.JSONObject;
import org.springframework.stereotype.Controller;
import org.springframework.web.bind.annotation.RequestMapping;
import org.springframework.web.bind.annotation.RequestParam;
import org.springframework.web.bind.annotation.ResponseBody;

import java.io.BufferedReader;
import java.io.InputStream;
import java.io.InputStreamReader;
import java.net.URL;
import java.net.URLConnection;

import static org.springframework.web.bind.annotation.RequestMethod.POST;
/**
 * @author xzbz
 * @create 2022-01-07 17:01
 */
@RestController
public class UserController {
    @Autowired
    private UserService userService;

    @ResponseBody
    @RequestMapping(value = "/login",method = POST)
    public  void getOpenid(@RequestParam(value="code",required=false)String code,@RequestParam(value = "imgurl")String imgurl,
                                 @RequestParam(value = "nickname")String nickname,@RequestParam(value = "sex")String sex){

        //微信官方提供获取openid的url
        String WX_URL = "https://api.weixin.qq.com/sns/jscode2session?appid=APPID&secret=SECRET&js_code=JSCODE&grant_type=authorization_code";
        //替换appid,appsecret,和code
        String requestUrl = WX_URL.replace("APPID", "").//填写自己的appid
                replace("SECRET", "").replace("JSCODE", code).//填写自己的appsecret,
                replace("authorization_code", "authorization_code");
        //定义json对象
        JSONObject convertvalue=new JSONObject();
        //调用get方法
        String  returnvalue=GET(requestUrl);
        //解析返回值,对象解析成字符串
        convertvalue= (JSONObject) JSON.parse(returnvalue);
        String session_key= (String) convertvalue.get("session_key");
        String openid= (String) convertvalue.get("openid");
        user user1 = userService.selectUserByOpenId(openid);//判断数据库中是否已存在
        if(user1==null){//不存在就存入数据库
            user user=new user();
            user.setSex(sex);
            user.setOpenid(openid);
            user.setImgurl(imgurl);
            user.setNickname(nickname);
            user.setPassword("123456");
            user.setSession_key(session_key);
            userService.save(user);
        }else{
            System.out.println("用户已存在,请登录");
        }
        System.out.println(returnvalue);//打印测试
        System.out.println("openid:"+openid);//打印测试
        System.out.println("session_key:"+session_key);//打印测试

    }
    //发起ge请求---生成openid和session_key
    public  String GET(String url) {
        String result="";
        BufferedReader in = null;
        InputStream is = null;
        InputStreamReader isr = null;
        try{
            //构造url对象
            URL realUrl = new URL(url);
            //获取一个对应该URL的URLConnection对象
            URLConnection conn = realUrl.openConnection();
            conn.connect();
            is = conn.getInputStream();
            isr = new InputStreamReader(is);
            in = new BufferedReader(isr);
            String line;
            while ((line = in.readLine()) != null) {
                result += line;
            }
        }catch (Exception e){
            e.printStackTrace();
            System.out.println("异常出现");
        }
        //关闭资源
        finally {
            try {
                if (in != null) {
                    in.close();
                }
                if (is != null) {
                    is.close();
                }
                if (isr != null) {
                    isr.close();
                }
            } catch (Exception e) {
                e.printStackTrace();
                System.out.println("出现异常");
            }
        }
        return result;
    }
}
appid和appsecret获取方法:https://mp.weixin.qq.com/
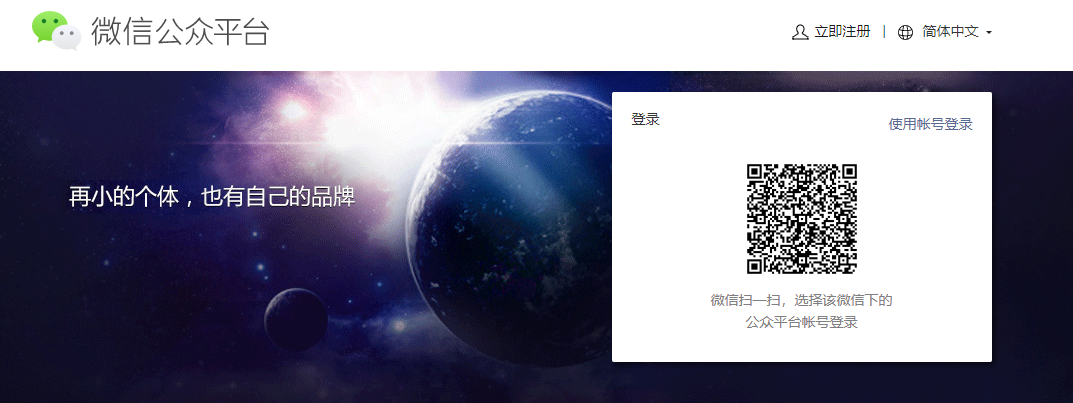
扫码登录之后
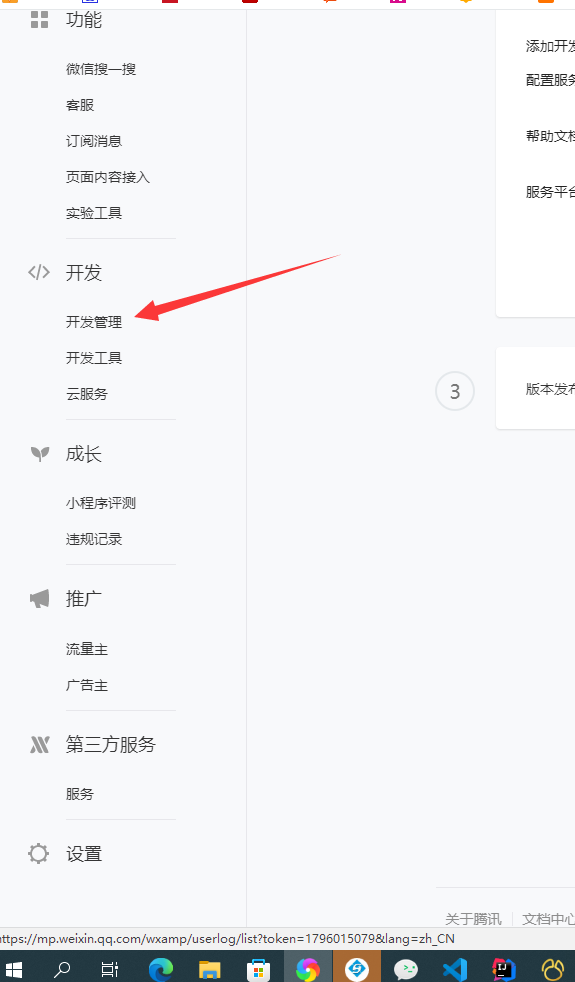


然后将获取到的AppID和AppSecret填入到代码中就可以返回了到openid和session_key了。
最后
以上就是俭朴导师最近收集整理的关于获取微信小程序授权信息并保存到数据库中的全部内容,更多相关获取微信小程序授权信息并保存到数据库中内容请搜索靠谱客的其他文章。
本图文内容来源于网友提供,作为学习参考使用,或来自网络收集整理,版权属于原作者所有。


发表评论 取消回复