Gazebo 中创建仿真实现方式有两种:
1.直接添加内置组件创建仿真环境
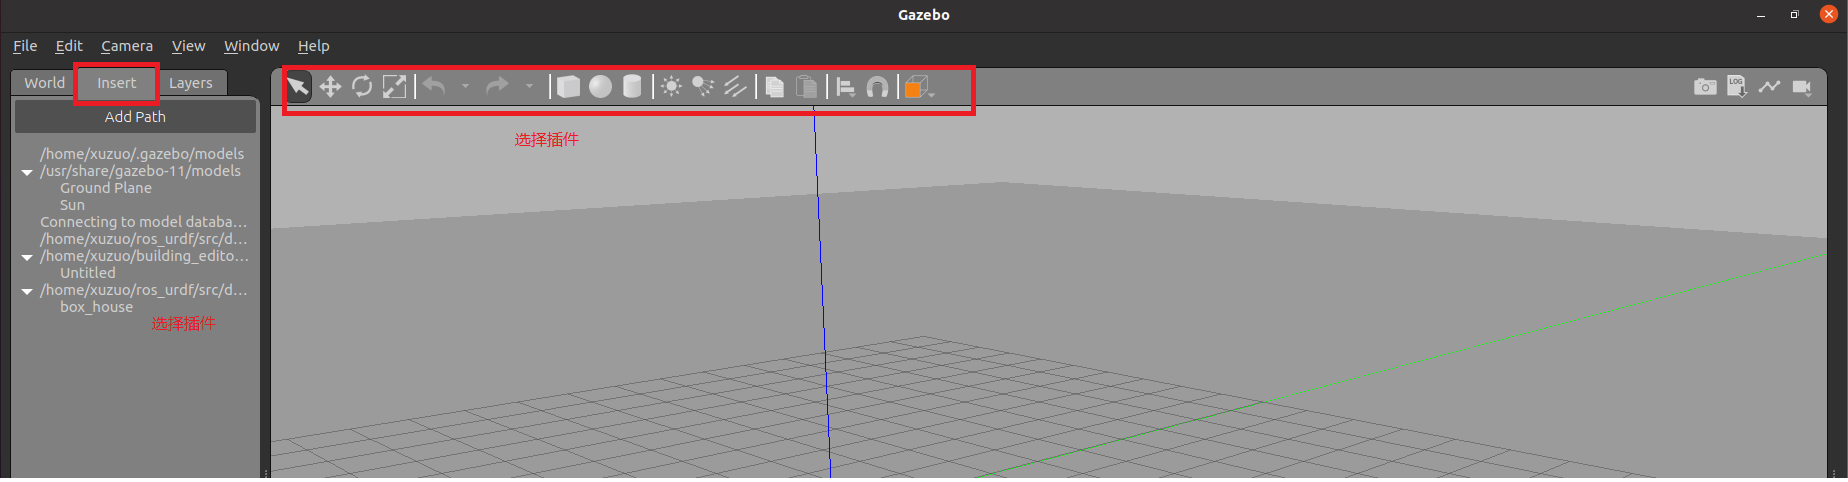
1.1启动 Gazebo 并添加组件
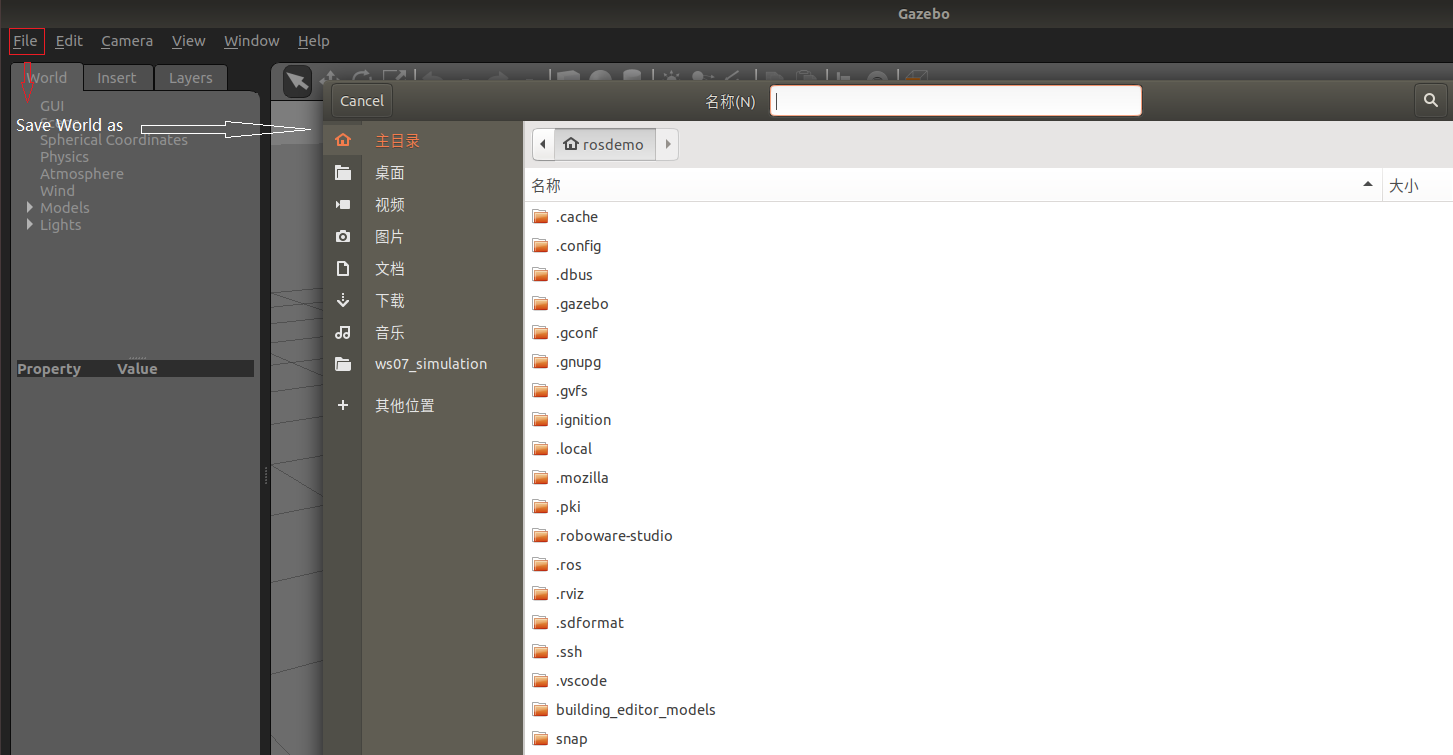
1.2保存仿真环境
添加完毕后,选择 file —> Save World as 选择保存路径(功能包下: worlds 目录),文件名自定义,后缀名设置为 .world

1.3 启动
<launch>
<!-- 将 Urdf 文件的内容加载到参数服务器 -->
<param name="robot_description" command="$(find xacro)/xacro $(find demo02_urdf_gazebo)/urdf/xacro/my_base_camera_laser.urdf.xacro" />
<!-- 启动 gazebo -->
<include file="$(find gazebo_ros)/launch/empty_world.launch">
<arg name="world_name" value="$(find demo02_urdf_gazebo)/worlds/hello.world" />
</include>
<!-- 在 gazebo 中显示机器人模型 -->
<node pkg="gazebo_ros" type="spawn_model" name="model" args="-urdf -model mycar -param robot_description"
/>
</launch>
核心代码: 启动 empty_world 后,再根据arg加载自定义的仿真环境
<include file="$(find gazebo_ros)/launch/empty_world.launch">
<arg name="world_name" value="$(find demo02_urdf_gazebo)/worlds/hello.world" />
</include>
2.自定义仿真环境
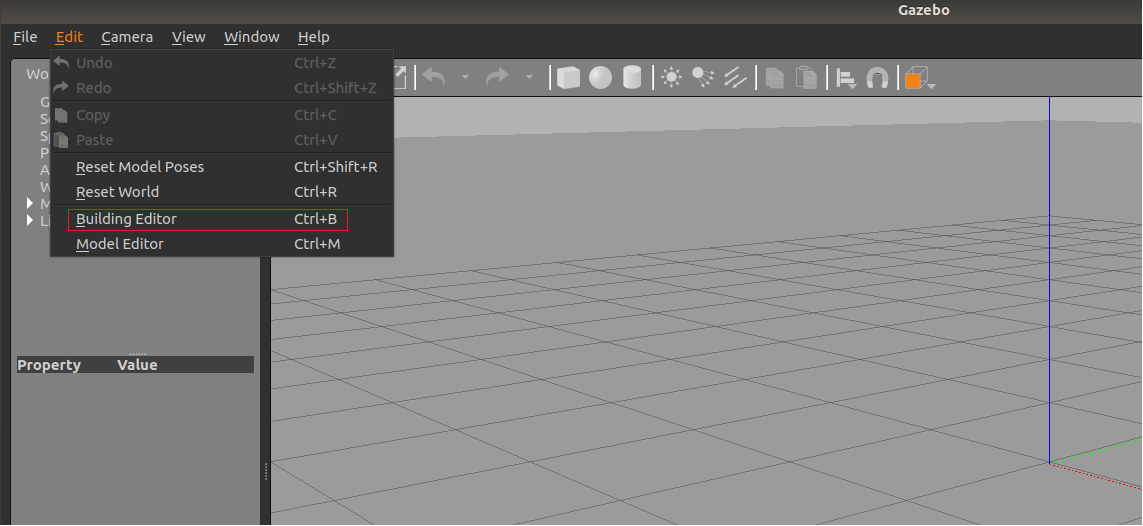
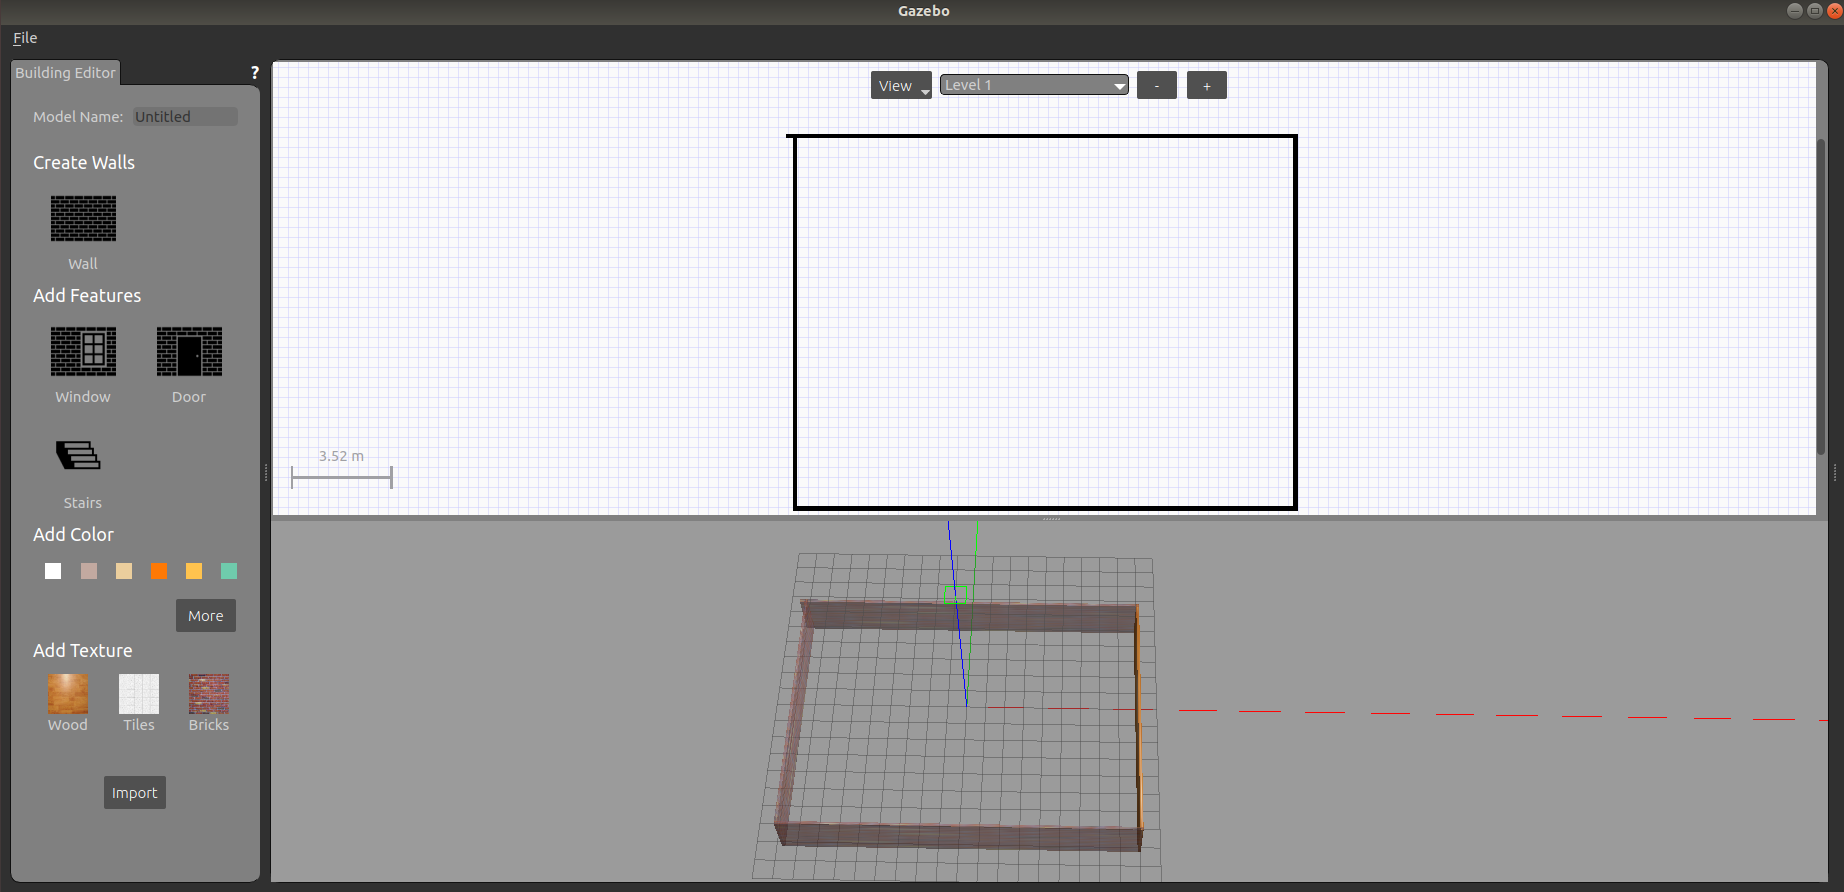
2.1 启动 gazebo 打开构建面板,绘制仿真环境
 2.2 保存构建的环境
点击: 左上角 file —> Save (保存路径功能包下的: models)
然后 file —> Exit Building Editor
2.3 保存为 world 文件
可以像方式1一样再添加一些插件,然后保存为 world 文件(保存路径功能包下的: worlds)
2.4 启动
同方式1
3.使用官方提供的插件
当前 Gazebo 提供的仿真道具有限,还可以下载官方支持,可以提供更为丰富的仿真实现,具体实现如下:
3.1 下载官方模型库
git clone https://github.com/osrf/gazebo_models
之前是:hg clone https://bitbucket.org/osrf/gazebo_models但是已经不可用
注意: 此过程可能比较耗时
3.2 将模型库复制进 gazebo
将得到的gazebo_models文件夹内容复制到 /usr/share/gazebo-*/models
3.3 应用
重启 Gazebo,选择左侧菜单栏的 insert 可以选择并插入相关道具了
最后
以上就是迷路金毛最近收集整理的关于Gazebo仿真环境搭建(04)的全部内容,更多相关Gazebo仿真环境搭建(04)内容请搜索靠谱客的其他文章。


发表评论 取消回复