平台参数:
Windows 8.1
Visual Studio 2013
Kinect for Xbox 360
Kinect for Windows SDK 1.8
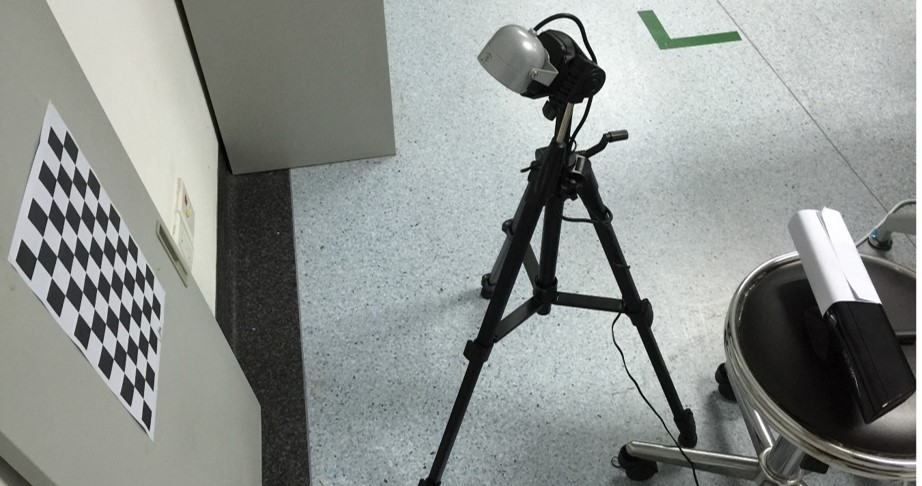
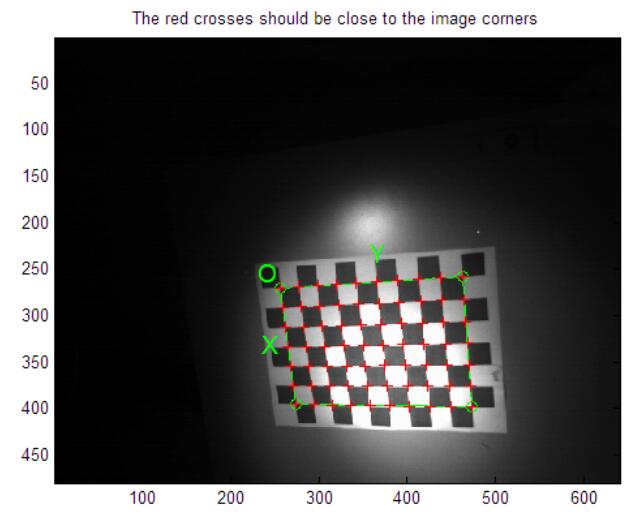
华硕的xtion用的较多,也想标定,但是感觉kinect的资料较多,所以想先标定手头的Kinect for xbox 360,再过渡到xtion上。在转载的这篇文章中http://blog.csdn.net/yaked/article/details/53125819
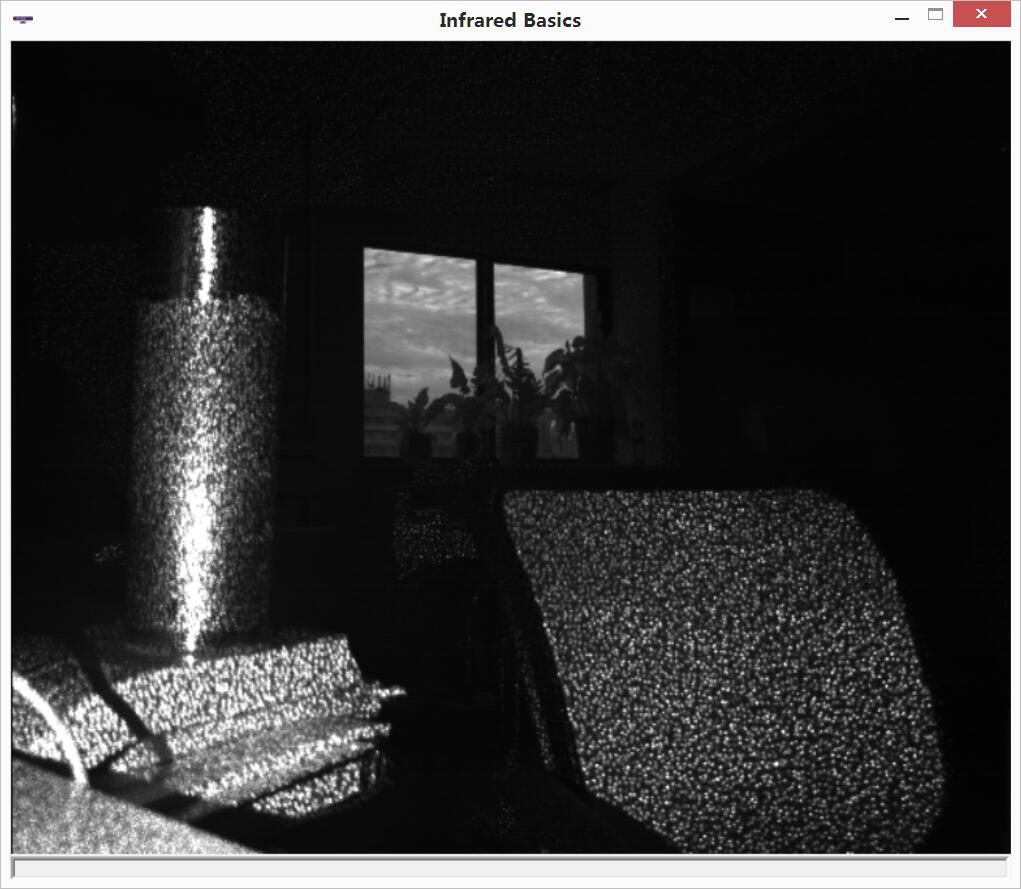
感觉还是比较靠谱,因此就跟着他来了,首先的问题是红外图像(Infrared Image)的获取,官方的SDK中有一个 InfraredBasics-D2D的例子,但是没有保存按钮就只能看看红外的效果。如下图所示
所以就深入下给它加上保存按钮,后边就可以用软件来读取保存好的图片去计算相机内参了。
修改步骤
1. 给界面添加按钮
打开工程文件InfraredBasics.rc下的Dialog,为界面添加一个按钮,属性Caption改为Screenshot,改变ID为IDC_BUTTON_SCREENSHOT,Default Button设为true。
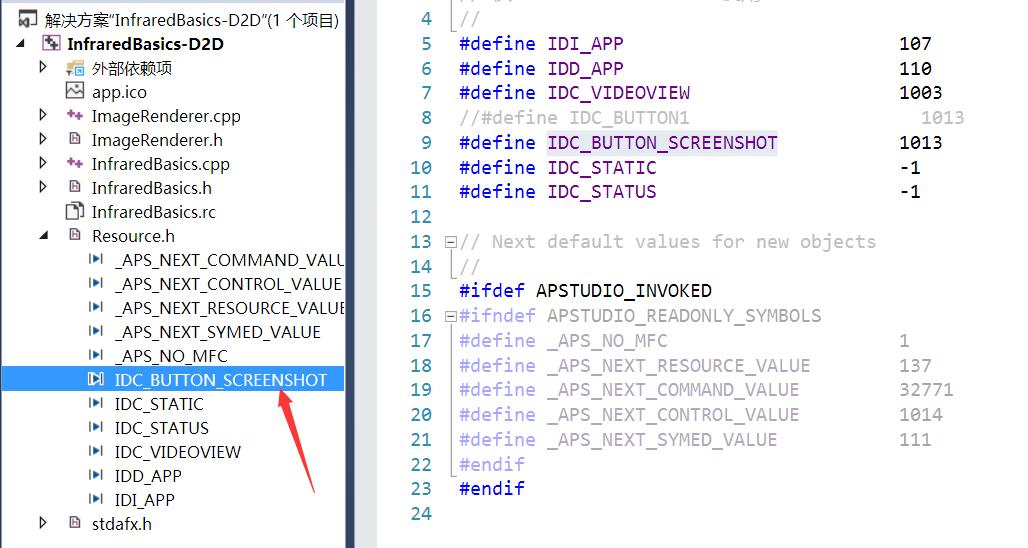
发现一个小问题,改变ID后在Resource.h文件中并没有出现这个变量。原来是添加的时候没有自动改,造成id相同,注释掉一个就可以了
注释掉以后就可以看到了刚添加的按钮资源了,如下图所示
2. 为按钮绑定变量和状态切换功能
其实以前学习MFC的时候,在界面上右键会有个添加变量的按钮,但是在这里一直都不起作用,所以没办法了,只能手动添加了。
在文件InfraredBasics.h的构造函数中添加一行 bool m_bSaveScreenshot; 为按钮的按下和松开绑定一个状态量
在InfraredBasics.cpp的CInfraredBasics的构造函数中添加变量的初始化m_bSaveScreenshot(false)
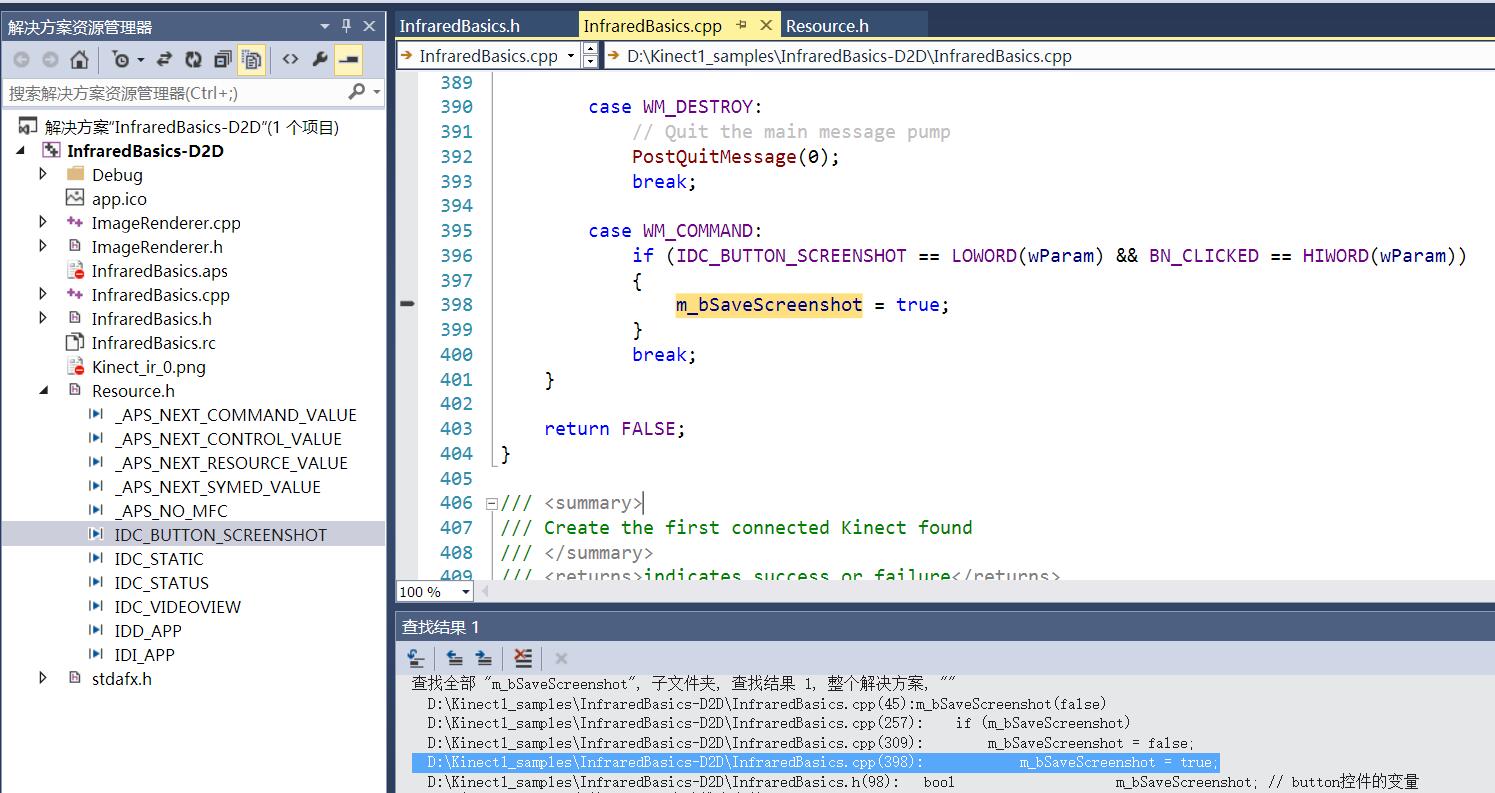
接下来就需要为它绑定事件了,按下按钮可以切换这个变量的状态。因此,在DlgProc函数中添加窗口按钮的状态切换代码
case WM_COMMAND:
if (IDC_BUTTON_SCREENSHOT == LOWORD(wParam) && BN_CLICKED == HIWORD(wParam))
{
  m_bSaveScreenshot = true;
}
break;
3. 图片保存
这个官方示例是在获取图片后用Direct2D显示到窗口,因此我们在它显示后,释放掉资源前加入我们的图片保存代码。Draw函数的后面加入
if (m_bSaveScreenshot)
{
  WCHAR statusMessage[cStatusMessageMaxLen];

  // Retrieve the path to My Photos
  WCHAR screenshotPath[MAX_PATH];
  GetScreenshotFileName(screenshotPath, _countof(screenshotPath));

  // Write out the bitmap to disk
  //hr = SaveBitmapToFile(static_cast<BYTE *>(LockedRect.pBits), cColorWidth, cColorHeight, 32, screenshotPath);

  hr = SaveBitmapToFile(reinterpret_cast<BYTE*>(m_pTempColorBuffer), cColorWidth, cColorHeight, 32, screenshotPath);

  if (SUCCEEDED(hr))
  {
    // Set the status bar to show where the screenshot was saved
       StringCchPrintf(statusMessage, cStatusMessageMaxLen, L"Screenshot saved to %s", screenshotPath);
  } else
  {
      StringCchPrintf(statusMessage, cStatusMessageMaxLen, L"Failed to write screenshot to %s", screenshotPath);
  }

    SetStatusMessage(statusMessage);

    // toggle off so we don't save a screenshot again next frame
    m_bSaveScreenshot = false;
}
保存图片实际的代码是
HRESULT CInfraredBasics::SaveBitmapToFile(BYTE* pBitmapBits, LONG lWidth, LONG lHeight, WORD wBitsPerPixel, LPCWSTR lpszFilePath)
{
DWORD dwByteCount = lWidth * lHeight * (wBitsPerPixel / 8);

BITMAPINFOHEADER bmpInfoHeader = { 0 };

bmpInfoHeader.biSize = sizeof(BITMAPINFOHEADER); // Size of the header
bmpInfoHeader.biBitCount = wBitsPerPixel; // Bit count
bmpInfoHeader.biCompression = BI_RGB; // Standard RGB, no compression
bmpInfoHeader.biWidth = lWidth; // Width in pixels
bmpInfoHeader.biHeight = -lHeight; // Height in pixels, negative indicates it's stored right-side-up
bmpInfoHeader.biPlanes = 1; // Default
bmpInfoHeader.biSizeImage = dwByteCount; // Image size in bytes

BITMAPFILEHEADER bfh = { 0 };

bfh.bfType = 0x4D42; // 'M''B', indicates bitmap
bfh.bfOffBits = bmpInfoHeader.biSize + sizeof(BITMAPFILEHEADER); // Offset to the start of pixel data
bfh.bfSize = bfh.bfOffBits + bmpInfoHeader.biSizeImage; // Size of image + headers

// Create the file on disk to write to
HANDLE hFile = CreateFileW(lpszFilePath, GENERIC_WRITE, 0, NULL, CREATE_ALWAYS, FILE_ATTRIBUTE_NORMAL, NULL);

// Return if error opening file
if (NULL == hFile)
{
 return E_ACCESSDENIED;
}

DWORD dwBytesWritten = 0;

// Write the bitmap file header
if (!WriteFile(hFile, &bfh, sizeof(bfh), &dwBytesWritten, NULL))
{
  CloseHandle(hFile);
  return E_FAIL;
}

// Write the bitmap info header
if (!WriteFile(hFile, &bmpInfoHeader, sizeof(bmpInfoHeader), &dwBytesWritten, NULL))
{
  CloseHandle(hFile);
  return E_FAIL;
}

// Write the RGB Data
if (!WriteFile(hFile, pBitmapBits, bmpInfoHeader.biSizeImage, &dwBytesWritten, NULL))
{
  CloseHandle(hFile);
  return E_FAIL;
}

// Close the file
CloseHandle(hFile);
return S_OK;
}
然后需要在头文件里申明这个函数(右键——Refactor——Create Declaration)
接着添加获取截图名称的代码
HRESULT GetScreenshotFileName(wchar_t *screenshotName, UINT screenshotNameSize)
{
wchar_t *knownPath = NULL;
HRESULT hr = SHGetKnownFolderPath(FOLDERID_Pictures, 0, NULL, &knownPath);

if (SUCCEEDED(hr))
{
// Get the time
wchar_t timeString[MAX_PATH];
GetTimeFormatEx(NULL, 0, NULL, L"hh'-'mm'-'ss", timeString, _countof(timeString));

// File name will be KinectSnapshot-HH-MM-SS.bmp
StringCchPrintfW(screenshotName, screenshotNameSize, L"%s\Kinect_IR-%s.bmp", knownPath, timeString);
}

CoTaskMemFree(knownPath);
return hr;
}
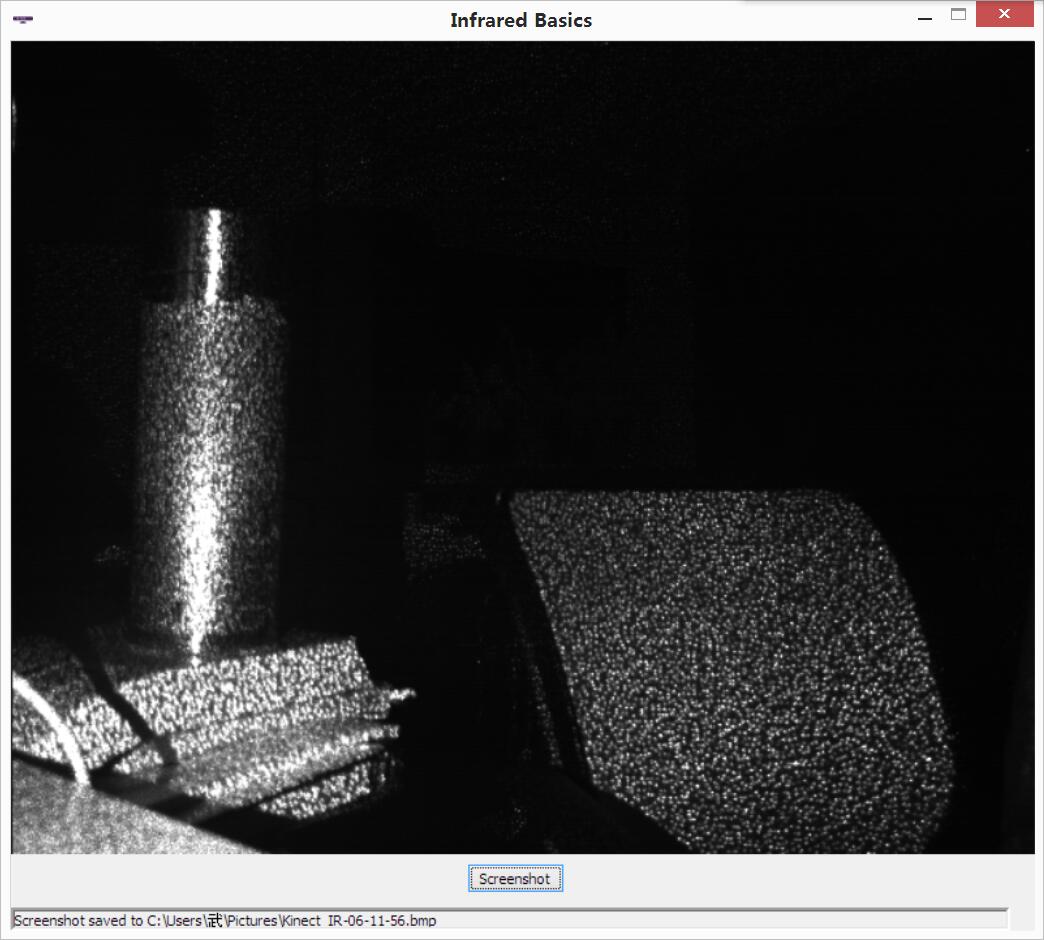
最后的效果图如图
收获:
加深了对MFC的理解,为标定做准备啦,呵呵!
关于在OpenCV中的处理,还可以看看他的经验总结:http://blog.csdn.net/yangtrees/article/details/16106271
=====================================2016.12=============================================
=========================================================
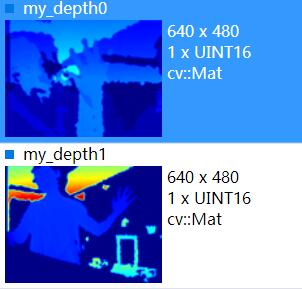
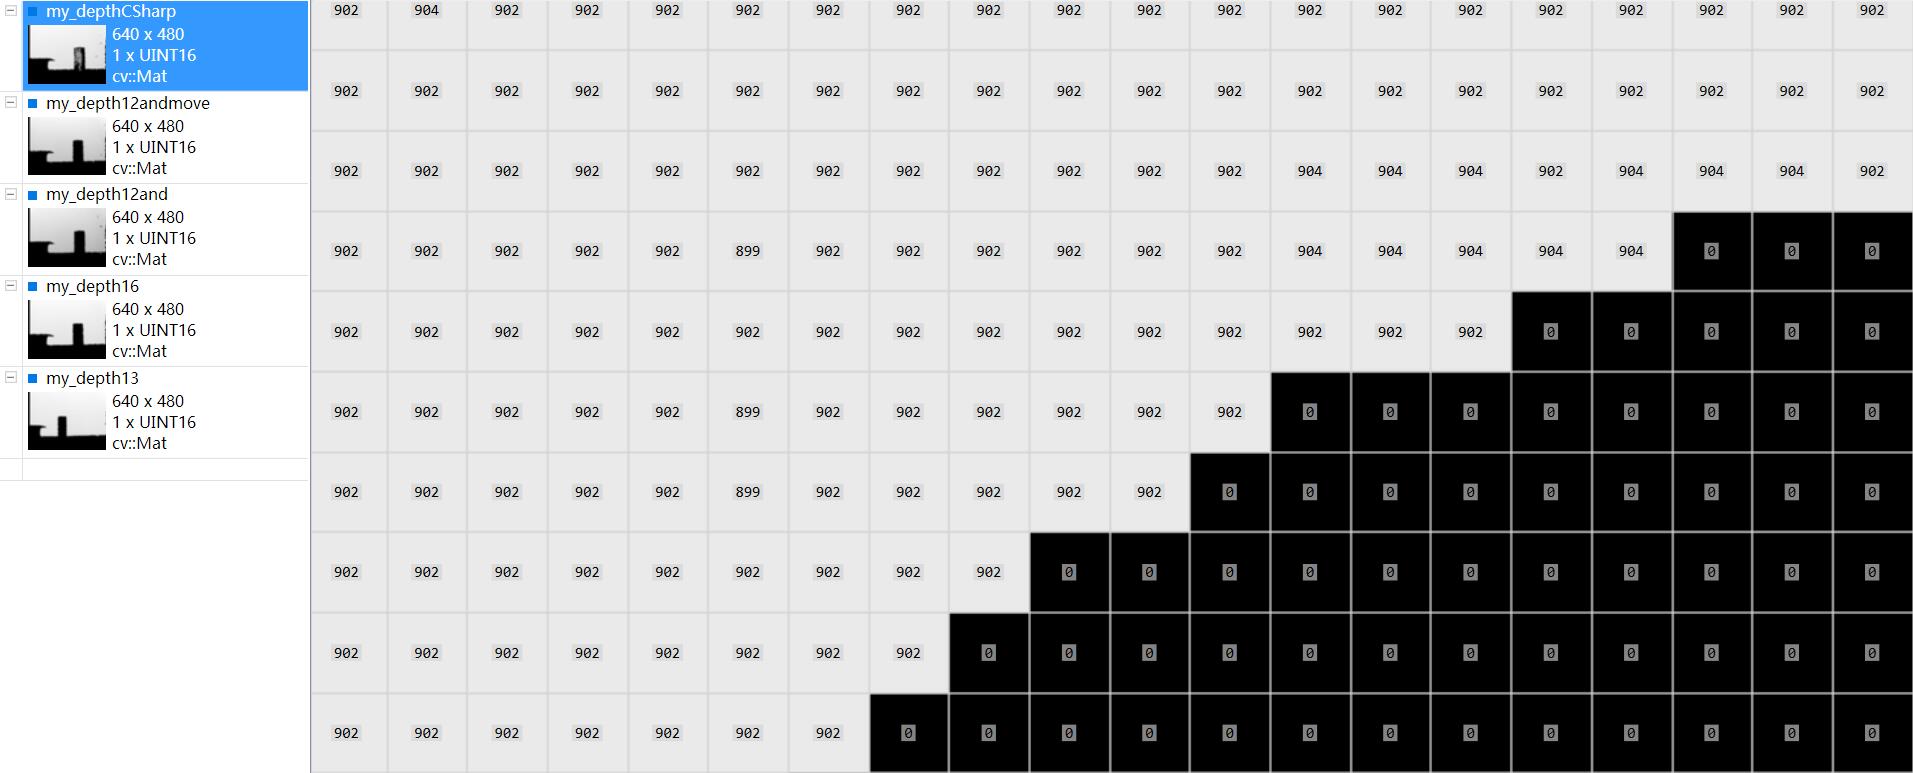
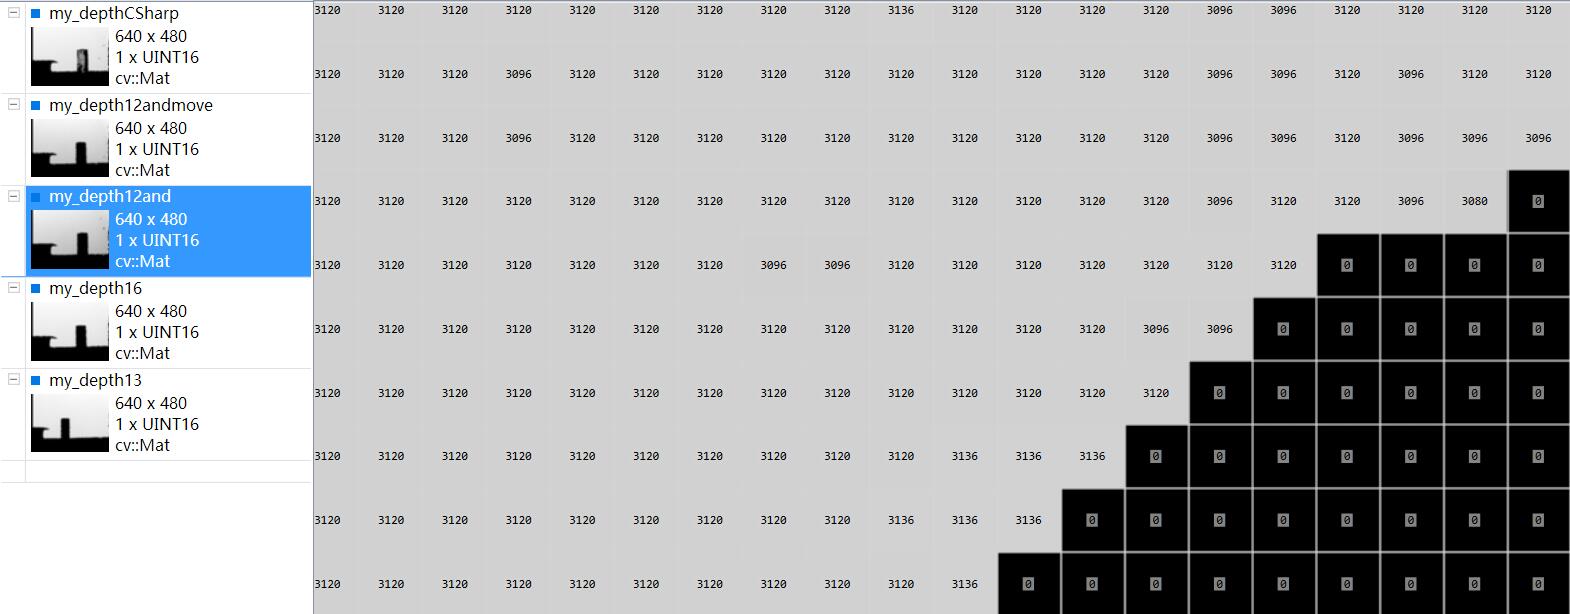
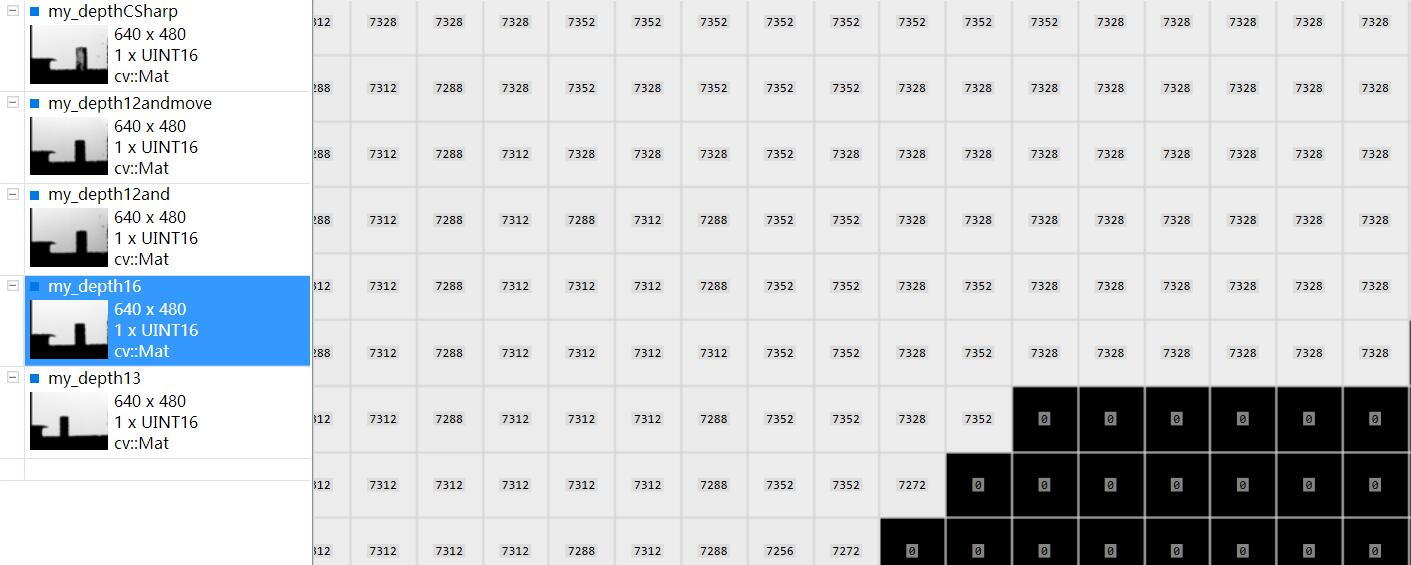
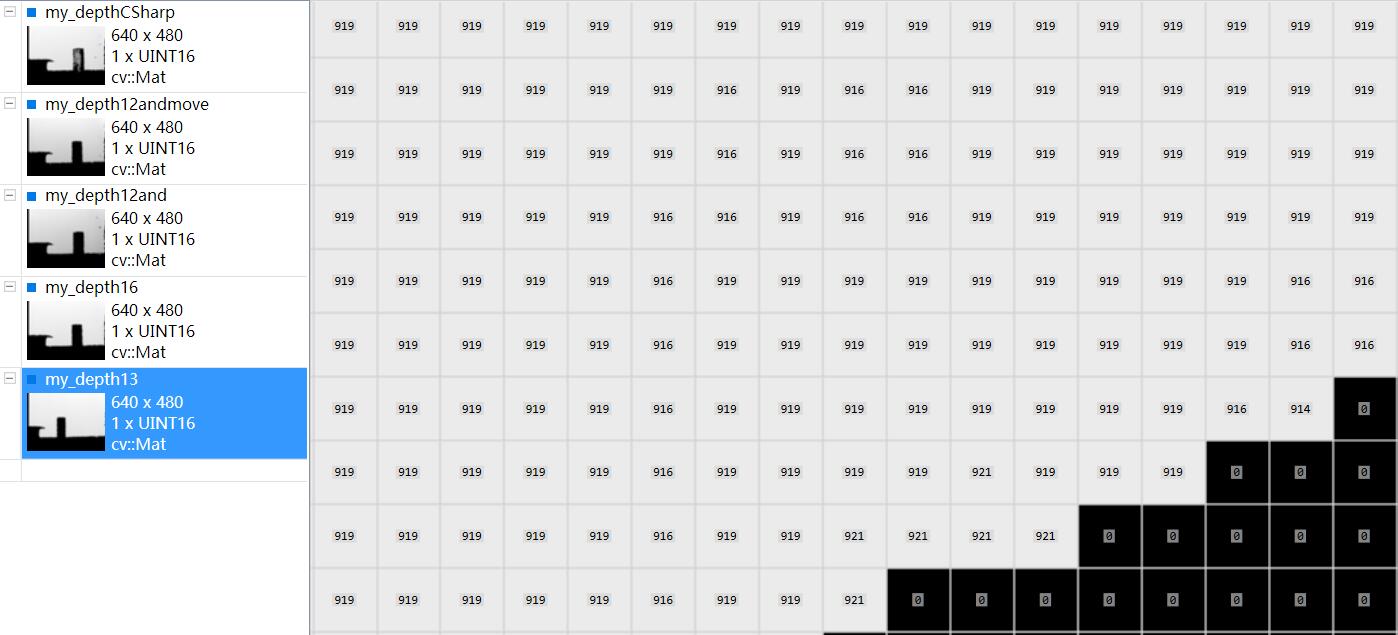
这里多说一句,Kinect的深度图,每一个深度像素值是2 BYTE,也就是16 bit,前13位为深度数据,相机离目标的位置,后三位为用户的索引id。因此提取深度图的时候千万记得要先提取出13位的数据,然后再保存,下面给出一个直接保存16位和直接13位的数据对比
另外,我在网上看到有博客说http://blog.csdn.net/zouxy09/article/details/8146719和http://blog.csdn.net/timebomb/article/details/7169372如果NuiInitialize(NUI_INITIALIZE_FLAG_USES_DEPTH)使用16数据的时候,低12位为有效位。这个我查阅了官方文档https://msdn.microsoft.com/en-us/library/jj131028.aspx 好像没有看到关于这方面的说法。深度数据只有16位和32位之分。
我试过了,关于这部分
d:kinect_workconsoleapplication1_cpp_depthnouseridmain.cpp
/************************************************************************/
/* 使用NUI_INITIALIZE_FLAG_USES_DEPTH信息中,高13位为深度有效信息位
 * */
/************************************************************************/
#include <windows.h>
#include <iostream>
#include <NuiApi.h>
#include <opencv2/opencv.hpp>

using namespace std;
using namespace cv;

int main(int argc, char *argv[])
{
	Mat image;
	image.create(480, 640, CV_16UC1);

	//1、初始化NUI,注意:这里传入的参数是DEPTH并不是NUI_INITIALIZE_FLAG_USES_DEPTH_AND_PLAYER_INDEX
	HRESULT hr = NuiInitialize(NUI_INITIALIZE_FLAG_USES_DEPTH);
	if (FAILED(hr))
	{
		cout << "NuiInitialize failed" << endl;
		return hr;
	}

	HANDLE nextColorFrameEvent = CreateEvent(NULL, TRUE, FALSE, NULL);
	HANDLE depthStreamHandle = NULL;

	hr = NuiImageStreamOpen(NUI_IMAGE_TYPE_DEPTH, NUI_IMAGE_RESOLUTION_640x480,
							0, 2, nextColorFrameEvent, &depthStreamHandle);
	if (FAILED(hr))
	{
		cout << "Could not open color image stream video" << endl;
		NuiShutdown();
		return hr;
	}
	namedWindow("depthImage", CV_WINDOW_AUTOSIZE);

	while (1)
	{
		const NUI_IMAGE_FRAME * pImageFrame = NULL;

		if (WaitForSingleObject(nextColorFrameEvent, INFINITE) == 0)
		{
			hr = NuiImageStreamGetNextFrame(depthStreamHandle, 0, &pImageFrame);
			if (FAILED(hr))
			{
				cout << "Could not get depth image" << endl;
				NuiShutdown();
				return -1;
			}

			INuiFrameTexture * pTexture = pImageFrame->pFrameTexture;
			NUI_LOCKED_RECT LockedRect;

			pTexture->LockRect(0, &LockedRect, NULL, 0);
			if (LockedRect.Pitch != 0)
			{
				for (int i = 0; i < image.rows; i++)
				{
					USHORT *ptr = image.ptr<USHORT>(i);  //第i行的指针

					//注意这里需要转换,因为每个数据是2个字节
					uchar *pBufferRun = (uchar*)(LockedRect.pBits) + i * LockedRect.Pitch;
					USHORT * pBuffer = (USHORT*)pBufferRun;

					//for (int j = 0; j < image.cols; j++)
					//{
					//	ptr[j] = 255 - (uchar)(256 * pBuffer[j] / 0x0fff);  //直接将数据归一化处理便于显示
					//}

					// 16bit
					/*for (int j = 0; j < image.cols; j++)
					{
						ptr[j] = pBuffer[j];// 将pbuffer的每一行数据存到cvMat中
					}*/

					// 12bitandMove
					/*for (int j = 0; j < image.cols; j++)
					{
						USHORT real_depth = (pBuffer[j] & 0x0fff) << 4;// 取出低12位数据
						ptr[j] = real_depth;
					}*/

					// 12bitand
					//for (int j = 0; j < image.cols; j++)
					//{
					//	USHORT real_dpth2 = pBuffer[j];
					//	USHORT real_dpth = (pBuffer[j] & 0x0fff);// 取出低12位数据不移位
					//	ptr[j] = real_dpth;

					//}

					// 13bit, 经验证这种是正确的,单位为毫米
					for (int j = 0; j < image.cols; j++)
					{
						USHORT real_depth = (pBuffer[j] & 0xfff8) >> 3;// 取出高13位数据
						ptr[j] = real_depth;
					}
				}
				imshow("depthImage", image);
			} else
			{
				cout << "Buffer length of received texture is bogusrn" << endl;
			}

			pTexture->UnlockRect(0);
			NuiImageStreamReleaseFrame(depthStreamHandle, pImageFrame);
		}
		if (cvWaitKey(20) == 27)// ESC
		{
			vector<int>compression_param;
			compression_param.push_back(CV_IMWRITE_PNG_COMPRESSION);
			compression_param.push_back(0);// png Highest quality


			stringstream stream;
			stream << "D:\kinect_work\ConsoleApplication1_cpp_depthNoUserID\depth_img\" << "Kinect_depth_13" << ".png";

			string filename = stream.str();

			// 保存图片
			if (imwrite(filename, image, compression_param))
			{
				cout << "save image" << endl;
				cout << sizeof(uchar) << endl;
			} else
			{
				cout << "save failed." << endl;
			}
			break;
		}

	}
	NuiShutdown();
	return 0;
}
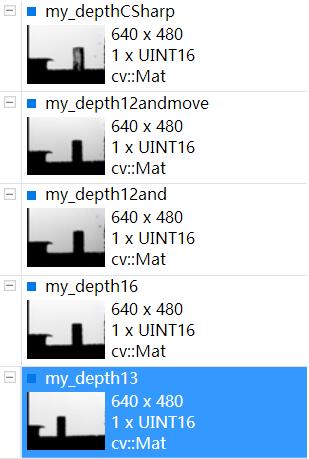
最后我把数据和我之前用CSharp写的保存深度图的数据做了对比,13位的那个数据my_depth13和my_depthCSharp数据接近(隔了一天采集,但是kinect都在桌子边沿,所以距离有一点差别)
kinect正对着一面白墙,他们之间有个杯子。可以利用VS插件ImageWatch查看图片像素值(深度图像素值即为kinect距离物体的距离值,单位为毫米),较为方便。
其中第一幅和最后一幅图的数据接近,说明13位数据是正确的,也就是说,并不存在16位数据,12位为有效位的情况。
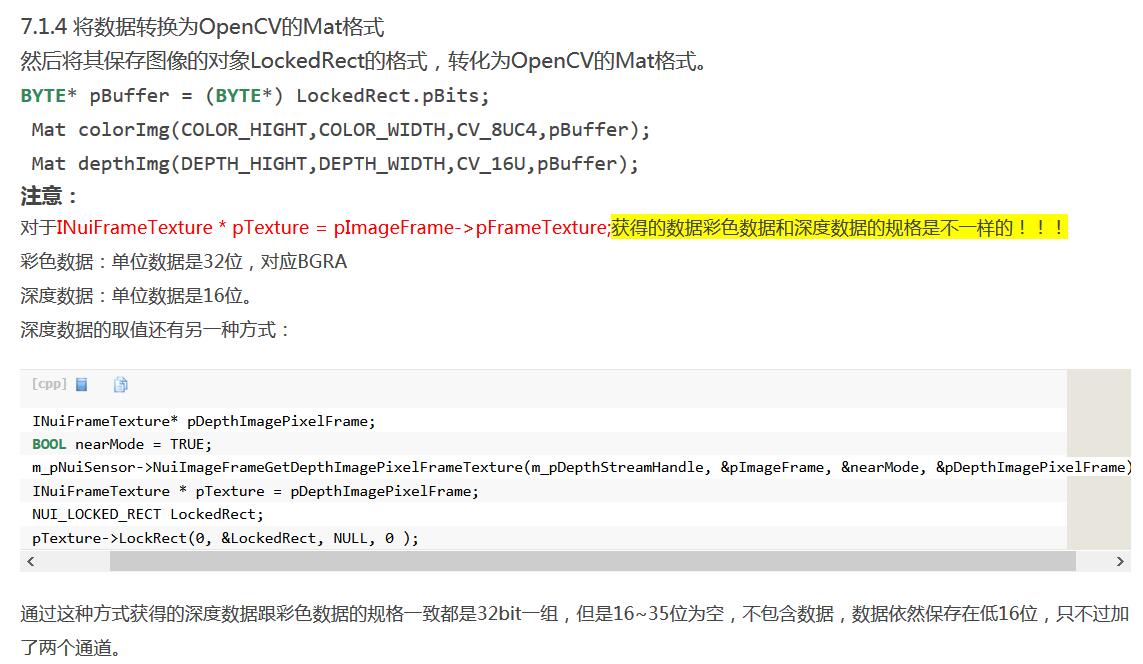
关于这部分,这个博主有探索,在7.1.4部分 http://blog.csdn.net/yangtrees/article/details/16106271
这里他说的和官方不一样,32位,16位深度,16位用户ID,有待考察验证。
最后
以上就是含蓄铃铛最近收集整理的关于官方C++示例 InfraredBasics-D2D的学习及Kinect深度数据的获取、保存的全部内容,更多相关官方C++示例内容请搜索靠谱客的其他文章。




发表评论 取消回复