


本文主要参照书《SIMULINK仿真与代码生成技术入门到精通》
Sinmulink coder 与Matlab coder生成的方式并不相同,前者在代码生成的输入输出定义中,并不能将其定义为结构体等类型,只能将输入输出定义为矩阵形式。同样的将函数封装为MATLAB function,设置输入输出端口。其中输入端口必须重新设置,右键端口1,点击“Block Parameters”选项,将“Port dimensions”设置为相应的输入格式,在本算例中设置为[4 1]。
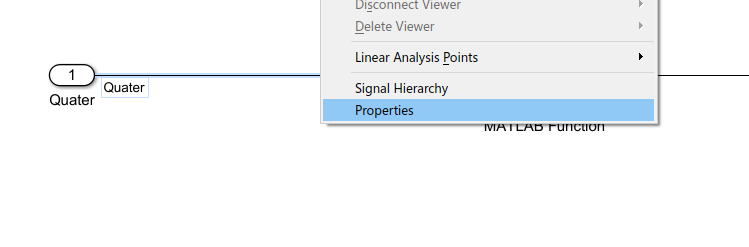
并且要对模型中的信号线命名,增加生成代码的可读性。操作为右键信号线,选择如图15 中选项。
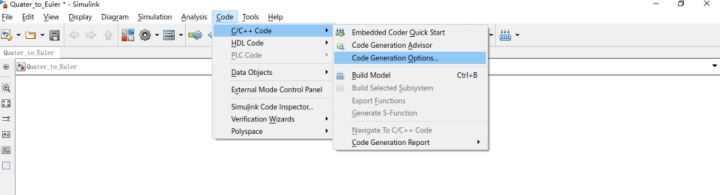
点击如图16选项,进入代码设置界面。
如图17中点击“System target file”右侧的“Browse”,如图选择“Embedded coder”。

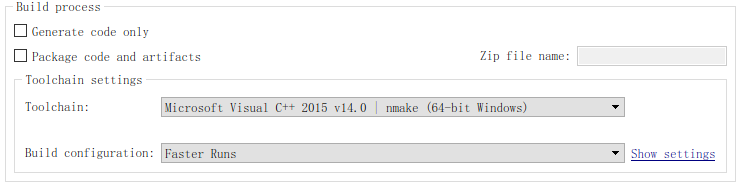
其中的Toolchain setting 设置为下图所示。
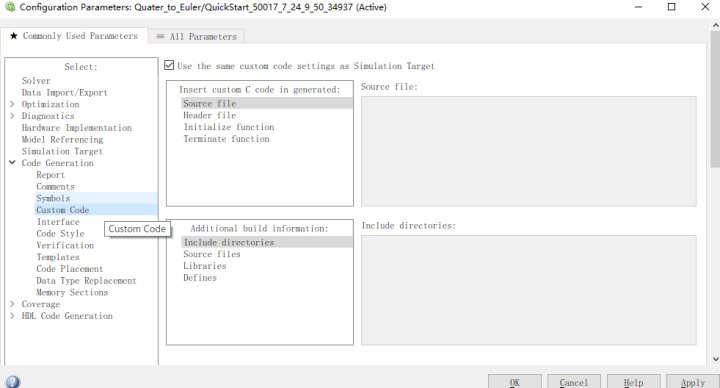
如图18,点击“Custom Code”选项并将最上方的选项框打勾
点击其中的“Code placement”选项,如下图选中最后一个选项。
同理,如图选中如下图选项
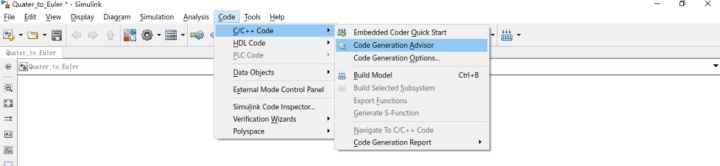
如图21,调用出“Code generate advisor”选项。选中此项目,点击“Run Select Checks”,依据报告进行相应的设置调整
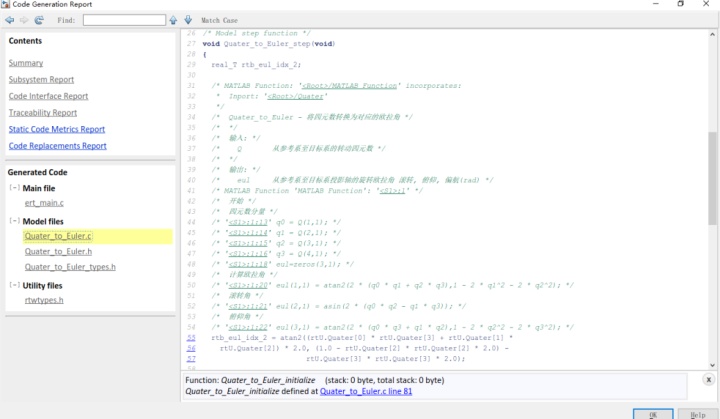
最后点击“Build model”,生成代码如下图
SIMULINK代码生成参数配置
在Simulink完成代码移植前需要对Configuration Parameters配置,Configuration Parameters中集中管理着模型的代码生成方法、格式等约束条件,为了生成嵌入式代码,至少需要配合3部分:模型的解算器Solver、模型的系统目标文件(嵌入式系统目标文件),硬件实现规定(Hardware Implementation)。

5.1 模型的解算器Solver
模型解算器solver页面,如下图
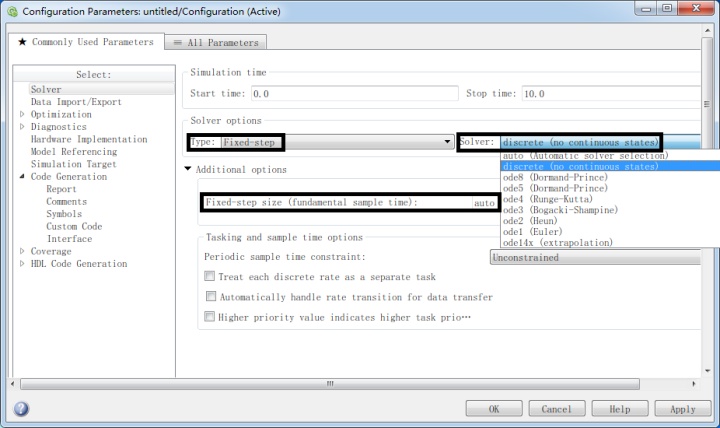
Solver options中的Type选择为Fixed-step
Solver options中的Solver选择为discrete,理由:由于模型不是连续状态。
Solver options中的Fixed-step size设置为auto,针对STM32的代码生成过程中,硬件驱动工具箱往往将步长step size作为其外设或内核中定时器的中断周期,使得生成打算法代码在硬件芯片中以同样的时间间隔执行。
5.2 硬件实现规定(Hardware Implementation)
Hardware Implementation页面,如下图
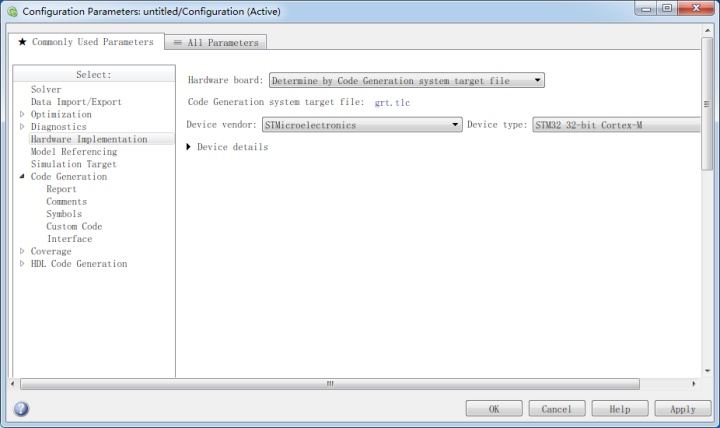
Hardware board(硬件板):选择为None,不选择具体操作系统。
Device vendor、Device type:设备制造商和设备型号。
Largest atomic size:最大原子尺寸,关系数据的储存形式。
5.3 代码生成规定(Code Generation)
其内容包扩Report(报告)、Comments(注释)、Symbols(定义规则)、Custom Code(自定义代码)、Interface(接口)、Code Style(代码风格)、Verification(代码验证方式SIL和PIL配置)、Templates(生成模板)、Code Placement(代码存储方式)、Data Type Replacement(自定义类型名)、Memory Sections(储存段设置)。
5.3.1Code Generation配置,如下图:
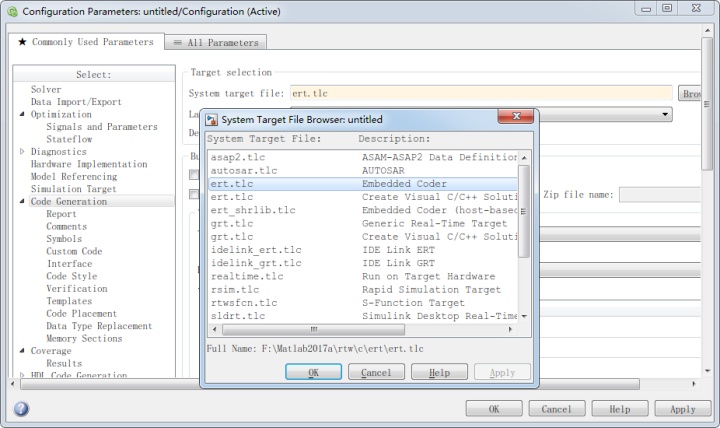
Code Generation中的System target file选择ert.tlc选项,生成嵌入式代码。
5.3.2 Report子标签配置,如下图:
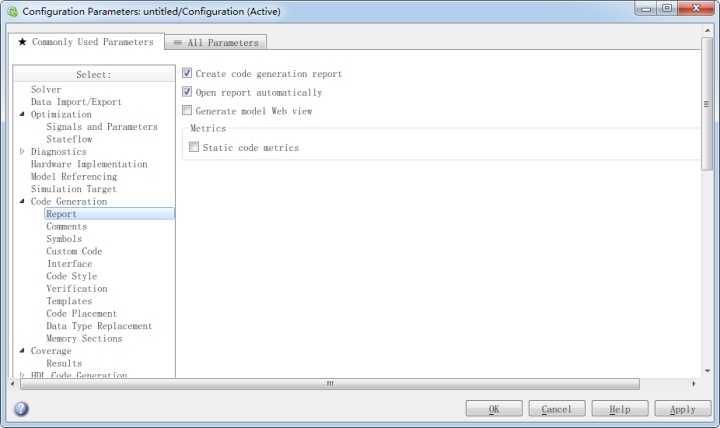
Creat code generation report:生成HTML格式生成报告。
Open report automatically:生成报告自动打开。
Static code metrics:生成静态代码参数指标,包括程序大小,占用内存大小等。
5.3.3 Comments子标签配置,如下图:
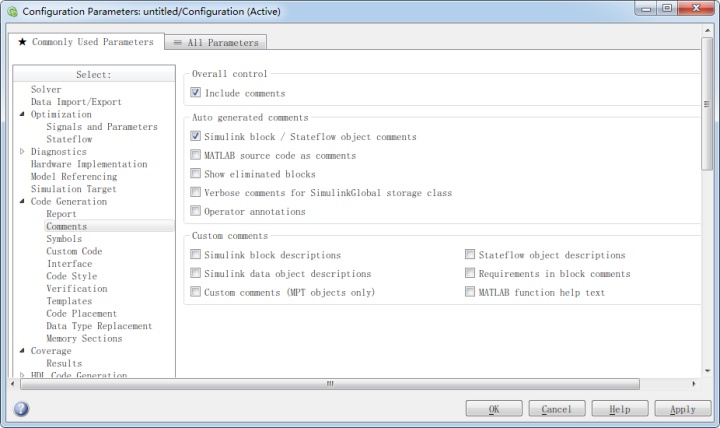
Include comments:生成代码自动添加注释。
Simulink block/Stateflow object comments:注释带有代码跳转对应模型的链接。
5.3.4 Symbols子标签配置,如下图:
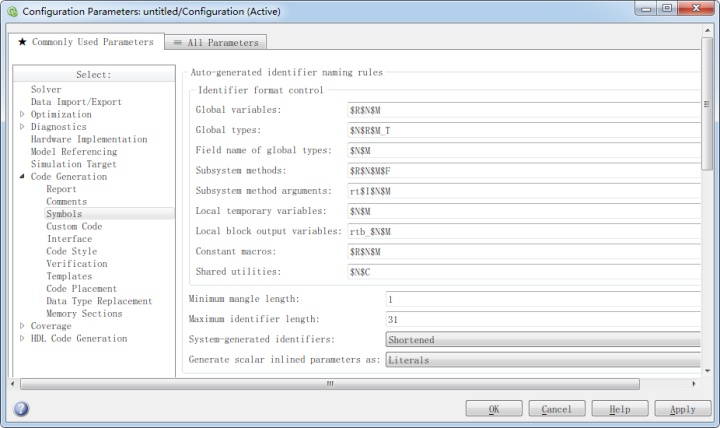
代码生成的命名规则,若无特殊要求不建议改动。
5.3.5 Custom Code子标签配置,如下图:
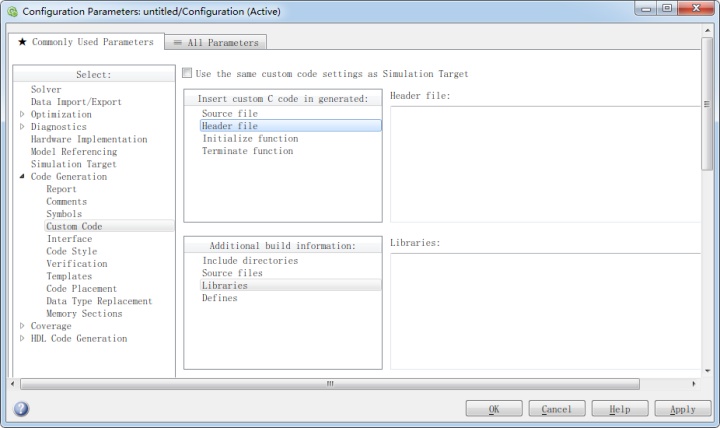
用于添加用户自定义的源文件、头文件、文件夹或库文件。
5.3.6 Interface子标签配置,如下图:
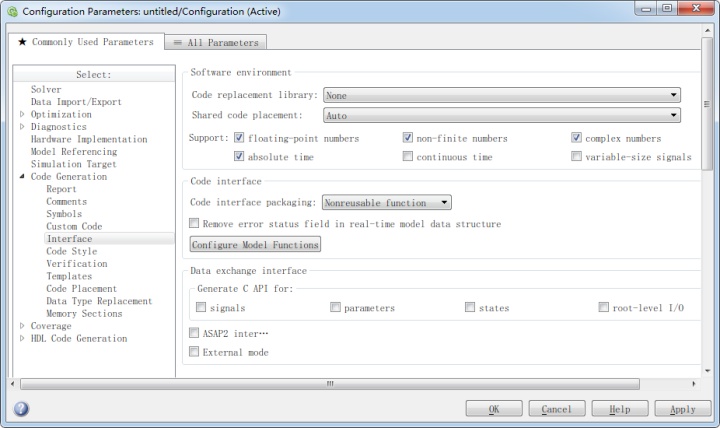
Code replacement library:与目标语言的数学函数及操作函数库挂接,不用配置,系统自动选择。
Support 参数: 嵌入式编码器对代码生成的支持功能,需要就选择。
Code Interface与Data Exchange用来配置生成代码的接口及数据记录方式,建议使用默认配置。
5.3.7 Code Style子标签配置,如下图:
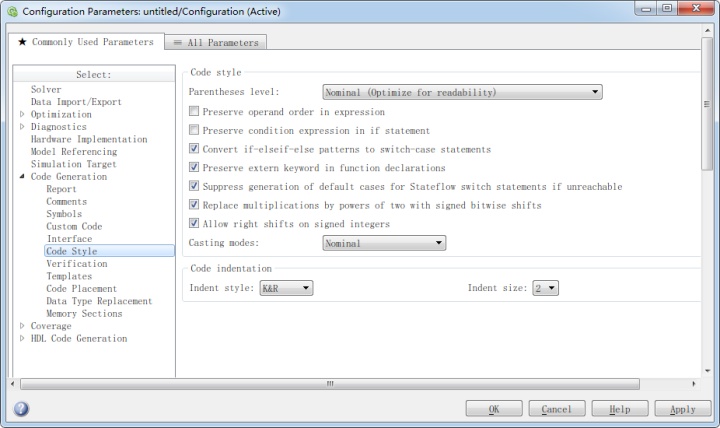
Code Style:影响代码生成风格,对代码本身无影响,不用操作。
5.3.8 Verification子标签配置,如下图:
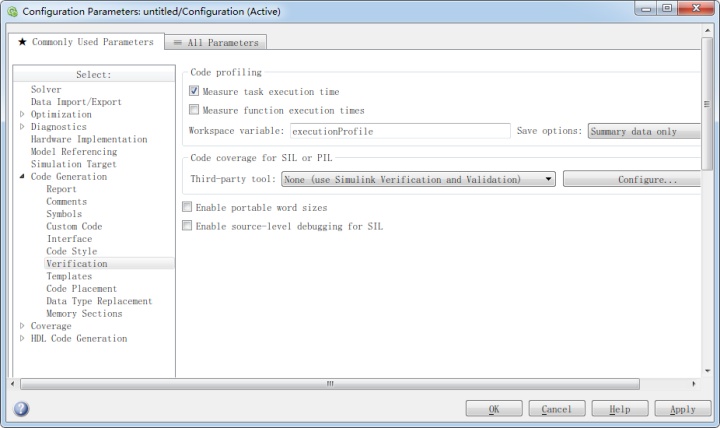
Code profiling:用于选择是否测量任务执行时间和函数执行时间及变量名。
Code coverage for SILor PIL:SIL和PIL的代码覆盖度,用到可进行设置。
5.3.9 Template子标签配置,如下图:
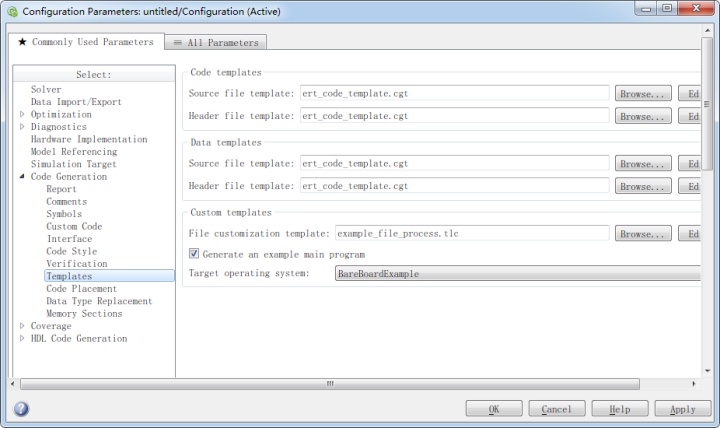
Template:代码生成的模板,影响代码段生成的顺序,默认配置。
Generate an example main program:示例主函数包含main()函数和一个调度器代码。
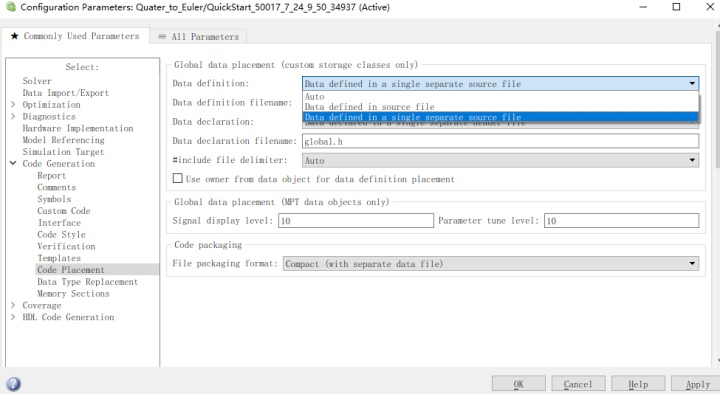
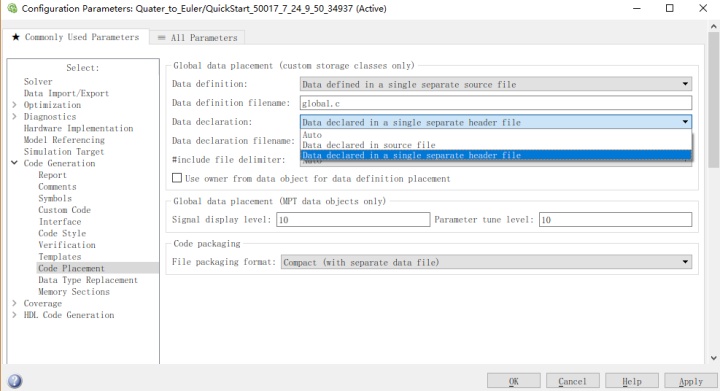
5.3.10 Code Placement子标签配置,如下图:
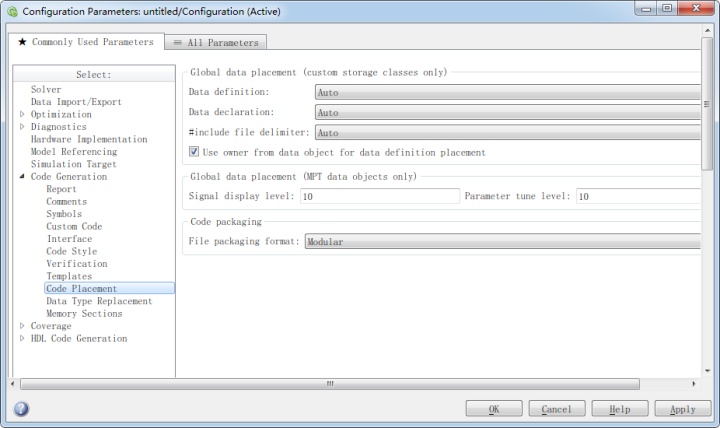
图35 Code Placement图
Golbal data placement:用于选择全局变量定义方式,定义在源文件中还是单独进行定义。
Code packaging:影响最终生成文件个数,可将一些文件合并,对代码运行无影响。
5.3.11 Data Type Replacement子标签配置,如下图:
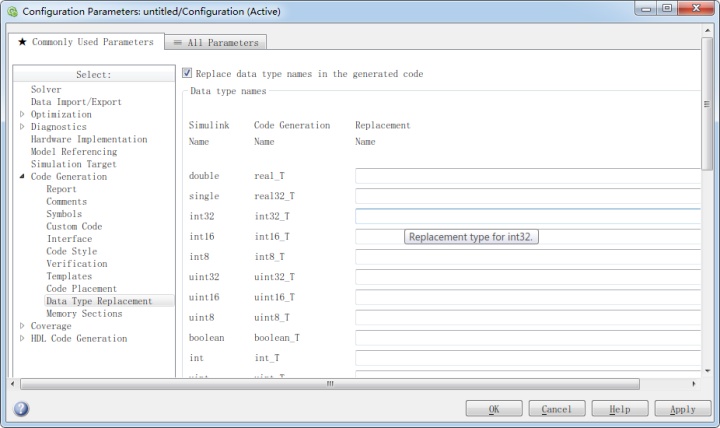
Data Type Replacement:用于自定义数据类型的命名,可以不进行操作,使用默认。
5.3.12 Memory Sections子标签配置,如下图:
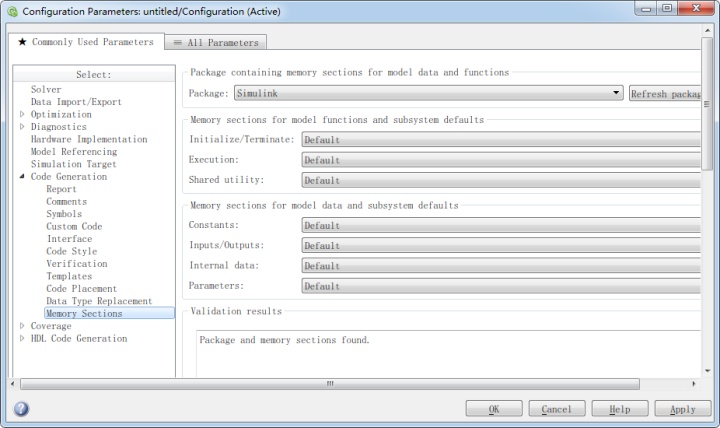
Memory Sections:设置函数、常数、输入/输出、数据和参数的存储段,只影响存储的方式,是固定还是变量存储,对实际的数据类型无影响。
Code Generation中Function Packaging 被选择,则可以对函数和内部数据存储段进行选择。5.3.13 Code Generation reporter,如下图:
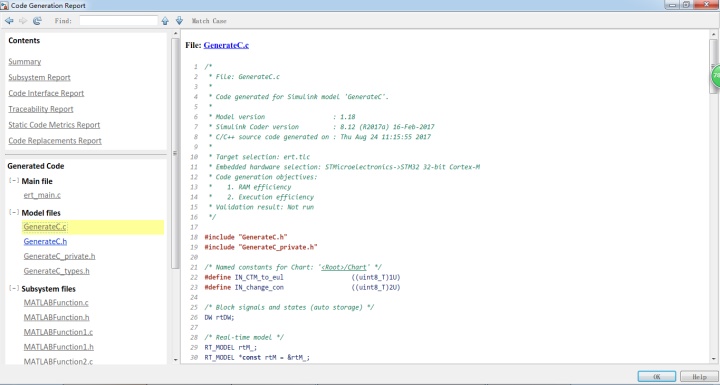
Contents:包含所选择的各个部分报告,可以通过报告查找生成的代码存在的问题。
Model files:包含模型的代码及其所用的头文件,报告中最主要的内容。
Subsystem files:包含各个子系统的源文件和头文件,便于进行模块移植。
针对STM32F7的SIMULINK代码生成配置
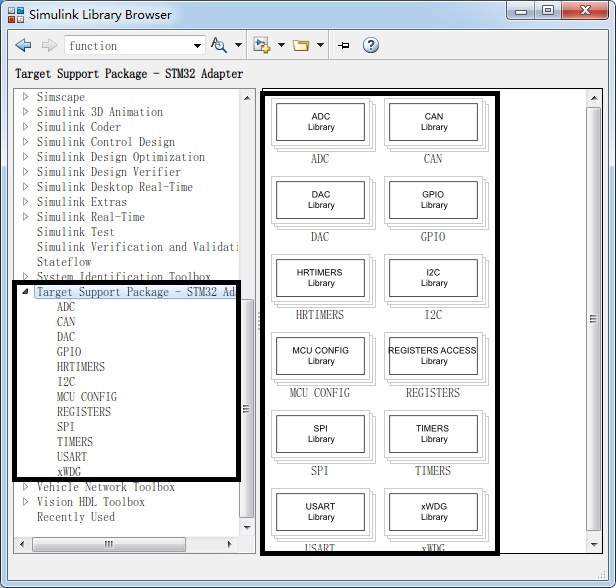
采用Simulink coder 一键生成STM32F7的嵌入式代码具有简单方便的特点,但simulink library browser本身并不支持STM32的开发,本文选择STM32-MAT/TARGET作为支持STM32的开发工具加载到Simulink中,本文针对STM32-MAT/TARGET下的Simulink代码生成进行配置。
STM32-MAT/TARGET加载到Simulink中,可调用模块如下图
点击Simulation→Model Configuration Parameters进入代码生成配置界面,如下图
为了生成嵌入式代码,至少需要配合3部分:模型的解算器Solver、模型的系统目标文件(stm32.tlc),硬件实现规定(Hardware Implementation)。
模型解算器solver页面,如下图
Solver options中的Type选择为Fixed-step
Solver options中的Solver选择为discrete,理由:由于STM32不是连续状态。
Solver options中的Fixed-step size设置为auto,针对STM32的代码生成过程中,硬件驱动工具箱往往将步长step size作为其外设或内核中定时器的中断周期,使得生成打算法代码在硬件芯片中以同样的时间间隔执行。
Code Generation中系统目标文件选择,如下图
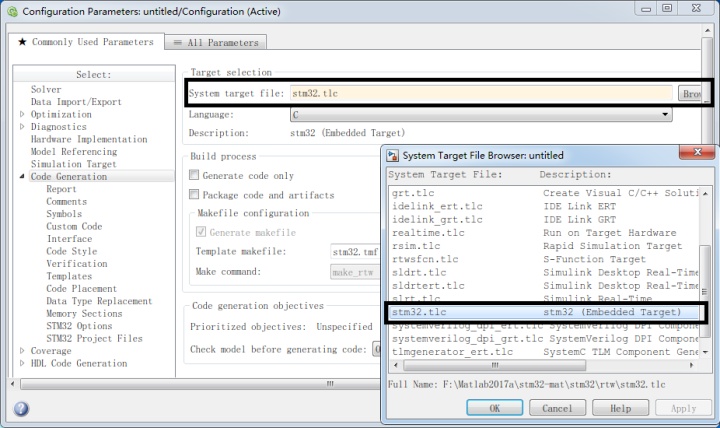
在选择框中选择stm32.tlc之后,Code Generation标签页下面的子标签也会发生变化,提供更多的功能选择标签,如下图所示,方框内为新增子标签。
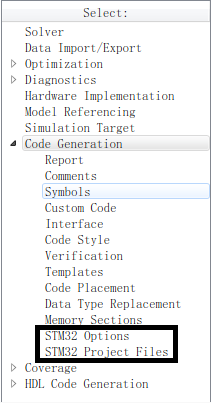
Code Generation下关于STM32子标签的配置
STM32 Options子标签进行路径配置,如下图
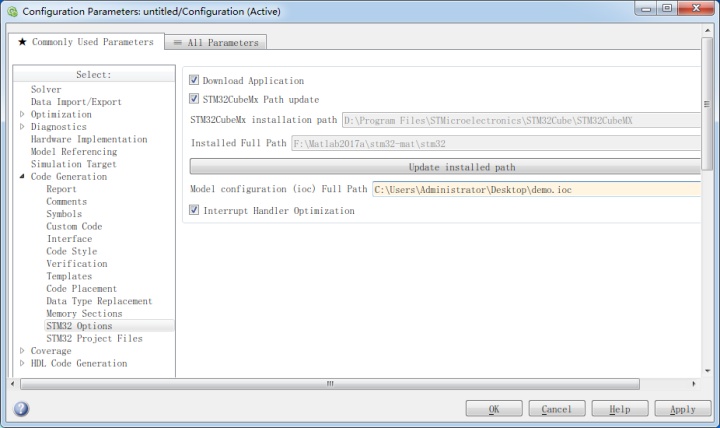
Download Application功能:是否开启STM32CubeMX生成工程。
STM32CubeMX Path update功能:自动更新STM32CubeMX的安装路径。
Installed Full Path:STM32-MAT/TARGET的安装路径。
Model configuration (ioc) Full Path:使用STM32CubeMX构建的硬件模型文件路径。
STM32 Project Files子标签用于Matlab矩阵的C代码转换,如下图
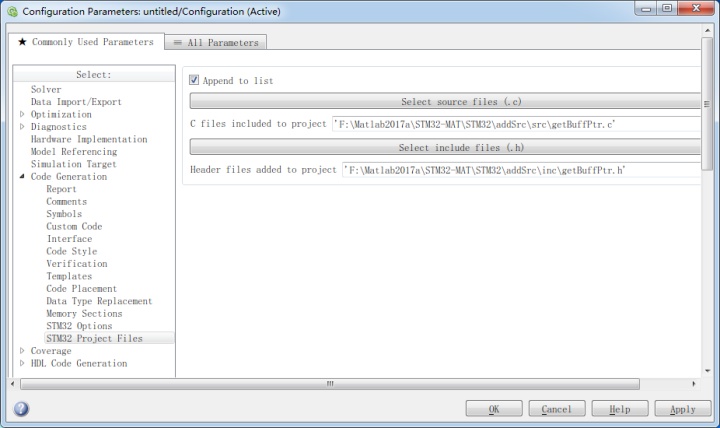
getBuffPtr是一个由STM32-MAT/TARGET提供的C函数,用于将MATLAB矩阵转换成C指针。用到可添加。
Matlab与simulink对比分析
本文针对Quater_to_Euler函数在matlab coder 与simulink coder 中分别转化为C代码,其中主函数的计算部分如下图。
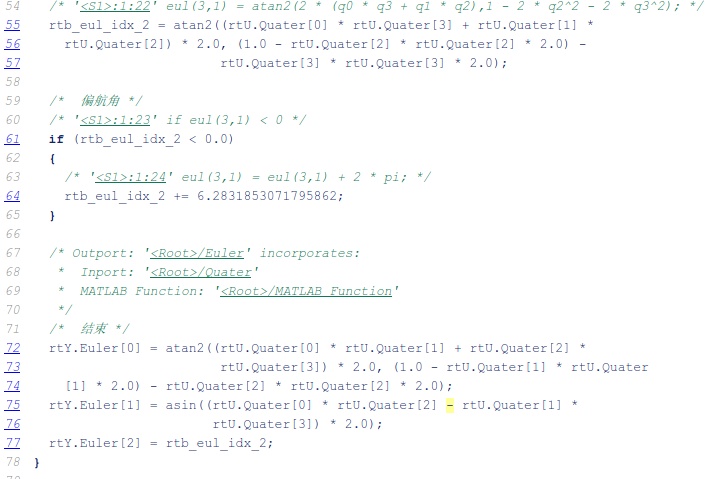
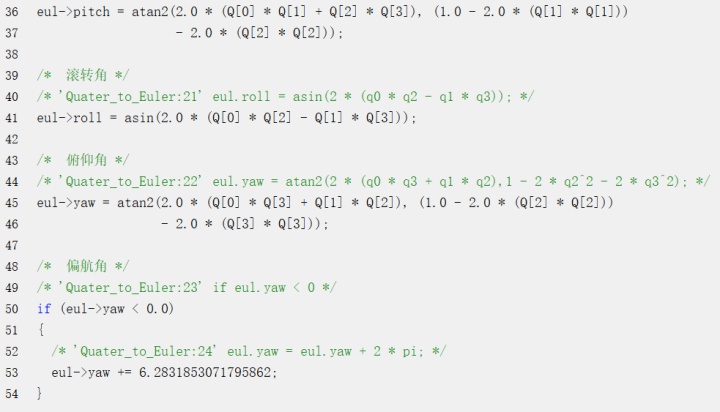
可见针对转化后的代码可读性,matlab转换的c函数的可读性强于simulink。这与m语言与c语言相似有关。因此,M-function中的函数最好通过matlab coder转化为C语言。
欢迎指正讨论,转载请注明,认同请点赞。
最后
以上就是无私口红最近收集整理的关于内部矩阵维度必须一致simulink_手把手教你代码生成(下):SIMULINK代码生成的全部内容,更多相关内部矩阵维度必须一致simulink_手把手教你代码生成(下)内容请搜索靠谱客的其他文章。


发表评论 取消回复