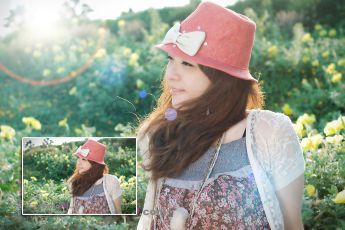


或者适合灯光特效的照片,这样看上去会比较自然。
在photoshop中打开需要添加眩光的照片,然后调用照片眩光滤镜
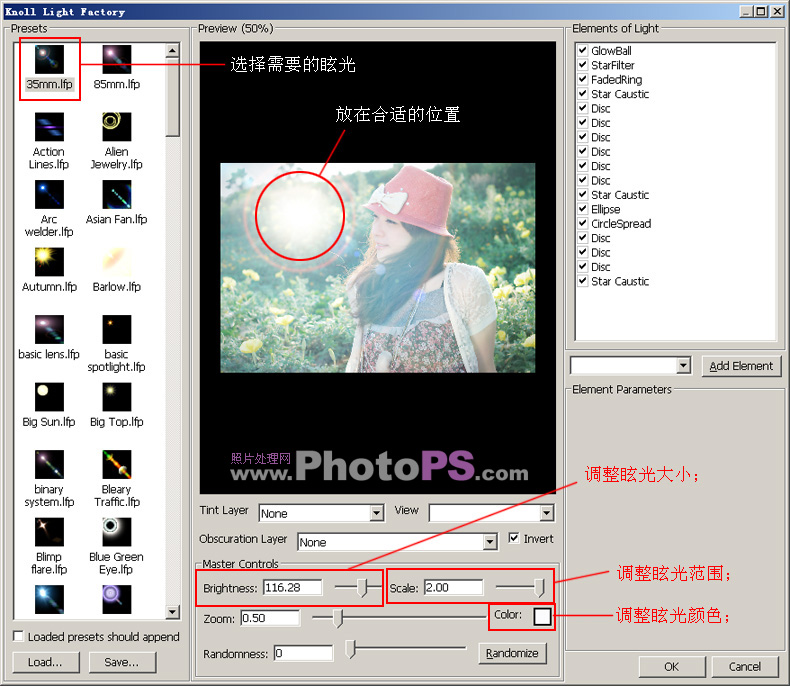
(花花提示;眩光的位置要和照片中人物的受光方向一致)


最后
以上就是顺心超短裙最近收集整理的关于photoshop使用Light Factory滤镜为照片添加光照效果的全部内容,更多相关photoshop使用Light内容请搜索靠谱客的其他文章。
本图文内容来源于网友提供,作为学习参考使用,或来自网络收集整理,版权属于原作者所有。
以上就是顺心超短裙最近收集整理的关于photoshop使用Light Factory滤镜为照片添加光照效果的全部内容,更多相关photoshop使用Light内容请搜索靠谱客的其他文章。


发表评论 取消回复