


第二步:盖印一层,运用应像图像,图层模式为滤色。人物留下,其他部分擦回来


相关教程:
Photoshop调出偏暗帅哥照片光亮的金黄色
PS外挂滤镜制作质感金黄色调古堡HDR效果教程
PS把图片调出金黄色非主流效果


第4步:我在次利用了可选颜色这层在加强下草的色调。你们可以边调边看变化


蒙板刷截图:

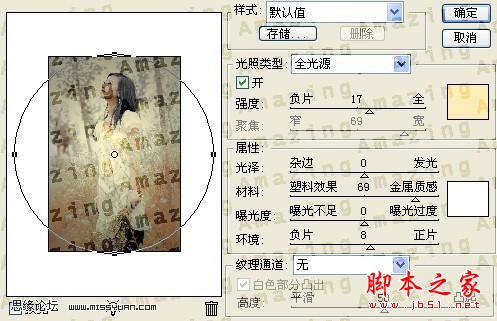
第七步:我运用了PS自带的滤境,渲染-光照效果:

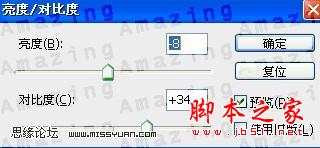
最后我用了亮度/对比度来调节下立体效果:

最后
以上就是唠叨身影最近收集整理的关于photoshop(PS)为美女外景照片调出秋日私语金黄色调的效果(图)的全部内容,更多相关photoshop(PS)为美女外景照片调出秋日私语金黄色调内容请搜索靠谱客的其他文章。
本图文内容来源于网友提供,作为学习参考使用,或来自网络收集整理,版权属于原作者所有。


发表评论 取消回复