查找多照片中包含指定人脸的所有照片
- 目标场景
- 目标任务
- 人脸检测
- 文件结构
- 代码详情
- 人脸相似度计算
目标场景
日常生活中,我们会拍下很多的瞬间,其中可能有一个人或多个人,当我们在看到某一张照片中的某一个人的时候,我们可能会想看本相册中包含这个人的所有照片。
目标任务
1. **人脸检测:**给定包含人脸的图像,找出其中的所有人脸并保存,用于选择目标人脸;
2. **人脸相似度计算:**根据目标人脸,在给定多个图像中逐张判断该人脸是否存在。
人脸检测
文件结构
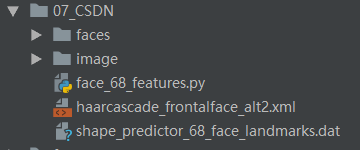
代码详情
# _*_ coding:utf-8 _*_

import numpy as np
import cv2
import dlib
import os
import math

face_cascade = cv2.CascadeClassifier('haarcascade_frontalface_alt2.xml')
detector = dlib.get_frontal_face_detector()
predictor = dlib.shape_predictor('shape_predictor_68_face_landmarks.dat')


def euclidean_distance(p1_list, p2_list):
    """欧式距离:计算两点[x1,y1]之间的欧式距离"""
    ed = math.sqrt((p1_list[0] - p2_list[0]) ** 2 + (p1_list[1] - p2_list[1]) ** 2)
    return ed


def get_filename(file_path):
    """通过绝对路径或相对路径获取文件名称"""
    for i in range(len(file_path)):
        if file_path[-i] == '\' or file_path[-i] == '/':
            filename = file_path[-i + 1:]
            break
        else:
            filename = file_path
    return filename


def get_face_68_features(img_path, out_dir):
    """通过68个特征点获取人脸图像并保存"""
    img_name = get_filename(img_path)  # 获取文件名称
    img = cv2.imread(img_path)  # cv2读取图像
    img_gray = cv2.cvtColor(img, cv2.COLOR_RGB2GRAY)  # 取灰度
    rects = detector(img_gray, 1)  # 人脸数rects
    for i in range(len(rects)):
        landmarks = np.matrix([[p.x, p.y] for p in predictor(img, rects[i]).parts()])
        print(img_name + "_" + str(i) + '.jpg', 'tlandmarks:', type(landmarks), landmarks.shape)

        # 保存当前脸部图像
        p8 = [landmarks[8, 0], landmarks[8, 1]]
        p0 = [landmarks[0, 0], landmarks[0, 1]]
        p16 = [landmarks[16, 0], landmarks[16, 1]]
        p27 = [landmarks[27, 0], landmarks[27, 1]]
        p29 = [landmarks[29, 0], landmarks[29, 1]]

        radius = round(3 / 7 * (euclidean_distance(p8, p0) + euclidean_distance(p8, p16)))  # 半径

        delta_x = round((p27[0] - p0[0]) - (1 / 2 * (p16[0] - p0[0])))
        center = [p29[0] - delta_x, p29[1]]

        left = center[0] - radius
        top = center[1] - radius
        right = center[0] + radius
        bottom = center[1] + radius

        face = img[int(top):int(bottom), int(left):int(right)]
        print(int(top), int(bottom), int(left), int(right))

        print(out_dir + '/' + img_name + "_" + str(i) + '_.jpg')
        cv2.imwrite(out_dir + '/' + img_name + "_" + str(i) + '_.jpg', face)
        print('t OK!')

        for idx, point in enumerate(landmarks):  # 将68个特征点画在图像上
            # 68点的坐标
            pos = (point[0, 0], point[0, 1])
            # print(idx, pos)

            # 利用cv2.circle给每个特征点画一个圈,共68个
            cv2.circle(img, pos, 1, color=(0, 255, 0))
            # 利用cv2.putText输出1-68
            font = cv2.FONT_HERSHEY_SIMPLEX
            cv2.putText(img, str(idx), pos, font, 0.2, (0, 0, 255), 1, cv2.LINE_AA)

    cv2.namedWindow("img")
    cv2.imshow("img", img)
    cv2.waitKey(2000)


if __name__ == '__main__':
    faces_dir = 'image/'
    out_dir = 'faces/'
    faces_rpath = os.listdir(faces_dir)
    for i in range(len(faces_rpath)):
        faces_rpath[i] = os.path.join(faces_dir, faces_rpath[i])
        get_face_68_features(faces_rpath[i], out_dir)
人脸相似度计算
相似度计算关键代码:
def compare2face(img1, img2):
    face1 = encoding_face(img1)
    face2 = encoding_face(img2)
    if face1 and face2:
        dist = np.sqrt(np.sum(np.square(np.subtract(face1[0]['embedding'], face2[0]['embedding']))))
        return dist
    return -1
最后
以上就是精明舞蹈最近收集整理的关于查找多照片中包含指定人脸的所有照片目标场景目标任务的全部内容,更多相关查找多照片中包含指定人脸内容请搜索靠谱客的其他文章。
本图文内容来源于网友提供,作为学习参考使用,或来自网络收集整理,版权属于原作者所有。


发表评论 取消回复