使用FDDB数据库测试分类器
// fddb_roc.cpp : 定义控制台应用程序的入口点。
//

#include "stdafx.h"
#include <opencv2/opencv.hpp>
#include <iostream>
#include <fstream>

#include "facedetect-dll.h"

//define the buffer size. Do not change the size!
#define DETECT_BUFFER_SIZE 0xC004

using namespace cv;
using namespace std;

string Double_String(double x)
{
    stringstream ss;
    ss << x;
    return ss.str();
}

string Int_String(int x)
{
    stringstream ss;
    ss << x;
    return ss.str();
}
void detectAndDisplay(Mat gray, string line)
{
    int * pResults = NULL;
    //pBuffer is used in the detection functions.
    //If you call functions in multiple threads, please create one buffer for each thread!
    unsigned char * pBuffer = (unsigned char *)malloc(DETECT_BUFFER_SIZE);
    if (!pBuffer) {
        fprintf(stderr, "Can not alloc buffer.n");
        return ;
    }

    //检测正脸-60~60
    //pResults = facedetect_frontal(pBuffer, (unsigned char*)(gray.ptr(0)), gray.cols, gray.rows, (int)gray.step, 1.2f, 2, 48);

    //视频监控中低照度下人脸-70~70
    //pResults = facedetect_frontal_surveillance(pBuffer, (unsigned char*)(gray.ptr(0)), gray.cols, gray.rows, (int)gray.step, 1.2f, 2, 48);

    //多角度人脸检测-90~90
    //pResults = facedetect_multiview(pBuffer, (unsigned char*)(gray.ptr(0)), gray.cols, gray.rows, (int)gray.step, 1.2f, 2, 48);

    //多角度人脸检测加强-90~90
    pResults = facedetect_multiview_reinforce(pBuffer, (unsigned char*)(gray.ptr(0)), gray.cols, gray.rows, (int)gray.step, 1.08f, 2, 16);


    //以下人脸的数量用face_number代替
    string face_position_1 = line;
    string face_position_2 = Int_String(pResults ? *pResults : 0);
    vector<string> face;
    for (int i = 0; i < (pResults ? *pResults : 0); i++) {

        short * p = ((short*)(pResults + 1)) + 6 * i;
        // <left_x top_y width height detection_score>
        //we do it
        string face_vector = Int_String(p[0]) + " " + Int_String(p[1]) + " " + Int_String(p[2]) + " " + Int_String(p[3]) + " " + Double_String(p[5]);//detect_score,根据官网上的介绍,分类器中应该就包含这个参数。如果你是用opencv,那么在detectMultiScale中可以找到
        face.push_back(face_vector);
    }
    //首先打开txt
    ofstream result("result.txt", ios::app);
    result << face_position_1 << endl << face_position_2 << endl;
    result.close();//先关闭一次
    //把vector写入
    for (vector<string>::iterator iter = face.begin(); iter != face.end(); ++iter) {
        ofstream result_eachface("result.txt", ios::app);  //每一张脸
        result_eachface << *iter << endl;
        result_eachface.close();
    }
    face.clear();//清除这个
    result.clear();
}

int _tmain(int argc, _TCHAR* argv[])
{
    string file = "Fold_all.txt";
    string line;
    ifstream in(file);

    if (in) // 有该文件
    {
        while (getline(in, line)) // line中不包括每行的换行符
        {
            string pic_road = line + ".jpg";
            Mat gray = imread(pic_road, CV_LOAD_IMAGE_GRAYSCALE);//it is necessary that must have CV_LOAD_IMAGE_GRAYSCALE
            detectAndDisplay(gray, line);
        }
    }
    cout << "Finally we got it";
    getchar();
    return 0;
}
运行代码,检测结果会保存到txt文件中
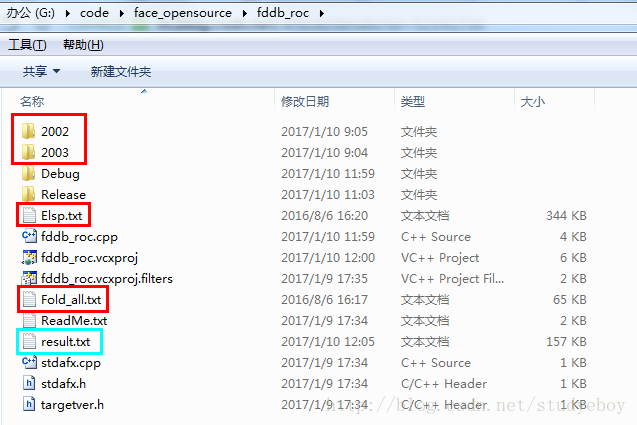
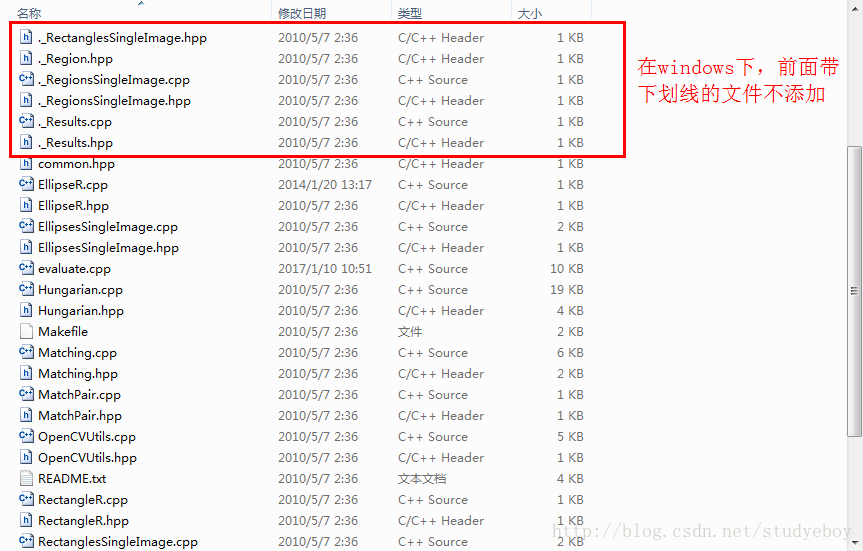
新建评测项目,将evaluation的文件拷贝到项目中
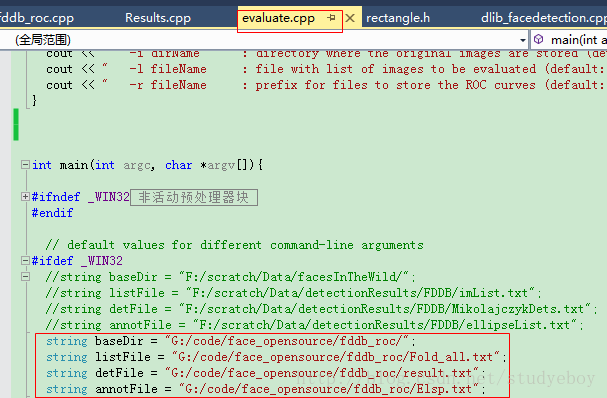

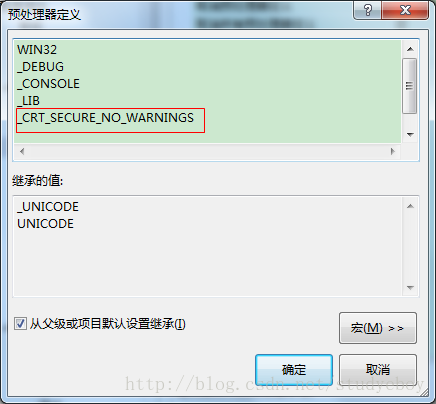
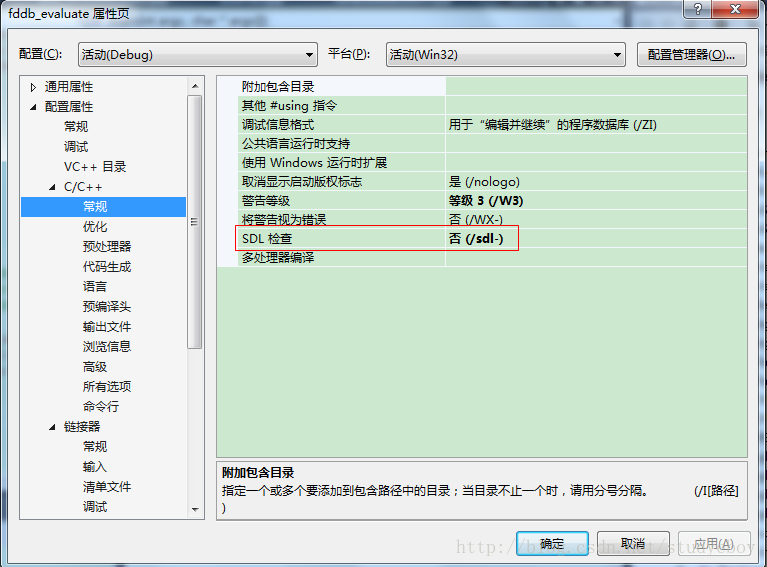
运行代码,得到tempContROC.txt和tempDiscROC.txt
安装perl和gnuplot
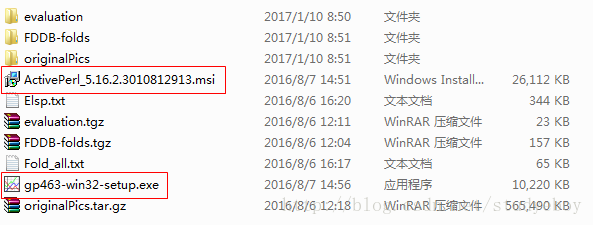
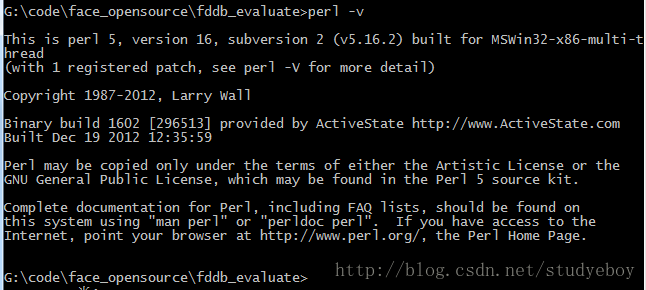
配置perl
写评测pl文件
#!/usr/bin/perl -w
use strict;
#### VARIABLES TO EDIT ####
# where gnuplot is
my $GNUPLOT = "D:/Program Files (x86)/gnuplot/bin/gnuplot";
# where the binary is
my $evaluateBin = "evaluate";
# where the images are
my $imDir = "G:/code/face_opensource/fddb_roc"; #FDDB数据库的图片在哪
# where the folds are
my $fddbDir = "G:/code/face_opensource/fddb_roc"; #fddb图片的两个txt
# where the detections are
my $detDir = "G:/code/face_opensource/fddb_evaluate/"; #图片存放的位置
###########################


my $detFormat = 0; # 0: rectangle, 1: ellipse 2: pixels


sub makeGNUplotFile
{
  my $rocFile = shift;
  my $gnuplotFile = shift;
  my $title = shift;
  my $pngFile = shift;


  open(GF, ">$gnuplotFile") or die "Can not open $gnuplotFile for writingn";
  #print GF "$GNUPLOTn";
  print GF "set term pngn";
  print GF "set size 1,1n";
  print GF "set output "$pngFile"n";
  #print GF "set xtics 500n";
  print GF "set ytics 0.1n";
  print GF "set gridn";
  #print GF "set size ratio -1n";
  print GF "set ylabel "True positive rate"n";
  print GF "set xlabel "False positives"n";
  #print GF "set xr [0:2000]n";
  print GF "set yr [0:1.0]n";
  print GF "set key right bottomn";
  print GF "plot "$rocFile" using 2:1 title "$title" with lines lw 2 n";
  close(GF);
}

my $gpFile = "G:/code/face_opensource/fddb_evaluate/ContROC.p";
my $gpFile1 = "G:/code/face_opensource/fddb_evaluate/DistROC.p";
my $title = "multiview_reinforce";

# plot the two ROC curves using GNUplot
makeGNUplotFile("G:/code/face_opensource/fddb_evaluate/tempContROC.txt", $gpFile, $title, $detDir."ContROC.png");
makeGNUplotFile("G:/code/face_opensource/fddb_evaluate/tempDiscROC.txt", $gpFile1, $title, $detDir."DiscROC.png");
运行pl文件得到ContROC.p和DistROC.p

.p文件拖到gnuplot中,然后file->output即得到结果图片
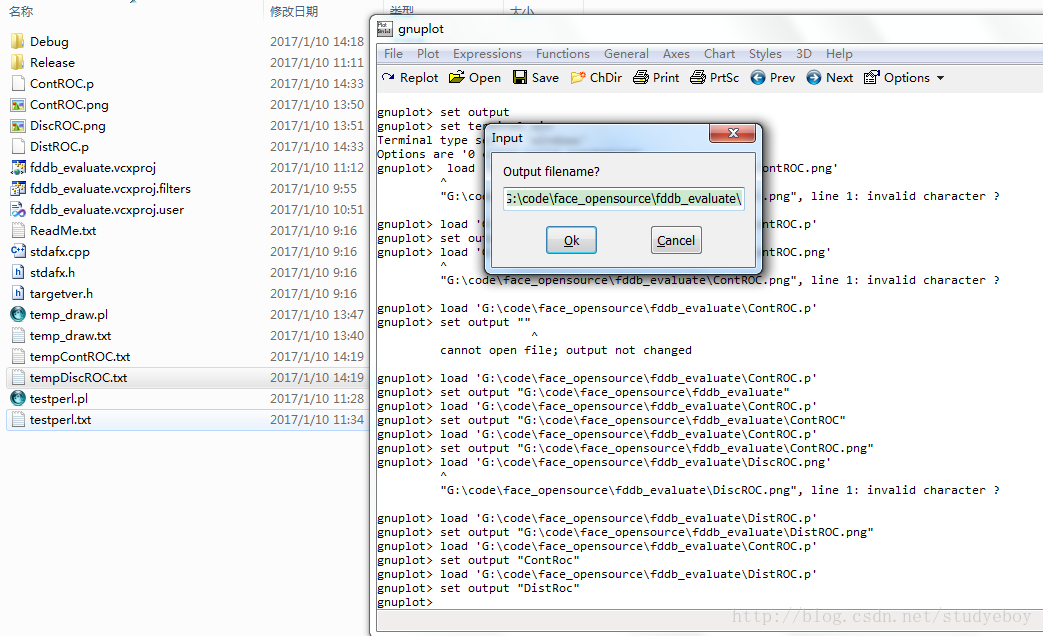
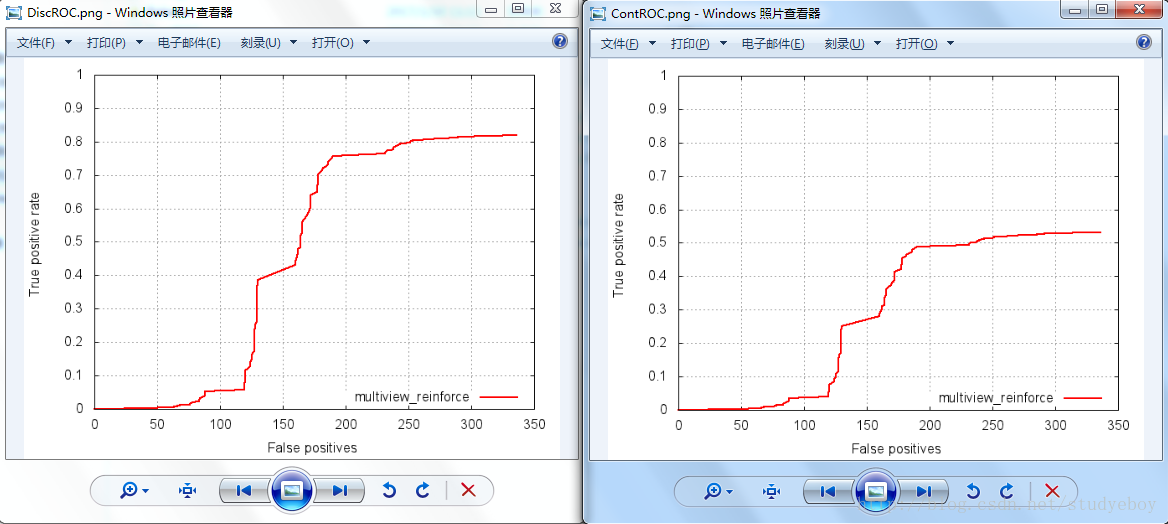
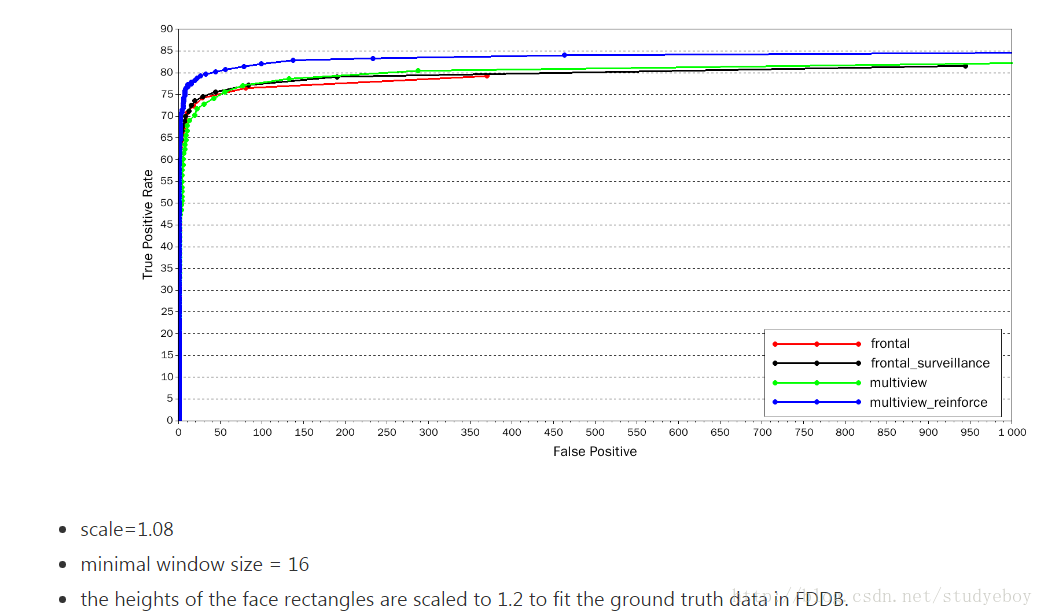
此结果与于仕祺老师给的结果有差异(参数设置一样),还未找到原因。
参考资料
windows下如何在FDDB数据库上评测自己的人脸检测分类器
windows下测试算法在FDDB数据库的性能
windows下perl的安装和脚本的运行
最后
以上就是发嗲曲奇最近收集整理的关于FDDB数据库上评测人脸检测分类器的全部内容,更多相关FDDB数据库上评测人脸检测分类器内容请搜索靠谱客的其他文章。
本图文内容来源于网友提供,作为学习参考使用,或来自网络收集整理,版权属于原作者所有。


发表评论 取消回复