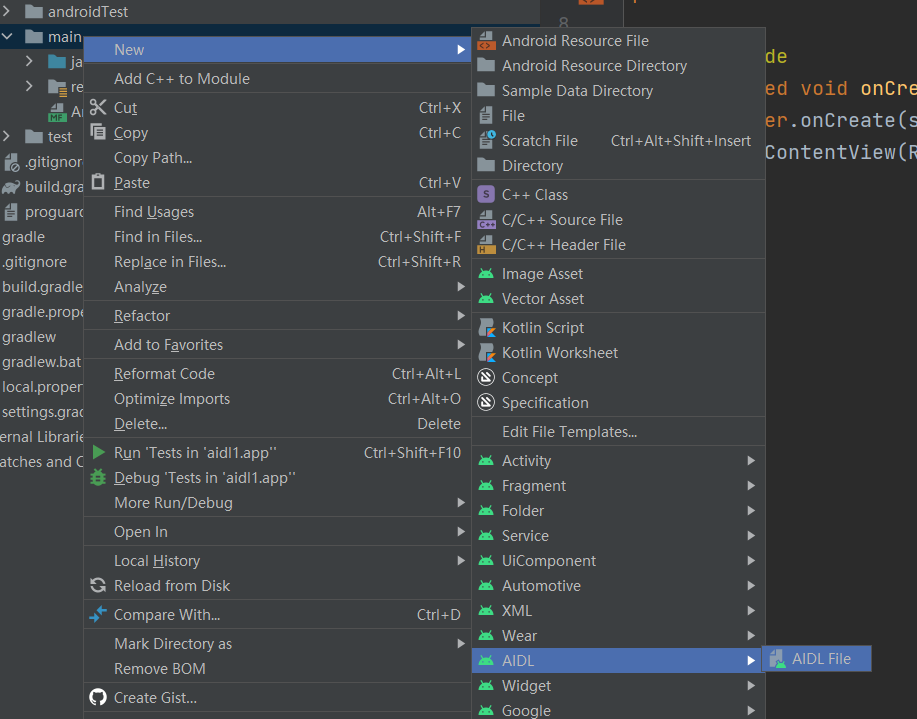
1.创建服务端:
1.新建aidl文件 ,并make project

AIDL 支持 的类型有:int long Boolean float double String
interface IMyAidlInterface {
    /**
     * Demonstrates some basic types that you can use as parameters
     * and return values in AIDL.
     */
    void basicTypes(int anInt, long aLong, boolean aBoolean, float aFloat,
            double aDouble, String aString);

    String getName();//自定义接口
}
2.客户端创建 Service
在service里面创建一个内部类,继承刚才创建的AIDL的名称里的Stub类,并实现接口方法,在onBind返回内部类的实例。
public class MyService extends Service {
    public MyService() {
    }

    @Override
    public IBinder onBind(Intent intent) {
        // TODO: Return the communication channel to the service.
        return new MyBinder();//返回MyBinder类实例
    }

    //自定义内部类 并继承AIDL接口的STUB类 实现AIDL接口里的方法
    class MyBinder extends IMyAidlInterface.Stub{

        @Override
        public void basicTypes(int anInt, long aLong, boolean aBoolean, float aFloat,
                double aDouble, String aString) throws RemoteException {

        }

        @Override
        public String getName() throws RemoteException {
            return "name";
        }
    }
}
3.给Service 设置action
 <service
            android:name=".MyService"
            android:enabled="true"
            android:exported="true">
            <intent-filter>
                <action android:name="com.example.aidl.MyService" />
            </intent-filter>
        </service>
2.创建客户端
1.复制服务端的AIDL包到客户端,并make project

2.绑定Service
 protected IMyAidlInterface iMyAidlInterface;
Intent intent = new Intent("com.example.aidl.MyService");
        intent.setPackage("com.example.aidl");
        bindService(intent, new ServiceConnection() {
            @Override
            public void onServiceConnected(ComponentName name, IBinder service) {
                iMyAidlInterface = IMyAidlInterface.Stub.asInterface(service);
            }

            @Override
            public void onServiceDisconnected(ComponentName name) { }
        },BIND_AUTO_CREATE);
3.调用接口,获得数据
Toast.makeText(MainActivity.this, iMyAidlInterface.getName(), Toast.LENGTH_SHORT).show();
2.AIDL如何使用自定义类型
1.定义自定义类并实现Parcelable 接口
public class Person implements Parcelable {
    int age;
    String name;
    protected Person(Parcel in) {
        name = in.readString();
        age = in.readInt();
    }

    public static final Creator<Person> CREATOR = new Creator<Person>() {
        @Override
        public Person createFromParcel(Parcel in) {
            return new Person(in);
        }

        @Override
        public Person[] newArray(int size) {
            return new Person[size];
        }
    };

    @Override
    public int describeContents() {
        return 0;
    }

    @Override
    public void writeToParcel(Parcel dest, int flags) {
        dest.writeString(name);
        dest.writeInt(age);
    }
}
2. 在 aidl文件中引用
parcelable Person;//必须引入 不然会报错
interface MyAidlInterface {
    /**
     * Demonstrates some basic types that you can use as parameters
     * and return values in AIDL.
     */
    void basicTypes(int anInt, long aLong, boolean aBoolean, float aFloat,
            double aDouble, String aString);

    String getName();
    Person getPerson();//使用自定义类型
}
3.将自定义类型和aidl接口 复制到客户端即可:注意 自定义类型的包名要和aidl里声明的包名一致,不然会报错(找不到类)
最后
以上就是称心棒棒糖最近收集整理的关于Android AIDL 的使用1.创建服务端: 2.创建客户端的全部内容,更多相关Android内容请搜索靠谱客的其他文章。
本图文内容来源于网友提供,作为学习参考使用,或来自网络收集整理,版权属于原作者所有。


发表评论 取消回复