于仕琪老师的开源库效果很好,好像是前一段时间刚刚开源,特在这里贴一下的我的配置过程以供参考。
1.首先你要下载cmake来编译开源库,以及下载于老师的libfacedetection
2.用cmake编译,推荐使用命令行。以下路径是我存放路径,根据自己实际情况进行更改
cd C:Softwarelibdetectlibfacedetection-master
mkdir bulid
cd bulid
cmake -G "Visual Studio 15 2017 Win64" -T host=x64 ..
**后面还有两个..不要忘记
cmake --build . --config Release
以上配置的Release x64版本的,如果你要使用opencv,也要配置Release版本的
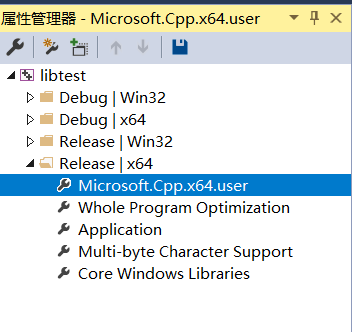
3.在vs里面新建一个项目,视图-其他窗口-属性管理器,选择Microsoft.Cpp.x64.user
首先配置vc++,包含目录和库目录,其实配置方式和opencv一样。
包含目录:C:Softwarelibdetectlibfacedetection-mastersrc
库目录:C:Softwarelibdetectlibfacedetection-masterbulidRelease
链接器-输入-附加依赖项 ,添加facedetection.lib
4.运行于老师的example
#include <stdio.h>
#include <opencv2/opencv.hpp>
#include "facedetectcnn.h"
//define the buffer size. Do not change the size!
#define DETECT_BUFFER_SIZE 0x20000
using namespace cv;
int main()
{
//load an image and convert it to gray (single-channel)
Mat image = imread("keliamoniz2.jpg");
if (image.empty())
{
fprintf(stderr, "Can not load the image file n");
return -1;
}
int * pResults = NULL;
//pBuffer is used in the detection functions.
//If you call functions in multiple threads, please create one buffer for each thread!
unsigned char * pBuffer = (unsigned char *)malloc(DETECT_BUFFER_SIZE);
if (!pBuffer)
{
fprintf(stderr, "Can not alloc buffer.n");
return -1;
}
///
// CNN face detection
// Best detection rate
//
//!!! The input image must be a BGR one (three-channel) instead of RGB
//!!! DO NOT RELEASE pResults !!!
pResults = facedetect_cnn(pBuffer, (unsigned char*)(image.ptr(0)), image.cols, image.rows, (int)image.step);
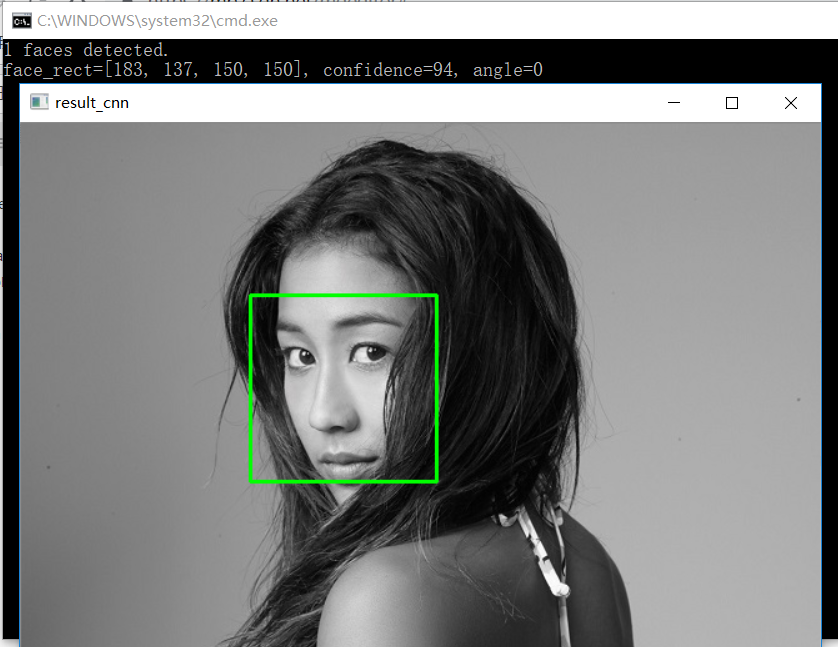
printf("%d faces detected.n", (pResults ? *pResults : 0));
Mat result_cnn = image.clone();
//print the detection results
for (int i = 0; i < (pResults ? *pResults : 0); i++)
{
short * p = ((short*)(pResults + 1)) + 142 * i;
int x = p[0];
int y = p[1];
int w = p[2];
int h = p[3];
int confidence = p[4];
int angle = p[5];
printf("face_rect=[%d, %d, %d, %d], confidence=%d, angle=%dn", x, y, w, h, confidence, angle);
rectangle(result_cnn, Rect(x, y, w, h), Scalar(0, 255, 0), 2);
}
imshow("result_cnn", result_cnn);
waitKey();
//release the buffer
free(pBuffer);
return 0;
}
5.结果
6.感受
比dlib库人脸检测快太多,还附带角度,同时超级感谢于老师开源!!!!给我们一个学习的机会!!!
最后
以上就是腼腆期待最近收集整理的关于于仕琪开源库libfacedetection+vs2017配置过程的全部内容,更多相关于仕琪开源库libfacedetection+vs2017配置过程内容请搜索靠谱客的其他文章。
本图文内容来源于网友提供,作为学习参考使用,或来自网络收集整理,版权属于原作者所有。


发表评论 取消回复