initMouseEvent参数
event.initMouseEvent(type, canBubble, cancelable, view,
detail, screenX, screenY, clientX, clientY,
ctrlKey, altKey, shiftKey, metaKey,
button, relatedTarget);
形参
- type
设置事件类型type 的字符串,包含以下几种鼠标事件:click,mousedown,mouseup,mouseover,mousemove,mouseout。 - canBubble
是否可以冒泡。取值集合见Event.bubbles。 - cancelable
是否可以阻止事件默认行为。取值集合见Event.cancelable。 - view
事件的AbstractView对象引用,这里其实指向window 对象。取值集合见 UIEvent.view。 - detail
事件的鼠标点击数量。取值集合见Event.detail (en-US)。 - screenX
事件的屏幕的x坐标。取值集合见MouseEvent.screenX。 - screenY
事件的屏幕的y坐标。取值集合见MouseEvent.screenY。 - clientX
事件的客户端x坐标。取值集合见MouseEvent.clientX。 - clientY
事件的客户端y坐标。取值集合见MouseEvent.clientY。 - ctrlKey
事件发生时 control 键是否被按下。取值集合见MouseEvent.ctrlKey。 - altKey
事件发生时 alt 键是否被按下。取值集合见MouseEvent.altKey。 - shiftKey
事件发生时 shift 键是否被按下。取值集合见MouseEvent.shiftKey。 - metaKey
事件发生时 meta 键是否被按下。取值集合见MouseEvent.metaKey。
14.button
鼠标按键值 button。 - relatedTarget
事件的相关对象。只在某些事件类型有用 (例如 mouseover ?和 mouseout)。其它的传null。
使用dispatchEvent分发事件
var evObj = document.createEvent(‘MouseEvents’);
evObj.initMouseEvent(‘mousedown’, true, true)
fireOnThis.dispatchEvent(evObj);
evObj.initMouseEvent(‘mousemove’, true, true, window, null, null, null, 261, null);
fireOnThis.dispatchEvent(evObj);
evObj.initMouseEvent(‘mouseup’, true, true)
fireOnThis.dispatchEvent(evObj);
标题
<!DOCTYPE html>
<html lang="en">

<head>
    <meta charset="UTF-8">
    <title>Document</title>
    <style>
        * {
            padding: 0;
            margin: 0;
        }

        body {
            user-select: none;
            /*禁止用户选中*/
        }

        .wrap {
            width: 300px;
            height: 40px;
            background-color: #e8e8e8;
            margin: 100px auto;
            text-align: center;
            line-height: 40px;
            /*border-radius: 7px;*/
            position: relative;
        }

        .rect {
            position: relative;
            width: 300px;
            height: 100%;
        }

        .rec {
            position: absolute;
            top: 0;
            left: 0;
            width: 0;
            height: 100%;
            background: #00b894;
        }

        .silde {
            position: absolute;
            top: 0;
            left: 0;
            z-index: 11;
            box-sizing: border-box;
            width: 40px;
            height: 40px;
            background: #fff;
            border: 1px solid #ccc;
        }
    </style>
</head>

<body>
    <div class='wrap'>
        <div class='rec'>
            <div class='rect'>滑块验证
                <div class='silde'><img src="https://img-blog.csdnimg.cn/img_convert/2c7b3630606c742c1a3a8925eca0efd7.png" alt=""></div>
            </div>
        </div>
    </div>
    <script>
        window.onload = function() {
                var fireOnThis = document.querySelector('.silde');
                var evObj = document.createEvent('MouseEvents');
                evObj.initMouseEvent('mousedown', true, true)
                fireOnThis.dispatchEvent(evObj);
                evObj.initMouseEvent('mousemove', true, true, window, null, null, null, 261, null);
                fireOnThis.dispatchEvent(evObj);
                evObj.initMouseEvent('mouseup', true, true)
                fireOnThis.dispatchEvent(evObj);
            }
            //获取事件
        var silde = document.querySelector('.silde');
        var rec = document.querySelector('.rec');
        var rect = document.querySelector('.rect');
        var img = document.querySelector('img');
        var minusX; //保存变化的 X坐标(全局变量)

        //注册事件
        silde.onmousedown = function(e) { //鼠标点击事件,点击之后执行函数,获得点击位置的X坐标
            var initX = e.clientX; //保存初始按下位置的 X坐标;
            console.log("down", e); //用以测试
            document.onmousemove = function(e) { //鼠标移动事件
                console.log("move", e)
                var moveX = e.clientX;
                // var minusX = moveX - initX;    //变化的坐标(要注意作用域的问题,在这里面定义变量,在这个函数之外的函数就没法使用,所以要将minusX变成全局变量)
                minusX = moveX - initX;
                //这里注意一下,获得的minusX只是一个差值,没有单位想让 滑块的位置改变还需要加上 单位px
                //这个时候滑块会跟随鼠标整个页面一行的跑,价格条件判段,限制 滑块移动的区域不可以超过边框,保持left<=0。
                if (minusX < 0) {
                    // silde.style.left = '0';
                    minusX = 0;
                }
                if (minusX > 260) { //判断最大值
                    // silde.style.left = '251';
                    // 这里面的距离用边框长度减去 滑块的长度 300-49
                    minusX = 260;

                }
                silde.style.left = minusX + 'px';
                rec.style.width = minusX + 'px';
                if (minusX >= 260) {
                    rect.style.color = 'white';
                    img.src = 'https://img-blog.csdnimg.cn/img_convert/5f486ab64b48cb31df78ea4d7a9d7289.png';
                    document.onmousemove = null;
                    silde.onmousedown = null;
                    // rect.innerHTML = '验证成功';
                }
                // console.log(222,e,minusX);    //用以测试
            }
        }
        document.onmouseup = function(e) { //鼠标抬起事件
            document.onmousemove = null; //不允许鼠标移动事件发生
            console.log("up", e);
            if (minusX < 260) { //如果没有到头
                img.src = 'https://img-blog.csdnimg.cn/img_convert/2c7b3630606c742c1a3a8925eca0efd7.png';
                silde.style.left = 0; //设置一个 left值
                rec.style.width = 0; //绿色背景层设置宽度
            }
        }
    </script>
</body>

</html>
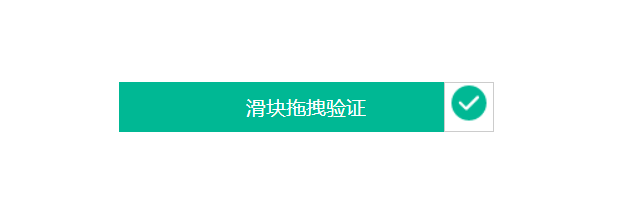
运行效果

最后
以上就是畅快夕阳最近收集整理的关于js模拟鼠标自动滑动滑块--dispatchEvent的全部内容,更多相关js模拟鼠标自动滑动滑块--dispatchEvent内容请搜索靠谱客的其他文章。
本图文内容来源于网友提供,作为学习参考使用,或来自网络收集整理,版权属于原作者所有。


发表评论 取消回复