Android使用selector文件点击文字变色
在开发中我们给按钮或者一段文字做点击事件的时候,很多时候不仅背景需要改变,文字的颜色也是要根据点击来跟着改变,今天刚好自己详细的做了这个,并且对比了一下几个参数的特点,写下来分享一下,也是把这个当做笔记留在这里,以便以后复习.先上代码.
1.在drawable文件夹下新建textcolor.xml文件,这里面可以引用颜色值也可以引用drawable,引用color就在colors.xml文件中用键值对定义相关的颜色,引用drawable那就colors.xml文件中用键值对定义相关的颜色,我们这里引用的是color,我也测试了drawable效果是一样的,因为颜色是一样的嘛,这里实际上也就是可以直接使用图片,但是我们没有图片就直接在资源文件中定义了,话说谁会给文字设置颜色的时候使用图片的呀,至少我还没有使用过呀.
    <?xml version="1.0" encoding="utf-8"?>
    <selector xmlns:android="http://schemas.android.com/apk/res/android">

    <item android:state_focused="false"
      android:state_enabled="true"
      android:state_pressed="false"
      android:color="@color/blue"/><!--选择器的默认颜色-->

    <item android:state_enabled="false"
      android:color="@color/black" /><!--控件是否接受触摸或者点击事件时的颜色,false不接受-->

    <item android:state_pressed="true"
      android:color="@color/green" /><!--是否按下,如一个按钮触摸或者点击,true按下-->

    <item android:state_focused="true"
      android:color="@color/red" /><!--是否取得焦点,true取的焦点-->
    </selector>
2.在values文件夹下的colors.xml文件中添加几个颜色值,在这里我两种都定义了,反正名字都是一样的,看你自己喜好了,效果也是一样的.
     <drawable name="red">#ff0000</drawable>
     <drawable name="green">#00ff00</drawable>
     <drawable name="blue">#0000ff</drawable>
     <drawable name="black">#000000</drawable>
     <drawable name="white">#ffffff</drawable>

     <color name="red">#ff0000</color>
     <color name="green">#00ff00</color>
     <color name="blue">#0000ff</color>
     <color name="black">#000000</color>
     <color name="white">#ffffff</color>
3.在布局文件中是用我们定义的这个textcolor.xml资源,新建一个叫activity_main.xml的布局文件
    <?xml version="1.0" encoding="utf-8"?>
    <LinearLayout
    xmlns:android="http://schemas.android.com/apk/res/android"
    xmlns:tools="http://schemas.android.com/tools"
    android:layout_width="match_parent"
    android:layout_height="match_parent"
    android:paddingBottom="@dimen/activity_vertical_margin"
    android:paddingLeft="@dimen/activity_horizontal_margin"
    android:paddingRight="@dimen/activity_horizontal_margin"
    android:paddingTop="@dimen/activity_vertical_margin"
    android:orientation="vertical"
    tools:context="com.lwen.selectortest.MainActivity">


    <EditText
        android:layout_width="match_parent"
        android:layout_height="wrap_content"
        android:textColor="@drawable/textcolor"/>
    <TextView
        android:id="@+id/tv_text_test"
        android:layout_width="wrap_content"
        android:layout_height="wrap_content"
        android:padding="5dip"
        android:textColor="@drawable/textcolor"
        android:text="文字测试"/>

    <Button
        android:layout_width="wrap_content"
        android:layout_height="wrap_content"
        android:text="按下文字颜色改变"
        android:textColor="@drawable/textcolor"
    />

    <Button
        android:layout_width="wrap_content"
        android:layout_height="wrap_content"
        android:text="按钮被禁用"
        android:enabled="false"
        android:textColor="@drawable/textcolor"
    />
</LinearLayout>
4.引用这个布局文件
    public class MainActivity extends AppCompatActivity {

    @Override
    protected void onCreate(Bundle savedInstanceState) {
        super.onCreate(savedInstanceState);
        setContentView(R.layout.activity_main);
        initView();
    }

    private void initView() {
        TextView tv_test = (TextView) findViewById(R.id.tv_text_test);
        tv_test.setOnClickListener(new View.OnClickListener() {
            @Override
            public void onClick(View v) {
                Toast.makeText(MainActivity.this,"按下获得焦点",Toast.LENGTH_SHORT).show();
            }
        });
    }
}
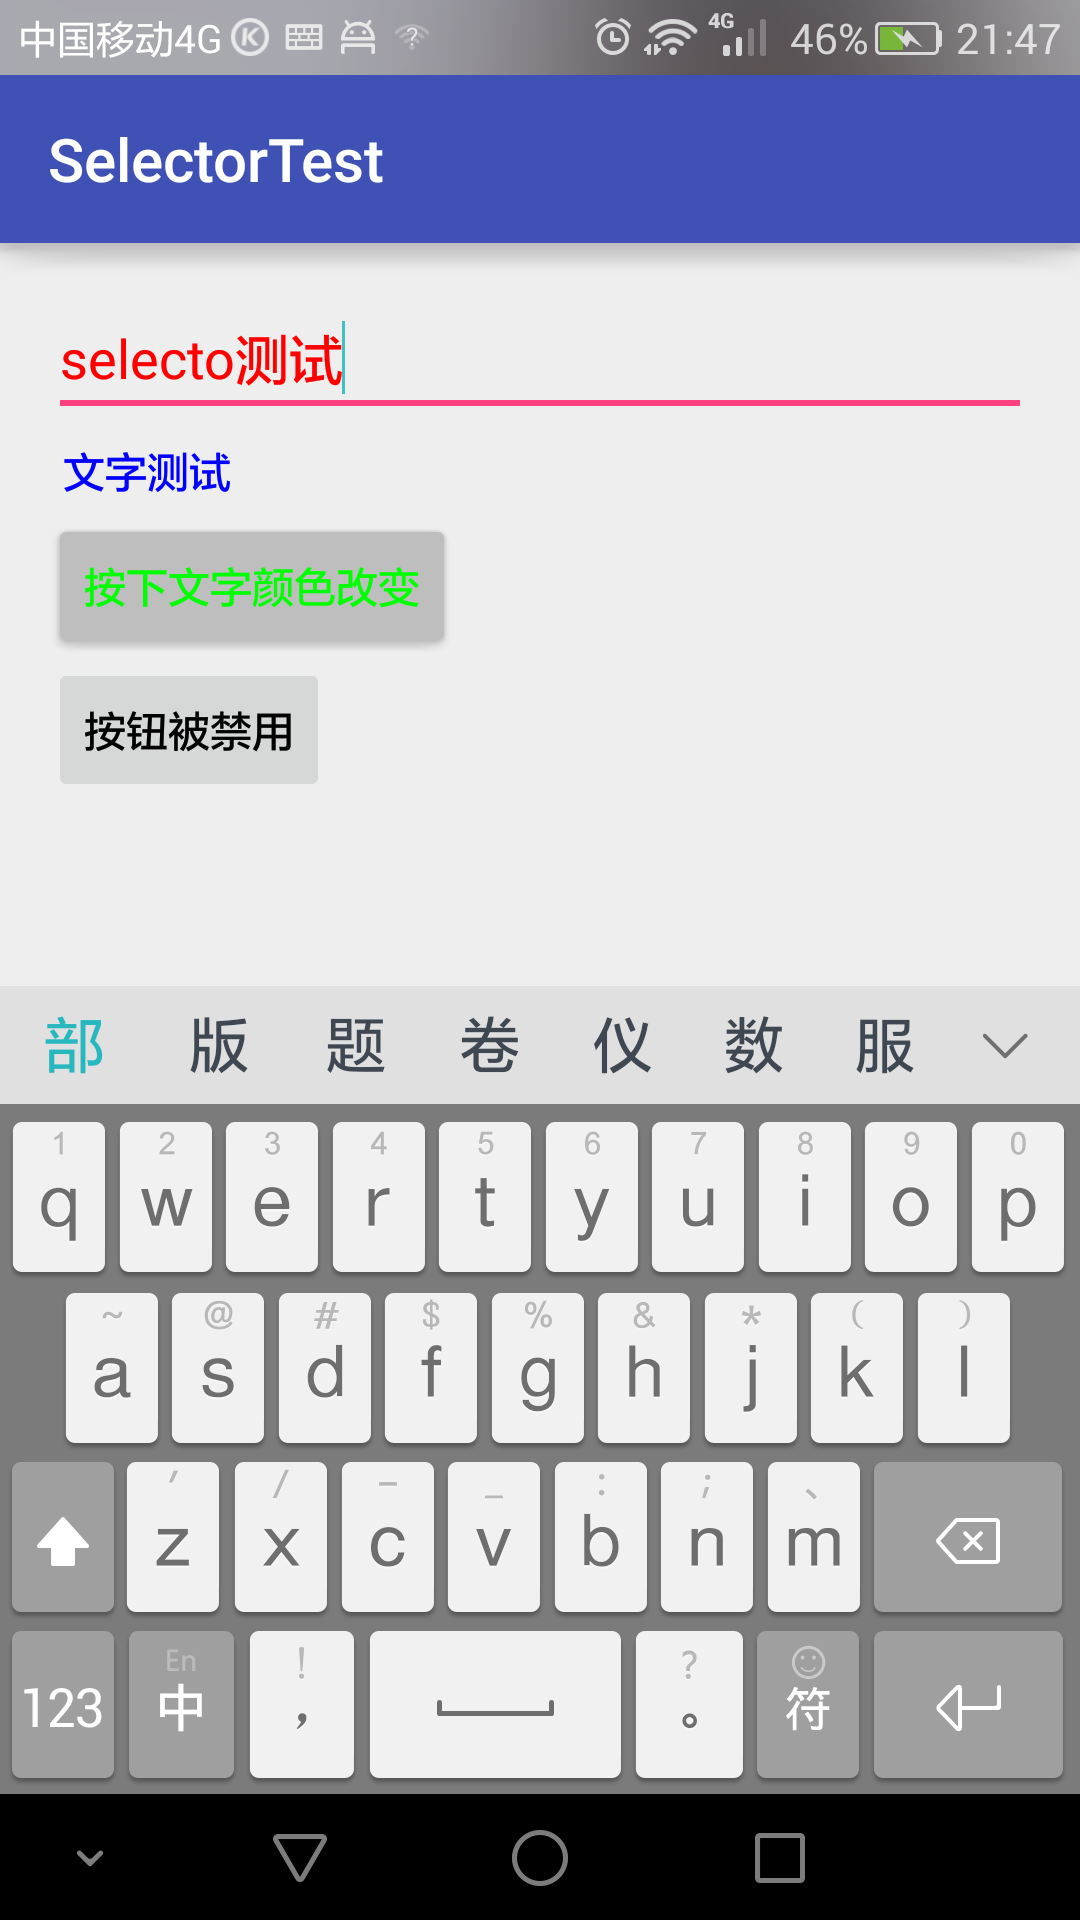
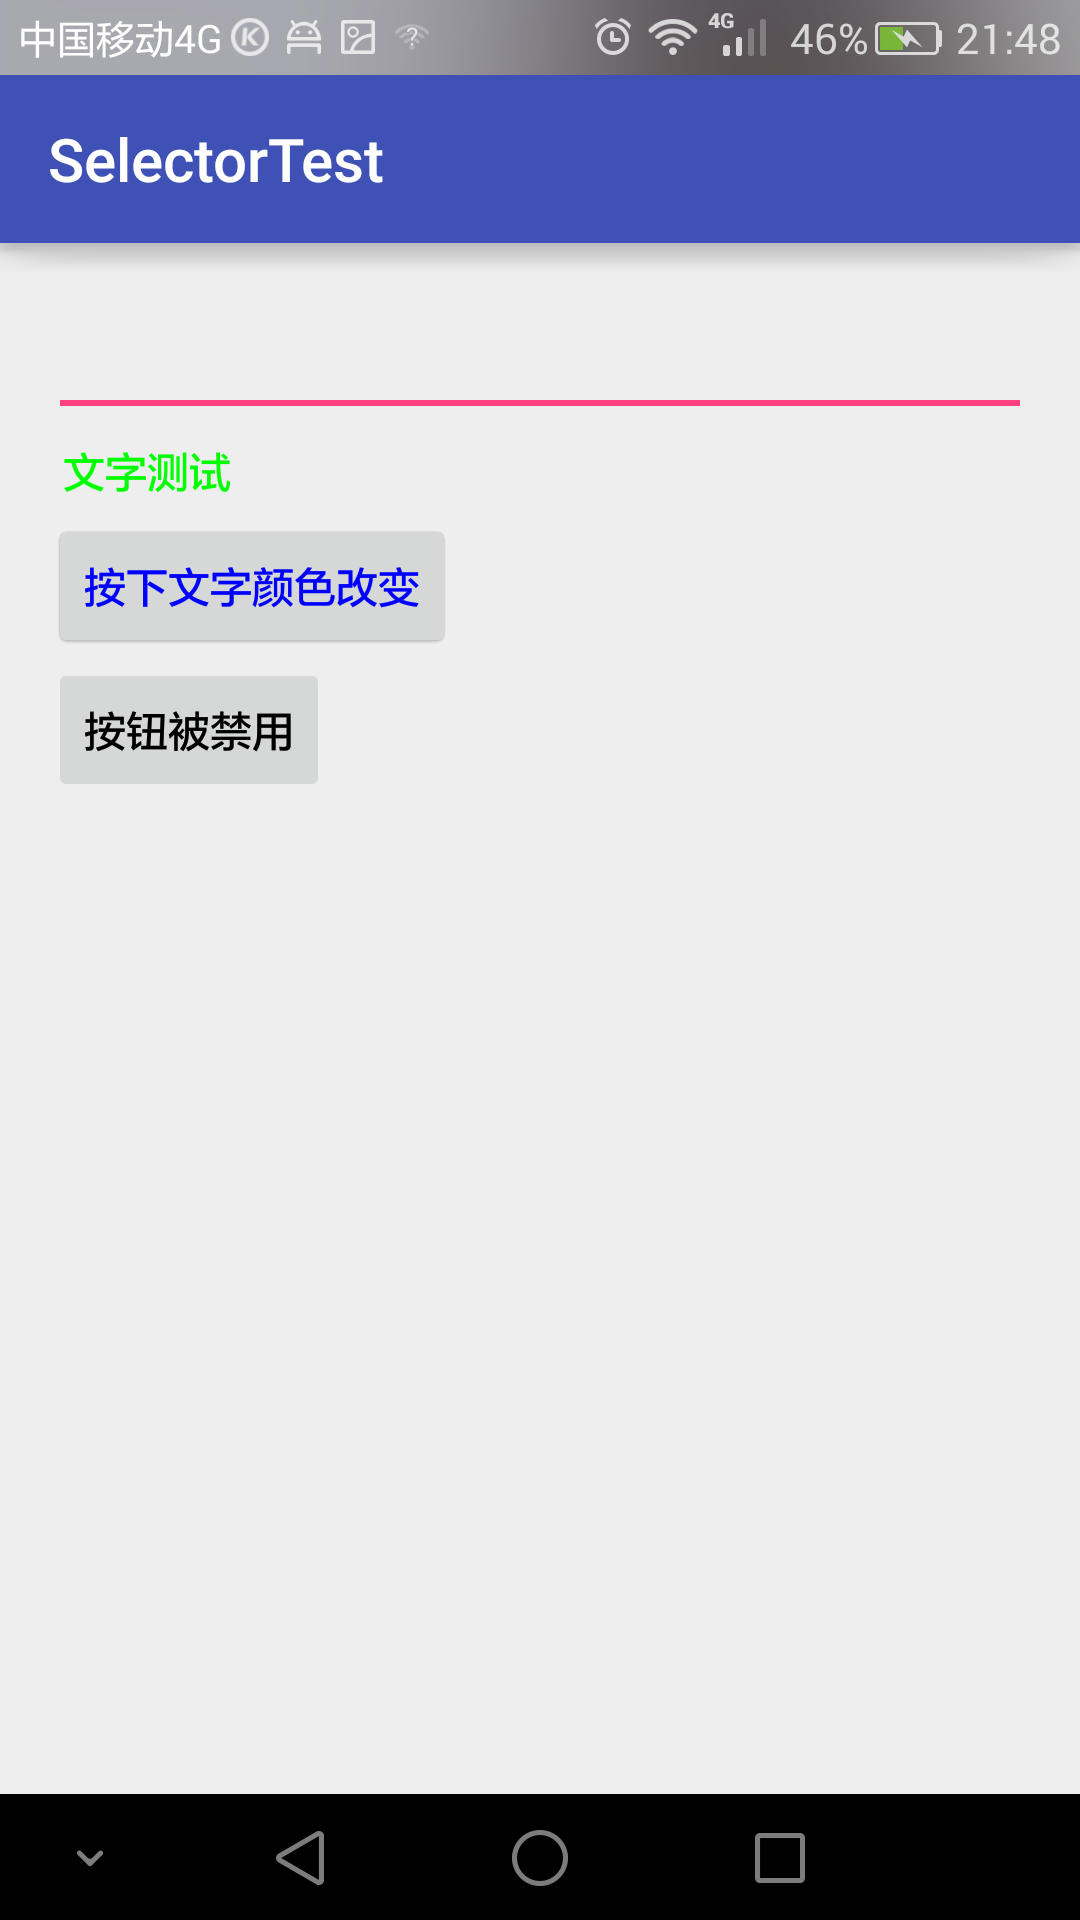
5.运行效果图

6.好了到这里我们的selector文件就的学习剧完成了,至于selector文件中那几个参数的作用,我想我在代码旁边写的注释应该已经很清楚了,他们到底在哪种情况下起效果,你把代码贴到编译器中运行一下就非常清楚了.
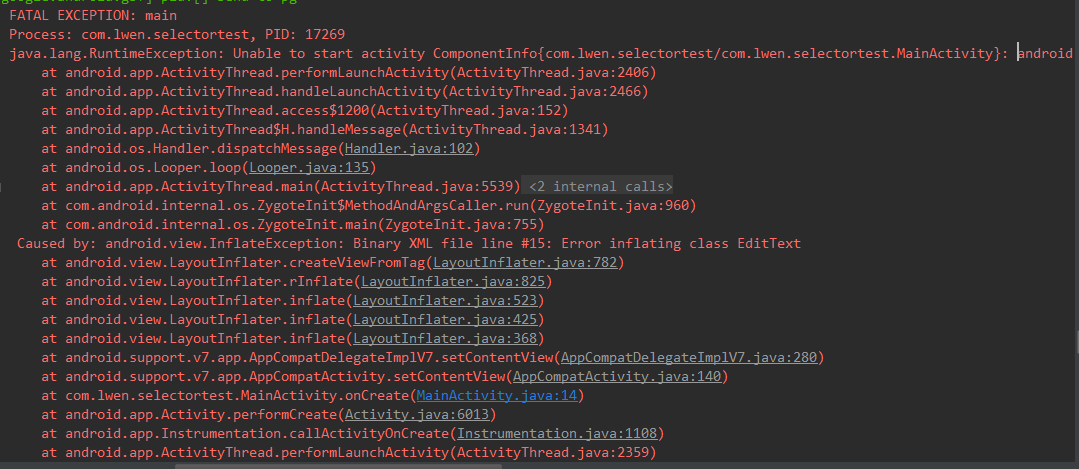
在这里要说一个问题,就是在编写selector文件夹时,那个默认颜色是一定要写的,不写就会出问题,当你的控件不包含item键值对包含的那些状态时就会出现这样的错误
注意:如果有多个item,那么程序将自动从上到下进行匹配,最先匹配的将得到应用。(不是通过最佳匹配)
如果一个item没有任何的状态说明,那么它将可以被任何一个状态匹配。
7.这里写一下我们写selector文件时常用的一些属性
    Android:drawable 放一个drawable资源
    android:state_pressed 是否按下,如一个按钮触摸或者点击。
    android:state_focused 是否取得焦点,比如用户选择了一个文本框。
    android:state_hovered 光标是否悬停,通常与focused state相同,它是4.0的新特性
    android:state_selected 被选中,它与focus state并不完全一样,如一个list view 被选中的时候,它里面的各个子组件可能通过方向键,被选中了。
    android:state_checkable 组件是否能被check。如:RadioButton是可以被check的。
    android:state_checked 被checked了,如:一个RadioButton可以被check了。
    android:state_enabled 能够接受触摸或者点击事件
    android:state_window_focused 应用程序是否在前台,当有通知栏被拉下来或者一个对话框弹出的时候应用程序就不在前台了
最后
以上就是美好悟空最近收集整理的关于Android使用selector文件点击文字变色的全部内容,更多相关Android使用selector文件点击文字变色内容请搜索靠谱客的其他文章。


发表评论 取消回复