我是靠谱客的博主 丰富百褶裙,这篇文章主要介绍springboot篇】二十一. 基于springboot电商项目 三 整合docker配置fastdfs和solr中国加油,武汉加油!篇幅较长,配合目录观看案例准备1. 测试FastDFS user-web(shop-back)2 springboot整合fastdfs3. 搭建前台页面4. 搜索模块5. springboot整合solr,现在分享给大家,希望可以做个参考。
springboot项目
- **中国加油,武汉加油!**
- 篇幅较长,配合目录观看
- 案例准备
- 1. 测试FastDFS user-web(shop-back)
- 1.1 添加FastDFS依赖
- 1.2 程序入口加入注解
- 1.3 配置yml
- 1.4 TestFastDFS
- 1.5 访问图片路径
- 2 springboot整合fastdfs
- 2.1 修改yml
- 2.1 修改GoodsController
- 2.3 访问测试
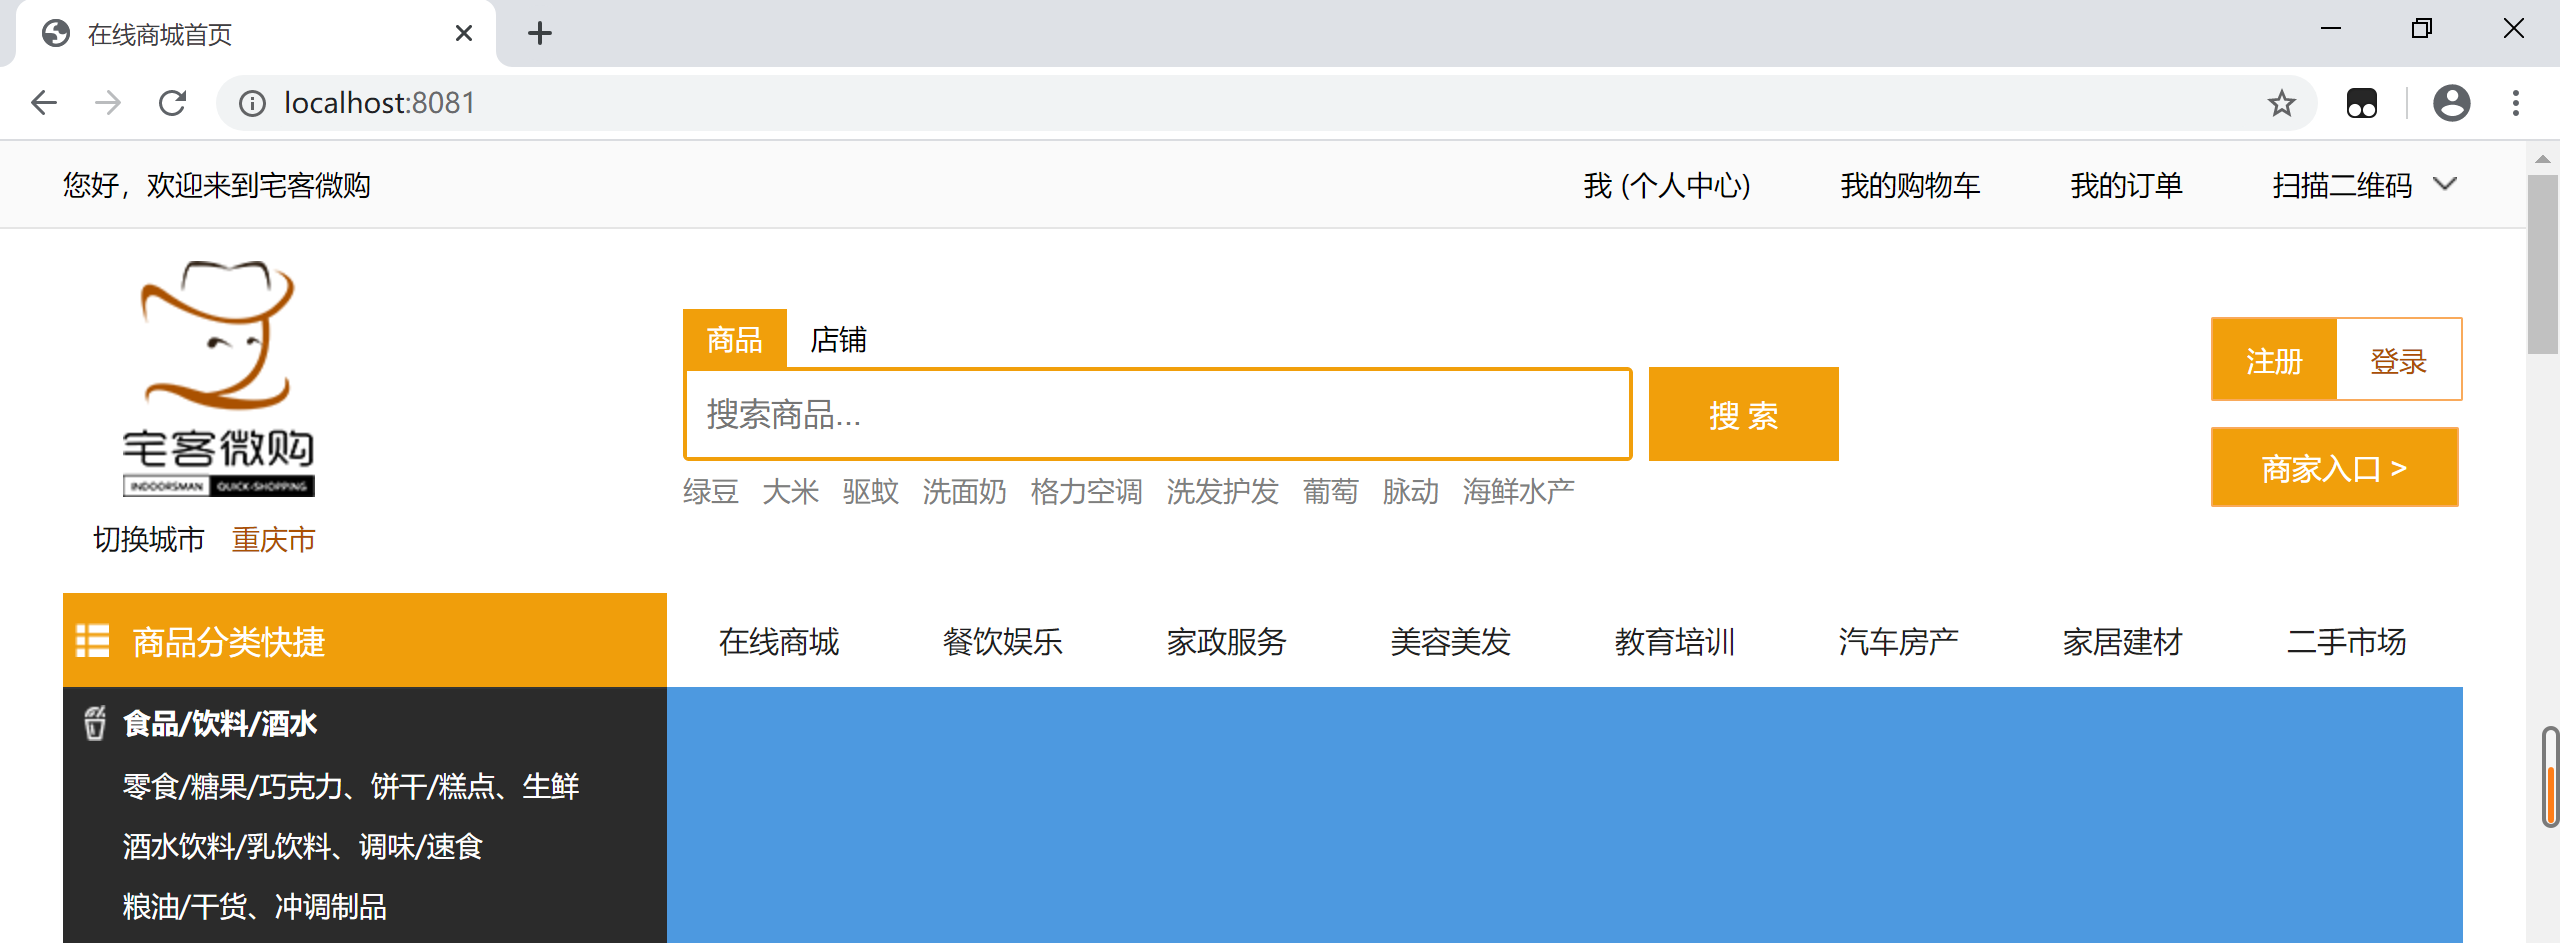
- 3. 搭建前台页面
- 3.1 新建shop-front(module-springboot)
- 3.2 导入静态资源
- 3.3 编写index.html
- 3.4 编写yml
- 3.5 启动程序入口
- 4. 搜索模块
- 4.1 新建shop-search(module-springboot)
- 4.2 编写yml
- 4.3 编写Controller
- 4.4 修改程序入口
- 4.5 修改shop-front的index.html
- 4.6 启动8081和8082程序入口
- 5. springboot整合solr
- 5.1 新建shop-temp(module-maven)
- 5.1.1 删掉src
- 5.2 shop-temp下新建solr-demo(module-springboot)
- 5.3 solr-demo导包
- 5.4 编写yml
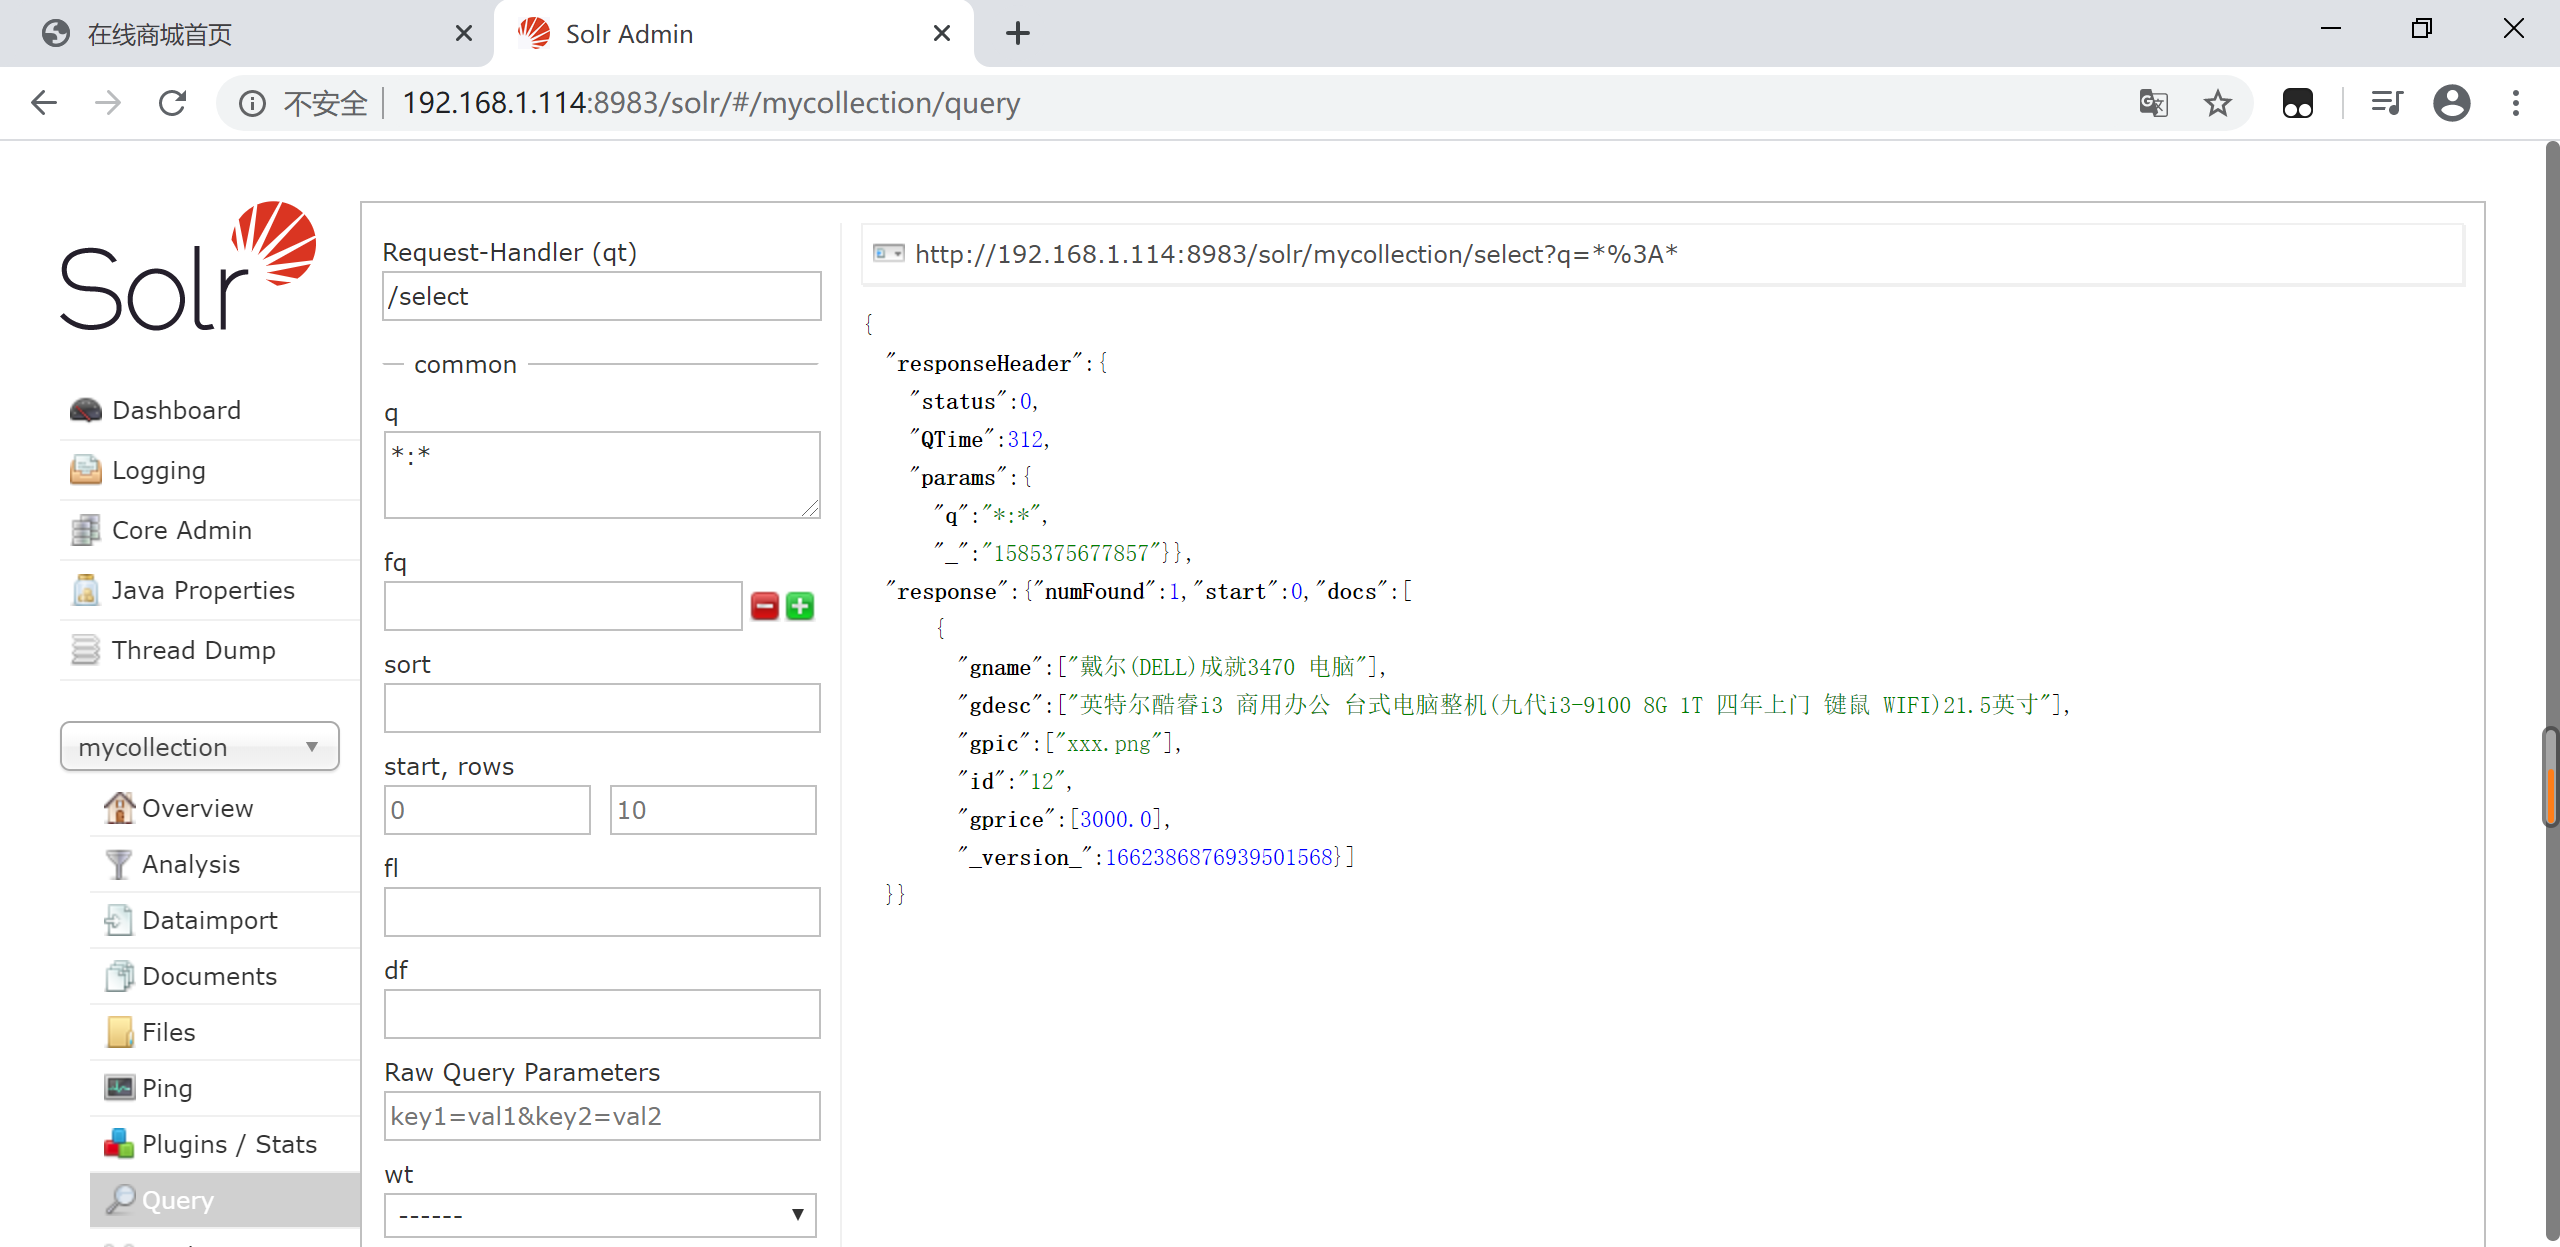
- 5.5 TestAdd
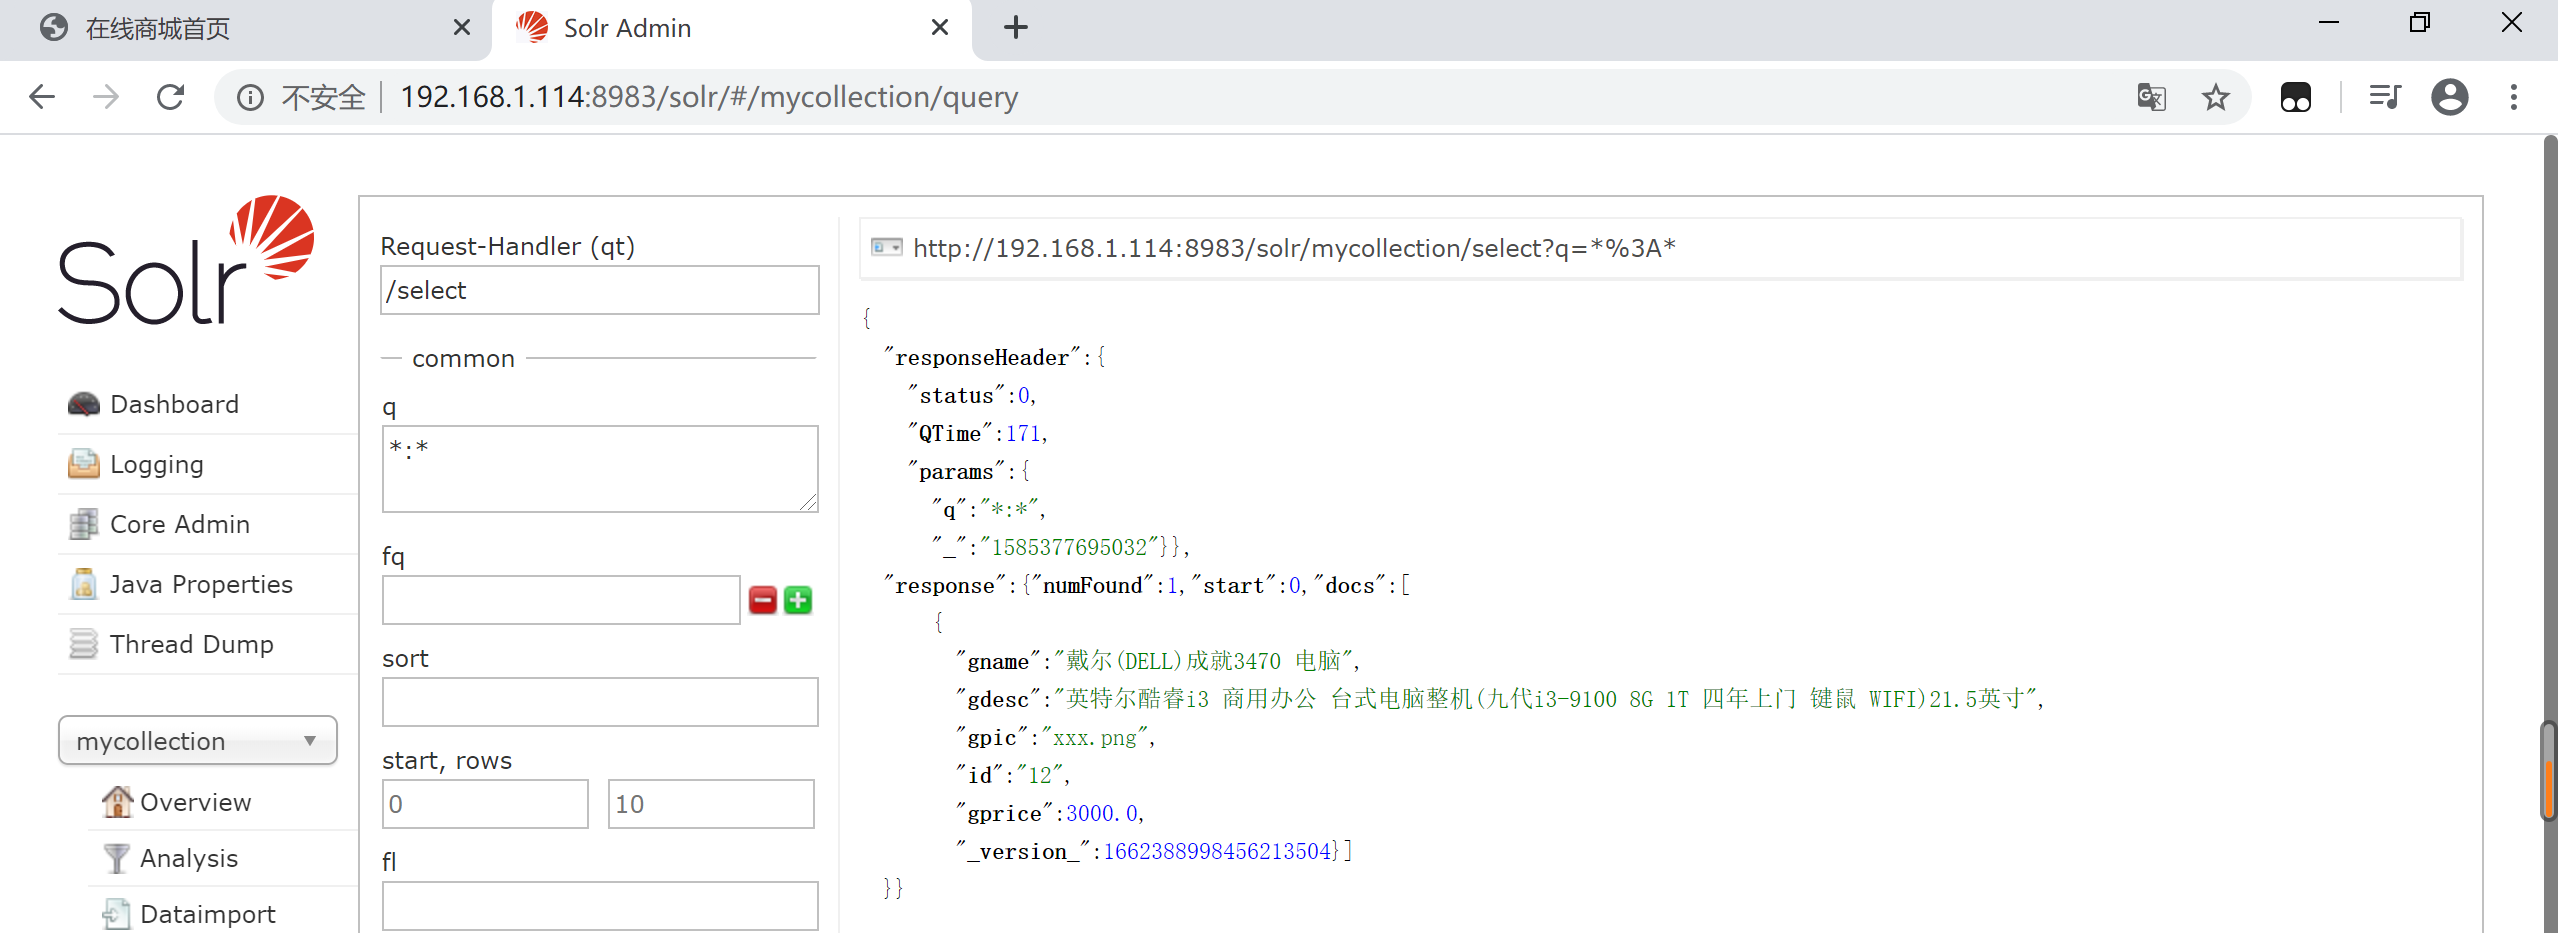
- 5.6 查询
- 5.7 修改查询数据的格式(匹配【linux篇】十. Docker安装FastDFS和Solr的2.7配置solr字段域)
- 5.8 高光查询
- 5.9 删除与查询
中国加油,武汉加油!
篇幅较长,配合目录观看
案例准备
- 本案例基于springboot篇】二十一. 基于springboot电商项目 二 模块功能实现
- linux篇】九. Docker安装
- linux篇】十. Docker安装FastDFS和Solr
- gitee地址 https://gitee.com/springboot-dubbo/nz1904-springboot-shop-03
1. 测试FastDFS user-web(shop-back)
1.1 添加FastDFS依赖
<dependency>
	<groupId>com.github.tobato</groupId>
	<artifactId>fastdfs-client</artifactId>
	<version>1.26.1-RELEASE</version>
</dependency>
1.2 程序入口加入注解
package com.wpj;

import com.github.tobato.fastdfs.FdfsClientConfig;
import org.springframework.boot.SpringApplication;
import org.springframework.boot.autoconfigure.SpringBootApplication;
import org.springframework.boot.autoconfigure.jdbc.DataSourceAutoConfiguration;
import org.springframework.context.annotation.EnableMBeanExport;
import org.springframework.context.annotation.Import;
import org.springframework.jmx.support.RegistrationPolicy;

@SpringBootApplication(scanBasePackages = "com.wpj", exclude = DataSourceAutoConfiguration.class)
// FastDFS
@Import(FdfsClientConfig.class)
@EnableMBeanExport(registration = RegistrationPolicy.IGNORE_EXISTING)
public class UserWebApplication {
    public static void main(String[] args) {
        SpringApplication.run(UserWebApplication.class, args);
    }
}
1.3 配置yml
fdfs:
  tracker-list:
    - 192.168.1.114:22122
  connect-timeout: 2000
  so-timeout: 2000
  thumb-image:
    height: 300
    width: 300
1.4 TestFastDFS
package com.wpj;

import com.github.tobato.fastdfs.domain.StorePath;
import com.github.tobato.fastdfs.service.FastFileStorageClient;
import org.junit.jupiter.api.Test;
import org.junit.runner.RunWith;
import org.springframework.beans.factory.annotation.Autowired;
import org.springframework.boot.test.context.SpringBootTest;
import org.springframework.test.context.junit4.SpringRunner;

import java.io.File;
import java.io.FileInputStream;

@SpringBootTest
@RunWith(SpringRunner.class)
class UserWebApplicationTests {

    @Autowired
    private FastFileStorageClient client;

    @Test
    void testFastDFS() throws Exception {
        // 准备上传的文件
        File file = new File("E:\codeDevelop\ideaDevelop\springboot\nz1904-shop\shop-web\user-web\src\main\resources\static\upload\1.jpg");
        // 把文件转成一个流
        FileInputStream fis = new FileInputStream(file);
        // 把图片上传到FastFDS
        StorePath storePath = client.uploadImageAndCrtThumbImage(fis, file.length(),"jpg",null);
        // 获取图片返回的路径
        System.out.println(storePath.getFullPath());
    }
}
1.5 访问图片路径

2 springboot整合fastdfs
2.1 修改yml
upload:
  FdfsPath: http://192.168.1.114:8080/
2.1 修改GoodsController
package com.wpj.controller;

import com.alibaba.dubbo.common.utils.IOUtils;
import com.alibaba.dubbo.config.annotation.Reference;
import com.baomidou.mybatisplus.plugins.Page;
import com.github.tobato.fastdfs.domain.StorePath;
import com.github.tobato.fastdfs.service.FastFileStorageClient;
import com.wpj.common.entity.ResultEntity;
import com.wpj.entity.Goods;
import com.wpj.service.IGoodService;
import org.springframework.beans.factory.annotation.Autowired;
import org.springframework.beans.factory.annotation.Value;
import org.springframework.stereotype.Controller;
import org.springframework.ui.ModelMap;
import org.springframework.web.bind.annotation.RequestMapping;
import org.springframework.web.bind.annotation.ResponseBody;
import org.springframework.web.multipart.MultipartFile;

import java.io.*;

@Controller
@RequestMapping("/goods")
public class GoodsController {

    @Reference
    private IGoodService goodService;

    @RequestMapping("/getGoodsPage")
    public String getGoodsPage(Page<Goods> page, ModelMap map){
        page = goodService.getDubboPage(page);
        map.put("url", "goods/getGoodsPage");
        map.put("page",page);
        return "goods/goodsList";
    }

    @Autowired
    private FastFileStorageClient client;

    @Value("${upload.FdfsPath}")
    private String FdfsPath;

    private String uploadPath = "E:\codeDevelop\ideaDevelop\springboot\nz1904-shop\shop-web\user-web\src\main\resources\static\upload";

    @RequestMapping("/uploadFile")
    @ResponseBody
    public String uploadFile(MultipartFile file){
        System.out.println("文件名:"+ file.getOriginalFilename());
        FileOutputStream os = null;
        InputStream is = null;
        File opsFile = new File(uploadPath+ File.separator+file.getOriginalFilename());

        String fileName = file.getOriginalFilename();
        String fileExtName = fileName.substring(fileName.lastIndexOf(".")+1);
        StorePath storePath = null;
        try {
            storePath = client.uploadImageAndCrtThumbImage(file.getInputStream(), file.getSize(), fileExtName, null);

        } catch (IOException e) {
            e.printStackTrace();
        }
        return FdfsPath+storePath.getFullPath();
    }

    @RequestMapping(value = "/addGoods")
    @ResponseBody
    public ResultEntity addGoods(Goods goods){
        // 1.把商品添加数据库
        goodService.insert(goods);
        // 在这里主键回填不过来,所以要在service层添加
        return ResultEntity.SUCCESS();
    }
}
2.3 访问测试

3. 搭建前台页面
3.1 新建shop-front(module-springboot)
- Spring Boot DevTool
- Spring Web
- Thymeleaf
3.2 导入静态资源
3.3 编写index.html
3.4 编写yml
server:
  port: 8081
spring:
  thymeleaf:
    cache: false
    prefix: classpath:/templates/
3.5 启动程序入口

4. 搜索模块
4.1 新建shop-search(module-springboot)
- Spring Boot DevTool
- Spring Web
- Thymeleaf
4.2 编写yml
server:
  port: 8082
4.3 编写Controller
package com.wpj.controller;

import org.springframework.stereotype.Controller;
import org.springframework.web.bind.annotation.RequestMapping;
import org.springframework.web.bind.annotation.ResponseBody;

@Controller
@RequestMapping("/search")
public class SearchController {
    @RequestMapping("/searchGoods")
    @ResponseBody
    public String searchGoods(String key) {
        System.out.println("SearchController.searchGoods" + key);
        return "ok";
    }
}
4.4 修改程序入口
package com.wpj;

import org.springframework.boot.SpringApplication;
import org.springframework.boot.autoconfigure.SpringBootApplication;

@SpringBootApplication(scanBasePackages = "com.wpj")
public class ShopSearchApplication {
    public static void main(String[] args) {
        SpringApplication.run(ShopSearchApplication.class, args);
    }
}
4.5 修改shop-front的index.html
<div class="srh">
    <form method="post" action="http://localhost:8082/search/searchGoods   ">
        <div class="ipt f-l">
            <input type="text" name="key" placeholder="搜索商品..." ss-search-show="sp" />
            <input type="text" placeholder="搜索店铺..." ss-search-show="dp" style="display:none;" />
         </div>
        <button class="f-r">搜 索</button>
        <div style="clear:both;"></div>
    </form>
</div>
4.6 启动8081和8082程序入口


5. springboot整合solr
5.1 新建shop-temp(module-maven)
5.1.1 删掉src
5.2 shop-temp下新建solr-demo(module-springboot)
5.3 solr-demo导包
<dependency>
   <groupId>org.springframework.boot</groupId>
   <artifactId>spring-boot-starter-data-solr</artifactId>
   <version>2.1.7.RELEASE</version>
</dependency>
5.4 编写yml
spring:
  data:
    solr:
      host: http://192.168.1.114:8983/solr/mycollection
5.5 TestAdd
package com.wpj;

import org.apache.solr.client.solrj.SolrClient;
import org.apache.solr.common.SolrInputDocument;
import org.junit.jupiter.api.Test;
import org.junit.runner.RunWith;
import org.springframework.beans.factory.annotation.Autowired;
import org.springframework.boot.test.context.SpringBootTest;
import org.springframework.test.context.junit4.SpringRunner;

@SpringBootTest
@RunWith(SpringRunner.class)
class SolrDemoApplicationTests {

    @Autowired
    private SolrClient solrClient;

    @Test
    public void testAdd() throws Exception{
        SolrInputDocument document = new SolrInputDocument();
        document.addField("gname","戴尔(DELL)成就3470 电脑");
        document.setField("gdesc","英特尔酷睿i3 商用办公 台式电脑整机(九代i3-9100 8G 1T 四年上门 键鼠 WIFI)21.5英寸");
        document.setField("gpic","xxx.png");
        document.setField("id","12");
        document.setField("gprice",3000.0);
        solrClient.add(document); // 如果id存在就会修改
        solrClient.commit(); // 事务提交
        System.out.println(solrClient);
    }
}
5.6 查询

5.7 修改查询数据的格式(匹配【linux篇】十. Docker安装FastDFS和Solr的2.7配置solr字段域)

5.8 高光查询
@Test
public void search()throws  Exception{
    String key ="Apple iPhone XR";
    String temp ="gname:%s || gdesc:%s";
    String format = String.format(temp, key, key);
    // 字段名称:值
    SolrQuery solrQuery = new SolrQuery(format);
    solrQuery.setHighlight(true); // 开启高亮
    solrQuery.addHighlightField("gname"); // 设置高亮的字段
    // 设置高亮的颜色
    solrQuery.setHighlightSimplePre("<font color='red'>");
    solrQuery.setHighlightSimplePost("</font>");
    QueryResponse queryResponse = solrClient.query(solrQuery);
    SolrDocumentList solrDocumentList = queryResponse.getResults(); // 得到结果集
    // 返回的是有高亮的结果集
    //<id,<高亮的字段,[值1,值2]>>
    Map<String, Map<String, List<String>>> highlighting = queryResponse.getHighlighting();
    for(SolrDocument document:solrDocumentList){
        String goodsId = document.getFieldValue("id").toString();
        // 判断当前商是否有高亮的字段
        if(highlighting.get(goodsId) != null){
            // 获取高亮的字段
            Map<String,List<String>> map = highlighting.get(goodsId);
            List<String> gname = map.get("gname");
            System.out.println(gname);
        }
    }
}
5.9 删除与查询
/**
 * 根据id查询商品
 * @throws Exception
 */
@Test
public void testGetById() throws Exception{
    SolrDocument solrDocument = solrClient.getById("12");
    System.out.println("gname:"+solrDocument.get("gname")); // 根据key获取value
    Collection<String> fieldNames = solrDocument.getFieldNames();// 获取所有的字段名称
    for(String filed:fieldNames){
        System.out.println(filed+":"+solrDocument.getFieldValue(filed)); // 属性名称
    }
    Map<String, Object> fieldValueMap = solrDocument.getFieldValueMap();
    System.out.println(fieldValueMap);
}

@Test
public void testDelete()throws  Exception{
//		solrClient.deleteById("12");
    solrClient.deleteByQuery("*:*");
    solrClient.commit();
}
最后
以上就是丰富百褶裙最近收集整理的关于springboot篇】二十一. 基于springboot电商项目 三 整合docker配置fastdfs和solr中国加油,武汉加油!篇幅较长,配合目录观看案例准备1. 测试FastDFS user-web(shop-back)2 springboot整合fastdfs3. 搭建前台页面4. 搜索模块5. springboot整合solr的全部内容,更多相关springboot篇】二十一.内容请搜索靠谱客的其他文章。
本图文内容来源于网友提供,作为学习参考使用,或来自网络收集整理,版权属于原作者所有。


发表评论 取消回复