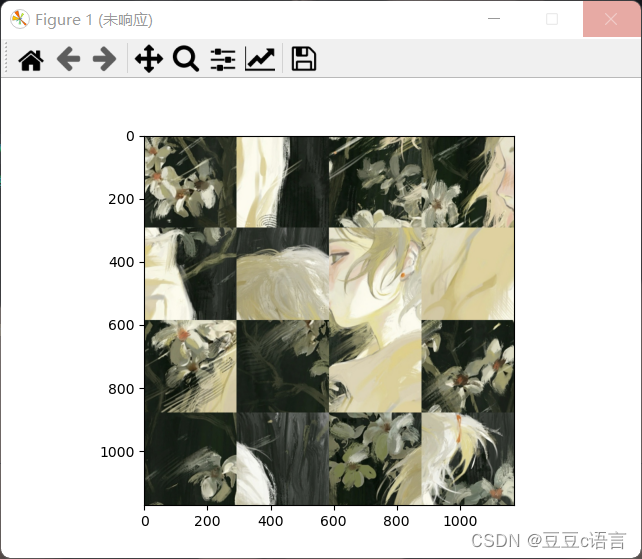
效果展示:

代码如下:
import numpy as np
import matplotlib.pyplot as plt
from PIL import Image
import math
import random

# 读入图片
im = Image.open('ruanbin.jpg')  # 这里放置你的图片路径
im = np.array(im)  # 将图片转化成numpy数组
# 输入一个数字并计算行数和列数 输入的数字必须能开平方
n = int(input())
row = int(math.sqrt(n))  # 计算每一行图片个数

# 高度和宽度
H, W = im.shape[0], im.shape[1]
height = H // row
width = W // row
# 宽度和高度取模
rowmod = H % row
colmod = W % row
# 高度和宽度的起始像素和结束像素
startrow = rowmod // 2
startcol = colmod // 2
endrow = startrow + row * height
endcol = startcol + row * width

List = []
for h in range(startrow, endrow, height):
    for w in range(startcol, endcol, width):
        temp = im[h:h + height, w:w + width, :]
        List.append(temp)
        # plt.imshow(temp)
# print(len(List))
random.shuffle(List)
List1 = []
# 对图片进行行拼接
for i in range(row):
    img = List[i * row]
    for j in range(row - 1):
        img = np.concatenate((img, List[j + i * row + 1]), axis=1)
    List1.append(img)  # 行拼接的每个图片存储在一个列表中
img1 = List1[0]
# 再对刚才列表的图片进行竖拼接
for i in range(1, row):
    img1 = np.concatenate((img1, List1[i]), axis=0)
plt.imshow(img1)
plt.show()
最后
以上就是朴实八宝粥最近收集整理的关于python实现图片n宫格裁剪和拼接的全部内容,更多相关python实现图片n宫格裁剪和拼接内容请搜索靠谱客的其他文章。
本图文内容来源于网友提供,作为学习参考使用,或来自网络收集整理,版权属于原作者所有。


发表评论 取消回复