首先导入高德地图依赖的jar文件,并添加权限
1 xml布局文件中添加地图
<?xml version="1.0" encoding="utf-8"?>
<LinearLayout xmlns:android="http://schemas.android.com/apk/res/android"
android:layout_width="match_parent"
android:layout_height="match_parent"
android:orientation="vertical"
>
<com.amap.api.maps2d.MapView

android:layout_marginTop="5dp"
android:id="@+id/map_map01"
android:layout_width="fill_parent"
android:layout_height="fill_parent"
/>
</LinearLayout>
2 在activity中获取并定位
package com.example.mapp;
import com.amap.api.location.AMapLocation;
import com.amap.api.location.AMapLocationListener;
import com.amap.api.location.LocationManagerProxy;
import com.amap.api.location.LocationProviderProxy;
import com.amap.api.maps2d.AMap;
import com.amap.api.maps2d.MapView;
import com.amap.api.maps2d.model.LatLng;
import com.amap.api.maps2d.model.MarkerOptions;
import android.support.v7.app.ActionBarActivity;
import android.support.v7.app.ActionBar;
import android.support.v4.app.Fragment;
import android.telephony.SmsManager;
import android.location.Location;
import android.os.Bundle;
import android.view.LayoutInflater;
import android.view.Menu;
import android.view.MenuItem;
import android.view.View;
import android.view.ViewGroup;
import android.os.Build;
public class MainActivity extends ActionBarActivity implements AMapLocationListener{
private MapView mapView;
private AMap aMap;
@Override
protected void onCreate(Bundle savedInstanceState) {
super.onCreate(savedInstanceState);
setContentView(R.layout.fragment_main);
mapView = (MapView) findViewById(R.id.map_map01);
mapView.onCreate(savedInstanceState);
aMap = mapView.getMap();
// 初始化定位,只采用网络定位
System.out.println("----------------定位 获取当前位置------------------------");
LocationManagerProxy loca = LocationManagerProxy.getInstance(MainActivity.this);
loca.requestLocationData(LocationProviderProxy.AMapNetwork, -1, 0, this); // -1只定位一次
如是2000 2秒定位一次
loca.setGpsEnable(false);
}
@Override
protected void onResume() {
super.onResume();
mapView.onResume();
}
@Override
protected void onPause() {
super.onPause();
mapView.onPause();
}
@Override
protected void onDestroy() {
super.onDestroy();
mapView.onDestroy();
}
@Override
public void onLocationChanged(Location location) {
}
@Override
public void onStatusChanged(String provider, int status, Bundle extras) {
}
@Override
public void onProviderEnabled(String provider) {
}
@Override
public void onProviderDisabled(String provider) {
}
//定位成功后回调此方法
@Override
public void onLocationChanged(AMapLocation arg0) {
System.out.println("-----定位的纬度-------"+arg0.getLatitude()+"-----定位的经度----"+arg0.getLongitude()+arg0.getAMapException().getErrorCode());
MarkerOptions mark=new MarkerOptions();
mark.position(new LatLng(arg0.getLatitude(), arg0.getLongitude()));
aMap.addMarker(mark);
}
}
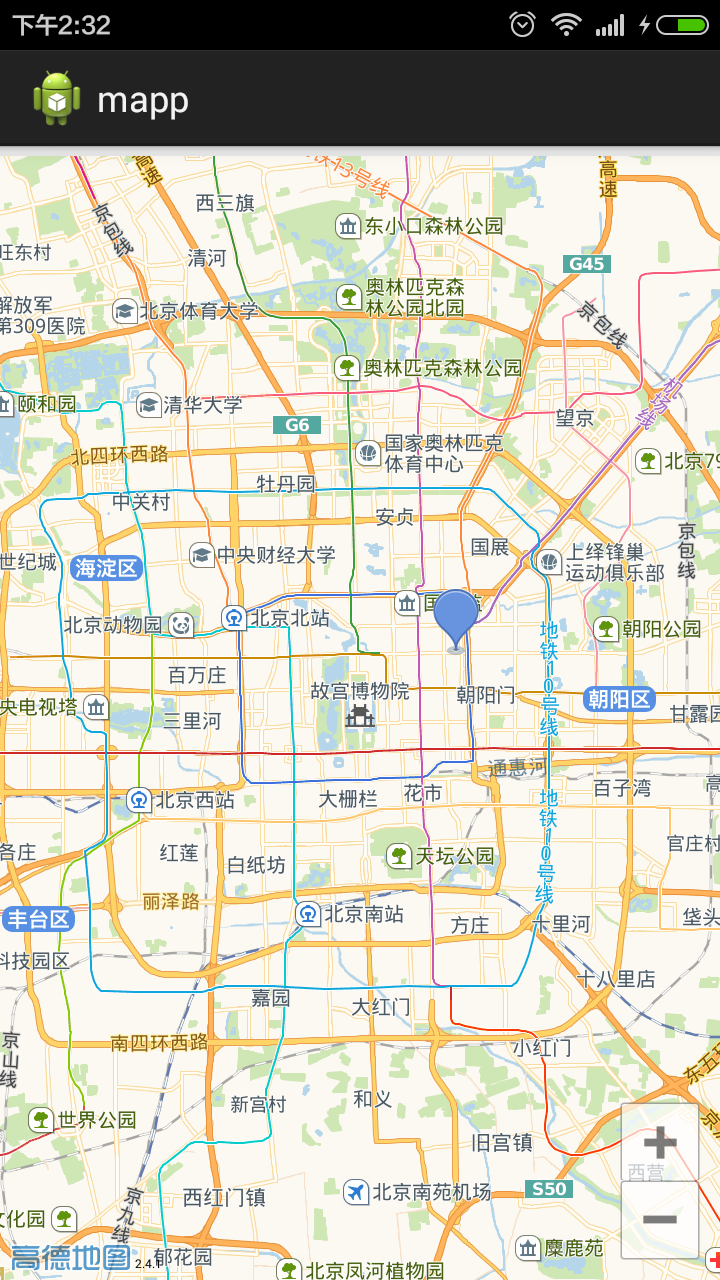
效果如下
最后
以上就是陶醉母鸡最近收集整理的关于高德地图03---定位本地位置的全部内容,更多相关高德地图03---定位本地位置内容请搜索靠谱客的其他文章。
本图文内容来源于网友提供,作为学习参考使用,或来自网络收集整理,版权属于原作者所有。


发表评论 取消回复