JDjingrong
京东金融项目
一.开始项目(里面的初始文件可以用来移动端初始化)
1.下载初始文件,里面已整理好移动端初始样式(支持es6,引入scss+css module,自动刷新,可以用来移动端初始化),用git版本回退到ccbe7f9即可;
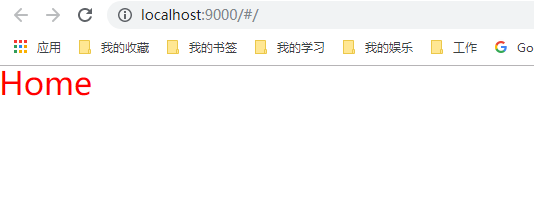
接着在git安装插件和运行开启服务命令,最终界面显示如下代表成功.
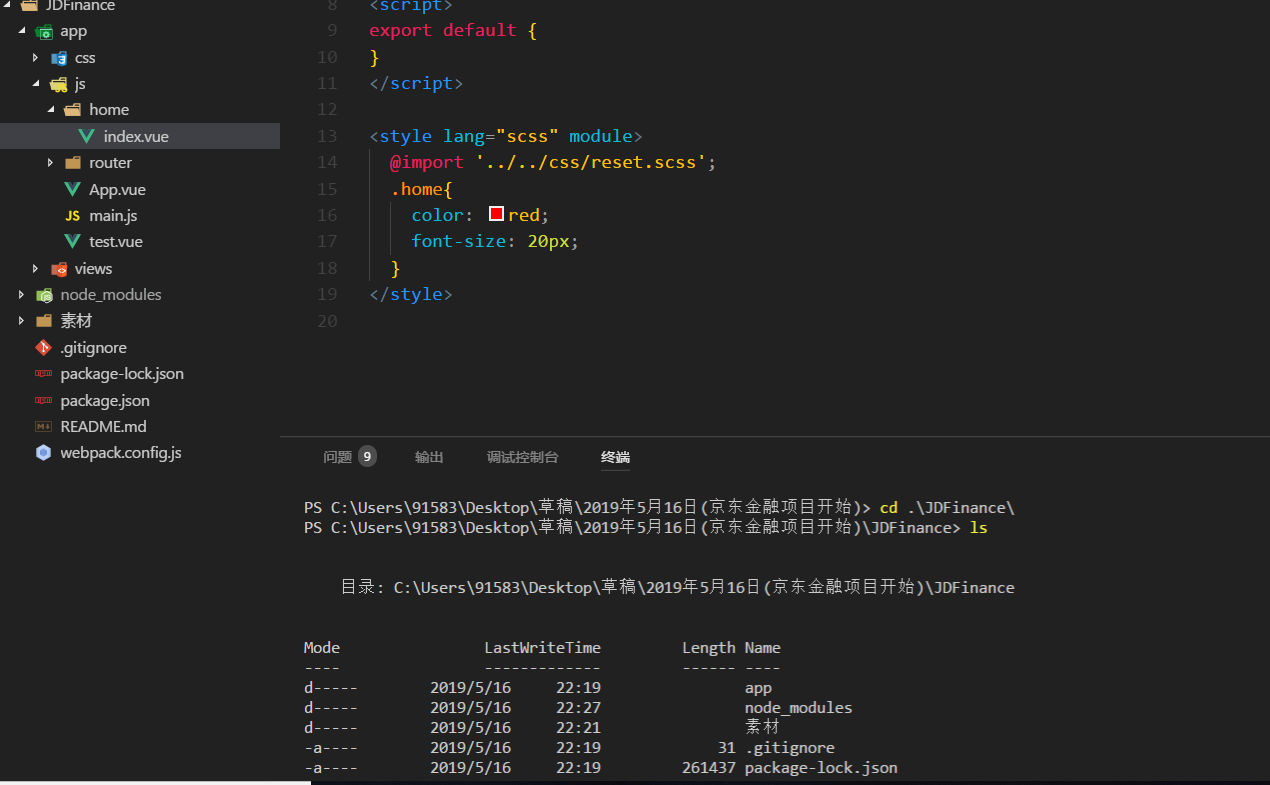
小技巧:终端ls命令可以显示当前目录文件;
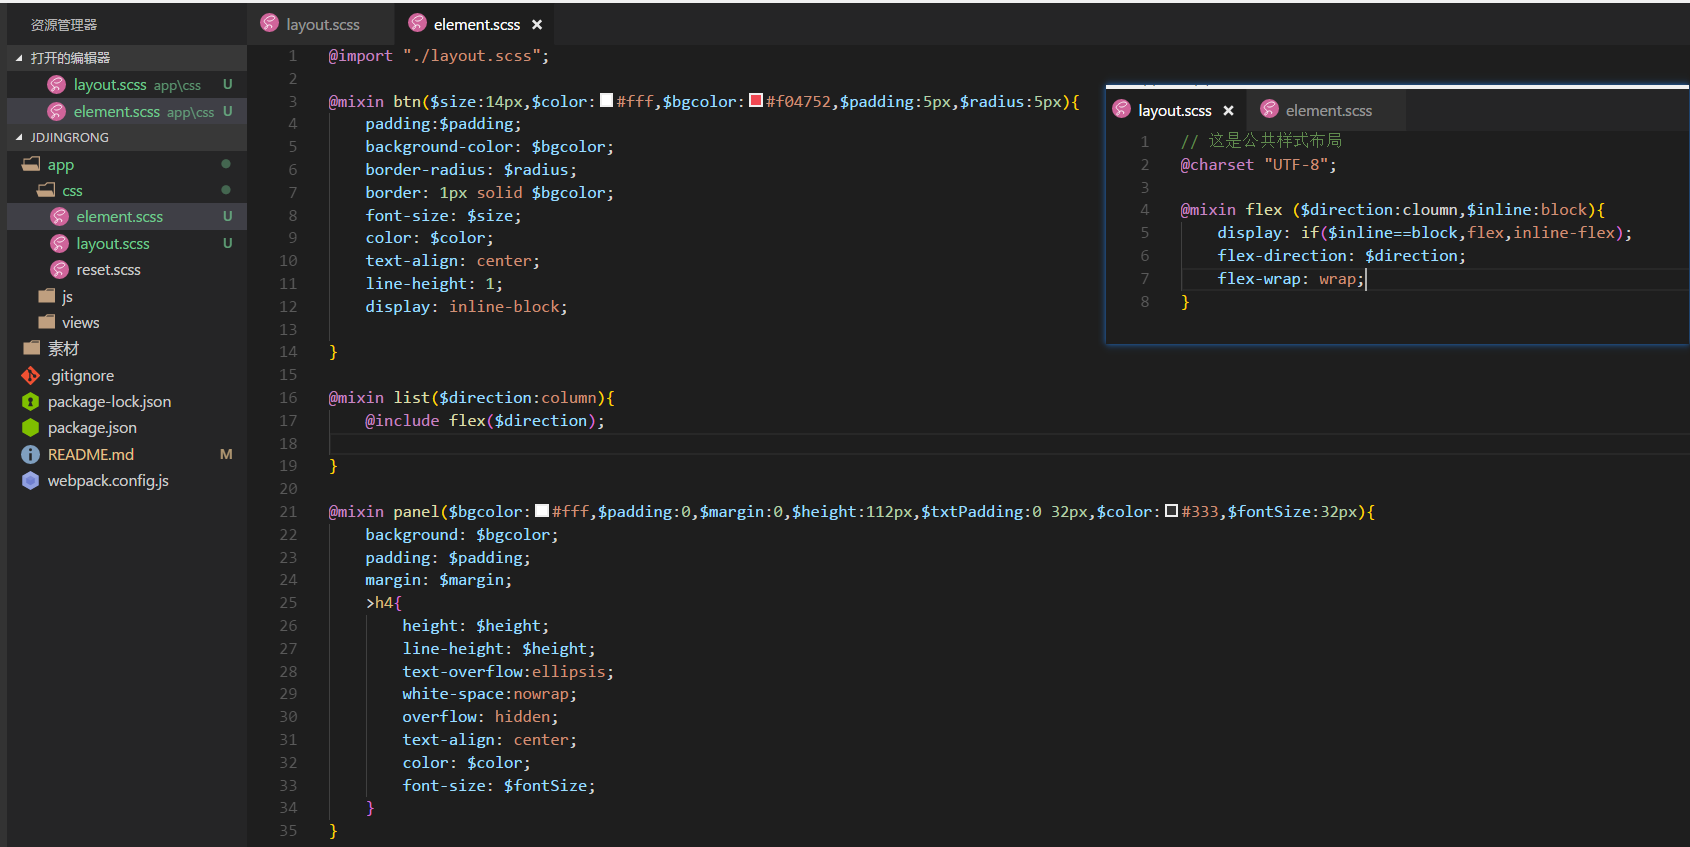
2.开始基础样式布局(里面用到了@mixin,@include,不会看scss官网介绍)
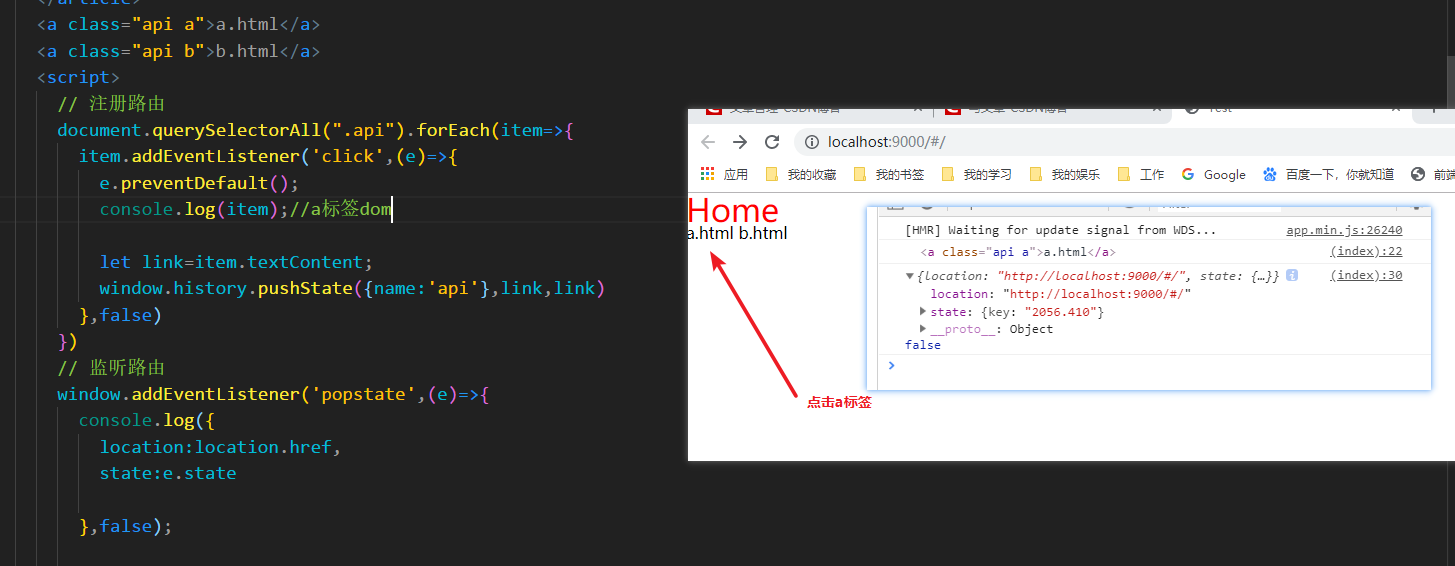
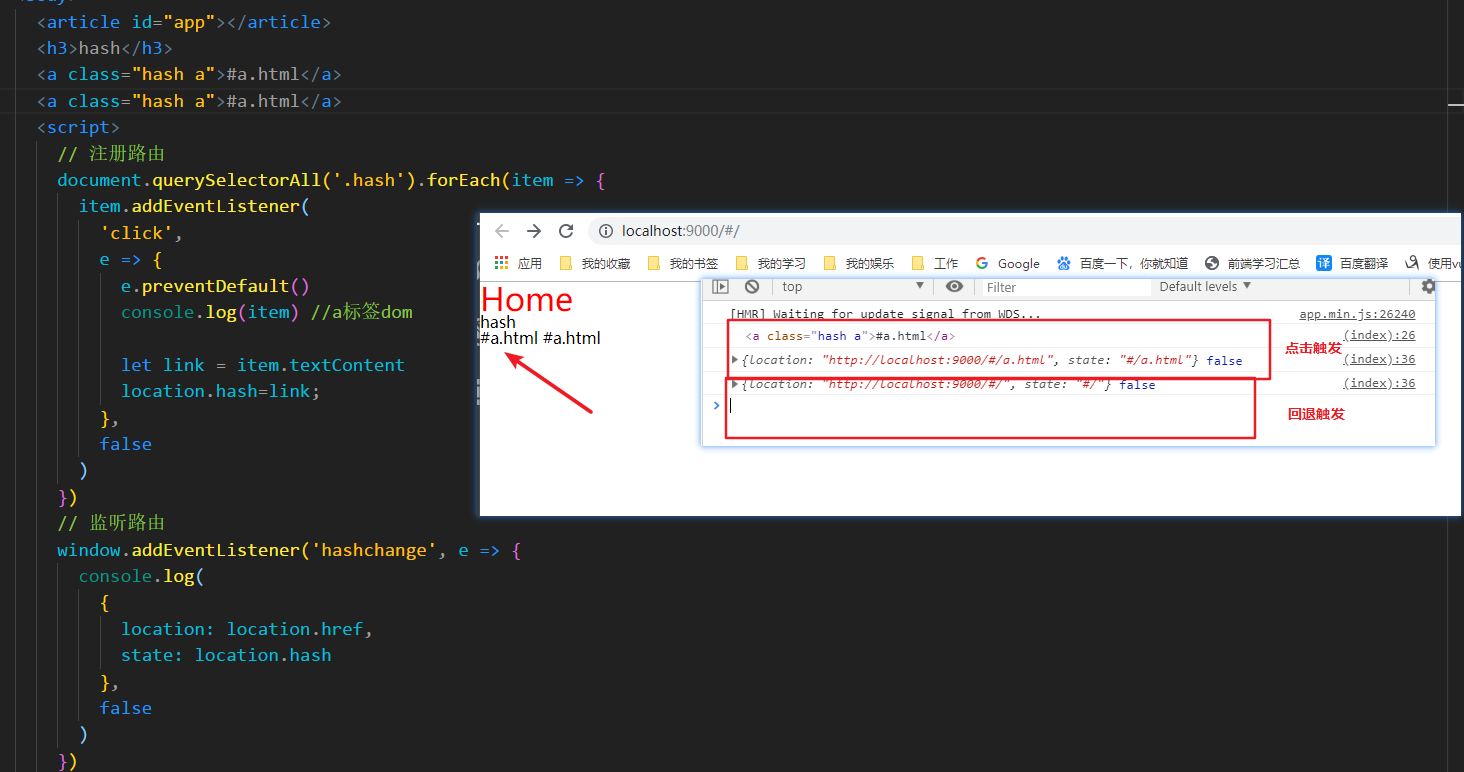
3.两种路由模式原理.
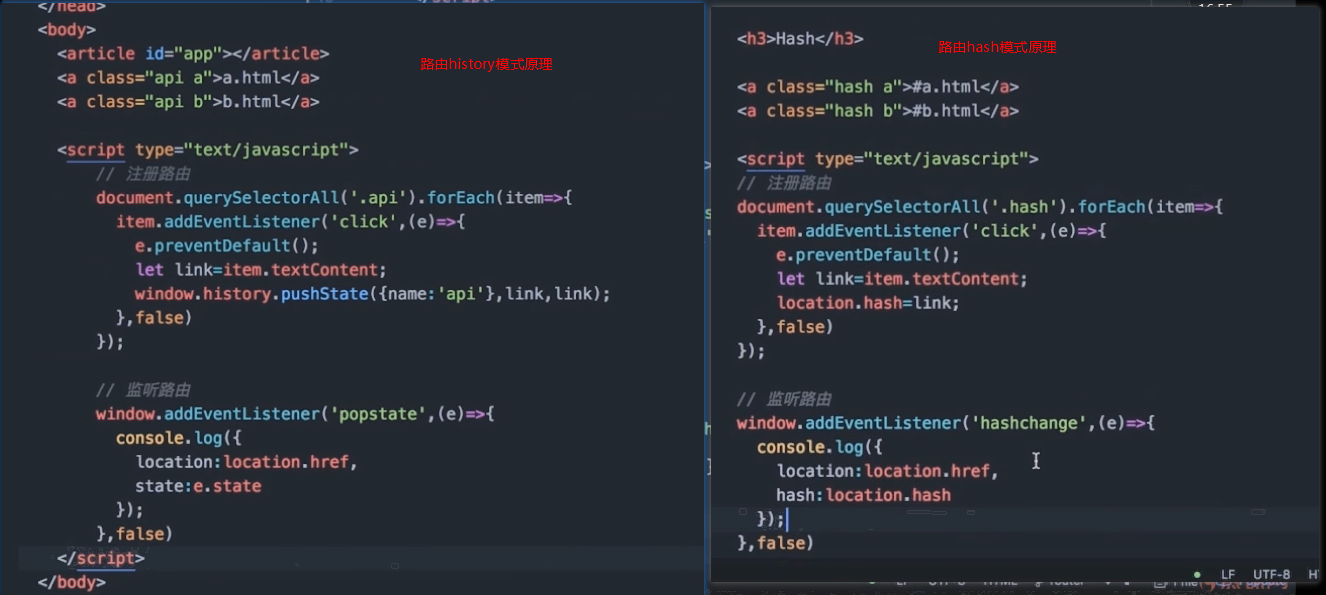
实操history模式:
实操hash模式:
二.正式开始js开发
ps:用ls查看当前目录文件,用mkdir+文件名创建文件;
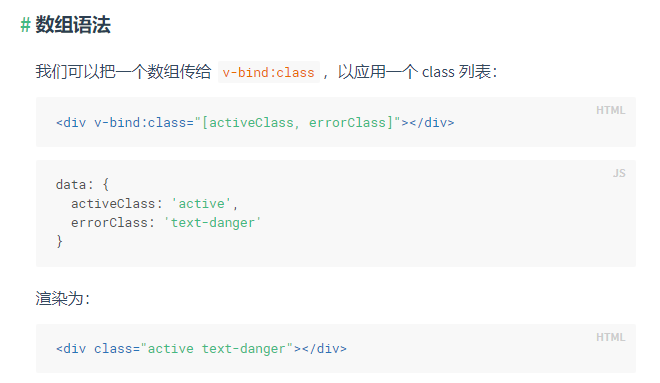
1.创建js/core/btn.vue公共组件,写法如下
<template>
<!-- [btnClass,cname]v-bind数组指令 -->
  <div :class="[btnClass,cname]">
     <slot/>
  </div>
</template>
<script>
export default {
  name: 'btn',
  props:{//props外面传值
      cname:{
          type:String,
          default:""
      }
  },
  data(){
      return {
          btnClass:'btn'
      }
  }
}
</script>
<style lang="scss">
/*引入样式,这就是sass强大之处 */
@import "../../css/element.scss";
.btn{
    @include btn;
}
</style>
同样,创建js/core/panel.vue,
<template>
<!-- 下面三行依次是:类名,标题名,插槽要填充的内容 -->
  <section :class="[panelClass,cname]">
      <h4>-{{title}}-</h4>
      <slot/>
  </section>
</template>

<script>
export default {
  name: 'panel',
  props:{//这里是要传递的值
      cname:{
          type:String,
          default:""
      },
      title:{
          type:String,
          default:''
      }
  },
  data() {
      return {
        panelClass:"panel"

      }
  },
}
</script>
<style lang="scss">
@import "../../css/element.scss";
.panel{
    @include panel;
}
</style>
3.vue中有一个轮播图的插件叫 vue-awesome-swiper,轮播图我们用这个.
检查有没安装vue-awesome-swipe的办法
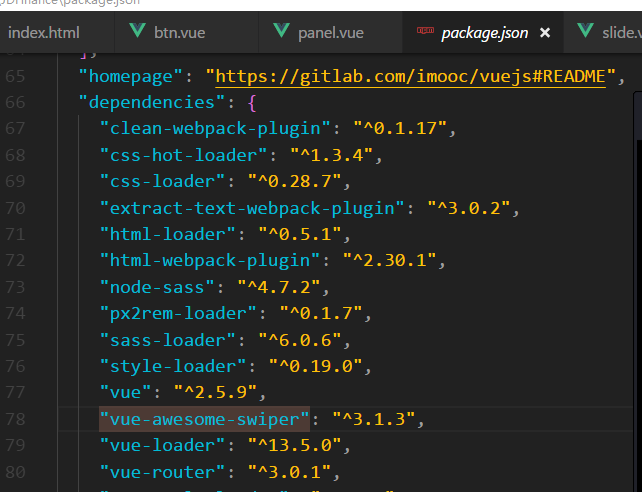
安装好后,创建js/core/slide.vue,代码如下
<template>
 <section :class="cname">
     <swiper :options="options" :not-next-tick="options.notNextTick">
         <swiper-slide v-for="item in items" :key="item.href">
             <router-link :to="{name:'item.href'}">
                 <img :src="item.src" alt="">
             </router-link>
         </swiper-slide>
         <!-- 指示器 -->
         <div class="swiper-pagination" v-if="options.pagination" slot="pagination"></div>
     </swiper>
 </section>
</template>

<script>
import {swiper,swiperSlide} from "vue-awesome-swiper"
export default {
  name: 'slide',
  props:{
      cname:{
          type:String,
          default:''
      },
      options:{
          type:Object,//注意如果是对象,那下面的也要对象形式返回
          default(){
              return{
                 autoplay:true,//自己滚动
                 loop:true, //是否循环
                 pagination:{//显示点点
                     el:".swiper-pagination"
                 },
                 notNextTick:false//下一个点击
              }
          }
      },
      items:{
          type:Array,
          default(){
              return[
                //   {
                //       href:'',//跳转的连接
                //       src:""//显示的连接
                //   }
              ]
          }
      }

  },
  components:{
      swiper,
      swiperSlide
  }
}
</script>
<style lang="scss">
// 使用~可以直接在nodle里面找
@import '~swiper/dist/css/swiper.css';
 img{
               width: 100%;
                height: 336px;
        }
</style>
4.app/js/public/header.vue
<template>
<!-- 样式加了命名空间 -->
<div :class="$style.header">
<!-- 采用浮动布局 -->
<span :class="$style.left">
<!-- 真正项目写成router-link -->
<em>注册</em> |
<em>登录</em>
</span>
<!-- btn是引用的组件 -->
<btn :class="$style.btnDownload">APP下载</btn>
</div>
</template>
<script>
// 引入btn组件
import btn from '../core/btn'
export default {
name: 'my-header',
components: {
btn
}
}
</script>
<style lang="scss" module>
.header {
color: #666;
position: fixed;
height: 100px;
line-height: 100px;
top: 0;
left: 0;
right: 0;
font-size: 32px;
background: #fff
url(//timgsa.baidu.com/timg?image&quality=80&size=b9999_10000&sec=1558500134807&di=39fc00d33159b1a84c74d7f046059403&imgtype=0&src=http%3A%2F%2Fcbu01.alicdn.com%2Fimg%2Fibank%2F2016%2F638%2F684%2F2738486836_931934101.jpg)
center center no-repeat;
background-size: 207px auto;
z-index: 100;
.left {
font-size: 28px;
height: 30px;
line-height: 30px;
margin: 17px 0 0 18px;
}
.btnDownload {
float: right;
font-size: 28px;
border-width: 0;
height: 56px;
line-height: 56px;
min-width: 120px;
padding: 0;
border-radius: 4px;
margin: 28px 24px 0 0;
}
}
</style>
5.增加viewport布局
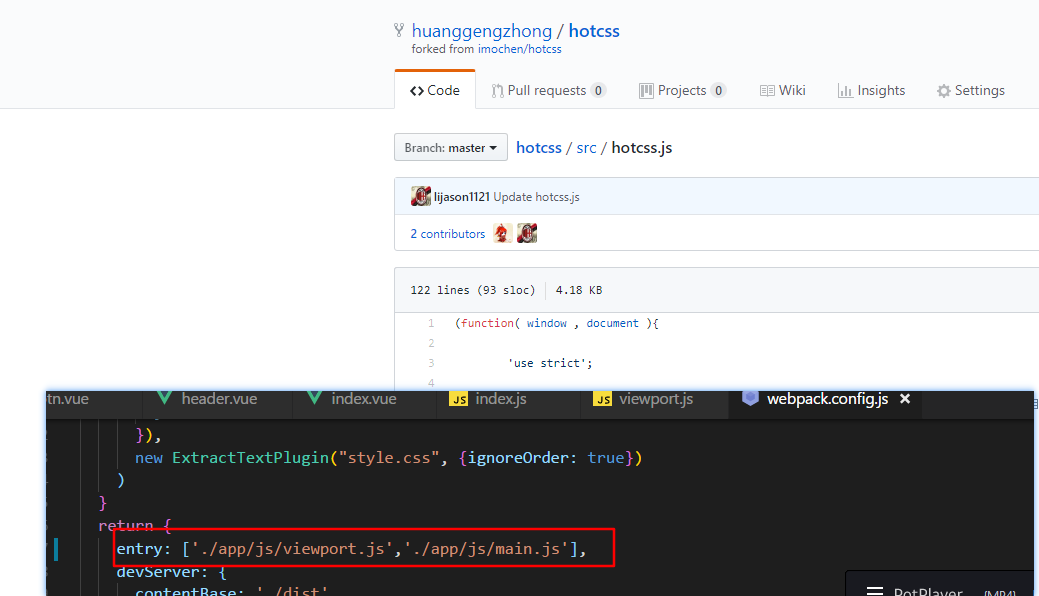
我的收藏的hotcss.js文件地址
hotcss.js文件拷贝到viewport.js里,然后在webpack.config.js里面引入即可.
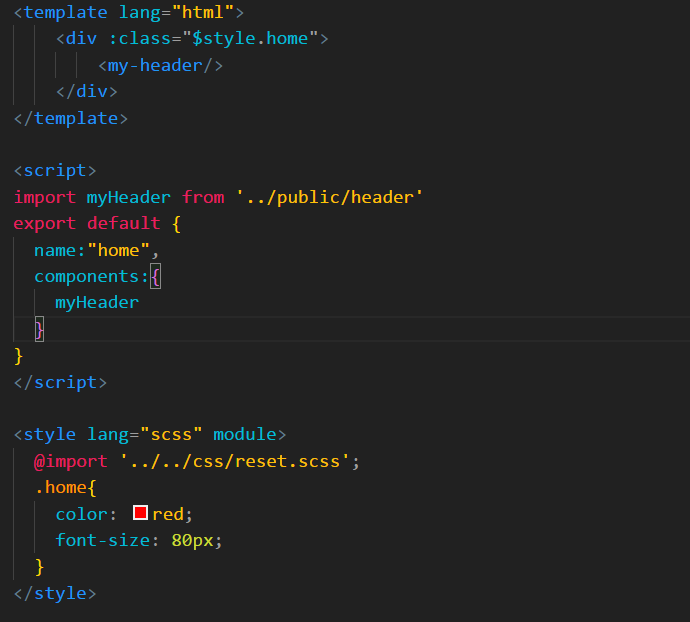
然后在home/index.vue里将header组件引入进来
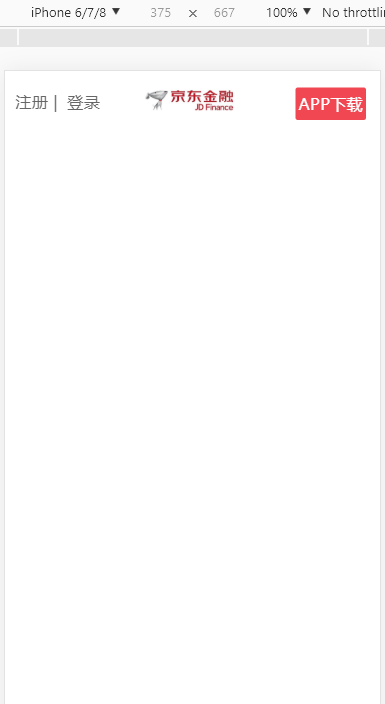
此时效果如下:
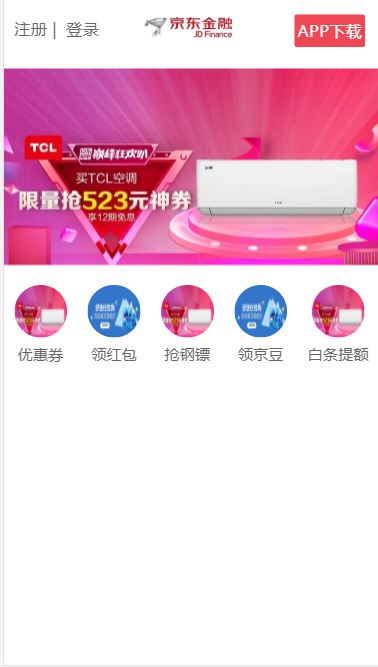
6.增加轮播和导航菜单
在home/hslider.vue里,写如下代码
<template>
 <article class="">
     <slider :items="items" :cname="$style.slider"/>
     <section :class="$style.list">
         <div :class="$style.item" v-for="(item,index) in enters" :key="index">
             <router-link :to="{name:'item.href'}">
                 <img :src="item.img" alt="item.title">
                 <h4>{{item.title}}</h4>
             </router-link>
         </div>
     </section>
 </article>
</template>

<script>
import slider from "../core/slide"
    export default {
      components:{
          slider
      },
      data() {
          return {
              items:[
                  {
                      href:"home",
                      src:'//m.360buyimg.com/mobilecms/s750x366_jfs/t29284/135/1476724112/81257/1327748f/5ce0f691N2b4ed27d.jpg!cr_1125x549_0_72!q70.jpg.dpg'
                  },
                   {
                      href:"home",
                      src:'//imgcps.jd.com/ling4/7631419/5rSX6KGj5ray5Y-I546w5L2O5Lu3/5aW96LSn5Lu75oCn6LSt/p-5c130ba282acdd181d949666/5fa6dcf2/cr_1125x549_0_72/s1125x690/q70.jpg'
                  },
                   {
                      href:"home",
                      src:'//m.360buyimg.com/mobilecms/s750x366_jfs/t29284/135/1476724112/81257/1327748f/5ce0f691N2b4ed27d.jpg!cr_1125x549_0_72!q70.jpg.dpg'
                  }
              ],
              enters:[
                  {
                      href:'home',
                      img:'//m.360buyimg.com/mobilecms/s750x366_jfs/t29284/135/1476724112/81257/1327748f/5ce0f691N2b4ed27d.jpg!cr_1125x549_0_72!q70.jpg.dpg',
                      title:'优惠券'
                  },
                    {
                      href:'home',
                      img:'//imgcps.jd.com/ling4/7631419/5rSX6KGj5ray5Y-I546w5L2O5Lu3/5aW96LSn5Lu75oCn6LSt/p-5c130ba282acdd181d949666/5fa6dcf2/cr_1125x549_0_72/s1125x690/q70.jpg',
                      title:'领红包'
                  },
                    {
                      href:'home',
                      img:'//m.360buyimg.com/mobilecms/s750x366_jfs/t29284/135/1476724112/81257/1327748f/5ce0f691N2b4ed27d.jpg!cr_1125x549_0_72!q70.jpg.dpg',
                      title:'抢钢镖'
                  },
                    {
                      href:'home',
                      img:'//imgcps.jd.com/ling4/7631419/5rSX6KGj5ray5Y-I546w5L2O5Lu3/5aW96LSn5Lu75oCn6LSt/p-5c130ba282acdd181d949666/5fa6dcf2/cr_1125x549_0_72/s1125x690/q70.jpg',
                      title:'领京豆'
                  },
                    {
                      href:'home',
                      img:'//m.360buyimg.com/mobilecms/s750x366_jfs/t29284/135/1476724112/81257/1327748f/5ce0f691N2b4ed27d.jpg!cr_1125x549_0_72!q70.jpg.dpg',
                      title:'白条提额'
                  }
              ]
          }
      },
    }
</script>

<style lang="scss" scoped module>
    @import "../../css/element.scss";
    .slider{
        margin-top: 120px;

    }
    .list{
        @include list(row);
        background: #fff;
        padding-top: 30px;
        padding-bottom: 20px;
        justify-content: space-around;

        a{
            text-decoration: none;

        }
        .item{
            text-align: center;
            img{
                display: inline-block;
                width: 90px;
                height: 90px;
                border-radius: 50%;

            }
            h4{
                font-size: 26px;
                margin-top: 12px;
                color: #666;
            }
        }
    }
</style>
同样,在home/index.vue里引入
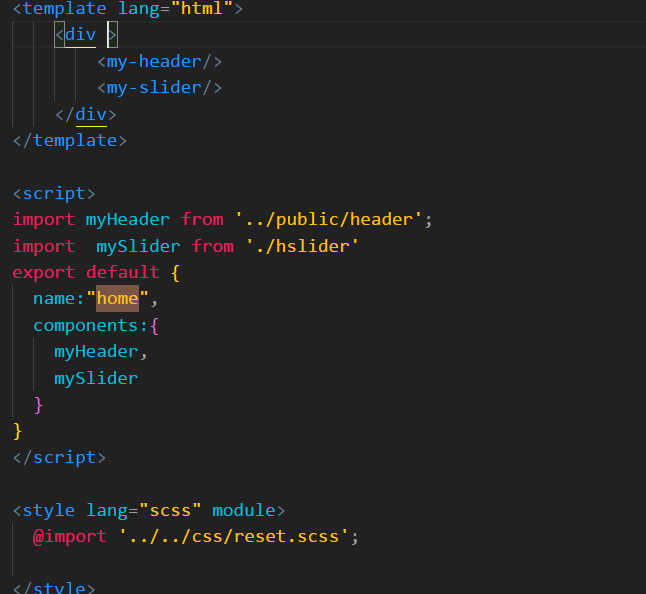
效果如下:
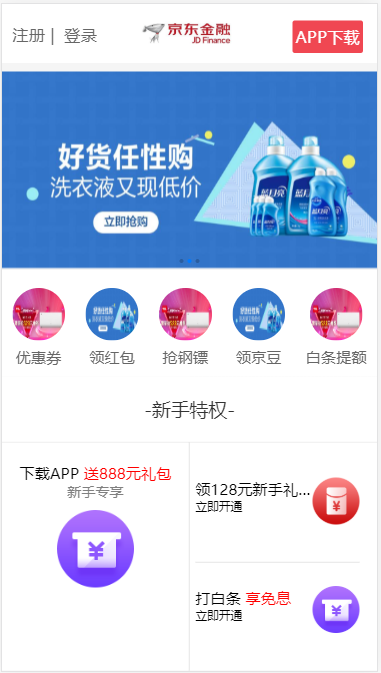
7.在home/notice.vue中创建新人特权组件,代码如下:
<template>
    <Panel :class="$style.panel" title="新手特权">
        <section :class="$style.content">
            <div :class="$style.item">
                <h4>下载APP
                    <span :class="$style.red">送888元礼包</span>
                </h4>
                <p :class="$style.gray">新手专享</p>
                <img src="https://img12.360buyimg.com/jrpmobile/jfs/t1/520/34/950/3686/5b9239e3Eaaf5465c/8d8c35badacfc114.png?width=90&height=90" alt="">
            </div>
            <div :class="$style.item">
                <ul>
                    <li>
                        <img src="https://img12.360buyimg.com/jrpmobile/jfs/t1/23337/6/15445/8974/5cb064c2E0cadac1d/c533bfe4da578fe7.png?width=90&height=90" alt="">
                        <h4>领128元新手礼包</h4>
                        <p>立即开通</p>
                    </li>
                    <li>
                        <img src="https://img12.360buyimg.com/jrpmobile/jfs/t1/520/34/950/3686/5b9239e3Eaaf5465c/8d8c35badacfc114.png?width=90&height=90" alt="">
                        <h4>打白条
                            <span :class="$style.red">享免息</span>
                        </h4>
                        <p>立即开通</p>
                    </li>
                </ul>
            </div>
        </section>
    </Panel>
</template>

<script>
import Panel from '../core/panel'
export default {
  components: {
    Panel
  }
}
</script>

<style lang="scss" module>
@import '../../css/element.scss';
.panel {
  @include panel;
  > h4 {
    border-bottom: 1px solid #ddd;
  }
  .content {
    @include list(row);
    .item {
      width: 50%;
      box-sizing: border-box;
      &:first-child {
        padding: 32px 20px;
        text-align: center;
        border-right: 1px solid #ccc;
        img {
          width: 132px;
          height: 132px;
          margin: 20px auto 0;
        }
      }
    }

    h4 {
      font-size: 26px;
      line-height: 40px;
    }
    .red {
      color: red;
    }
    .gray {
      color: gray;
      font-size: 24px;
    }
    ul {
      width: 100%;
      padding-top: 30px;
      padding-right: 30px;
      padding-left: 10px;
      box-sizing: border-box;
      li {
        font-size: 20px;
        height: 144px;
        width: 100%;
        padding-top: 30px;

        &:first-child {
          border-bottom: 1px solid #ccc;
        }
        &:last-child {
          margin-top: 10px;
        }
        h4 {
          white-space: nowrap;
          text-overflow: ellipsis;
          overflow: hidden;
        }
        img {
          width: 80px;
          height: 80px;
          float: right;
        }
      }
    }
  }
}
</style>
同样方式,在home/index.vue中引入notice组件.最后效果如下:
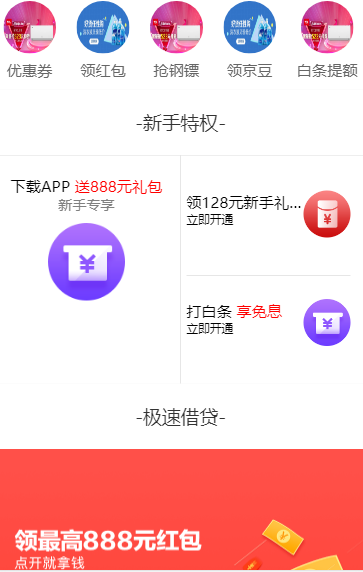
8.创建极速借贷组件,home/borrow.vue,写如下代码
<template>
    <Panel :class="$style.panel" title="极速借贷">
        <section :class="$style.content">
            <router-link :to="{name:'home'}">
                <img src="https://img12.360buyimg.com/jrpmobile/jfs/t1/36765/37/5600/41959/5cc0019fE75ecd507/b974d4b9cfad325a.png?width=750&height=400" alt="">
            </router-link>
        </section>
    </Panel>
</template>

<script>
import Panel from '../core/panel'
export default {
    components: {
        Panel,
    },
}
</script>

<style lang="scss" module>
@import "../../css/element.scss";
.panel{
    @include panel;
    .content{
        padding-bottom: 40px;
        img{
            display: block;
            width: 100%;
        }

    }
}
</style>
同样,在home/index.vue中引入,最后效果如下
9.在home/money.vue组件中写如下代码(这里是使用了dl,dt,dd列表标签(没有用ul),因为这里的数据会发生变化,所以我们用了data来动态渲染)
<template>
    <Panel title="理财首选" :class="$style.panel">
        <section :class="$style.content">
            <dl :class="$style.item" v-for="(item, index) in items" :key="index">
                <dt>{{item.title}}
                    <span :class="$style.red">{{item.sub}}</span>
                </dt>
                <dd>{{item.rate}}</dd>
                <dd>{{item.text}}</dd>
            </dl>
        </section>
    </Panel>
</template>

<script>
import Panel from '../core/panel'
export default {
    data() {
        return {
            items: [
                {
                    title: '定期理财',
                    sub:'理财首选',
                    rate:'5.6%',
                    text:"历史年化回报率"
                },
                  {
                    title: '定期理财',
                    sub:'理财首选',
                    rate:'5.6%',
                    text:"历史年化回报率"
                },
                  {
                    title: '定期理财',
                    sub:'理财首选',
                    rate:'5.6%',
                    text:"历史年化回报率"
                },
                  {
                    title: '定期理财',
                    sub:'理财首选',
                    rate:'5.6%',
                    text:"历史年化回报率"
                }
                ],
        }
    },
    components: {
        Panel,
    },
}
</script>

<style lang="scss" module>
@import '../../css/element.scss';
.panel{
    @include panel;
    .content{
        .item{
           color: red;
        }
    }
}
</style>
10.理财精选
<template>
    <Panel title="理财精选" :class="$style.panel">
        <section :class="$style.content">
            <dl :class="$style.item" v-for="(item, index) in items" :key="index">
                <dt>{{item.title}}
                    <span>{{item.sub}}</span>
                </dt>
                <dd>{{item.rate}}</dd>
                <dd>{{item.text}}</dd>
            </dl>
        </section>
    </Panel>
</template>

<script>
import Panel from '../core/panel'
export default {
    data() {
        return {
            items: [
                {
                    title: '定期理财',
                    sub: '理财精选',
                    rate: '5.6%',
                    text: '历史年化回报率',
                },
                {
                    title: '定期理财',
                    sub: '理财精选',
                    rate: '5.6%',
                    text: '历史年化回报率',
                },
                {
                    title: '定期理财',
                    sub: '理财精选',
                    rate: '5.6%',
                    text: '历史年化回报率',
                },
                {
                    title: '定期理财',
                    sub: '理财精选',
                    rate: '5.6%',
                    text: '历史年化回报率',
                },
            ],
        }
    },
    components: {
        Panel,
    },
}
</script>

<style lang="scss" module>
@import '../../css/element.scss';
.panel {
    @include panel;
    .content {
        @include flex(row);
        justify-content: space-around;
        box-sizing: border-box;
        &::after {
            content: ' ';
            display: block;
            width: 100%;
            height: 0px;
            box-sizing: border-box;
            border-bottom: 1px solid #000;
            position: relative;
            top: -208px;
        }
        .item {
            position: relative;
            width: 50%;
            box-sizing: border-box;

            &:after {
                content: '';
                width: 1px;
                height: 136px;
                display: block;
                position: absolute;
                top: 50%;
                right: 0;
                margin-top: -68px;
                border-right: 1px solid #eee;
            }
            &:nth-child(2n) {
                &::after {
                    display: none;
                }
            }
            padding: 34px 16px;
            dt {
                font-size: 30px;
                line-height: 42px;
                color: #333;
                span {
                    font-size: 22px;
                    color: #ff5150;
                    border: 1px solid #ff5150;
                    padding: 0 8px;
                    vertical-align: 1px;
                    margin-left: 2px;
                }
            }
            dd {
                &:nth-child(2) {
                    font-weight: 700;
                    font-size: 44px;
                    height: 58px;
                    line-height: 58px;
                    color: #333;
                    white-space: nowrap;
                    text-overflow: ellipsis;
                    overflow: hidden;
                }
                &:nth-child(3) {
                    font-size: 24px;
                    height: 34px;
                    line-height: 34px;
                    color: #333;
                    white-space: nowrap;
                    text-overflow: ellipsis;
                    overflow: hidden;
                }
            }
        }
    }
}
</style>
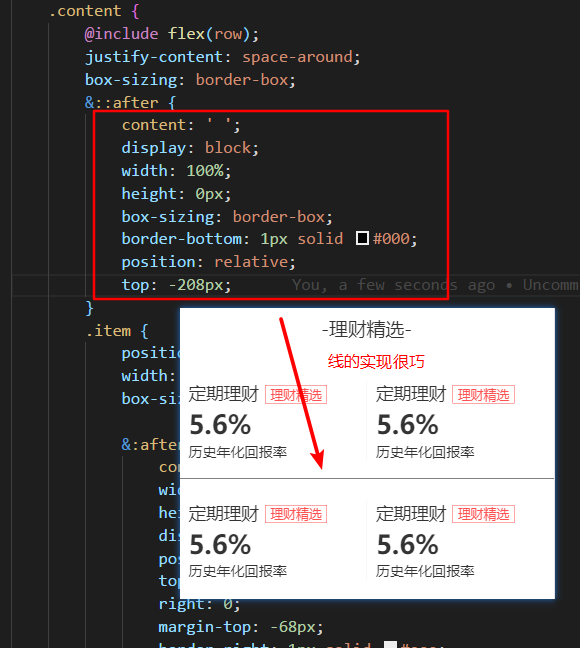
这条线是用伪元素的定位来实现的.
因其它模块开发模式一样,所以就不一一赘述,附完整项目代码:
https://github.com/huanggengzhong/JDjingrong/tree/router
最后
以上就是称心墨镜最近收集整理的关于京东金融项目JDjingrong的全部内容,更多相关京东金融项目JDjingrong内容请搜索靠谱客的其他文章。


发表评论 取消回复