本文讲通过一个自定义按钮来讲解自定义控件中的自定义属性的2种实现方式。
首先,本AutoButton实现功能是按钮的文字可以根据自定义的行数对文字进行自动缩放,例如maxLines = 2,那么本按钮无论多少文字,最多只显示2行,当超出2行则字体会进行自动缩放,然后再重新mesure。
1、方式一,直接在引用的自定义控件中设置自定义属性。
贴上代码如下:
package com.example.kingsoft.CustomWidget;

import android.annotation.SuppressLint;
import android.content.Context;
import android.content.res.TypedArray;
import android.os.Debug;
import android.util.AttributeSet;
import android.util.TypedValue;
import android.widget.Button;

import com.example.kingsoft.CustomAdapter.R;

/**
 * 自定义属性MaxLine:
 * <AutoAdjustButton
 *      MaxLine="1"
 *      android:layout_width = "wrap_content"
 *      android:layout_height = "wrap_content"/>
 *
 */
@SuppressLint("AppCompatCustomView")
public class AutoAdjustButton extends Button {

    private final float FONT_ACCURACY_SIZE = 2f;
    private float mDefaultTextSize;

    private int mMaxLine = 2;

    public AutoAdjustButton(Context context) {
        this(context, null);
    }

    public AutoAdjustButton(Context context, AttributeSet attrs) {
        this(context, attrs, android.R.attr.buttonStyle);
    }

    public AutoAdjustButton(Context context, AttributeSet attrs, int defStyle) {
        super(context, attrs, defStyle);
        if (attrs != null) {
//            Debug.waitForDebugger();
//          TypedArray typedArray = context.obtainStyledAttributes(attrs, R.styleable.AutoAdjustButton);
//          mMaxLine  = typedArray.getInt(R.styleable.AutoAdjustButton_maxLineNum, 10);
//          mDefaultTextSize = getTextSize();
            mMaxLine =  attrs.getAttributeIntValue(null, "MaxLine", mMaxLine);
        }
    }

//  public void setMaxLine(int line) {
//      mMaxLine = line;
//  }

    @Override
    public void setTextSize(int unit, float size)
    {
        super.setTextSize(unit, size);
        mDefaultTextSize = getTextSize();
    }

    public void setTempTextSize(int unit, float size) {
        super.setTextSize(unit, size);
    }

    @Override
    protected void onMeasure(int widthMeasureSpec, int heightMeasureSpec) {
//      Debug.waitForDebugger();
        if (mDefaultTextSize > 0)
            super.setTextSize(TypedValue.COMPLEX_UNIT_PX, mDefaultTextSize);
        super.onMeasure(widthMeasureSpec, heightMeasureSpec);

        if (mMaxLine <= 0 || getLineCount() <= mMaxLine || getMeasuredWidth() <= 0) {
            return;
        }

        //高度大于两行
        float maxFontSize = getTextSize();
        float minFontSize = 0;
        float oriFontSize = maxFontSize;
        float curFontSize = 0;

        while (maxFontSize - minFontSize > FONT_ACCURACY_SIZE) {
            curFontSize = (maxFontSize + minFontSize) / 2;

            super.setTextSize(TypedValue.COMPLEX_UNIT_PX, curFontSize );
            super.onMeasure(widthMeasureSpec, heightMeasureSpec);

            if (getLineCount() > mMaxLine) {
                maxFontSize = curFontSize;
            } else {
                minFontSize = curFontSize;
//              break;
            }
        }

        if (minFontSize < FONT_ACCURACY_SIZE / 2) {
            minFontSize = oriFontSize;
        }

        super.setTextSize(TypedValue.COMPLEX_UNIT_PX, minFontSize );
        if (Math.abs(curFontSize - minFontSize) < 0.0000001f)
        {
            super.onMeasure(widthMeasureSpec, heightMeasureSpec);
        }
    }

}
以下贴上前段代码:
<?xml version="1.0" encoding="utf-8"?>
<LinearLayout xmlns:android="http://schemas.android.com/apk/res/android"
    xmlns:ad="http://schemas.android.com/apk/res-auto"
    android:orientation="vertical"
    android:layout_width="match_parent"
    android:layout_height="match_parent"
    android:gravity="center">
    <com.example.kingsoft.CustomWidget.AutoAdjustButton
        android:text="特殊所所所所所所所胜多负少的范德萨发大水"
        android:layout_height="100dp"
        android:layout_width="200dp"
        MaxLine="1"/>
</LinearLayout>
请注意xml文件中的MaxLine=”1”,这里我直接在使用的地方定义了自定义属性,然后在AutoButton.java中构造函数中 通过 attrs.getAttributeIntValue(null, “MaxLine”, mMaxLine); 获取到了自定义属性。
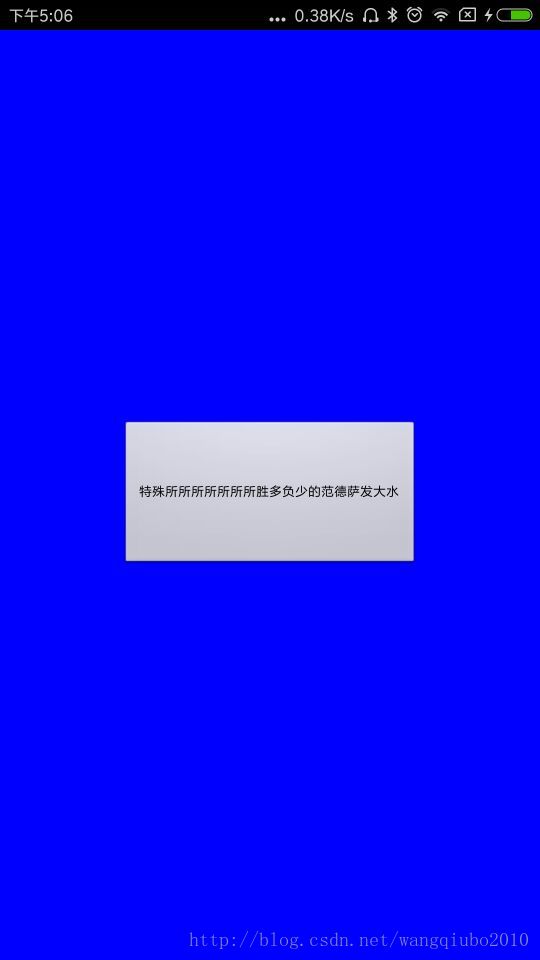
运行以上代码,请看如下截图:

通过上图可以看出 自定义的MaxLine = “1” 已经成功获取。
2、通过attr.xml中的declare-styleable来设置自定义属性。
修改后的代码如下:
attr.xml 文件,声明了自定义属性集合AutoAdjustButton(和自定义控件名称保持一致),自定义属性有

<?xml version="1.0" encoding="utf-8"?>
<resources>
    <declare-styleable name="AutoAdjustButton">
        <attr name="maxLineNum" format="integer" />
    </declare-styleable>
</resources>
引用控件的XML中 , MaxLine="1" 用 ad:maxLineNum="1"进行替换,ad自己随便设置,最好代表一定的意义
<com.example.kingsoft.CustomWidget.AutoAdjustButton
android:text="特殊所所所所所所所胜多负少的范德萨发大水"
android:layout_height="100dp"
android:layout_width="200dp"
ad:maxLineNum="1" />修改AutoAdjustButton中获取 maxLine的代码,将mMaxLine = attrs.getAttributeIntValue(null, “MaxLine”, mMaxLine); 替换为以下代码:
            TypedArray typedArray = context.obtainStyledAttributes(attrs, R.styleable.AutoAdjustButton);
            int fontSize = typedArray.getInt(R.styleable.AutoAdjustButton_maxLineNum, 10);
            mDefaultTextSize = getTextSize();
实现完毕,运行结果和第一种的自定义属性一致!
最后
以上就是忐忑龙猫最近收集整理的关于Android自定义控件的自定义属性2种实现方式的全部内容,更多相关Android自定义控件内容请搜索靠谱客的其他文章。
本图文内容来源于网友提供,作为学习参考使用,或来自网络收集整理,版权属于原作者所有。


发表评论 取消回复