说明:本部署文章参照了 https://github.com/opsnull/follow-me-install-kubernetes-cluster ,欢迎给作者star
etcd 是基于 Raft 的分布式 key-value 存储系统,由 CoreOS 开发,常用于服务发现、共享配置以及并发控制(如 leader 选举、分布式锁等)。kubernetes 使用 etcd 存储所有运行数据。
本文档介绍部署一个三节点高可用 etcd 集群的步骤:
- 下载和分发 etcd 二进制文件;
- 创建 etcd 集群各节点的 x509 证书,用于加密客户端(如 etcdctl) 与 etcd 集群、etcd 集群之间的数据流;
- 创建 etcd 的 systemd unit 文件,配置服务参数;
- 检查集群工作状态;
etcd 集群各节点的名称和 IP 如下:
- k8s-master1:192.168.161.150
- k8s-master2:192.168.161.151
- k8s-master3:192.168.161.152
注意:如果没有特殊指明,本文档的所有操作均在 master1 节点上执行,然后远程分发文件和执行命令。
1.下载和分发 etcd 二进制文件
到 https://github.com/coreos/etcd/releases 页面下载最新版本的发布包:
cd /opt/k8s/work
wget https://github.com/coreos/etcd/releases/download/v3.3.10/etcd-v3.3.10-linux-amd64.tar.gz
tar -xvf etcd-v3.3.10-linux-amd64.tar.gz
分发二进制文件到集群master节点:
cd /opt/k8s/work
for node_ip in 192.168.161.150 192.168.161.151 192.168.161.152
do
echo ">>> ${node_ip}" scp etcd-v3.3.10-linux-amd64/etcd* root@${node_ip}:/opt/k8s/bin ssh root@${node_ip} "chmod +x /opt/k8s/bin/*" done
2.创建 etcd 证书和私钥
创建证书签名请求:
cd /opt/k8s/work
cat > etcd-csr.json <<EOF
{
"CN": "etcd",
"hosts": [
"127.0.0.1",
"192.168.161.150",
"192.168.161.151",
"192.168.161.152"
],
"key": {
"algo": "rsa",
"size": 2048
},
"names": [
{
"C": "CN",
"ST": "BeiJing",
"L": "BeiJing",
"O": "k8s",
"OU": "4Paradigm"
}
]
}
EOF
hosts 字段指定授权使用该证书的 etcd 节点 IP 或域名列表,这里将 etcd 集群的三个master节点 IP 都列在其中;
生成证书和私钥:
cd /opt/k8s/work
cfssl gencert -ca=/opt/k8s/work/ca.pem
-ca-key=/opt/k8s/work/ca-key.pem
-config=/opt/k8s/work/ca-config.json
-profile=kubernetes etcd-csr.json | cfssljson -bare etcd
ls etcd*pem
分发生成的证书和私钥到各 etcd 节点:
cd /opt/k8s/work
for node_ip in 192.168.161.150 192.168.161.151 192.168.161.152
do
echo ">>> ${node_ip}"
ssh root@${node_ip} "mkdir -p /etc/etcd/cert"
scp etcd*.pem root@${node_ip}:/etc/etcd/cert/
done
3.创建 etcd 的 systemd unit 模板文件
cd /opt/k8s/work
source /opt/k8s/bin/environment.sh
cat > etcd.service.template <<EOF
[Unit]
Description=Etcd Server
After=network.target
After=network-online.target
Wants=network-online.target
Documentation=https://github.com/coreos

[Service]
Type=notify
WorkingDirectory=${ETCD_DATA_DIR}
ExecStart=/opt/k8s/bin/etcd \
--data-dir=${ETCD_DATA_DIR} \
--wal-dir=${ETCD_WAL_DIR} \
--name=##NODE_NAME## \
--cert-file=/etc/etcd/cert/etcd.pem \
--key-file=/etc/etcd/cert/etcd-key.pem \
--trusted-ca-file=/etc/kubernetes/cert/ca.pem \
--peer-cert-file=/etc/etcd/cert/etcd.pem \
--peer-key-file=/etc/etcd/cert/etcd-key.pem \
--peer-trusted-ca-file=/etc/kubernetes/cert/ca.pem \
--peer-client-cert-auth \
--client-cert-auth \
--listen-peer-urls=https://##NODE_IP##:2380 \
--initial-advertise-peer-urls=https://##NODE_IP##:2380 \
--listen-client-urls=https://##NODE_IP##:2379,http://127.0.0.1:2379 \
--advertise-client-urls=https://##NODE_IP##:2379 \
--initial-cluster-token=etcd-cluster-0 \
--initial-cluster=${ETCD_NODES} \
--initial-cluster-state=new \
--auto-compaction-mode=periodic \
--auto-compaction-retention=1 \
--max-request-bytes=33554432 \
--quota-backend-bytes=6442450944 \
--heartbeat-interval=250 \
--election-timeout=2000
Restart=on-failure
RestartSec=5
LimitNOFILE=65536
[Install]
WantedBy=multi-user.target
EOF
WorkingDirectory、--data-dir:指定工作目录和数据目录为${ETCD_DATA_DIR},需在启动服务前创建这个目录;--wal-dir:指定 wal 目录,为了提高性能,一般使用 SSD 或者和--data-dir不同的磁盘;--name:指定节点名称,当--initial-cluster-state值为new时,--name的参数值必须位于--initial-cluster列表中;--cert-file、--key-file:etcd server 与 client 通信时使用的证书和私钥;--trusted-ca-file:签名 client 证书的 CA 证书,用于验证 client 证书;--peer-cert-file、--peer-key-file:etcd 与 peer 通信使用的证书和私钥;--peer-trusted-ca-file:签名 peer 证书的 CA 证书,用于验证 peer 证书;
4.为各节点创建和分发 etcd systemd unit 文件
替换模板文件中的变量,为各节点创建 systemd unit 文件:
cd /opt/k8s/work
source /opt/k8s/bin/environment.sh
for (( i=0; i < 3; i++ ))
do
sed -e "s/##NODE_NAME##/${NODE_NAMES[i]}/" -e "s/##NODE_IP##/${NODE_IPS[i]}/" etcd.service.template > etcd-${NODE_IPS[i]}.service
done
ls *.service
- NODE_NAMES 和 NODE_IPS 为相同长度的 bash 数组,分别为节点名称和对应的 IP;

分发生成的 systemd unit 文件:
cd /opt/k8s/work
for node_ip in 192.168.161.150 192.168.161.151 192.168.161.152
do
echo ">>> ${node_ip}"
scp etcd-${node_ip}.service root@${node_ip}:/etc/systemd/system/etcd.service
done
- 文件重命名为 etcd.service;
完整 unit 文件见:etcd.service
5.启动 etcd 服务
cd /opt/k8s/work
source /opt/k8s/bin/environment.sh
for node_ip in 192.168.161.150 192.168.161.151 192.168.161.152
do
echo ">>> ${node_ip}"
ssh root@${node_ip} "mkdir -p ${ETCD_DATA_DIR} ${ETCD_WAL_DIR}"
ssh root@${node_ip} "systemctl daemon-reload && systemctl enable etcd && systemctl restart etcd " &
done
- 必须创建 etcd 数据目录和工作目录;
- etcd 进程首次启动时会等待其它节点的 etcd 加入集群,命令
systemctl start etcd会卡住一段时间,为正常现象。
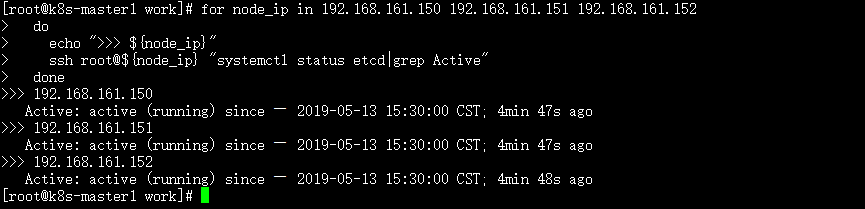
6.检查启动结果
cd /opt/k8s/work
for node_ip in 192.168.161.150 192.168.161.151 192.168.161.152
do
echo ">>> ${node_ip}"
ssh root@${node_ip} "systemctl status etcd|grep Active"
done
确保状态为 active (running),否则查看日志,确认原因:
$ journalctl -u etcd
7.验证服务状态
部署完 etcd 集群后,在master1(192.168.161.150)节点上执行如下命令:
cd /opt/k8s/work
source /opt/k8s/bin/environment.sh
for node_ip in 192.168.161.150 192.168.161.151 192.168.161.152
do
echo ">>> ${node_ip}"
ETCDCTL_API=3 /opt/k8s/bin/etcdctl
--endpoints=https://${node_ip}:2379
--cacert=/opt/k8s/work/ca.pem
--cert=/etc/etcd/cert/etcd.pem
--key=/etc/etcd/cert/etcd-key.pem endpoint health
done
预期输出:
>>> 192.168.161.150
https://192.168.161.150:2379 is healthy: successfully committed proposal: took = 4.183308ms
>>> 192.168.161.151
https://192.168.161.151:2379 is healthy: successfully committed proposal: took = 5.532617ms
>>> 192.168.161.152
https://192.168.161.152:2379 is healthy: successfully committed proposal: took = 4.016865ms
8.查看当前的 leader
source /opt/k8s/bin/environment.sh
ETCDCTL_API=3 /opt/k8s/bin/etcdctl
-w table --cacert=/opt/k8s/work/ca.pem
--cert=/etc/etcd/cert/etcd.pem
--key=/etc/etcd/cert/etcd-key.pem
--endpoints=${ETCD_ENDPOINTS} endpoint status
输出:

- 可见,当前的 leader 为 192.168.161.151(master2)。
转载于:https://www.cnblogs.com/gytangyao/p/10856791.html
最后
以上就是难过手机最近收集整理的关于部署 etcd 集群的全部内容,更多相关部署内容请搜索靠谱客的其他文章。


发表评论 取消回复