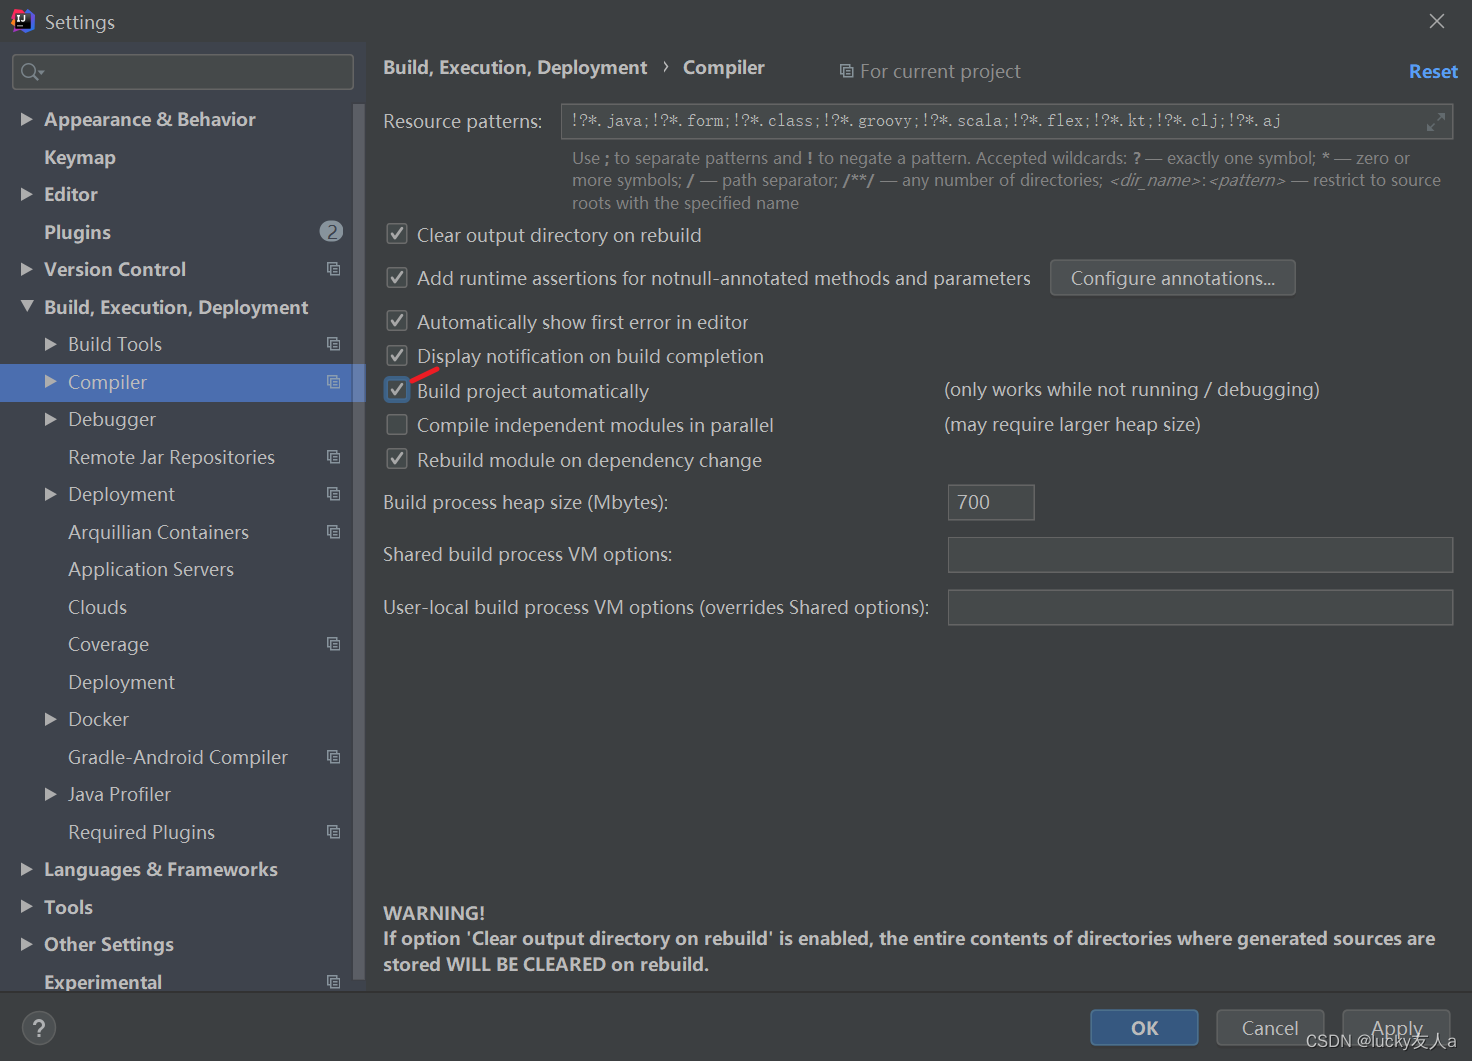
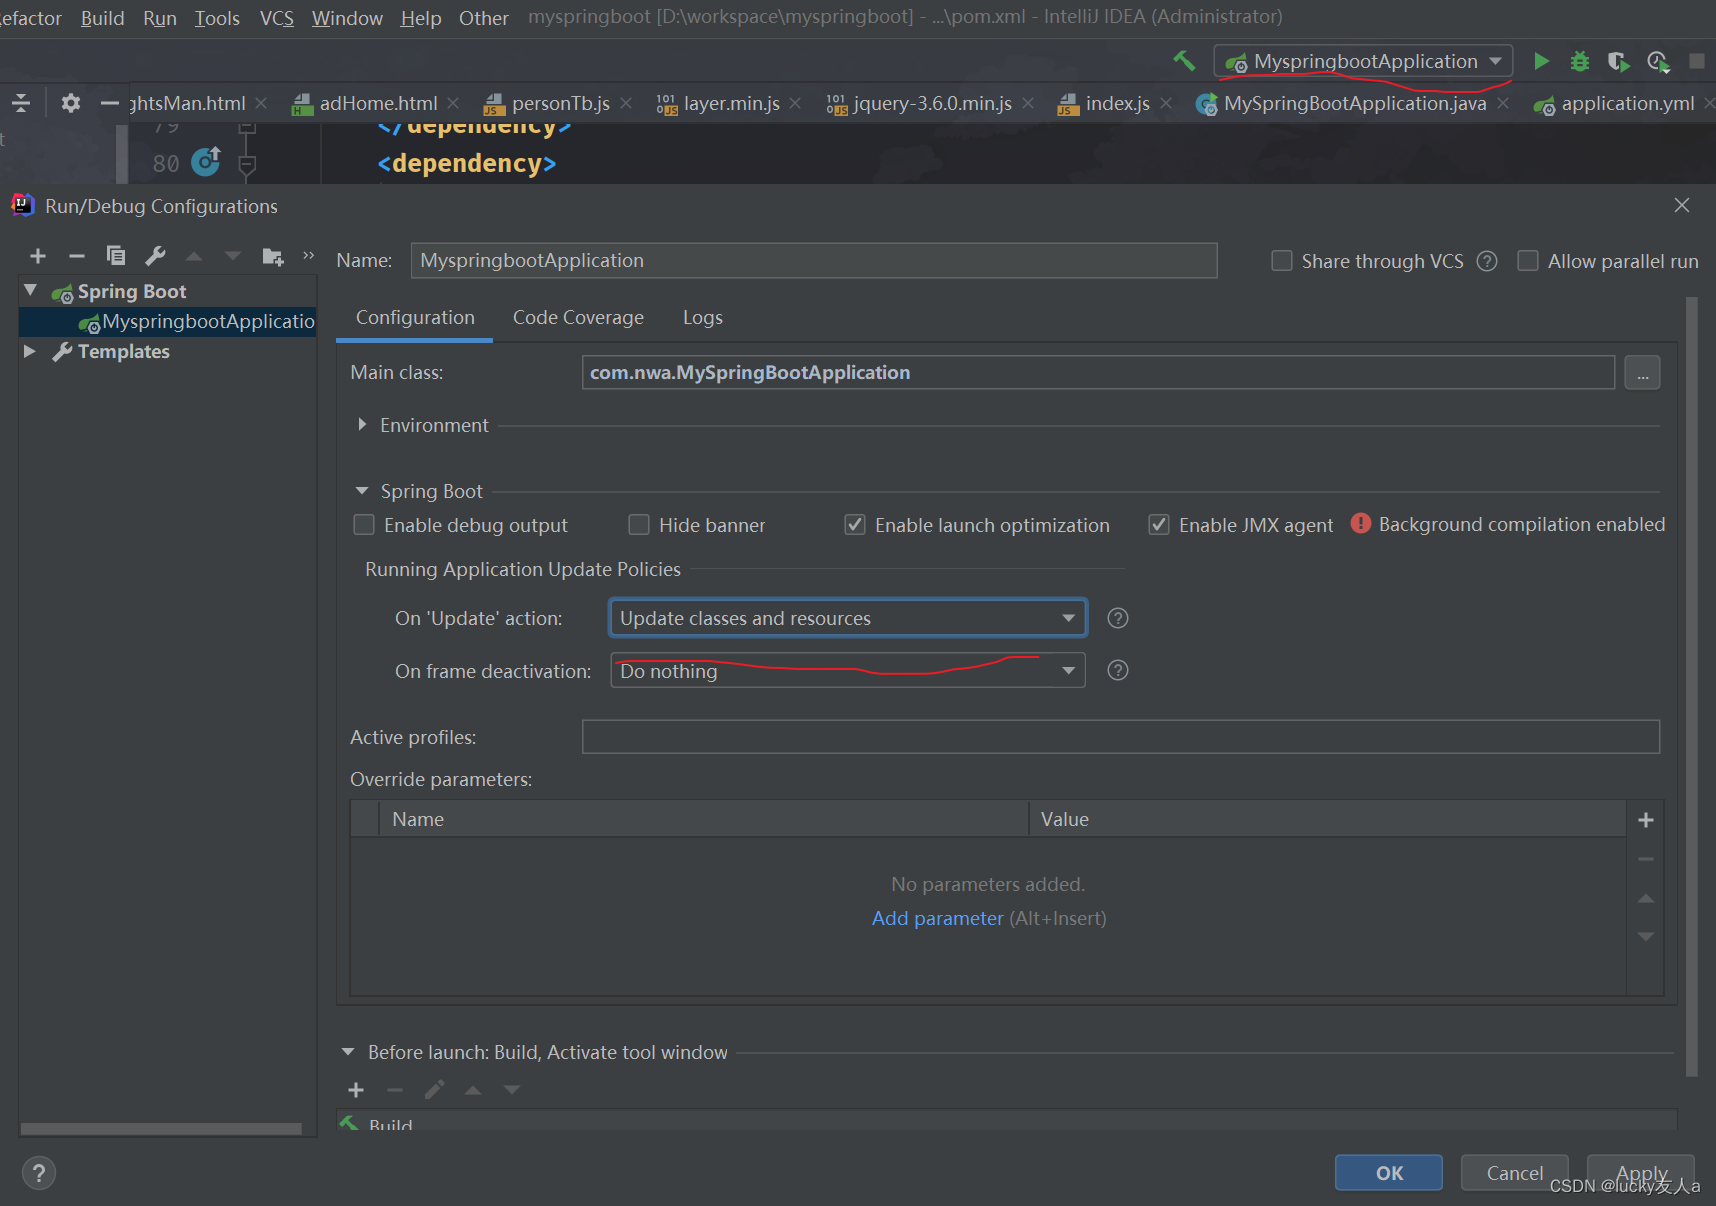
1、去设置那勾选图中,并apply应用保存
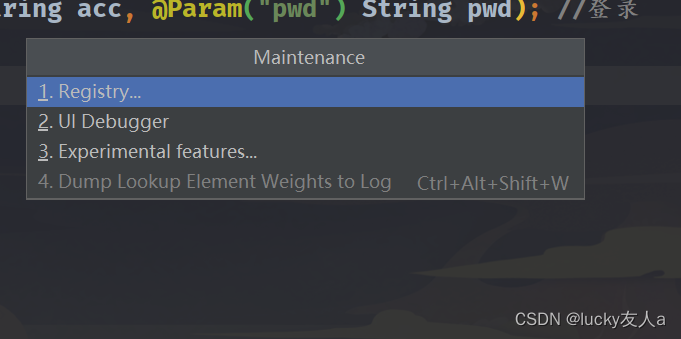
2、在idea主页面输入shift+alt+ctrl+/,出现,点第一个
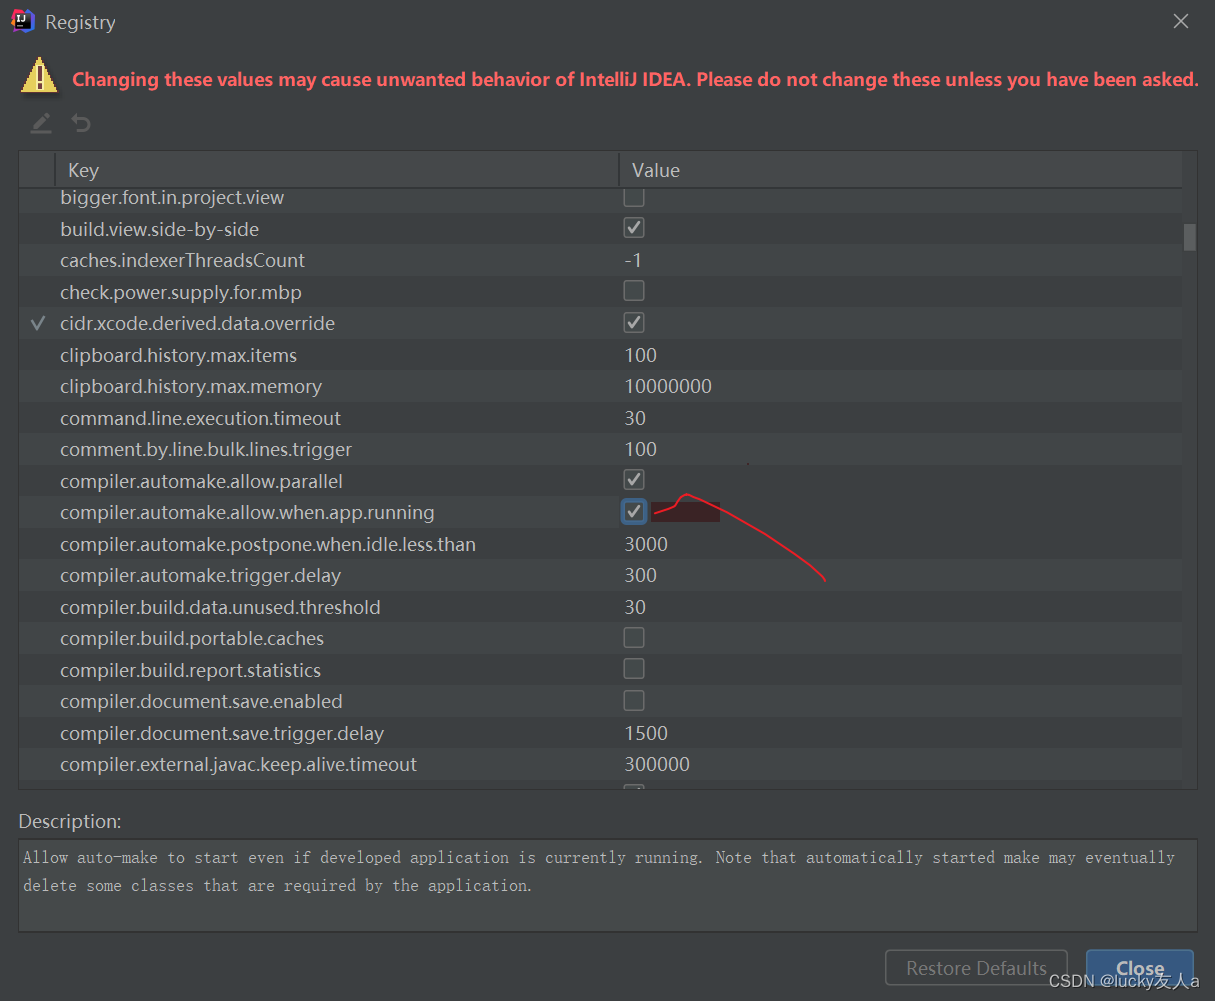
3、勾选下面那个,然后close即可
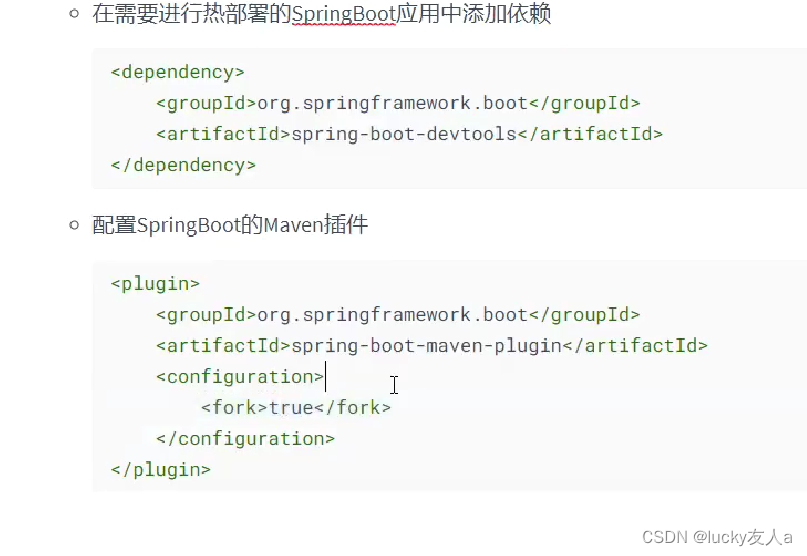
4、添加依赖
<dependency>
        <groupId>org.springframework.boot</groupId>
        <artifactId>spring-boot-devtools</artifactId>
        <scope>runtime</scope>
        <optional>true</optional>
</dependency>
在</dependencies>后面的build标签里的spring-boot-maven-plugin下添加<configuration>
                <fork>true</fork>
 </configuration>
···     类似如下
<build>
    <plugins>
        <plugin>
            <groupId>org.springframework.boot</groupId>
            <artifactId>spring-boot-maven-plugin</artifactId>
            <configuration>
                <fork>true</fork>
            </configuration>
        </plugin>
    </plugins>
</build>
4.2、要是上面依赖没效果
5、应用并ok
最后
以上就是贪玩小懒虫最近收集整理的关于springboot热部署配置的全部内容,更多相关springboot热部署配置内容请搜索靠谱客的其他文章。
本图文内容来源于网友提供,作为学习参考使用,或来自网络收集整理,版权属于原作者所有。


发表评论 取消回复