最终效果图: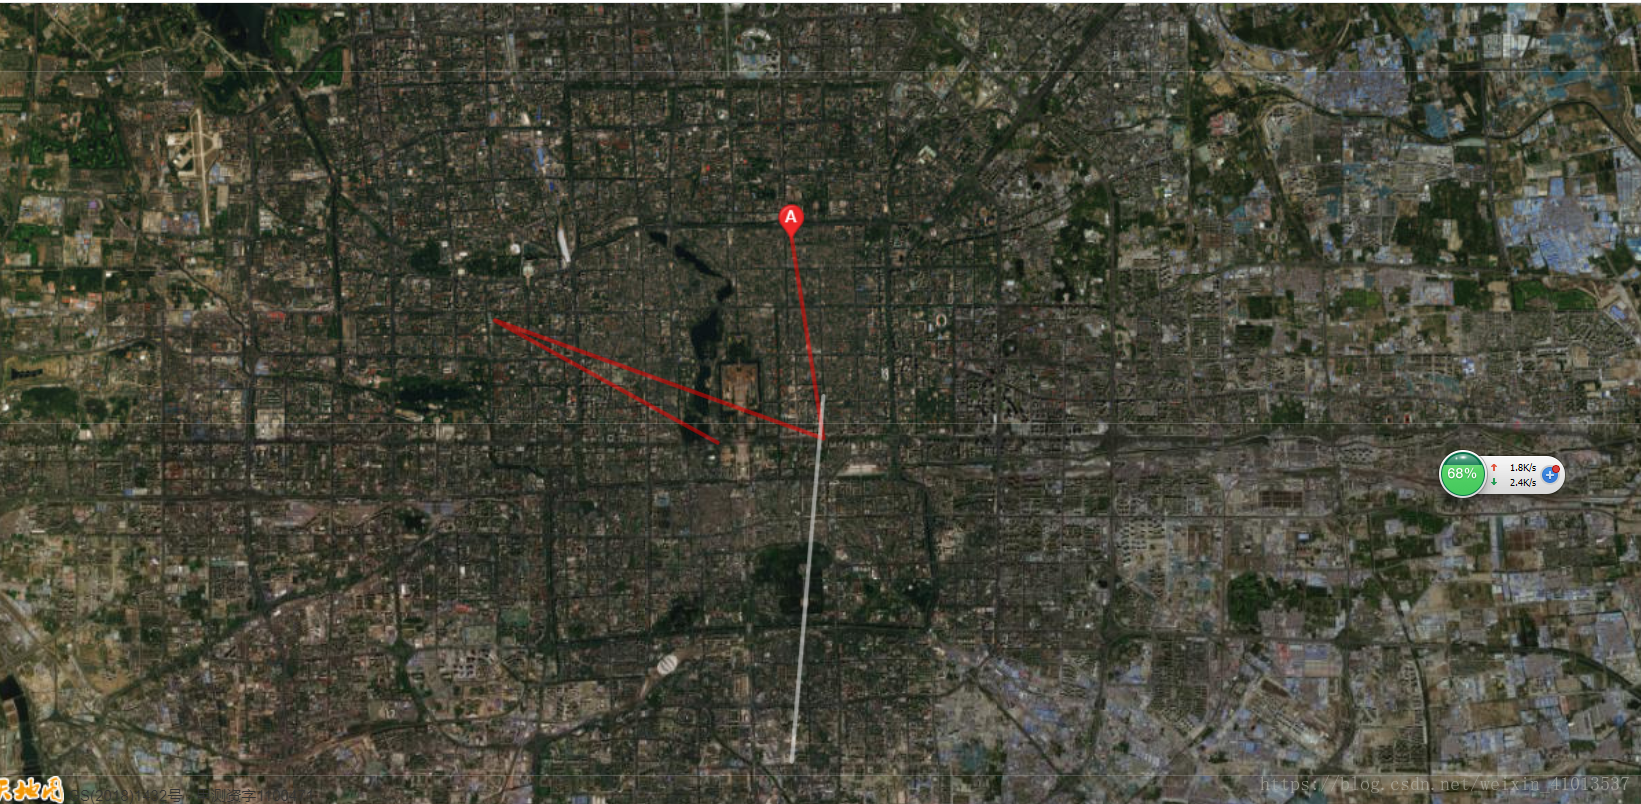
1、新建一个初始化js(init.js)
在index.html引入js
<script src="http://api.tianditu.gov.cn/api?v=4.0&tk=您的tk" type="text/javascript"></script>
export default {
  init: function() {
    return new Promise((resolve, reject) => {
      // debugger
      // 如果已加载直接返回
      // 如果已加载直接返回
      if (typeof window.T !== 'undefined') {
        console.log('地图脚本初始化成功1111...')
        resolve(window.T)
        return true
      }
      window.onload = function() {
        console.log('地图脚本初始化成功...')
        // eslint-disable-next-line
        resolve(window.T)
      }

      // // 插入script脚本
      // const scriptNode = document.createElement('script')
      // scriptNode.setAttribute('type', 'text/javascript')
      // scriptNode.setAttribute('src', TMapURL)
      // document.body.appendChild(scriptNode)
    })
  }
}
2、在需要的页面引入js
<template>
<div>
  <div id="mapDiv" class="mapDiv" ref="mapDiv">
  </div>
</div>
</template>

<script>
import BaiduMap from '@/common/js/baidu-map'
// import {getCity} from '@/api/remote'
// import BMap from 'BMap'

export default {
  data() {
    return {
      zoom: '11',
      points: [],
      line: '',
      T: '',
      lay: '',
      map: '',
      drivingRoute: '',

      _CarTrack: '',
      startIcon: '',
      endIcon: '',
      config: '',
      iconMaker: [],
      myIcon: ''
    }
  },
  created() {
    this.startIcon = 'http://lbs.tianditu.gov.cn/images/bus/start.png'
    this.endIcon = 'http://lbs.tianditu.gov.cn/images/bus/end.png'
    this.myIcon = 'http://lbs.tianditu.gov.cn/images/bus/end.png'
  },
  mounted() {
    setTimeout(this.getPosition(), 1000)
  },
  watch: {
    '$route': 'getPosition'
  },
  methods: {
    getPosition() {
      window.onload = function() {
        console.log(11111)
      }
      BaiduMap.init().then((T) => {
        this.T = T
        this.zoom = 12
        var imageURL = 'http://t0.tianditu.gov.cn/img_w/wmts?' +
                'SERVICE=WMTS&REQUEST=GetTile&VERSION=1.0.0&LAYER=img&STYLE=default&TILEMATRIXSET=w&FORMAT=tiles' +
                '&TILEMATRIX={z}&TILEROW={y}&TILECOL={x}'
        // 创建自定义图层对象
        this.lay = new T.TileLayer(imageURL, { minZoom: 1, maxZoom: 18 })
        var config = { layers: [this.lay] }
        this.map = new T.Map(this.$refs.mapDiv, config)// 初始化地图对象
        this.map.centerAndZoom(new T.LngLat(116.40969, 39.94940), this.zoom)// 设置显示地图的中心点和级别
        // 创建图片对象
        var icon = new T.Icon({
          iconUrl: 'http://api.tianditu.gov.cn/img/map/markerA.png',
          iconSize: new T.Point(19, 27),
          iconAnchor: new T.Point(10, 25)
        })
        var marker = new T.Marker(new T.LngLat(116.404, 39.945), { icon: icon }) // 创建点
        this.map.addOverLay(marker) // 增加点
        this.points.push(new T.LngLat(116.404, 39.945), new T.LngLat(116.411794, 39.9068), new T.LngLat(116.32969, 39.92940), new T.LngLat(116.385438, 39.90610))
        const points1 = []
        points1.push(new T.LngLat(116.404, 39.845), new T.LngLat(116.411794, 39.915))
        // 创建线对象
        var line = new T.Polyline(points1, { color: '#fff' })
        var line1 = new T.Polyline(this.points, { color: '#f00' })
        // 向地图上添加线
        this.map.addOverLay(line1)
        this.map.addOverLay(line)
        // // 创建信息窗口对象
        // var infoWin = new T.InfoWindow()
        // infoWin.setLngLat(new T.LngLat(116.404, 39.945))
        // // 设置信息窗口要显示的内容
        // infoWin.setContent('起始点')
        // // 向地图上添加信息窗口
        // this.map.addOverLay(infoWin)
      }).catch(error => {
        console.log(error)
      })
    }

  }
}
</script>

<style scoped>
.mapDiv{
  width: 100%;
  height: 85vh;
}
</style>
就可以看到效果了,更多功能可以去天地图官网查看
最后
以上就是高挑银耳汤最近收集整理的关于vue引入天地图的全部内容,更多相关vue引入天地图内容请搜索靠谱客的其他文章。
本图文内容来源于网友提供,作为学习参考使用,或来自网络收集整理,版权属于原作者所有。


发表评论 取消回复