目录
- 缘由
- 原生Swagger
- Knife4J
缘由
接口文档想必是许多开发小伙伴的噩梦,不仅要写详细,还要及时维护文档与后端代码保持一致,稍有没及时更新接口文档,前端同学肯定会抱怨后端同学给的文档与实际情况不一致。

于是,引入了Swagger组件,它实现了代码即文档,后端只管写代码,只需要通过几个注解,会自动生成接口文档,前端同学可在线访问。
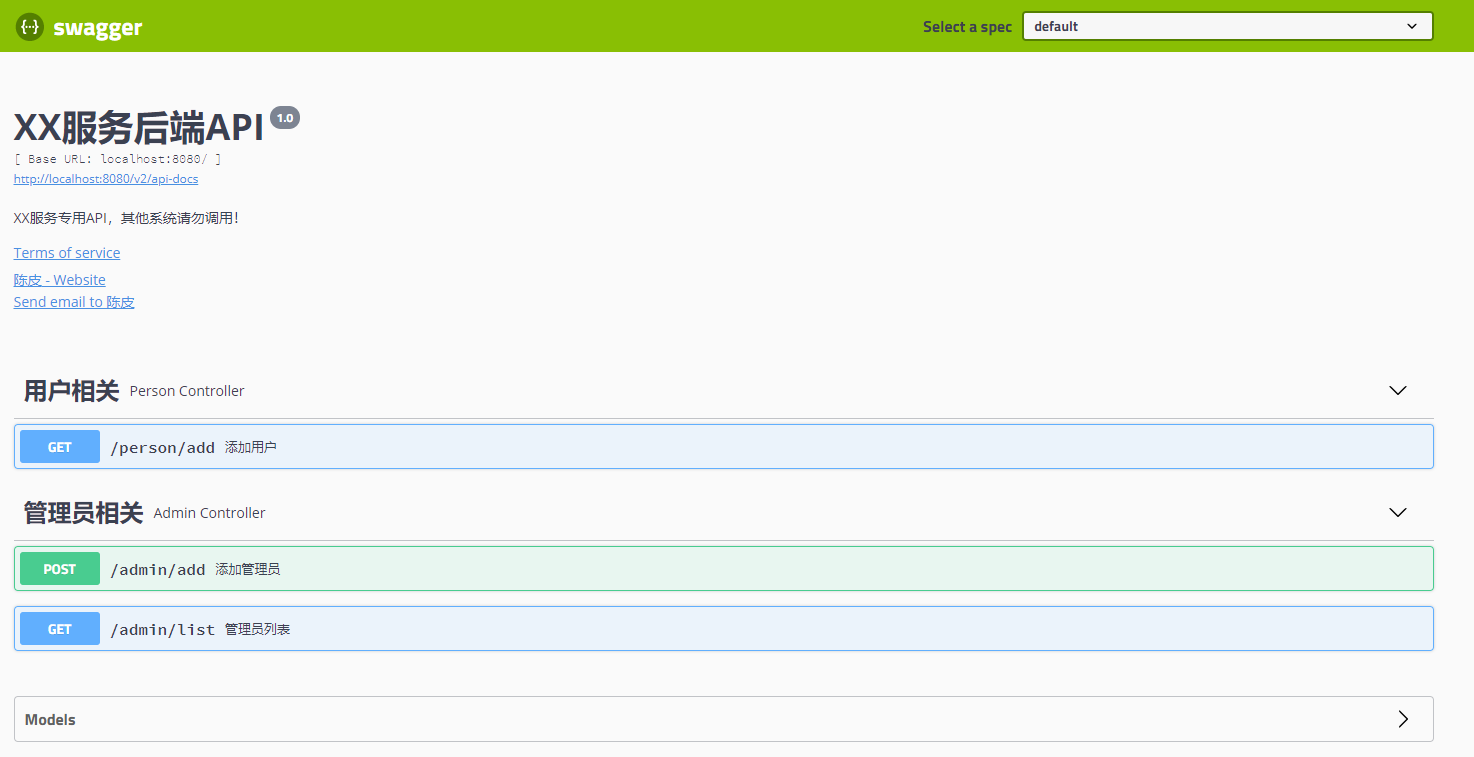
但是,对界面审美有要求的前端同学,又吐槽Swagger原生界面太low了,而且功能还少。

有压迫就有反抗,后端肯定不服,既然你嫌弃原生Swagger太low,那就给你开通超级VIP - knife4j。
原生Swagger
Springboot集成Swagger,其实很简单,主要是使用常用的几个注解而已。因为在面试他人的过程中,还是有不少人没使用过Swagger,所以这里简单介绍下。
首先在Spingboot工程中引入Swagger依赖,主要是2个,如下:
<dependency>
  <groupId>io.springfox</groupId>
  <artifactId>springfox-swagger2</artifactId>
  <version>2.9.2</version>
</dependency>
<dependency>
  <groupId>io.springfox</groupId>
  <artifactId>springfox-swagger-ui</artifactId>
  <version>2.9.2</version>
</dependency>
编写Swagger配置类,配置项名都简单易懂,可根据自己情况修改配置,注意一点是apis方法是指定要扫描的包路径,一定要写自己项目的。
package com.nobody.config;
import java.util.ArrayList;
import java.util.List;
import org.springframework.beans.factory.annotation.Value;
import org.springframework.context.annotation.Bean;
import org.springframework.context.annotation.Configuration;
import springfox.documentation.builders.ApiInfoBuilder;
import springfox.documentation.builders.PathSelectors;
import springfox.documentation.builders.RequestHandlerSelectors;
import springfox.documentation.service.ApiInfo;
import springfox.documentation.service.Contact;
import springfox.documentation.service.Parameter;
import springfox.documentation.spi.DocumentationType;
import springfox.documentation.spring.web.plugins.Docket;
import springfox.documentation.swagger2.annotations.EnableSwagger2;
@Configuration
@EnableSwagger2
public class Swagger2Config {
@Value("${swagger.enable:true}")
private boolean swaggerEnable;
@Bean
public Docket createApi() {
// 全局参数
List<Parameter> pars = new ArrayList<>();
return new Docket(DocumentationType.SWAGGER_2).enable(swaggerEnable).apiInfo(apiInfo())
.select().apis(RequestHandlerSelectors.basePackage("com.nobody"))
.paths(PathSelectors.any()).build().globalOperationParameters(pars);
}
private ApiInfo apiInfo() {
return new ApiInfoBuilder().title("XX服务后端API").description("XX服务专用API,其他系统请勿调用!")
.version("1.0").termsOfServiceUrl("https://nobody.com")
.contact(new Contact("陈皮", "https://nobody.com", "chenpi@qq.com")).build();
}
}
下面讲解几个常用的注解,以及如何使用,更多注解以及详细使用可以参考官方文档。
- @Api:作用于类上,标识此类是Swagger的资源。
- @ApiOperation:主要作用于方法上,用于对一个接口进行说明。
- @ApiParam:用于方法,参数,字段上,用于对参数进行说明。
- @ApiModel:作用于类上,主要用于实体类当接口参数时使用,对实体类进行说明。
- @ApiModelProperty:作用于方法和字段上,一般用于实体类的属性说明。
package com.nobody.dto;
import io.swagger.annotations.ApiModel;
import io.swagger.annotations.ApiModelProperty;
import lombok.Data;
/**
* @Description
* @Author Mr.nobody
* @Date 2021/3/28
* @Version 1.0
*/
@ApiModel(value = "管理员实体")
@Data
public class AdminDTO {
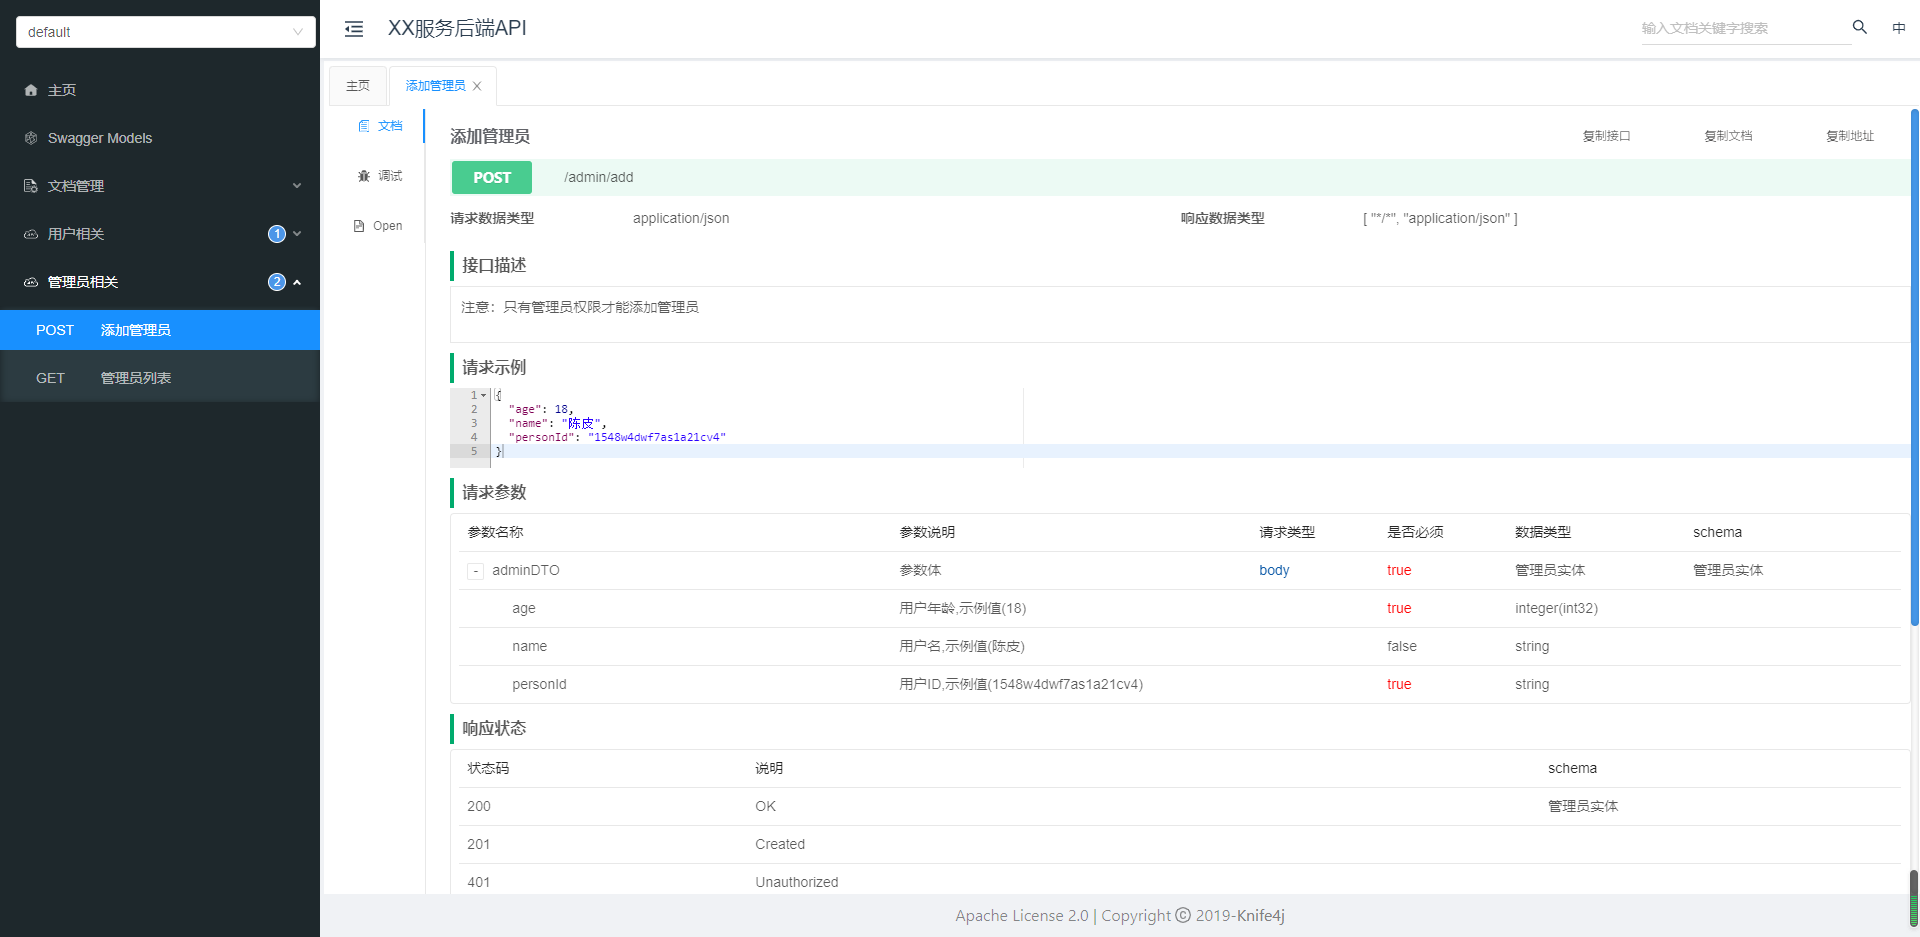
@ApiModelProperty(value = "用户ID", required = true, example = "1548w4dwf7as1a21cv4")
private String personId;
@ApiModelProperty(value = "用户名", example = "陈皮")
private String name;
@ApiModelProperty(value = "用户年龄", required = true, example = "18")
private Integer age;
}
package com.nobody.controller;
import com.nobody.dto.AdminDTO;
import io.swagger.annotations.Api;
import io.swagger.annotations.ApiOperation;
import io.swagger.annotations.ApiParam;
import org.springframework.web.bind.annotation.*;
import java.util.ArrayList;
import java.util.List;
/**
* @Description
* @Author Mr.nobody
* @Date 2021/3/27
* @Version 1.0
*/
@Api(tags = {"管理员相关"})
@RestController
@RequestMapping("admin")
public class AdminController {
@ApiOperation(value = "添加管理员", notes = "注意:只有管理员权限才能添加管理员", produces = "application/json",
consumes = "application/json")
@PostMapping("add")
public AdminDTO add(@ApiParam(value = "参数体", required = true) @RequestBody AdminDTO adminDTO) {
return adminDTO;
}
@ApiOperation(value = "管理员列表", notes = "注意:只有管理员权限才能获取管理员列表", produces = "application/json")
@GetMapping("list")
public List<AdminDTO> list(
@ApiParam(value = "页码,从1开始,1,2,3...", required = true,
example = "1") @RequestParam Integer pageIndex,
@ApiParam(value = "页量", required = true,
example = "10") @RequestParam Integer pageSize) {
return new ArrayList<>();
}
}
Knife4J
Knife4j的前身是swagger-bootstrap-ui,前身swagger-bootstrap-ui是一个纯swagger-ui的ui皮肤项目。
目前已经发行的Knife4j版本,其本身已经引入了springfox,所以我们不需要再单独引入Springfox的具体版本,否则会导致版本冲突。
注意,使用Knife4j2.0.6及以上的版本,SpringBoot的版本必须大于等于2.2.x。
Knife4J的使用极其简单,因为Knife4J将其封装成一个启动器starter,一个可拔插式的组件,只需要引入starter依赖,即可使用。
<dependency>
  <groupId>com.github.xiaoymin</groupId>
  <artifactId>knife4j-spring-boot-starter</artifactId>
  <version>3.0.2</version>
</dependency>
然后Swagger配置类还是和原生的一模一样,即上面介绍过的Swagger2Config类,注解的使用也是和原生的完全一样。只是项目启动后,接口文档界面的访问地址不一样:
- 原生Swagger:http://ip:port/swagger-ui.html#/
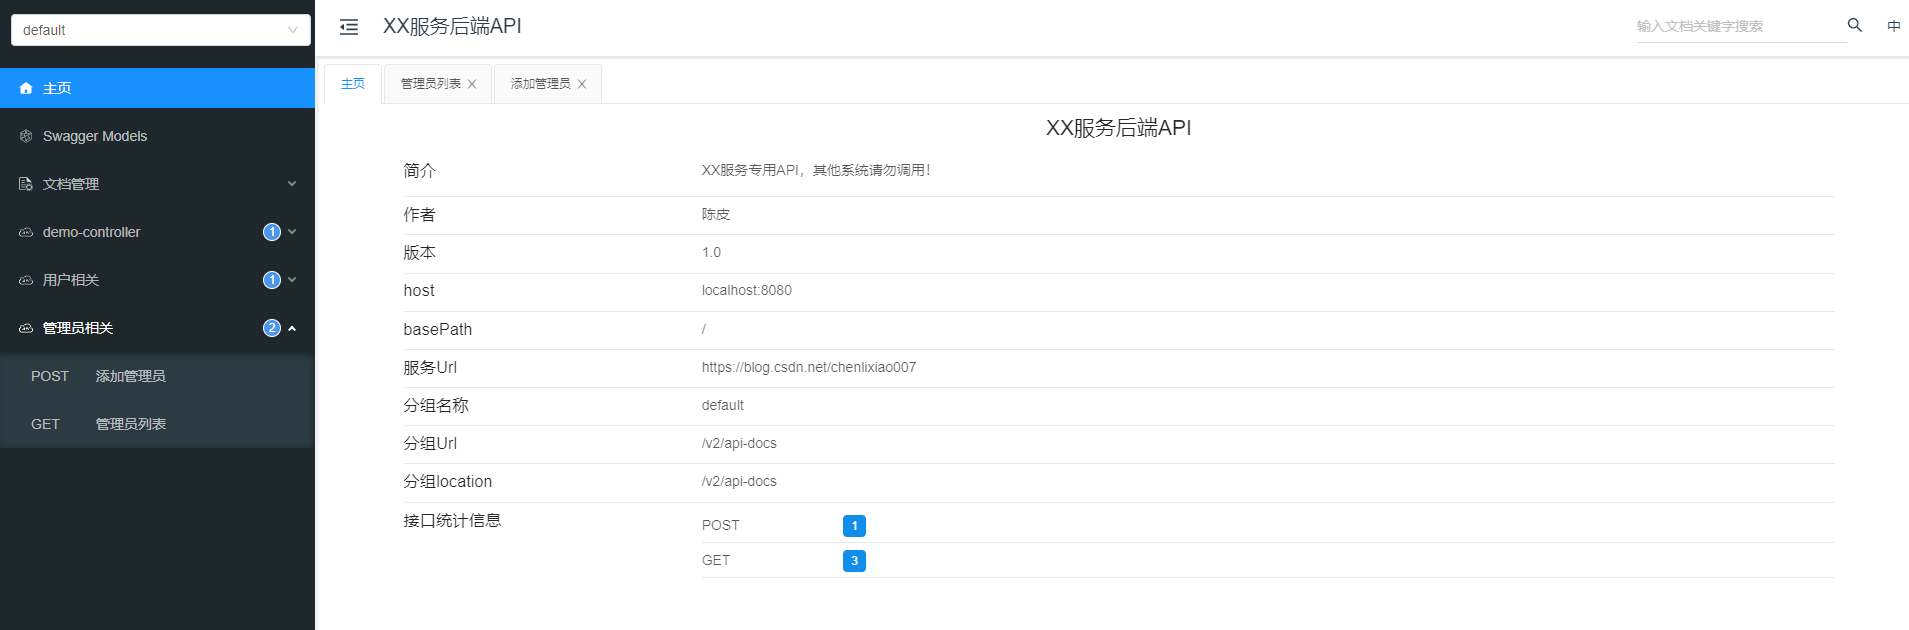
- Knife4J:http://ip:port/doc.html#/
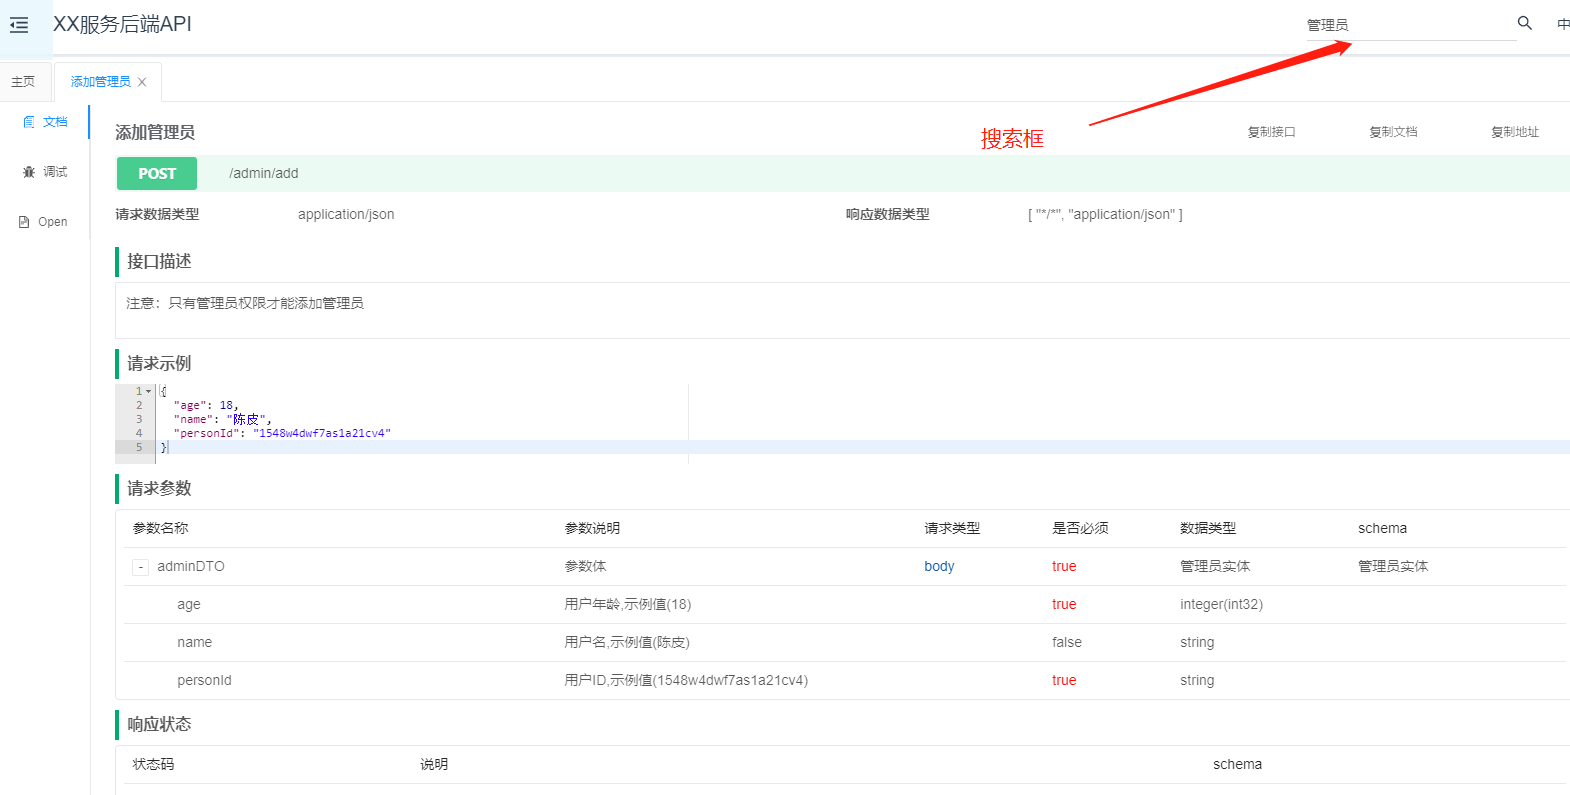
是不是界面比原生的好看多了,还是保持着简洁美观,但是功能更多了。
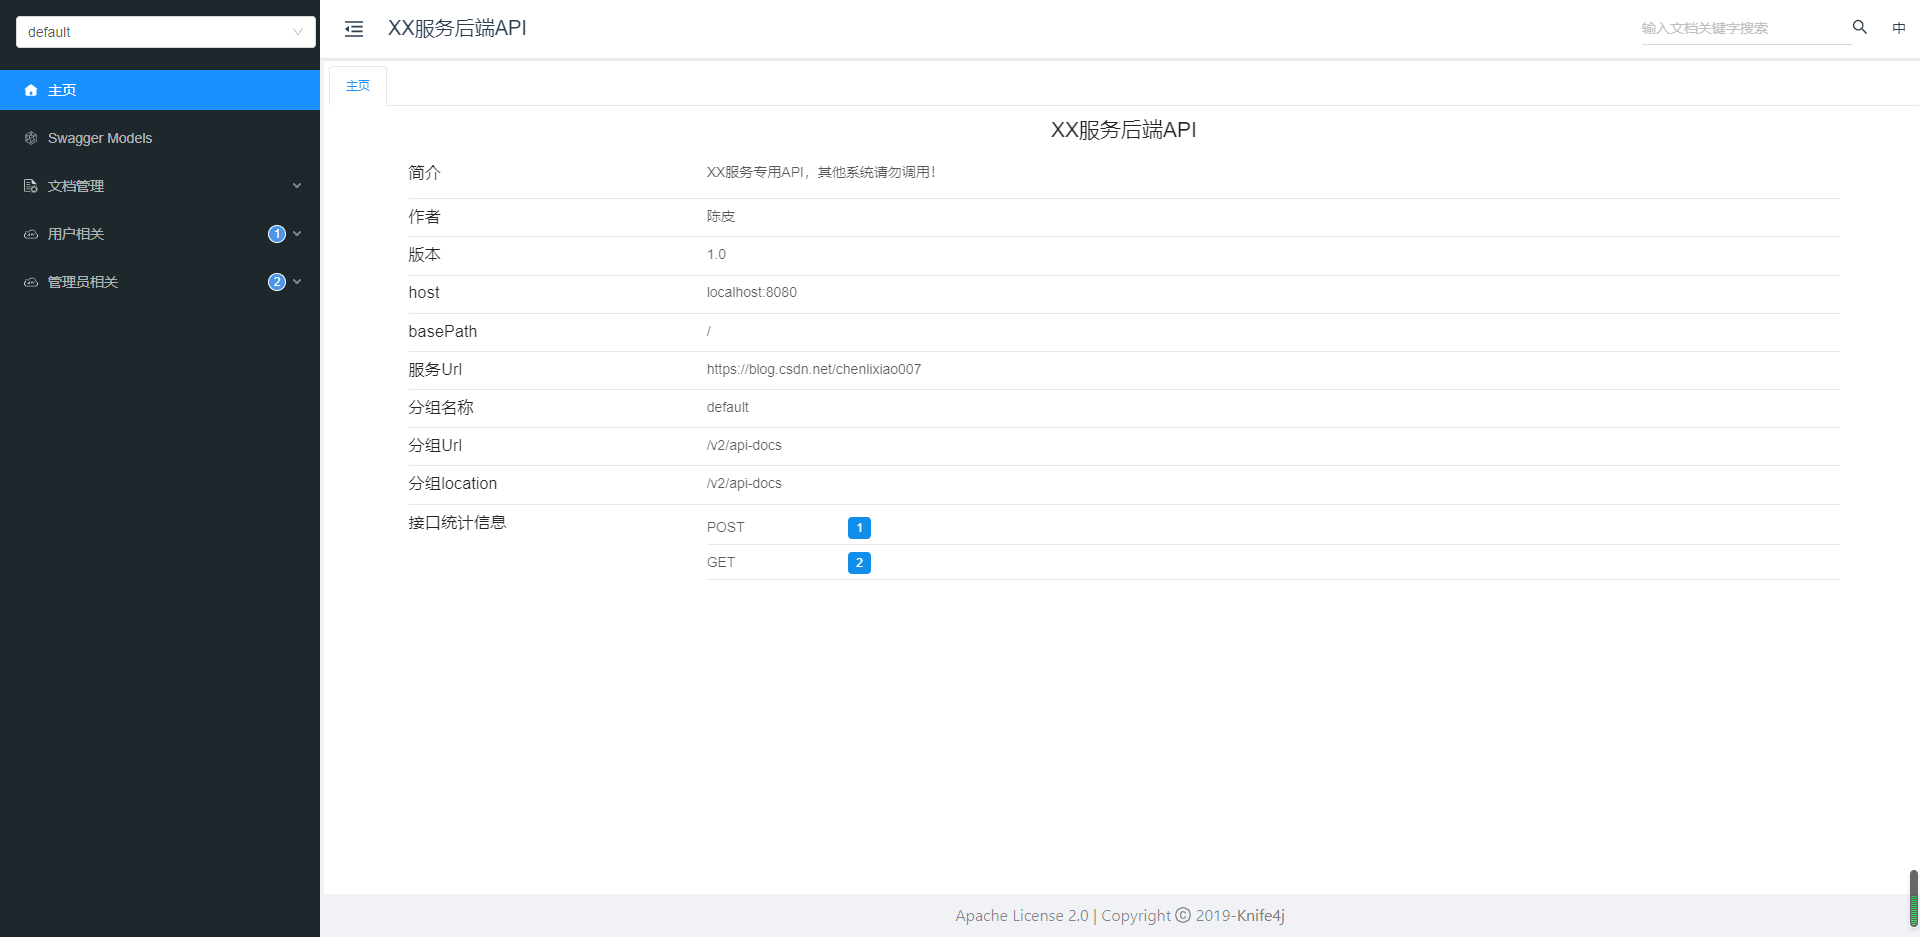
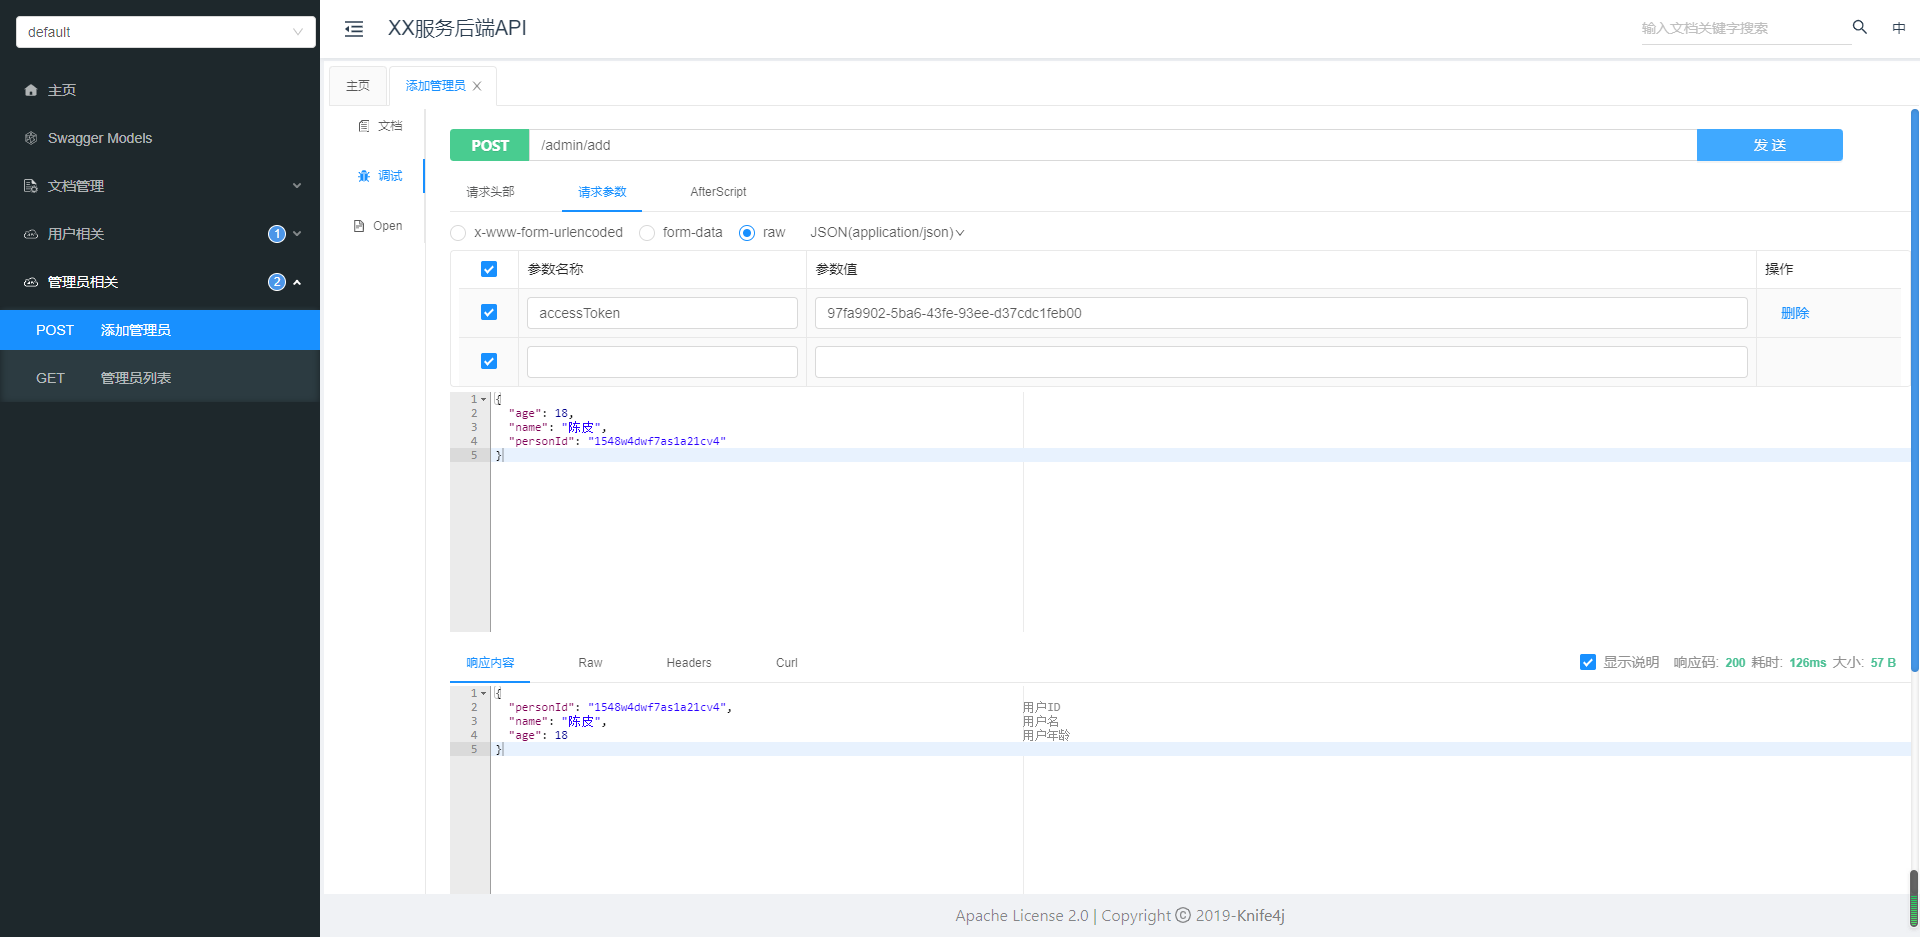
当我们打开一个接口,显示的界面信息更全了,而且分为3个页面,文档,调试和Open,如下所示:
支持全局搜索,不用在众多接口中一个一个查找,节省时间。
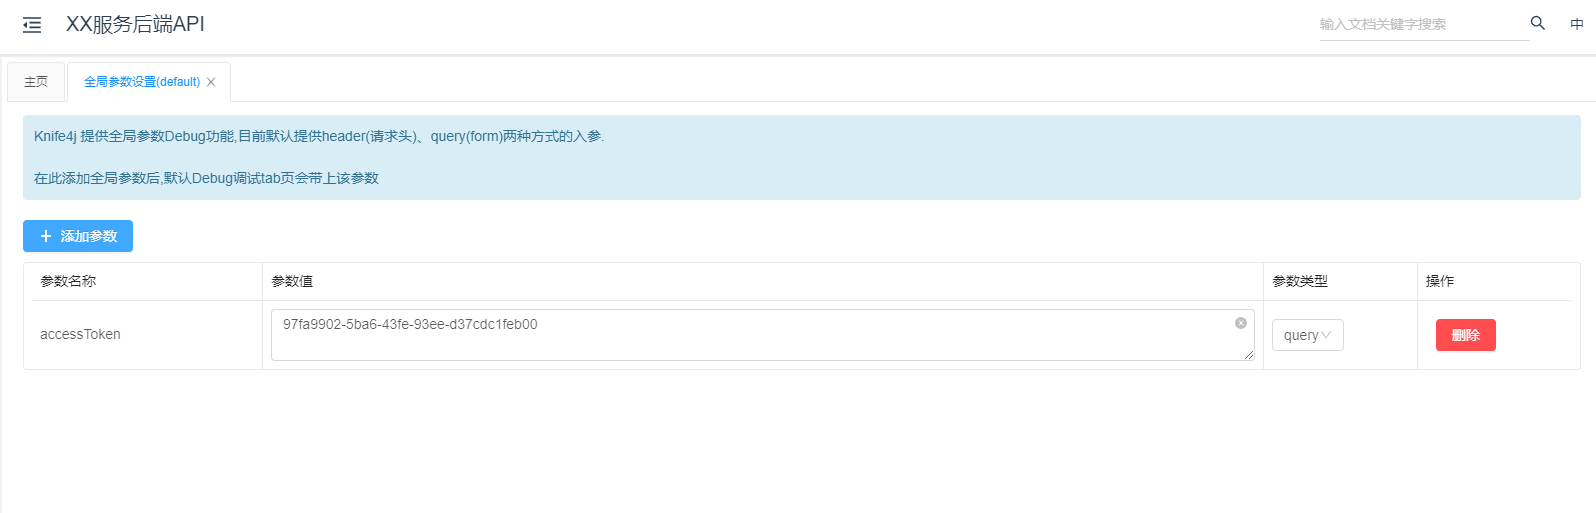
Knife4j 提供全局参数Debug功能,目前默认提供header(请求头)、query(form)两种方式的入参。添加全局参数后,默认Debug调试tab页会带上该参数。
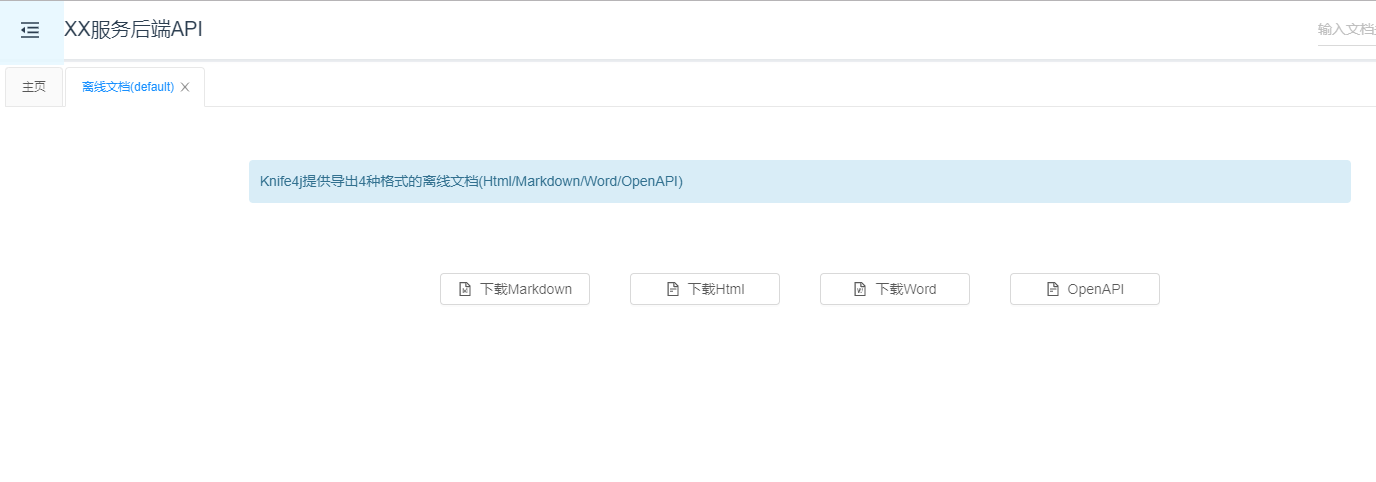
Knife4j提供导出4种格式的离线文档(Html/Markdown/Word/OpenAPI)
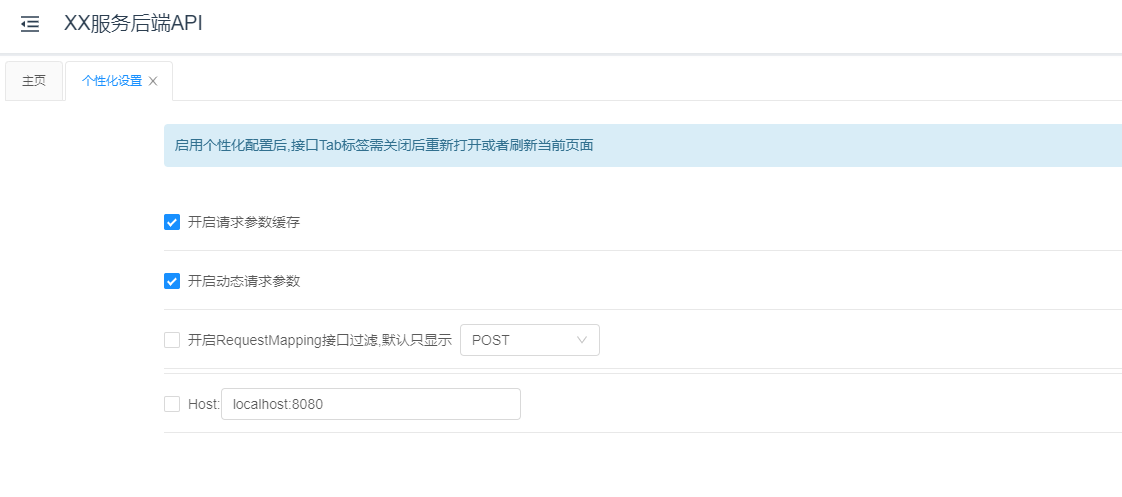
启用个性化配置后,接口Tab标签需关闭后重新打开或者刷新当前页面。
更多Knife4J的详细介绍,可以查看官方介绍文档,很详细。https://xiaoym.gitee.io/knife4j/documentation/description.html
最后
以上就是年轻鲜花最近收集整理的关于前端嫌弃原生Swagger界面太low,于是我给她开通了超级VIP缘由原生SwaggerKnife4J的全部内容,更多相关前端嫌弃原生Swagger界面太low内容请搜索靠谱客的其他文章。


发表评论 取消回复