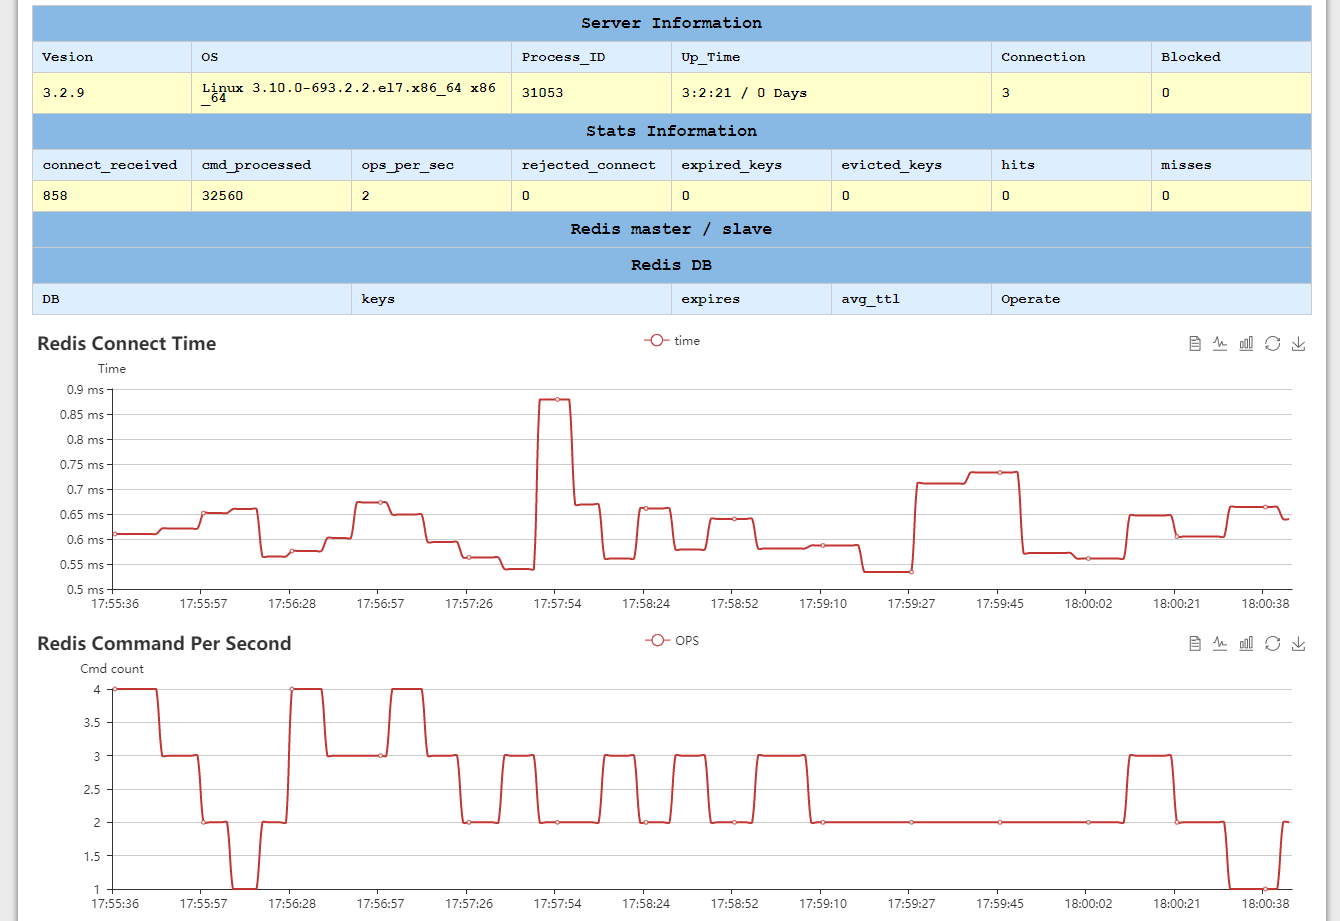
redis-monitor
项目github地址:https://github.com/NetEaseGame/redis-monitor (看作者名称,应该是华科的)
# 安装
pip install redis-monitor

#初始化
 redis-monitor init

#启动
nohup redis-monitor start > redis-monitor.log &
然后web访问http://IP:9527,在web界面进行操作即可。

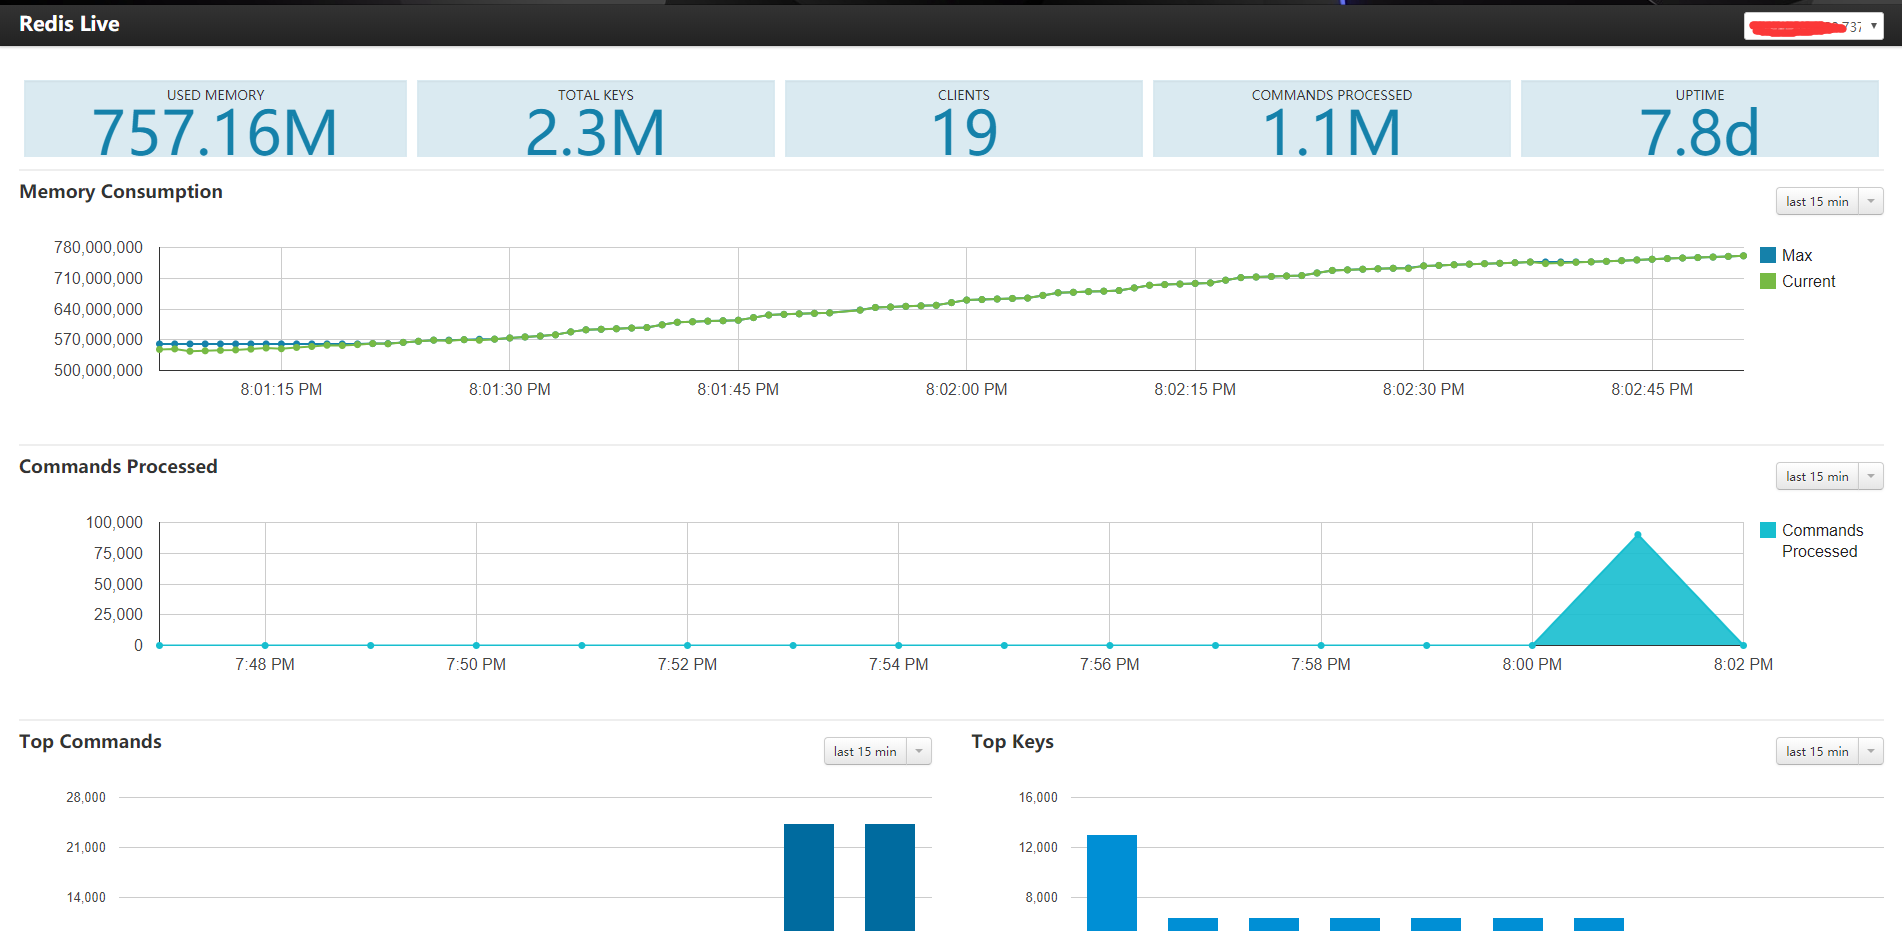
RedisLive
项目github地址:https://github.com/nkrode/RedisLive
pip install tornado
pip install redis
pip install python-dateutil
pip install argparse (python版本低于2.7需要安装,可使用python查看版本)
# 下载项目
git clone https://github.com/kumarnitin/RedisLive.git
修改配置文件redis-live.conf (项目里面叫redis-live.conf.sample)
PS:不支持sentinel,不要配置sentinel的节点,会报错
{
"RedisServers": //数组配置多个待监控的Reids实例
[
{
"server": "192.168.2.128",
"port" : 6379
},
{
"server": "localhost",
"port" : 6380,
"password" : "some-password" //指定Redis服务连接密码
}
],
"DataStoreType" : "redis", //监控数据存储[redis|sqlite] 不建议使用redis(简单测试是可以用redis,方便),db相关的在源码src/db目录下
"RedisStatsServer": //DataStoreType=redis时候,指定redis连接地址
{
"server" : "127.0.0.1",
"port" : 6385
},
"SqliteStatsStore" : //DataStoreType=sqlite,指定db路径
{
"path": "/usr/local/RedisLive/src/db/redislive.db"
}
}
运行:
./redis-monitor.py --duration=120 & #启动监控脚本 [duration监控持续时间(秒)],建议使用crontab定时运行
./redis-live.py & #启动web服务
使用浏览器打开http://localhost:8888/index.html查看监控页面
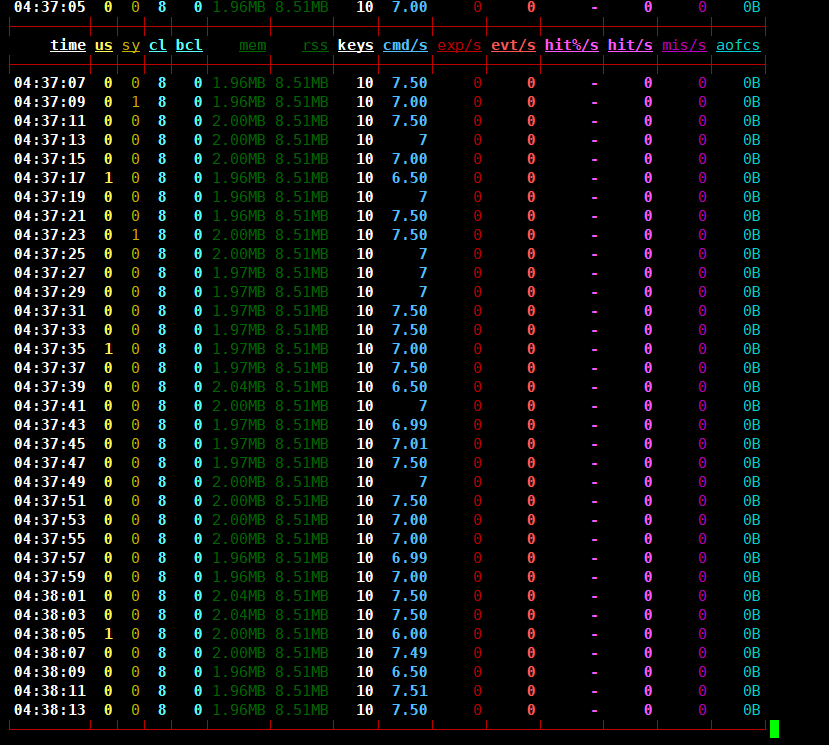
redis-stat
github项目地址:https://github.com/junegunn/redis-stat
这个项目是用ruby写的,但是ruby环境配了半天没弄好,项目很友好的提供了jar包的运行方式。
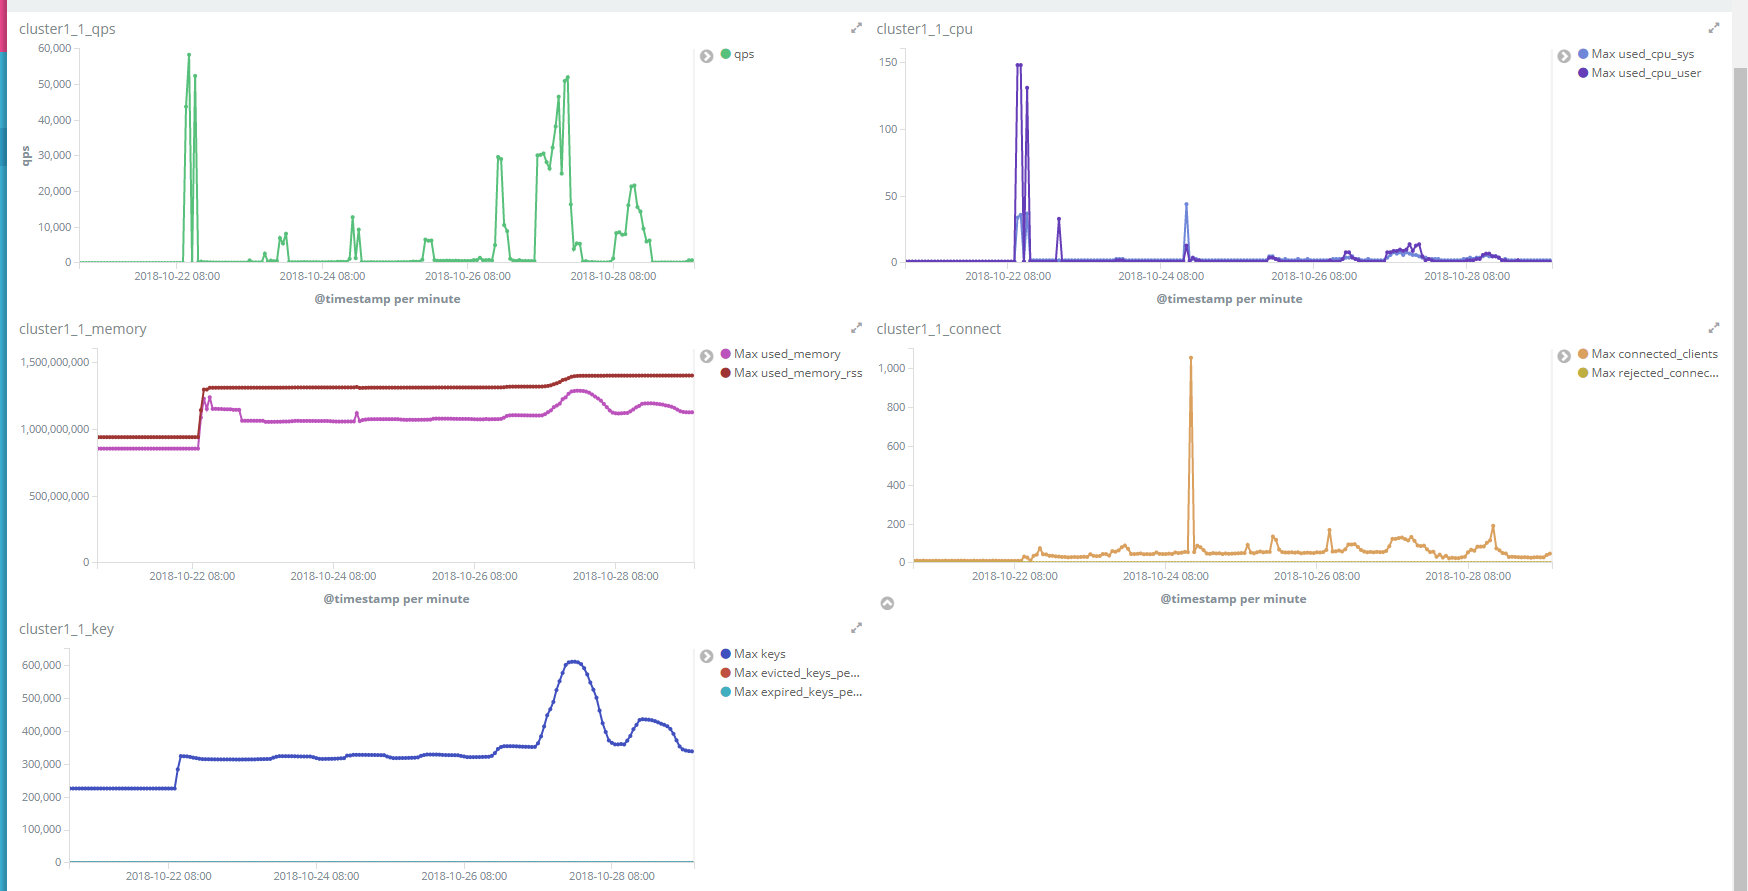
项目还一个优点是直接支持导出CSV文件,或者直接将数据导入es,然后配合kibana使用。
redis-stat虽然可以监控多个节点,但是所有的信息是汇总给出的,这点不太友好。
下载地址:https://github.com/junegunn/redis-stat/releases
# jar 启动
java -jar redis-stat-0.4.14.jar host:port  --server

# 后台启动(jruby的--daemon参数没用,使用screen实现后台运行)
screen -d -m  java -jar redis-stat-0.4.14.jar 127.0.0.1:6379 --auth=passwd --es=http://127.0.0.1:9200/redisstat --server=63794 >> redis-stat.log 2>&1

# 直接把数据导入elasticsearch6版本会有问题,解决办法  使用反向代理例如nginx,将header中的content-type设置为application/json

# elasticsearch的密码验证也可以通过nginx来做,参考https://blog.csdn.net/qq_36666651/article/details/83543358
具体参数含义:
# Usage
usage: redis-stat [HOST[:PORT][/PASS] ...] [INTERVAL [COUNT]]

    -a, --auth=PASSWORD              Password
    -v, --verbose                    Show more info
        --style=STYLE                Output style: unicode|ascii
        --no-color                   Suppress ANSI color codes
        --csv=OUTPUT_CSV_FILE_PATH   Save the result in CSV format
        --es=ELASTICSEARCH_URL       Send results to ElasticSearch: [http://]HOST[:PORT][/INDEX]

        --server[=PORT]              Launch redis-stat web server (default port: 63790)
        --daemon                     Daemonize redis-stat. Must be used with --server option.

        --version                    Show version
        --help                       Show this message


# Running redis-stat for command-line monitoring
redis-stat
redis-stat 1
redis-stat 1 10
redis-stat --verbose
redis-stat localhost:6380 1 10
redis-stat localhost localhost:6380 localhost:6381 5
redis-stat localhost localhost:6380 1 10 --csv=/tmp/output.csv --verbose
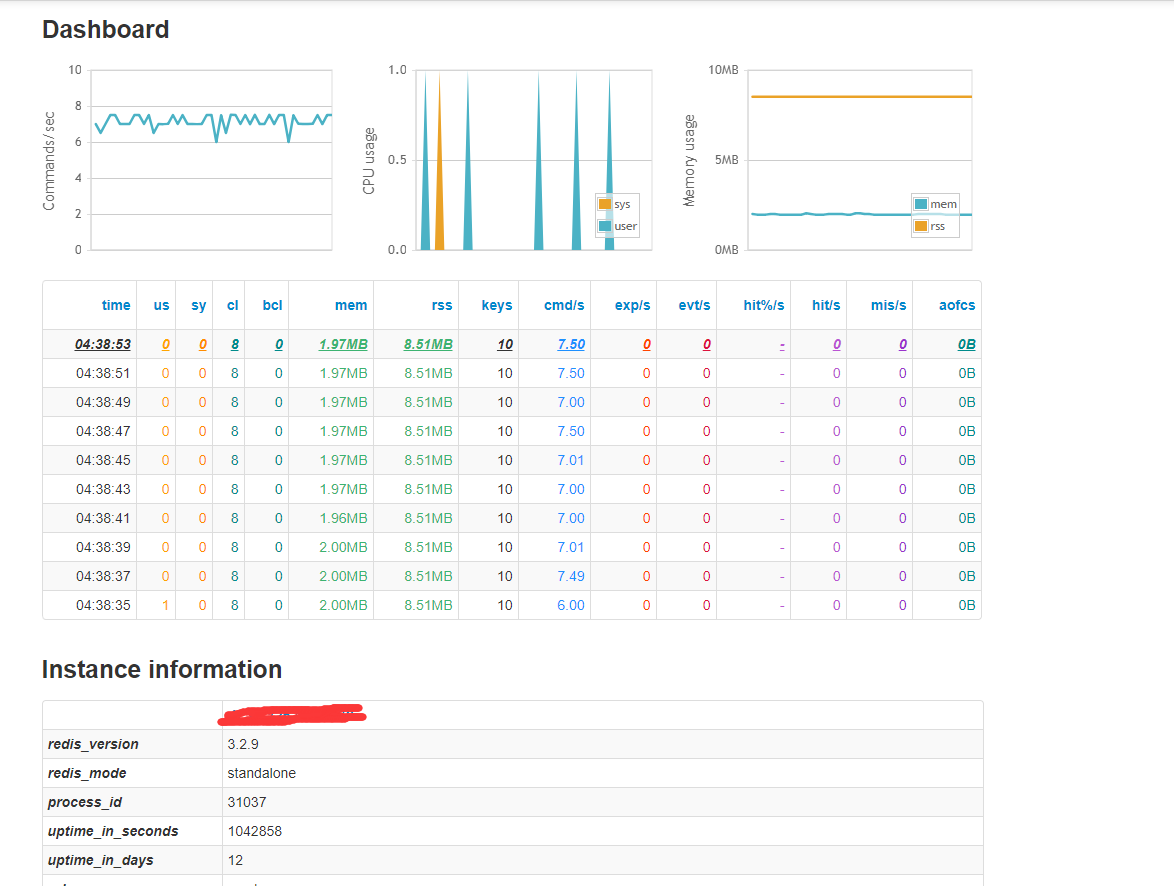
集合kibana的效果:
最后
以上就是笨笨皮卡丘最近收集整理的关于redis监控工具redis-monitorRedisLiveredis-stat的全部内容,更多相关redis监控工具redis-monitorRedisLiveredis-stat内容请搜索靠谱客的其他文章。
本图文内容来源于网友提供,作为学习参考使用,或来自网络收集整理,版权属于原作者所有。


发表评论 取消回复