对自己学习做一个总结 做了一个专题
目录
一:渐变的基础知识
1 什么是渐变
2 色标:
3 渐变的分类
二:几种渐变方式的实例分析
1:线性渐变
编辑
编辑
2 :径向渐变
3:重复渐变
编辑
编辑
4:浏览的兼容问题
三:完整代码实现 立刻上机
一:渐变的基础知识
1 什么是渐变
多种颜色,平缓变化的一-种显示效果。渐变是一种有规律性的变化。
2 色标:
一种颜色和这种颜色出现的位置
一个渐变,至少有两种颜色
3 渐变的分类
(1)线性渐变
(2)径向渐变
(3)重复渐变
二:几种渐变方式的实例分析
1:线性渐变
background-image:linear-gradient(方向,色标1,色标2.....)
取值
1:用终点
to bottom
to right
to left
to top
2:角度 :代表
0deg 代表 to top
90deg 代表 to right
180deg 代表 to bottom
270deg 代表 to left
色标 颜色+位置
图示:

位置
(1) 1% ~ 100%
(2) px .
(3)不写默认平均分配
d1
#d1{
width: 200px;
height: 200px;
background-image: linear-gradient(
to bottom,
#F00 0%,
#00F 25%,
#F00 50%,
#00F 100% /* 这里不要有, */
);
}

d2
#d2{
width: 200px;
height: 200px;
background-image: linear-gradient(
90deg,
#F00 0%,
#00F 25%,
#F00 50%,
#00F 100% /* 这里不要有, */
);
}
#d3{
width: 200px;
height: 200px;
background-image: linear-gradient(
180deg,
#F00 ,/* #不写px 直接默认平均分配 */
#00F ,
#F00 ,
#00F /* 这里不要有, */
);
}
2 :径向渐变
background-image:radial-gradient(半径at圆心,色标色标2....
半径
%就是正常的值 ,半径有效
px: 以px为单位的数字,半径无效()
圆心 的表示
1:关键字 x:left/center/right y:top/center/bottom
2: x y px为单位的数字
3: x% y%
如下:
at topat rightat leftat centerat bottomat 50px 100px指定位置
#d4{
width: 200px;
height: 200px;
background-image: radial-gradient(
/* 100px at center center,
100px at top, */
50px at 100px 100px,/* 半径at 圆心,色标1 色标2 */
#000 0%,
#FF0 10%,
#000 20%,
#0FF 30%,
#000 40%,
#FFF 50%,
#0F0 100%
);
}

/* % 以半径为底 开始渐变 | px 根据px自动变化*/
#d5{
width: 200px;
height: 200px;
background-image: radial-gradient(
100000000px at center center,
#000 0px,
#FF0 10px,
#000 20px,
#0FF 30px
);
}

3:重复渐变
background-image: repeating-radial-gradient(半径 at 坐标 坐标,
色标1,
色标2)
background-image: repeating-linear-gradient(方向,
色标1,
色标2)
#d6{
width: 200px;
height: 200px;
background-image: repeating-linear-gradient(
to bottom,
#F00 0px,
#FF0 10px,
#00F 20px
/* 50px at center center,
#F00 0%,
#FF0 1%,
#00F 2% */
);
}
#d7{
width: 200px;
height:200px;
background-image: repeating-radial-gradient(
100px at center center,
#F00 0%,
#FF0 1%,
#00F 2%
);
}
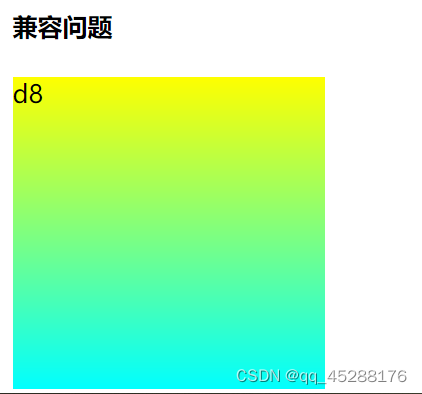
4:浏览的兼容问题
补充:低版本 浏览不支持渐变 我们是用css hack 来让低版本浏览 可以实现渐变效果
所以:需要给代码添加前缀 内核名字
-moz- firefox
-webkit- chrome/safari
-o- opera
-ms- IE
- background-image:-webkit-linear-gradient(top,色标)
- background-image-moz-linear-gradient(top,色标)
- background-image:-o-linear-gradient(top,色标)
- background-image:-ms-lineargradient(top,色标)
直接写起点 方向不能写to
#d8{
width: 200px;
height: 200px;
background-image: -webkit-linear-gradient(top,#FF0,#0FF);
background-image: -moz-linear-gradient(top,#FF0,#0FF);
background-image: -o-linear-gradient(top,#FF0,#0FF);
background-image: -ms-linear-gradient(top,#FF0,#0FF);
}


通过F12的观察可以发现 这是只有-webkit- 显示成功说明这是chrome浏览器 因此该语句可以自动兼容
三:完整代码实现 立刻上机
心中有图 撸码自然神
<!DOCTYPE html>
<html>
<head>
<meta charset="utf-8">
<title></title>
<style type="text/css">
#d1{
width: 200px;
height: 200px;
background-image: linear-gradient(
to bottom,
#F00 0%,
#00F 25%,
#F00 50%,
#00F 100% /* 这里不要有, */
);
}
#d2{
width: 200px;
height: 200px;
background-image: linear-gradient(
90deg,
#F00 0%,
#00F 25%,
#F00 50%,
#00F 100% /* 这里不要有, */
);
}
#d3{
width: 200px;
height: 200px;
background-image: linear-gradient(
180deg,
#F00 ,/* #不写px 直接默认平均分配 */
#00F ,
#F00 ,
#00F /* 这里不要有, */
);
}
#d4{
width: 200px;
height: 200px;
background-image: radial-gradient(
/* 100px at center center,
100px at top, */
50px at 100px 100px,/* 半径at圆心,色标1 色标2 */
#000 0%,
#FF0 10%,
#000 20%,
#0FF 30%,
#000 40%,
#FFF 50%,
#0F0 100%
);
}
/* % 以半径为底 开始渐变 | px 根据px自动变化*/
#d5{
width: 200px;
height: 200px;
background-image: radial-gradient(
100000000px at center center,
#000 0px,
#FF0 10px,
#000 20px,
#0FF 30px
);
}
#d6{
width: 200px;
height: 200px;
background-image: repeating-linear-gradient(
to bottom,
#F00 0px,
#FF0 10px,
#00F 20px
/* 50px at center center,
#F00 0%,
#FF0 1%,
#00F 2% */
);
}
#d7{
width: 200px;
height:200px;
background-image: repeating-radial-gradient(
100px at center center,
#F00 0%,
#FF0 1%,
#00F 2%
);
}
#d8{
width: 200px;
height: 200px;
background-image: -webkit-linear-gradient(top,#FF0,#0FF);
background-image: -moz-linear-gradient(top,#FF0,#0FF);
background-image: -o-linear-gradient(top,#FF0,#0FF);
background-image: -ms-linear-gradient(top,#FF0,#0FF);
}
</style>
</head>
<body>
<h4>简单的线性渐变</h4>
<div id="d1">
d1
</div>
<h4>角度的线性渐变</h4>
<div id="d2">
d2
</div>
<h4>以px为单位及不写单位的线性渐变2</h4>
<div id="d3">
d3
</div>
<h4>d4简单的径向渐变</h4>
<div id="d4">
d4
</div>
<h4>以px为单位的径向渐变</h4>
<div id="d5">
d5
</div>
<h4>重复线性渐变 linear</h4>
<div id="d6">
d6
</div>
<h4>重复线性渐变 radial</h4>
<div id="d7">
d7
</div>
<h4>兼容问题</h4>
<div id="d8">
d8
</div>
</body>
</html>
最后
以上就是美满红牛最近收集整理的关于CSS特性 之渐变 (全网最全)一:渐变的基础知识二:几种渐变方式的实例分析三:完整代码实现 立刻上机的全部内容,更多相关CSS特性内容请搜索靠谱客的其他文章。


发表评论 取消回复