我是靠谱客的博主 机灵母鸡,这篇文章主要介绍Android自定义时间选择器一、添加NumberPicker开源库 二、 添加弹出框主题样式三、添加时间选择器布局 四、添加时间选择器类 五、使用,现在分享给大家,希望可以做个参考。
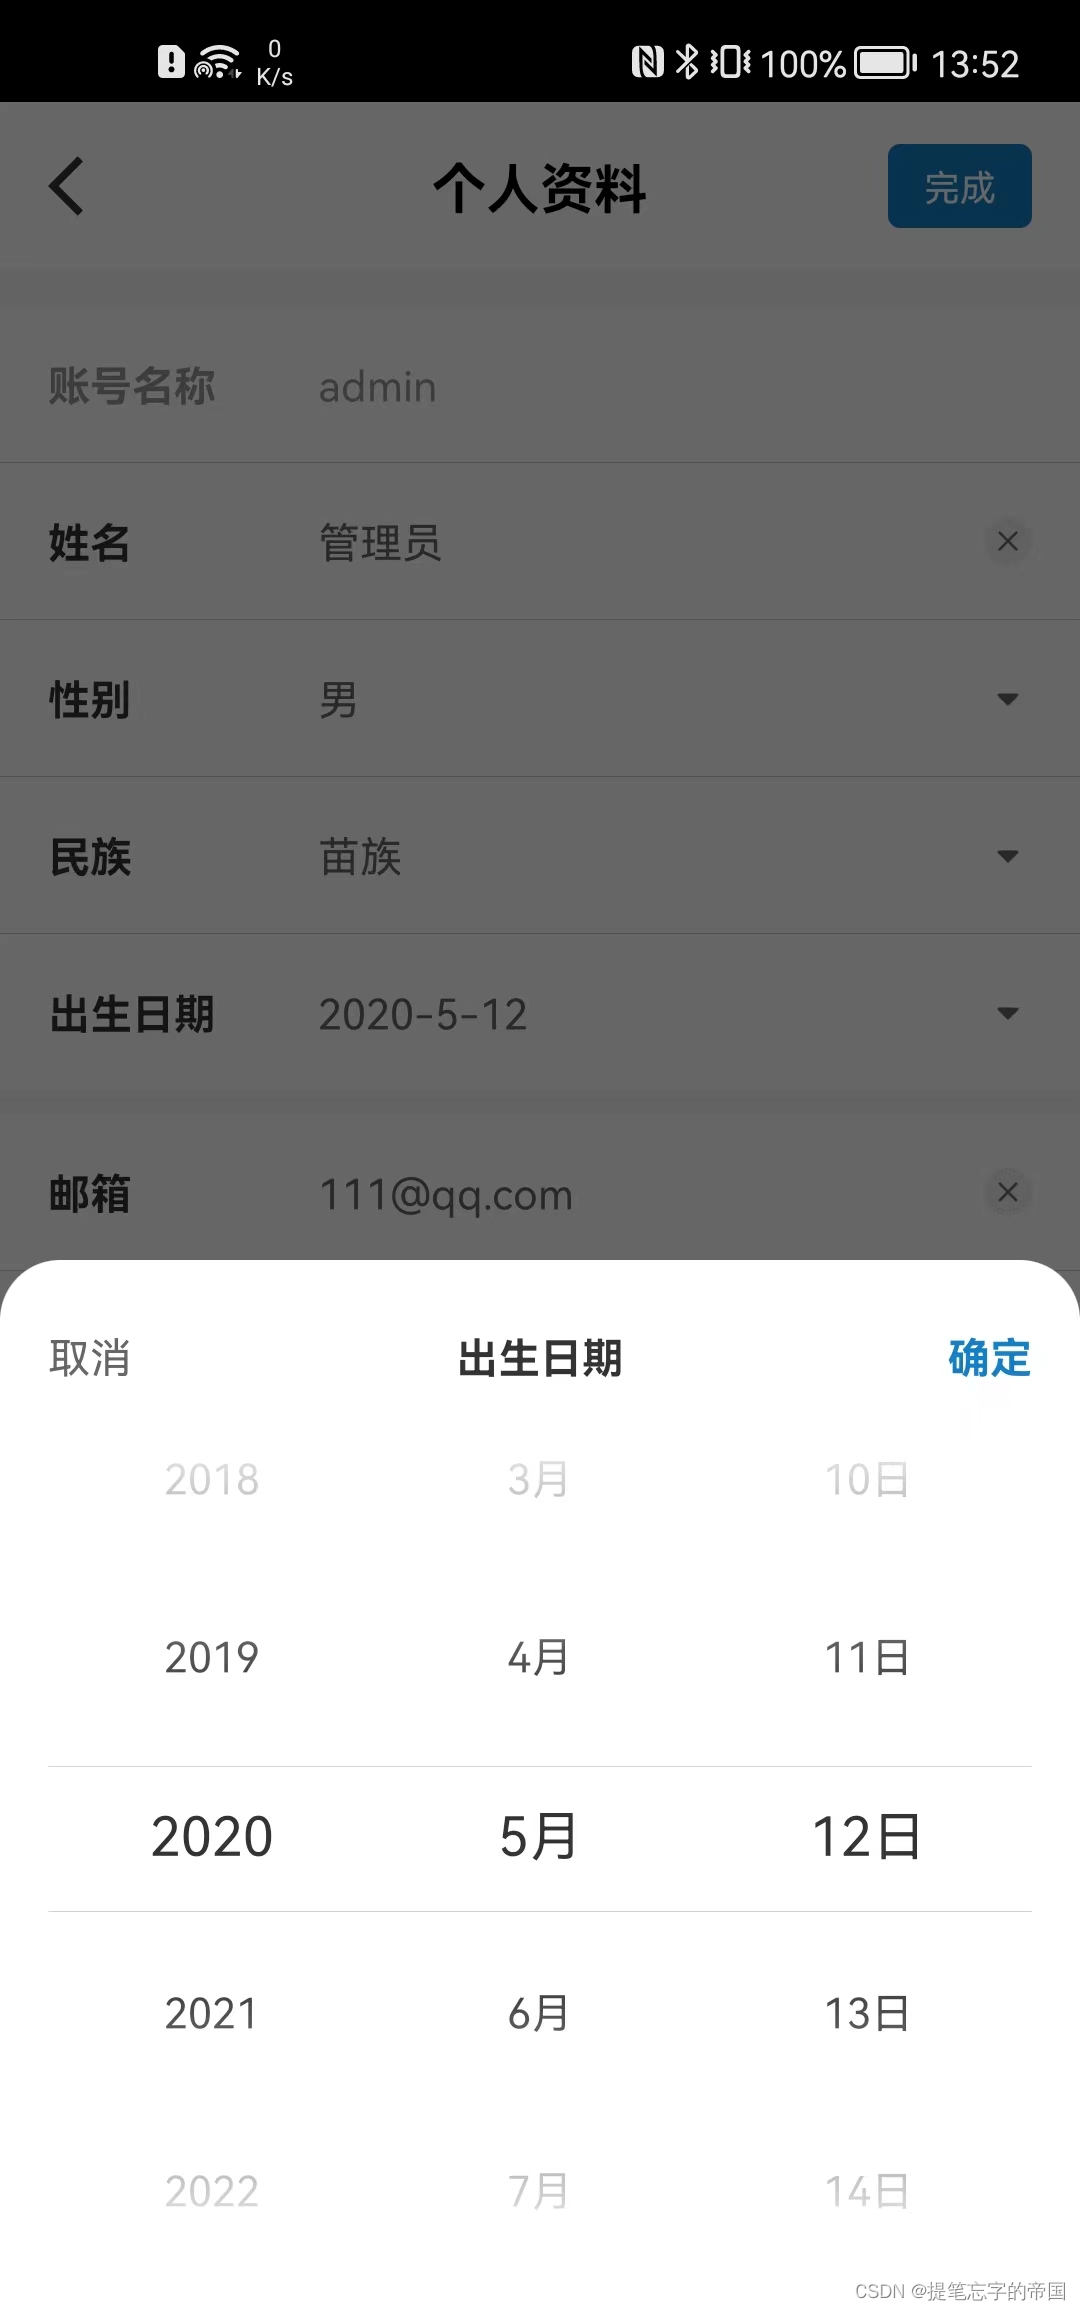
效果图

一、添加NumberPicker开源库
需要添加以下控件
仓库地址: https://github.com/ShawnLin013/NumberPicker
implementation 'io.github.ShawnLin013:number-picker:2.4.13'二、 添加弹出框主题样式
在drawable文件夹下新建一个bg_bottom_dialog.xml,添加以下代码:
<?xml version="1.0" encoding="utf-8"?>
<shape xmlns:android="http://schemas.android.com/apk/res/android">
    <!-- 圆角 -->
    <corners
        android:topLeftRadius="20dp"
        android:topRightRadius="20dp" />
    <!-- 填充色 -->
    <solid android:color="@color/white" />
    <!--内边距-->
    <padding
        android:top="12dp"
        android:left="16dp"
        android:right="16dp"
        android:bottom="16dp" />
</shape>
三、添加时间选择器布局
在layout文件夹下新建view_time_picker.xml文件,添加以下代码:
<?xml version="1.0" encoding="utf-8"?>
<androidx.constraintlayout.widget.ConstraintLayout xmlns:android="http://schemas.android.com/apk/res/android"
    android:layout_width="match_parent"
    android:layout_height="match_parent"
    xmlns:tools="http://schemas.android.com/tools"
    xmlns:app="http://schemas.android.com/apk/res-auto"
    android:background="@drawable/bg_bottom_dialog">

    <TextView
        android:id="@+id/cancel"
        android:layout_width="wrap_content"
        android:layout_height="40dp"
        app:layout_constraintTop_toTopOf="parent"
        app:layout_constraintLeft_toLeftOf="parent"
        app:layout_constraintBottom_toTopOf="@id/year"
        android:gravity="center"
        android:text="取消"
        android:textColor="#666666"
        android:clickable="true"
        android:focusable="true" />

    <TextView
        android:id="@+id/title"
        android:layout_width="0dp"
        android:layout_height="40dp"
        app:layout_constraintTop_toTopOf="parent"
        app:layout_constraintLeft_toRightOf="@id/cancel"
        app:layout_constraintBottom_toTopOf="@id/year"
        app:layout_constraintRight_toLeftOf="@id/ok"
        android:gravity="center"
        android:text="出生日期"
        android:textColor="#333333"
        android:textStyle="bold" />

    <TextView
        android:id="@+id/ok"
        android:layout_width="wrap_content"
        android:layout_height="40dp"
        app:layout_constraintRight_toRightOf="parent"
        app:layout_constraintTop_toTopOf="parent"
        app:layout_constraintBottom_toTopOf="@id/year"
        android:gravity="center"
        android:text="确定"
        android:textColor="#1580C8"
        android:textStyle="bold"
        android:clickable="true"
        android:focusable="true" />

    <com.shawnlin.numberpicker.NumberPicker
        android:id="@+id/year"
        android:layout_width="0dp"
        android:layout_height="0dp"
        app:layout_constraintTop_toBottomOf="@id/title"
        app:layout_constraintBottom_toBottomOf="parent"
        app:layout_constraintLeft_toLeftOf="parent"
        app:layout_constraintRight_toLeftOf="@id/month"
        app:np_formatter="%d"
        app:np_dividerColor="#2B000000"
        app:np_dividerThickness="1px"
        app:np_selectedTextColor="#333333"
        app:np_selectedTextSize="18sp"
        app:np_textSize="14sp"
        app:np_wheelItemCount="5"
        app:np_wrapSelectorWheel="false" />

    <com.shawnlin.numberpicker.NumberPicker
        android:id="@+id/month"
        android:layout_width="0dp"
        android:layout_height="0dp"
        app:layout_constraintTop_toBottomOf="@id/title"
        app:layout_constraintBottom_toBottomOf="parent"
        app:layout_constraintLeft_toRightOf="@id/year"
        app:layout_constraintRight_toLeftOf="@id/day"
        app:np_dividerColor="#2B000000"
        app:np_dividerThickness="1px"
        app:np_selectedTextColor="#333333"
        app:np_selectedTextSize="18sp"
        app:np_textSize="14sp"
        app:np_wheelItemCount="5"
        app:np_wrapSelectorWheel="false" />

    <com.shawnlin.numberpicker.NumberPicker
        android:id="@+id/day"
        android:layout_width="0dp"
        android:layout_height="0dp"
        app:layout_constraintTop_toBottomOf="@id/title"
        app:layout_constraintBottom_toBottomOf="parent"
        app:layout_constraintLeft_toRightOf="@id/month"
        app:layout_constraintRight_toRightOf="parent"
        app:np_dividerColor="#2B000000"
        app:np_dividerThickness="1px"
        app:np_selectedTextColor="#333333"
        app:np_selectedTextSize="18sp"
        app:np_textSize="14sp"
        app:np_wheelItemCount="5"
        app:np_wrapSelectorWheel="false" />

</androidx.constraintlayout.widget.ConstraintLayout>
四、添加时间选择器类
添加以下类,复制即用
import java.util.ArrayList;
import java.util.Calendar;
import java.util.List;

import com.google.android.material.bottomsheet.BottomSheetDialog;
import com.onegrid.app.npmn.R;
import com.shawnlin.numberpicker.NumberPicker;

import android.content.Context;
import android.view.View;
import android.view.ViewGroup;
import android.widget.FrameLayout;
import android.widget.TextView;

/**
 * 时间选择器
 *
 * @author DengLS
 * @date 2023/01/12
 */
public class TimePickerCustom {
    private final BottomSheetDialog bottomDialog;
    private final NumberPicker year;
    private final NumberPicker month;
    private final NumberPicker day;

    /**
     * 时间选择回调
     *
     * @author DengLS
     * @date 2023/01/12
     */
    public interface TimePickerCallback {
        /**
         * 回调
         *
         * @param year 年
         * @param month 月
         * @param day 日
         */
        void setDate(int year, int month, int day);
    }

    public TimePickerCustom(Context context, String title, TimePickerCallback callback) {
        // 设置时间选择器的布局以及弹窗的高度
        bottomDialog = getBottomDialog(context, R.layout.view_time_picker, dpToPx(context, 350));
        Calendar calendar = Calendar.getInstance();
        // 设置标题
        ((TextView)bottomDialog.findViewById(R.id.title)).setText(title);
        // 年
        year = (NumberPicker)bottomDialog.findViewById(R.id.year);
        int yearNow = calendar.get(Calendar.YEAR);
        year.setMinValue(yearNow - 100);
        year.setMaxValue(yearNow + 100);
        year.setValue(yearNow);

        // 月
        month = (NumberPicker)bottomDialog.findViewById(R.id.month);
        String[] monthNum = new String[12];
        for (int i = 0; i < 12; i++) {
            monthNum[i] = (i + 1) + "月";
        }
        month.setMinValue(1);
        month.setMaxValue(monthNum.length);
        month.setDisplayedValues(monthNum);
        month.setValue(calendar.get(Calendar.MONTH));

        // 日
        day = (NumberPicker)bottomDialog.findViewById(R.id.day);
        day.setMinValue(1);
        int days = calendar.getActualMaximum(Calendar.DAY_OF_MONTH);
        String[] newDays = getNewDays(days);
        day.setMaxValue(calendar.getActualMaximum(Calendar.DAY_OF_MONTH));
        day.setDisplayedValues(newDays);
        day.setValue(calendar.get(Calendar.DATE));

        // 年份和月份更改时对应的天数需要更改
        year.setOnValueChangedListener((picker, oldVal, newVal) -> {
            updateNumberOfDays();
            day.setValue(calendar.get(Calendar.DATE));
        });
        month.setOnValueChangedListener((picker, oldVal, newVal) -> {
            updateNumberOfDays();
            day.setValue(calendar.get(Calendar.DATE));
        });

        // 取消按钮和确定按钮事件绑定
        View cancel = bottomDialog.findViewById(R.id.cancel);
        View ok = bottomDialog.findViewById(R.id.ok);
        if (cancel != null) {
            cancel.setOnClickListener(v -> bottomDialog.dismiss());
        }
        if (ok != null) {
            ok.setOnClickListener(v -> {
                bottomDialog.dismiss();
                callback.setDate(year.getValue(), month.getValue(), day.getValue());
            });
        }
    }

    /**
     * 底部弹出框
     *
     * @param id 弹窗中的布局
     * @param height 弹窗高度
     */
    private BottomSheetDialog getBottomDialog(Context context, Integer id, int height) {
        BottomSheetDialog bottomSheet = new BottomSheetDialog(context);
        // 设置对框框中的布局
        bottomSheet.setContentView(id);
        // 设置点击外部是否可以取消
        bottomSheet.setCancelable(true);
        FrameLayout bottom = (FrameLayout)bottomSheet.findViewById(R.id.design_bottom_sheet);
        if (bottom != null) {
            // 设置背景透明颜色
            bottom.setBackgroundResource(R.color.transparent);
            // 修改弹窗的高度
            ViewGroup.LayoutParams layoutParams = bottom.getLayoutParams();
            layoutParams.height = height;
            bottom.setLayoutParams(layoutParams);
        }
        return bottomSheet;
    }

    /**
     * dp转px
     */
    private int dpToPx(Context context, float dp) {
        return (int)(dp * context.getResources().getDisplayMetrics().density + 0.5);
    }

    /**
     * 显示
     */
    public void show() {
        bottomDialog.show();
    }

    /**
     * 设置选中年份
     *
     * @param yearValue 年
     */
    public void setYearValue(int yearValue) {
        year.setValue(yearValue);
        updateNumberOfDays();
    }

    /**
     * 设置选中月份
     *
     * @param monthValue 月
     */
    public void setMonthValue(int monthValue) {
        month.setValue(monthValue);
        updateNumberOfDays();
    }

    /**
     * 设置选中天数
     *
     * @param dayValue 天
     */
    public void setDayValue(int dayValue) {
        day.setValue(dayValue);
    }

    /**
     * 更新天数
     *
     */
    private void updateNumberOfDays() {
        Calendar calendar = Calendar.getInstance();
        calendar.set(Calendar.YEAR, year.getValue());
        calendar.set(Calendar.MONTH, (month.getValue() - 1));
        calendar.set(Calendar.DATE, 1);
        calendar.roll(Calendar.DATE, -1);
        int date = calendar.get(Calendar.DATE);
        day.setMaxValue(date);
        day.setDisplayedValues(getNewDays(date));
    }

    /**
     * 格式化天数
     *
     * @param days 天数
     * @return {@link String[]}
     */
    private String[] getNewDays(int days) {
        List<String> dayList = new ArrayList<>();
        for (int i = 0; i < days; i++) {
            dayList.add((i + 1) + "日");
        }
        return dayList.toArray(new String[dayList.size()]);
    }
}
五、使用
TimePickerCustom timePickerCustom = new TimePickerCustom(context, "标题", (year, month, day) -> {
    // 确定按钮的回调
    Log.i("timePickerCustom", year + "------" + month + "--------" + day);
});
// 弹出
timePickerCustom.show();
????点赞,你的认可是我创作的动力 !
????收藏,你的青睐是我努力的方向!
✏️评论,你的意见是我进步的财富!
最后
以上就是机灵母鸡最近收集整理的关于Android自定义时间选择器一、添加NumberPicker开源库 二、 添加弹出框主题样式三、添加时间选择器布局 四、添加时间选择器类 五、使用的全部内容,更多相关Android自定义时间选择器一、添加NumberPicker开源库 二、内容请搜索靠谱客的其他文章。
本图文内容来源于网友提供,作为学习参考使用,或来自网络收集整理,版权属于原作者所有。


发表评论 取消回复