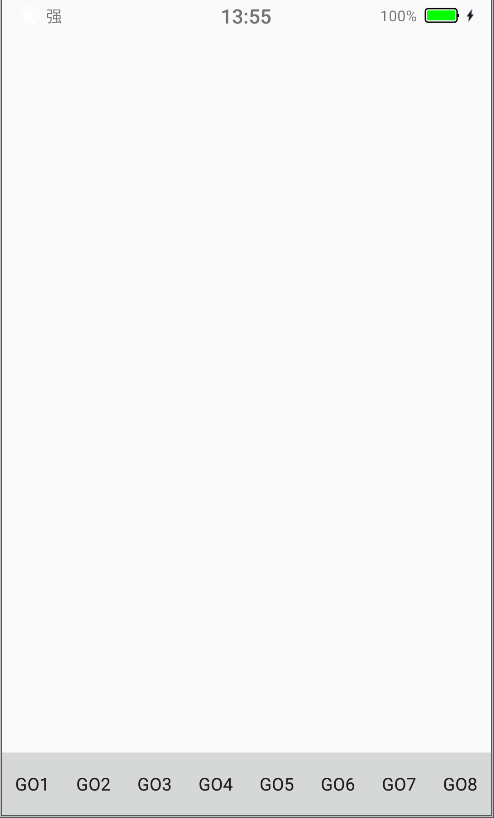
先上效果图.如果当前电量小于20时候,不管充电没充电,电池的颜色都是红色,如果大于20,充电的时候电量的颜色是绿色,如果是
正常的时候电量的颜色为黑色,提供改变电池颜色的方法等,此自定义View是做的自定义状态栏.
电量低充电电池的状态:

充电电池的状态:

正常电池的状态:

画电池的代码:
/**
 * 自定义画的电池 有接口 根据是否充电 白天黑夜等 改变电池的颜色 大小 等
 */
public class BatteryView extends View {
	public static final int BATTERY_OUTLINES_PAINT_WIDTH = 3;
	private Context mContext;
	private int mPower = 100;

	private Paint batteryOutlinesPaint; // 电池外框的画笔
	private Paint batteryPaint; // 电池内部画笔
	private Paint batteryHearPaint; // 电池头画笔

	private int battery_width; // 电池的宽
	private int battery_height; // 电池的高
	private int battery_inside_margin; // 电池内框距外框的margin

	private int battery_head_width = 4;// 电池头外面扭的宽
	private int battery_head_height = 6;// 电池头外面扭的高

	public BatteryView(Context context) {
		this(context, null);
	}

	public BatteryView(Context context, AttributeSet attrs) {
		this(context, attrs, 0);
	}

	public BatteryView(Context context, @Nullable AttributeSet attrs, int defStyleAttr) {
		super(context, attrs, defStyleAttr);
		TypedArray array = context.obtainStyledAttributes(attrs, R.styleable.BatteryView);
		battery_width = array.getInteger(R.styleable.BatteryView_battery_view_width, 70);
		battery_height = array.getInteger(R.styleable.BatteryView_battery_view_height, 30);
		battery_inside_margin = array.getInteger(R.styleable.BatteryView_battery_view_inside_margin, 4);

		array.recycle();
		init(context);
	}

	private void init(Context context) {
		mContext = context;
		batteryOutlinesPaint = new Paint();
		batteryOutlinesPaint.setColor(Color.BLACK);
		batteryOutlinesPaint.setAntiAlias(true);
		batteryOutlinesPaint.setStrokeWidth(BATTERY_OUTLINES_PAINT_WIDTH);
		batteryOutlinesPaint.setStyle(Paint.Style.STROKE);

		batteryPaint = new Paint();
		batteryPaint.setColor(Color.BLACK);
		batteryPaint.setAntiAlias(true);
		batteryPaint.setStyle(Paint.Style.FILL);


		batteryHearPaint = new Paint();
		batteryHearPaint.setColor(Color.BLACK);
		batteryPaint.setAntiAlias(true);
		batteryHearPaint.setStyle(Paint.Style.FILL);
	}

	@Override
	protected void onDraw(Canvas canvas) {
		super.onDraw(canvas);
		int rootHeight = getMeasuredHeight(); // 画布高度
		int rootWidth = getMeasuredWidth(); // 画布宽度

		//先画外框
		int outlinesLeft = (rootWidth - battery_width) / 2;
		int outlinesTop = (rootHeight - battery_height) / 2;
		int outlinesRight = outlinesLeft + battery_width;
		int outlinesBottom = outlinesTop + battery_height;

		RectF outlinesRect = new RectF(outlinesLeft, outlinesTop, outlinesRight, outlinesBottom);
		canvas.drawRoundRect(outlinesRect, 6, 6, batteryOutlinesPaint);//第二个参数是x半径,第三个参数是y半径 画出的外框有圆角
		float power_percent = mPower / 100.0f;

		//画电量
		if (power_percent != 0) {
			int powerLeft = outlinesLeft + battery_inside_margin;
			int powerTop = outlinesTop + battery_inside_margin;
			int powerFullWidth = battery_width - battery_inside_margin * 2; // 电池满电量的宽度
			int powerRight = (int) (outlinesLeft + battery_inside_margin + (powerFullWidth * power_percent));
			int powerBottom = outlinesBottom - battery_inside_margin;
			RectF batteryRect = new RectF(powerLeft, powerTop, powerRight, powerBottom);
			canvas.drawRoundRect(batteryRect, 2, 2, batteryPaint);
		}

		//画电池头
		int powerHeadLeft = outlinesRight;
		int powerHeadTop = outlinesTop + (battery_height - battery_head_height) / 2;
		int powerHeadRight = outlinesRight + battery_head_width;
		int powerHeadBottom = outlinesTop + (battery_height - battery_head_height) / 2 + battery_head_height;
		Rect batteryHeadRect = new Rect(powerHeadLeft, powerHeadTop, powerHeadRight, powerHeadBottom);
		canvas.drawRect(batteryHeadRect, batteryHearPaint);
	}

	@Override
	protected void onMeasure(int widthMeasureSpec, int heightMeasureSpec) {
		super.onMeasure(widthMeasureSpec, heightMeasureSpec);
		setMeasuredDimension(battery_width + battery_head_width + BATTERY_OUTLINES_PAINT_WIDTH * 2
				, battery_height + BATTERY_OUTLINES_PAINT_WIDTH * 2);
	}

	public void setBatteryOutlinesPaintColor(int color) {
		batteryOutlinesPaint.setColor(color);
		invalidate();
	}

	public void setBatteryHearPaintColor(int color) {
		batteryHearPaint.setColor(color);
		invalidate();
	}

	public void setBatteryPaintColor(int color) {
		batteryPaint.setColor(color);
		invalidate();
	}

	public int getPower() {
		return mPower;
	}

	public void setPower(int power) {
		mPower = power;
		if (mPower < 0) {
			mPower = 0;
		}
		invalidate();
	}
}
自定义属性:
<resources>
    <declare-styleable name="BatteryView">
        <attr name="battery_view_height" format="integer"/>
        <attr name="battery_view_width" format="integer"/>
        <attr name="battery_view_inside_margin" format="integer"/>

    </declare-styleable>
</resources>
以上就可以实现简单的自定义画电池
最后
以上就是善良咖啡最近收集整理的关于Android自定义View之电池的全部内容,更多相关Android自定义View之电池内容请搜索靠谱客的其他文章。
本图文内容来源于网友提供,作为学习参考使用,或来自网络收集整理,版权属于原作者所有。


发表评论 取消回复