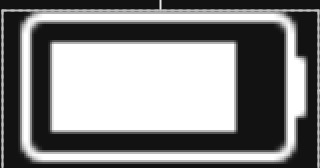
效果图:

代码
public class BatteryView extends View {
    private int mMargin = 30;    //电池内芯与边框的距离
    private int mBoder = 20;     //电池外框的宽带
    private int mWidth = 700;    //总长
    private int mHeight = 400;   //总高
    private int mHeadWidth = 60;
    private int mHeadHeight = 160;

    private RectF mMainRect;
    private RectF mHeadRect;
    private float mRadius = 40f;   //圆角
    private float mPower;

    private boolean mIsCharging;    //是否在充电


    public BatteryView(Context context, AttributeSet attrs, int defStyleAttr) {
        super(context, attrs, defStyleAttr);

    }

    public BatteryView(Context context, AttributeSet attrs) {
        super(context, attrs);

    }

    public BatteryView(Context context) {
        super(context);

    }

    private void initView() {
    //更新参数, 实现图标大小填充整个view start
        mWidth = getMeasuredWidth();
        mHeight = getMeasuredHeight();
        int min = Math.min(mWidth, mHeight);
        mBoder = min / 16;
        mMargin = mBoder * 2;
        mHeadWidth = mWidth / 10;
        mHeadHeight = (int) (mHeight / 2.5);
        mRadius = min / 10f;
     //更新参数, 实现图标大小填充整个view end
//        mHeadRect = new RectF(0, (mHeight - mHeadHeight) / 2f, mHeadWidth, (mHeight + mHeadHeight) / 2f);
//
//        float left = mHeadRect.width();
//        float top = mBoder;
//        float right = mWidth - mBoder;
//        float bottom = mHeight - mBoder;
//        mMainRect = new RectF(left, top, right, bottom);

        float left = mMargin;
        float top = mBoder;
        float right = mWidth   - mHeadWidth;
        float bottom = mHeight - mBoder;
        mMainRect = new RectF(left, top, right, bottom);

        mHeadRect = new RectF(mMainRect.width() + mMargin, (mHeight - mHeadHeight) / 2f, mMainRect.width() + mHeadWidth + mBoder / 2f, (mHeight + mHeadHeight) / 2f);
    }

    @Override
    protected void onDraw(Canvas canvas) {
        super.onDraw(canvas);
        Paint paint1 = new Paint();
        paint1.setAntiAlias(true);


        //画外框
        paint1.setStyle(Paint.Style.STROKE);    //设置空心矩形
        paint1.setStrokeWidth(mBoder);          //设置边框宽度
        paint1.setColor(Color.WHITE);
        canvas.drawRoundRect(mMainRect, mRadius, mRadius, paint1);
        //画电池芯
        Paint paint = new Paint();
        if (mIsCharging) {
            paint.setColor(Color.GREEN);
        } else {
            if (mPower < 0.1) {
                paint.setColor(Color.RED);
            } else {
                paint.setColor(Color.WHITE);
            }
        }

        int b1 = mHeight /6;
        int width = (int) (mPower * (mMainRect.width() - b1 * 2));

//        int left = (int) (mMainRect.left + b1 );
//        int right = (int) (mMainRect.left + b1 + width);
//        int top = (int) (mMainRect.top + b1);
//        int bottom = (int) (mMainRect.bottom - b1);
//        RectF rect = new RectF(left, top, right, bottom);
//        float r = (bottom - top) / 10f;
//        canvas.drawRoundRect(rect, r, r, paint);

        int left = (int) (mMainRect.left + b1 );
        int right = (int) (mMainRect.left + b1 + width);
        int top = (int) (mMainRect.top + b1);
        int bottom = (int) (mMainRect.bottom - b1);
        RectF rect = new RectF(left, top, right, bottom);
        float r = (bottom - top) / 10f;
        canvas.drawRoundRect(rect, r, r, paint);

        //画电池头
        paint1.setStyle(Paint.Style.FILL);
        paint1.setColor(Color.WHITE);
        int rH = mHeadWidth / 4;
        canvas.drawRoundRect(mHeadRect, rH, rH, paint1);
    }

    @Override
    protected void onMeasure(int widthMeasureSpec, int heightMeasureSpec) {
        super.onMeasure(widthMeasureSpec, heightMeasureSpec);
        initView();
    }

    public void setPower(float power) {
        mPower = power;
        invalidate();
    }
}
最后
以上就是迷人期待最近收集整理的关于Android 绘制电池图标的全部内容,更多相关Android内容请搜索靠谱客的其他文章。
本图文内容来源于网友提供,作为学习参考使用,或来自网络收集整理,版权属于原作者所有。


发表评论 取消回复