16.0、springcloud-Hystrix-Dashboard流监控
【Hystrix-DashBoard 是 客户端监控 和 服务端无关】,接下来我们来看看该如何实现
第一步:创建一个新的模块 springcloud-consumer-hystrix-dashboard
在pom.xml中导入以下相关依赖:
<!--Hystrix依赖-->
<dependency>
    <groupId>org.springframework.cloud</groupId>
    <artifactId>spring-cloud-starter-hystrix</artifactId>
    <version>1.4.6.RELEASE</version>
</dependency>
<dependency>
    <groupId>org.springframework.cloud</groupId>
    <artifactId>spring-cloud-starter-hystrix-dashboard</artifactId>
    <version>1.4.6.RELEASE</version>
</dependency>
<dependency>
    <groupId>com.hkl</groupId>
    <artifactId>springcloud-api</artifactId>
    <version>1.0-SNAPSHOT</version>
</dependency>
<dependency>
    <groupId>org.springframework.boot</groupId>
    <artifactId>spring-boot-starter-web</artifactId>
</dependency>
<!--导入eureka依赖,eureka中包含有ribbon-->
<dependency>
    <groupId>org.springframework.cloud</groupId>
    <artifactId>spring-cloud-starter-eureka-server</artifactId>
    <version>1.4.6.RELEASE</version>
</dependency>
第二步:配置application.yaml:
server:
  port: 9001
第三步:配置主启动类 DeptConsumerDashboard_9001.java,
加上 @EnableHystrixDashboard注解 开启监控功能
package com.hkl.springcloud;

import org.springframework.boot.SpringApplication;
import org.springframework.boot.autoconfigure.SpringBootApplication;
import org.springframework.cloud.netflix.hystrix.dashboard.EnableHystrixDashboard;

@SpringBootApplication
@EnableHystrixDashboard//开启监控
public class DeptConsumerDashboard_9001 {
    public static void main(String[] args) {
        SpringApplication.run(DeptConsumerDashboard_9001.class,args);
    }
}
注意在 【 服务提供者端 】 中必须要有下面这个监控的依赖,否则会有问题
<!--actuator完善监控信息-->
<dependency>
    <groupId>org.springframework.boot</groupId>
    <artifactId>spring-boot-starter-actuator</artifactId>
</dependency>
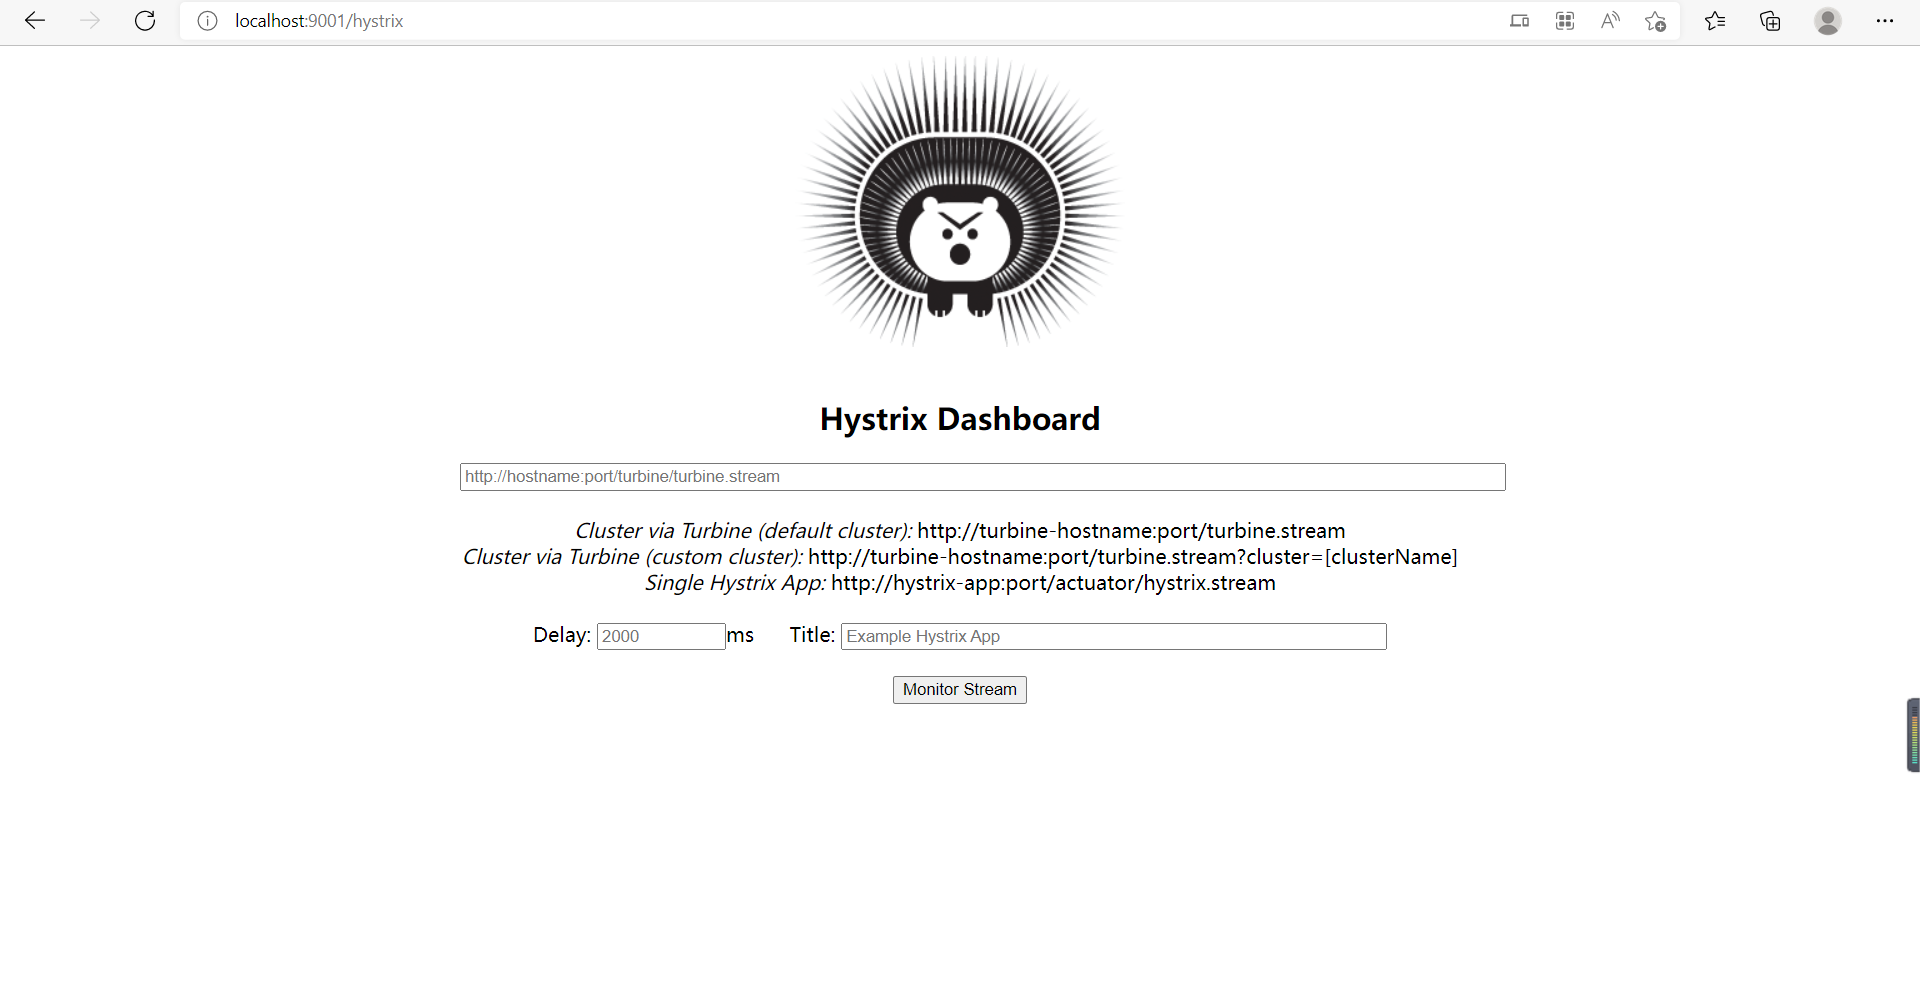
然后去访问:http://localhost:9001/hystrix,可以看到有一个豪猪的图标,因为hystrix是豪猪的意思嗷~
为了配合监控的使用,在 springcloud-provider-dept-hystrix-8001
服务提供者【这个module在之前14.0的文章里有说】的主启动类中加一个servlet,如下所示:
//添加一个Servlet
@Bean
public ServletRegistrationBean a() {
    ServletRegistrationBean registrationBean = new ServletRegistrationBean(new HystrixMetricsStreamServlet());
    registrationBean.addUrlMappings("/actuator/hystrix.stream");
    return registrationBean;
}
这里注意,主启动类要开启 hystrix熔断注解,下面这个监控的servlet才会生效,因为他也要去监控是否发生了熔断,降级等情况
启动7002-注册中心,启动9001-hystrixDash模块,最后启动8001-hystrix模块【这些环境在前面的文章里都搭建过了】
然后去访问一下: http://localhost:8001/actuator/hystrix.stream,可以看到有很多ping值,这些就是如果我们发起一些 request请求 这里的 ping 就会多一些数据
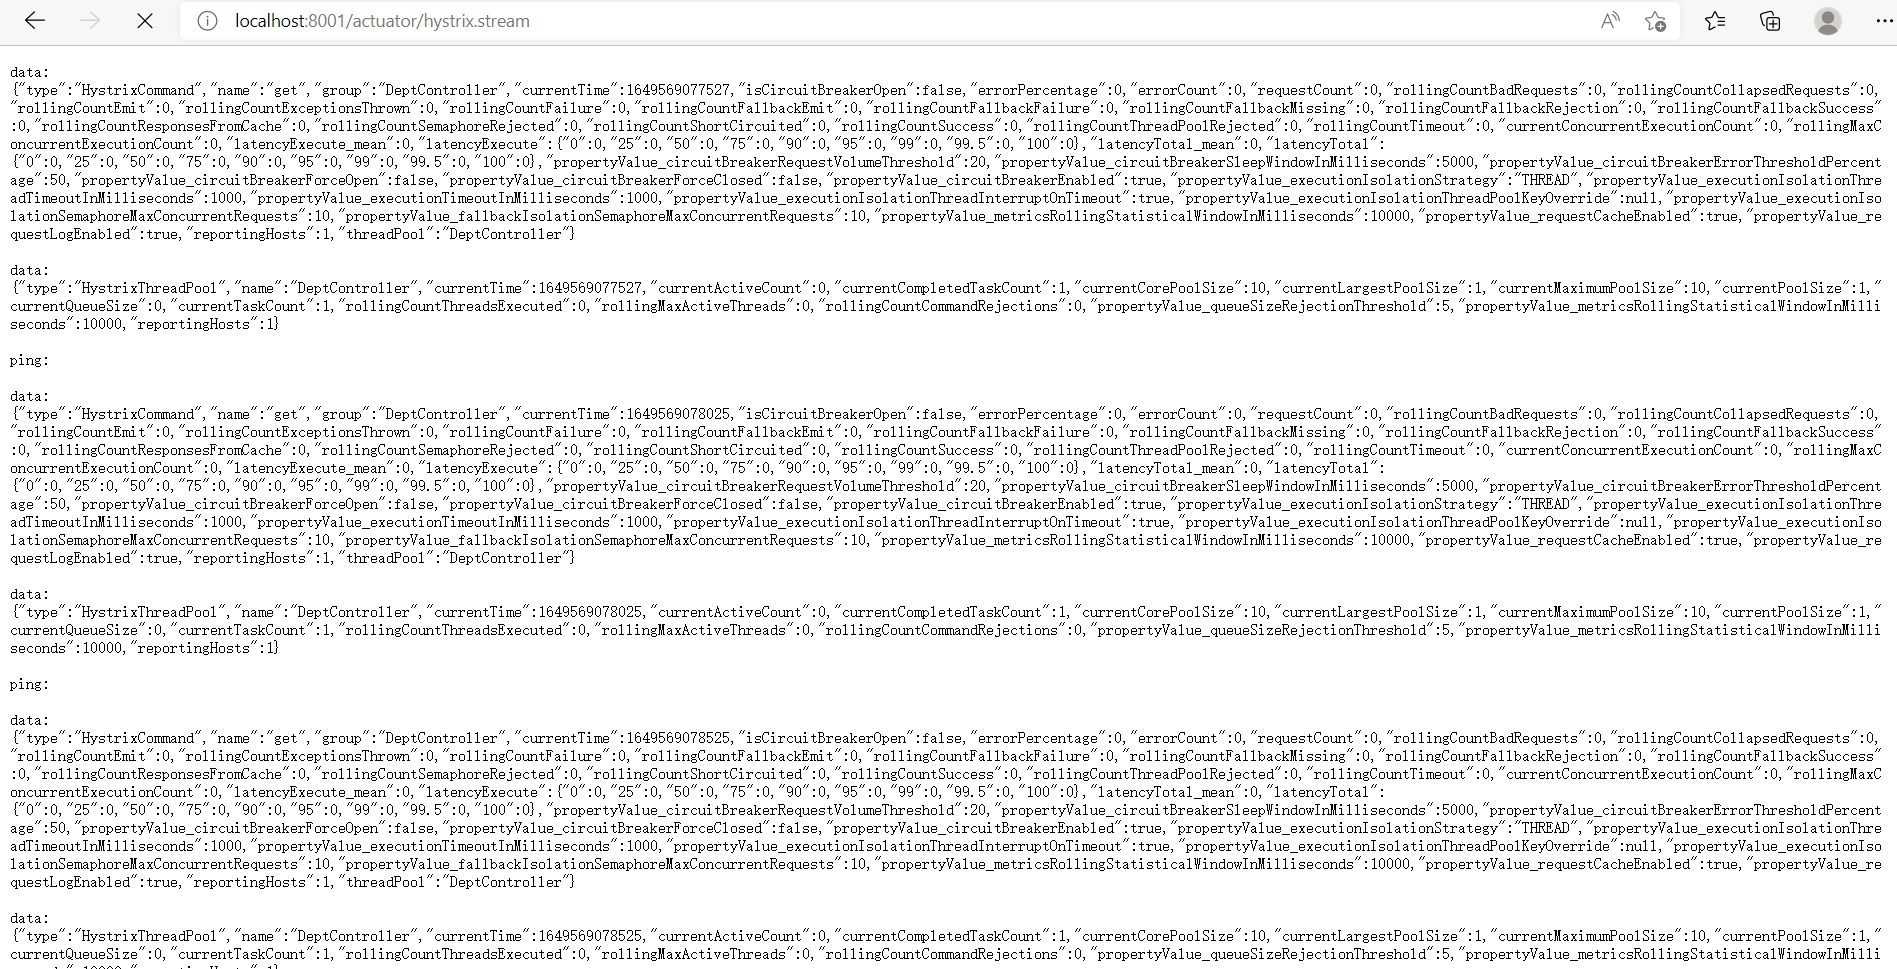
若成功访问能看到 ping 值,返回 http://localhost:9001/hystrix
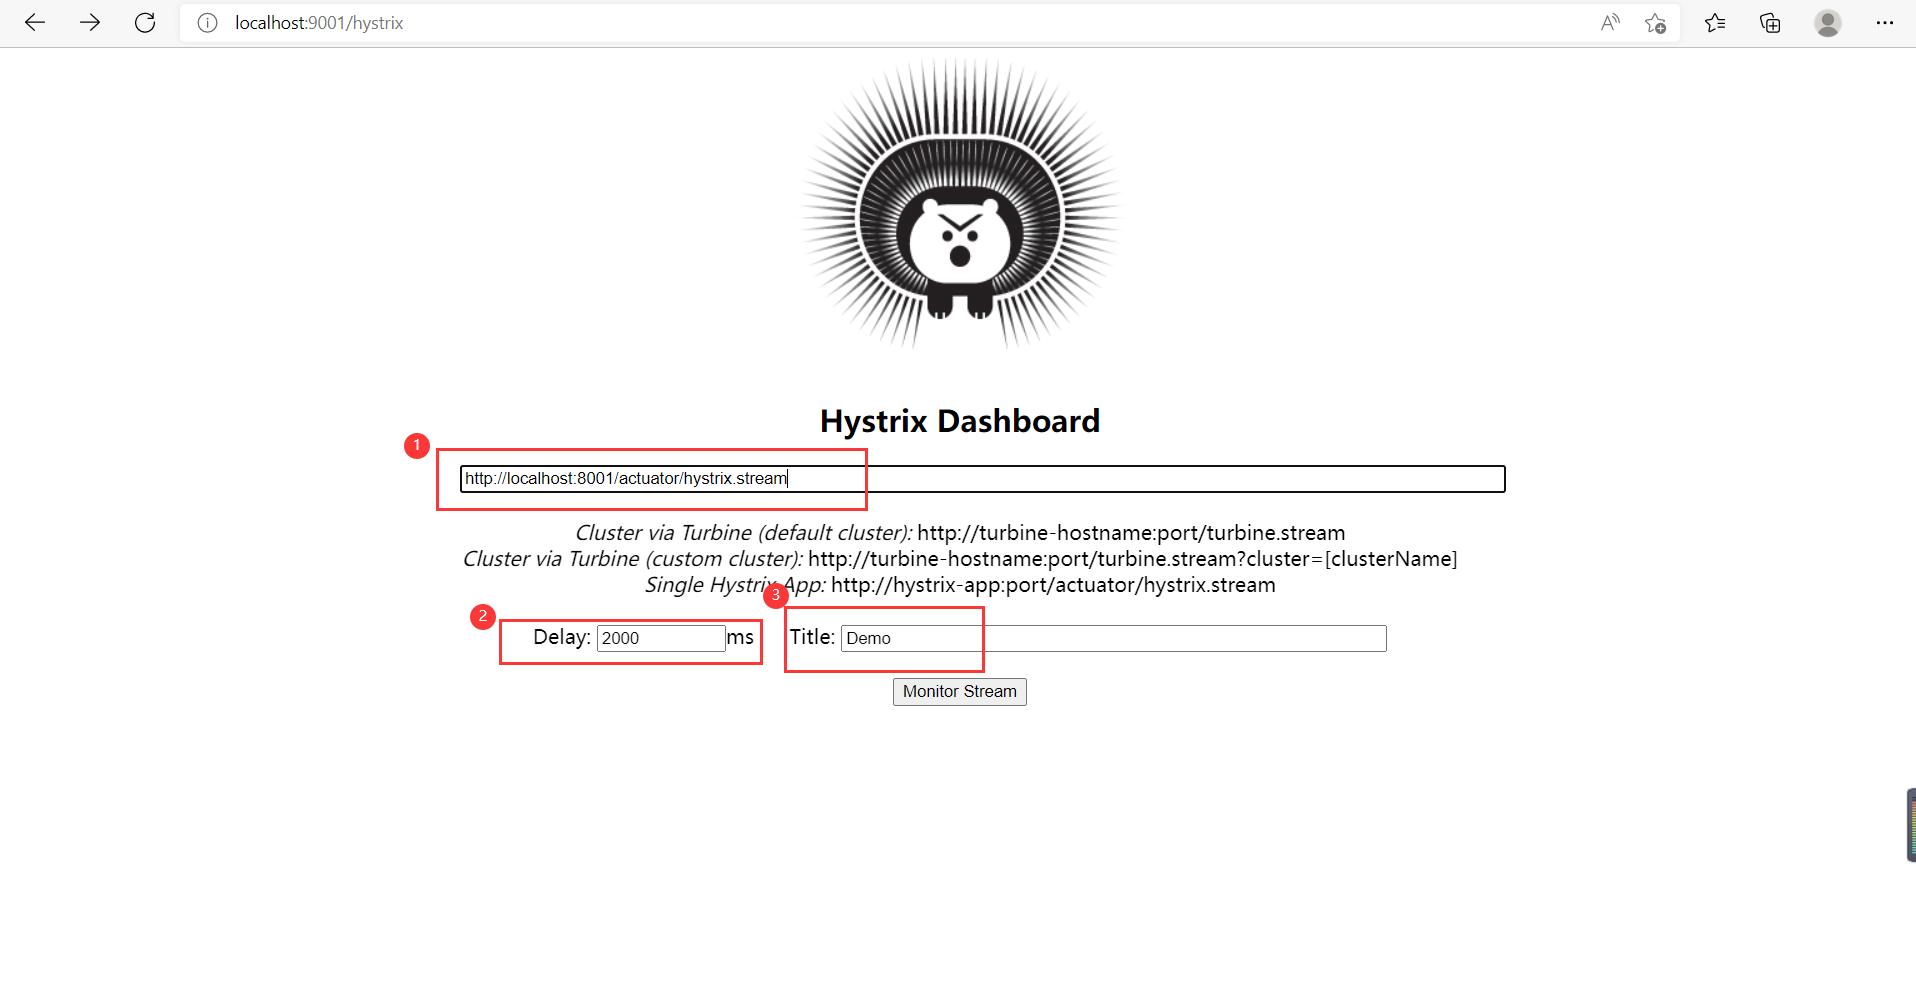
设置一些路径和参数,然后点击Monitor Stream 进入可视化监控页面,如下:
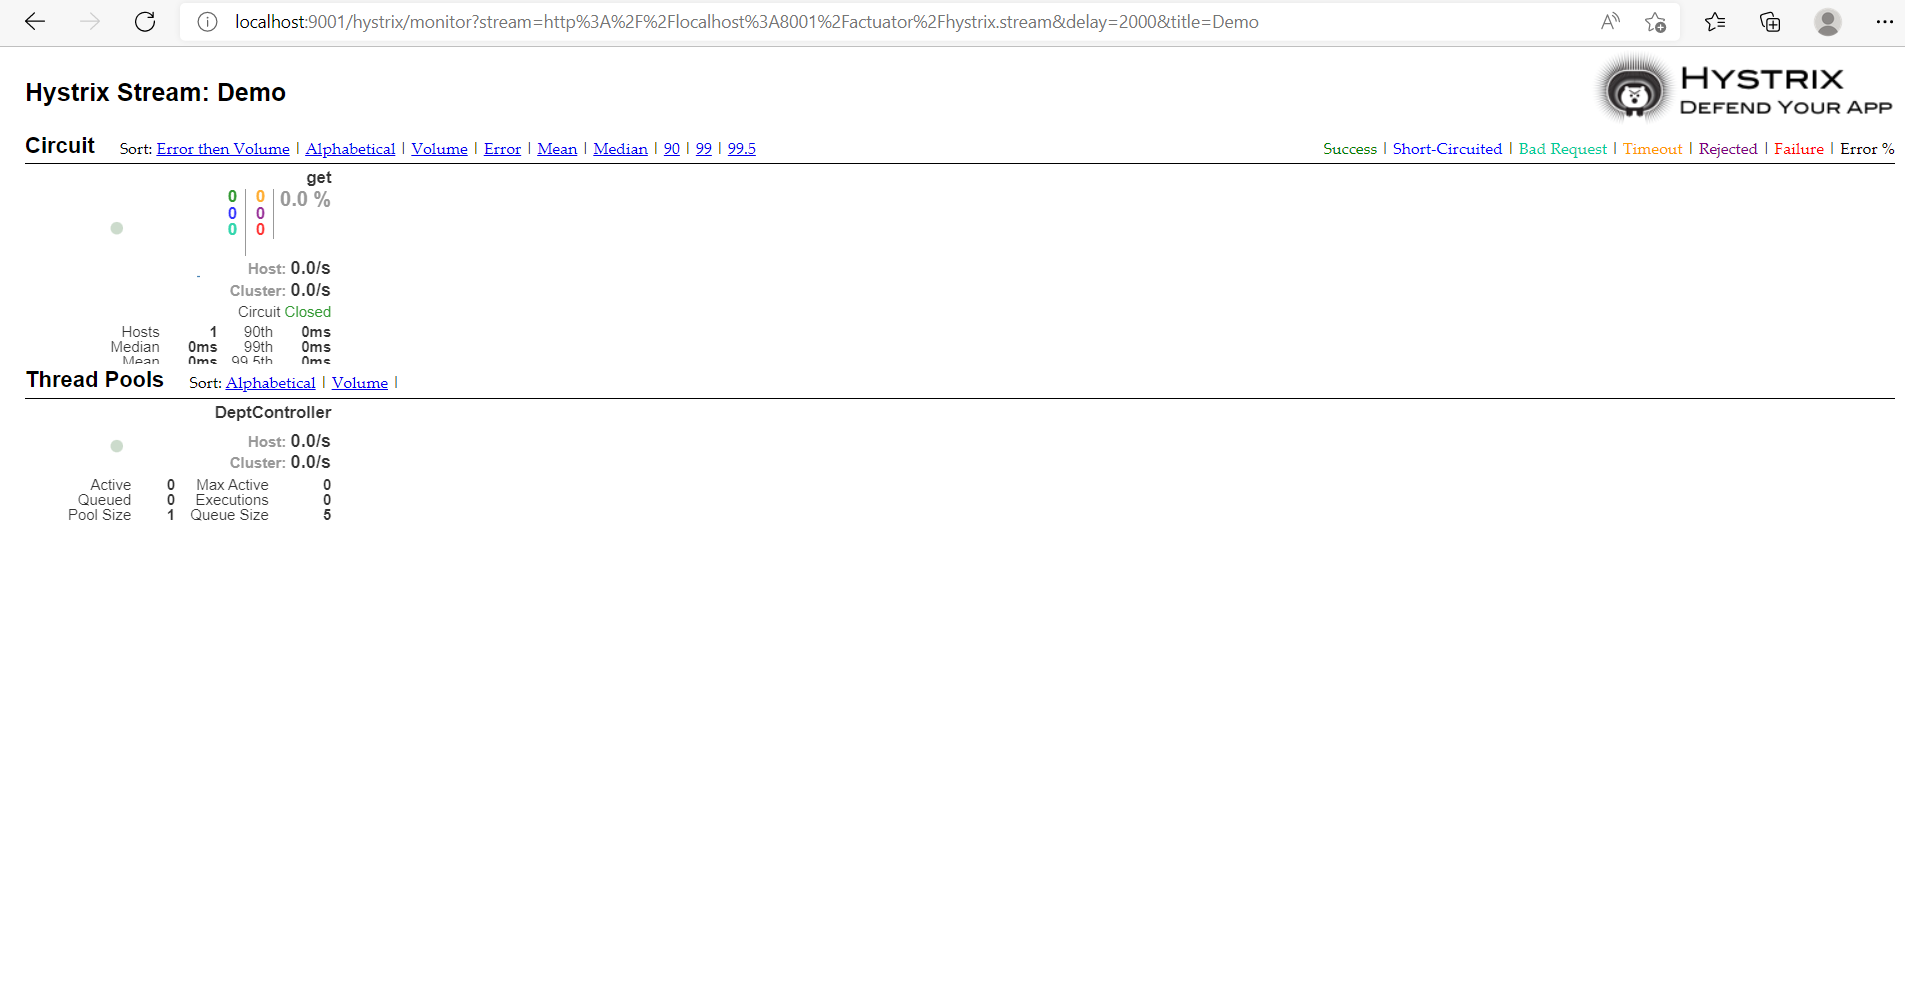
可以看到每次发出请求,左边的监控数据和图像都会随之变化
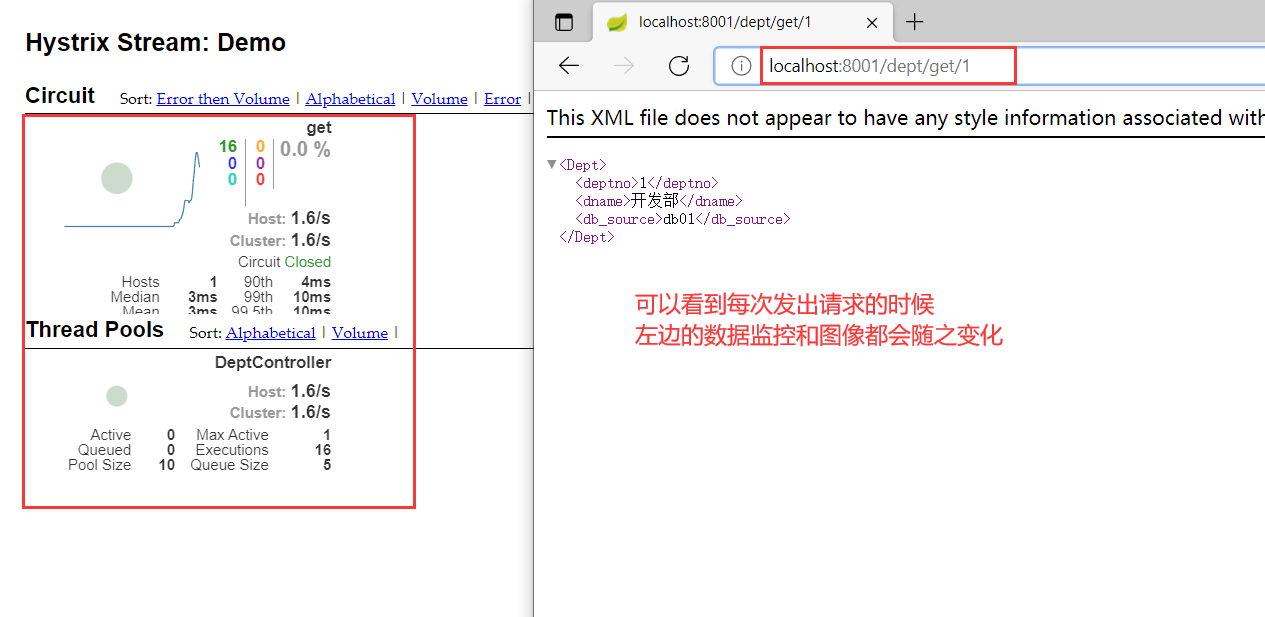
那个图像其实就是一个心跳值
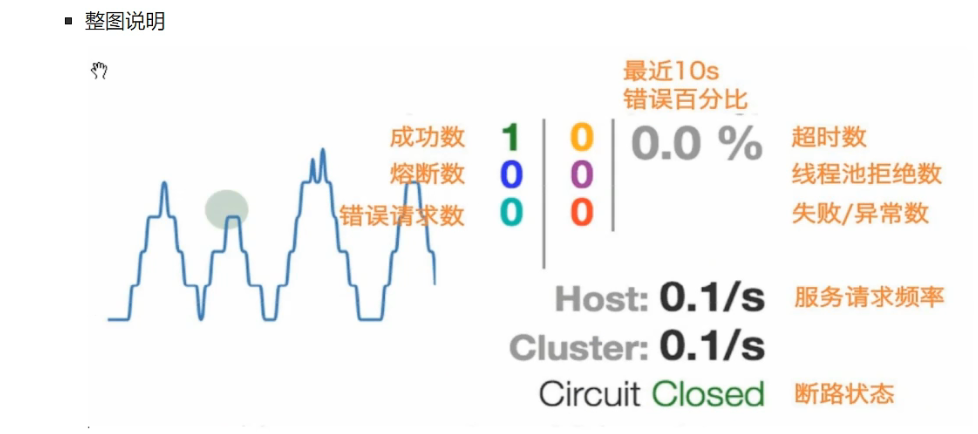
可以看到有:一圈、一线、和 七中颜色
一圈:
实心圆:共有两种含义,他通过颜色的变化代表了实例的健康程度
他的健康程度从 绿色 < 黄色 < 橙色 < 红色 依次递减【到红色就说明危险了】
该实心圆除了颜色的变化之外,他的大小也会根据实例的请求流量发生变化,流量越大,该实心圆就越大,所以通过该实心圆的展示,就可以在大量的实例中快速发现 故障实例和高压力实例
一线:
曲线:用来记录两分钟内流量的相对变化,可以通过他来观察到流量的上升和下降趋势!
总结一下步骤:
第一步:创建一个新的module,导入dash相关依赖,配置端口,创建springboot主启动类开启@EnableHystrixDashboard监控页面功能
第二步:在provider服务模块导入actuator的pom依赖,在该模块的主启动类中加上熔断的支持注解@EnableCircuitBreaker 和 添加一个 配合监控的servlet即可
最后
以上就是腼腆花瓣最近收集整理的关于16.0、springcloud-Hystrix-Dashboard流监控的实现的全部内容,更多相关16.0、springcloud-Hystrix-Dashboard流监控内容请搜索靠谱客的其他文章。


发表评论 取消回复