转载:[https://windmt.com/2018/04/16/spring-cloud-5-hystrix-dashboard/]
一、项目创建
1、创建Spring Boot 工程,命名为:hystrix-dashboard,引入如下依赖
<dependency>
    <groupId>org.springframework.cloud</groupId>
    <artifactId>spring-cloud-starter-netflix-hystrix</artifactId>
</dependency>
<dependency>
    <groupId>org.springframework.cloud</groupId>
    <artifactId>spring-cloud-starter-netflix-hystrix-dashboard</artifactId>
</dependency>
2、在 Spring Boot 的启动类上面引入注解@EnableHystrixDashboard,启用 Hystrix Dashboard 功能。
@SpringBootApplication
@EnableHystrixDashboard
public class DeptConsumerHystrixDashboard9001 {
    public static void main(String[] args){
        SpringApplication.run(DeptConsumerHystrixDashboard9001.class, args);
    }
}
3、修改配置文件 application.yml
server:
  port: 9001
spring:
  application:
    name: hystrix-dashboard
二、页面介绍
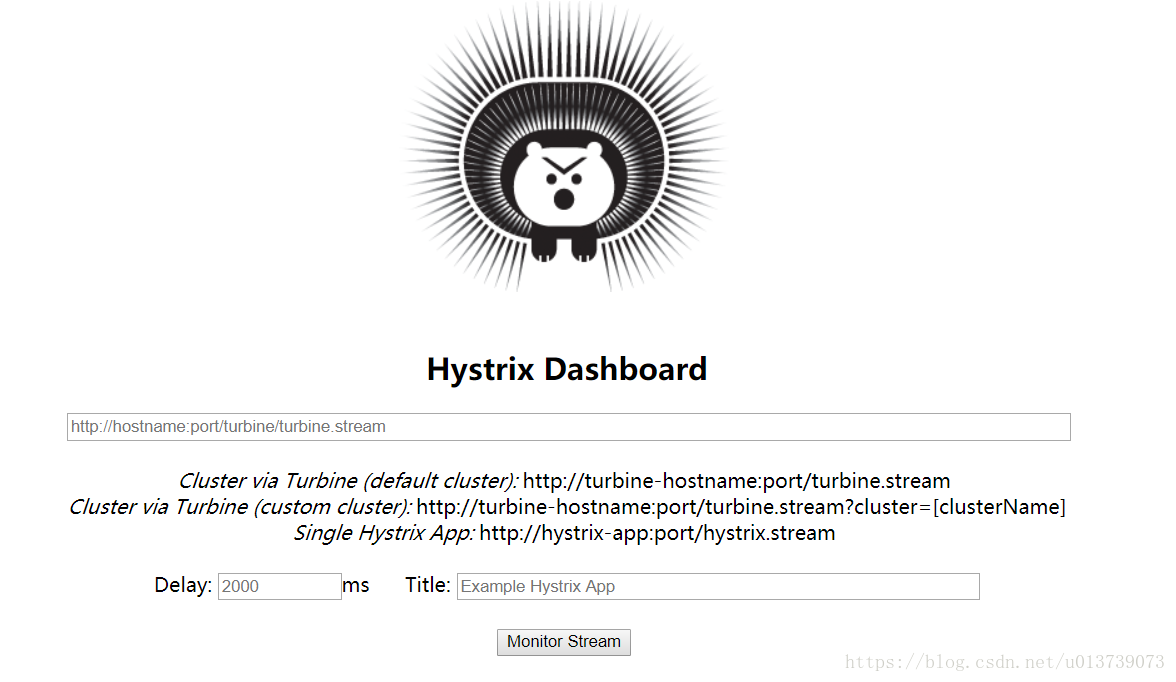
启动应用,然后再浏览器中输入 http://localhost:9001/hystrix 可以看到如下界面

通过 Hystrix Dashboard 主页面的文字介绍,我们可以知道,Hystrix Dashboard 共支持三种不同的监控方式:
默认的集群监控:通过 URL:http://turbine-hostname:port/turbine.stream 开启,实现对默认集群的监控。
指定的集群监控:通过 URL:http://turbine-hostname:port/turbine.stream?cluster=[clusterName] 开启,实现对 clusterName 集群的监控。
单体应用的监控: 通过 URL:http://hystrix-app:port/hystrix.stream 开启 ,实现对具体某个服务实例的监控。(现在这里的 URL 应该为 http://hystrix-app:port/actuator/hystrix.stream,Actuator 2.x 以后endpoints 全部在/actuator下,可以通过management.endpoints.web.base-path修改)。
前两者都对集群的监控,需要整合 Turbine 才能实现。这一部分我们先实现对单体应用的监控,这里的单体应用就用使用 Hystrix 实现的服务提供者——microservicecloud-provider-dept-hystrix-8087。
页面上的另外两个参数:
Delay:控制服务器上轮询监控信息的延迟时间,默认为 2000 毫秒,可以通过配置该属性来降低客户端的网络和 CPU 消耗。
Title:该参数可以展示合适的标题。
三、为服务microservicecloud-provider-dept-hystrix-8087添加 endpoint
既然 Hystrix Dashboard 监控单实例节点需要通过访问实例的/actuator/hystrix.stream接口来实现,自然我们需要为服务实例添加这个 endpoint。
1、POM 配置
在服务的pom.xml中的dependencies节点中新增spring-boot-starter-actuator监控模块以开启监控相关的端点,并确保已经引入断路器的依赖spring-cloud-starter-netflix-hystrix
<dependency>
    <groupId>org.springframework.cloud</groupId>
    <artifactId>spring-cloud-starter-netflix-hystrix</artifactId>
</dependency>
<dependency>
    <groupId>org.springframework.boot</groupId>
    <artifactId>spring-boot-starter-actuator</artifactId>
</dependency>
2、启动类
为启动类添加@EnableCircuitBreaker或@EnableHystrix注解,开启断路器功能。
@SpringBootApplication
@EnableEurekaClient
//服务发现
@EnableDiscoveryClient
//服务熔断
@EnableCircuitBreaker
public class DeptProviderApplication8087_hystrix {
    public static void main(String[] args) {
        SpringApplication.run(DeptProviderApplication8087_hystrix.class, args);
    }
}
3、 配置文件
在配置文件 application.yml 中添加
management:
  endpoints:
    web:
      exposure:
        include: hystrix.stream
management.endpoints.web.exposure.include这个是用来暴露 endpoints 的。由于 endpoints 中会包含很多敏感信息,除了 health 和 info 两个支持 web 访问外,其他的默认不支持 web 访问。
测试
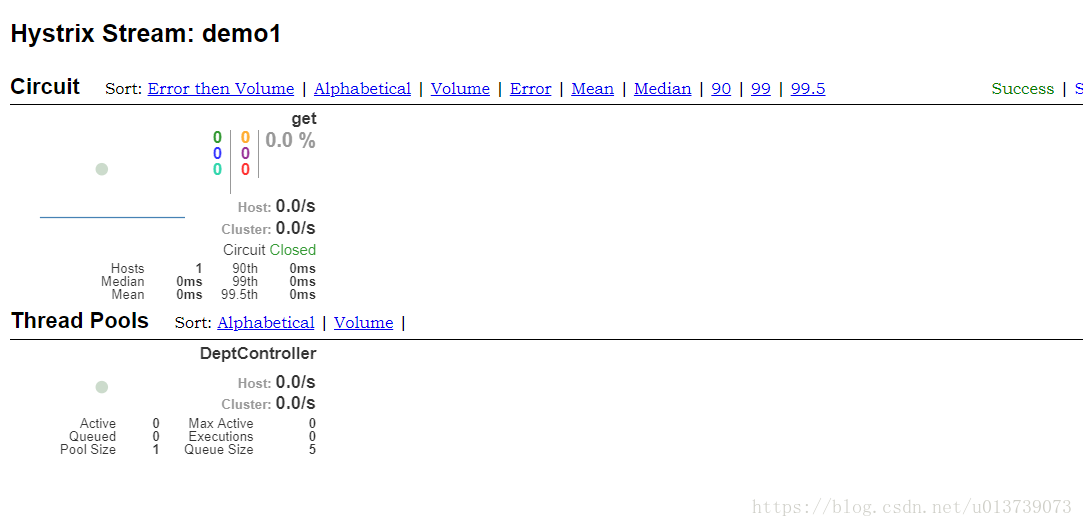
在 Hystrix-Dashboard 的主界面上输入 microservicecloud-provider-dept-hystrix-8087 对应的地址 http://localhost:8087/actuator/hystrix.stream 然后点击 Monitor Stream 按钮,进入页面。
如果没有请求会一直显示 “Loading…”,这时访问 http://localhost:8087/actuator/hystrix.stream 也是不断的显示 “ping”。
这时候访问一下 http://localhost:8087/dept/get/1,可以看到 Hystrix Dashboard 中出现了下面的效果

最后
以上就是矮小夏天最近收集整理的关于Hystrix DashBoard监控面板【Finchley 版】的全部内容,更多相关Hystrix内容请搜索靠谱客的其他文章。


发表评论 取消回复